LiftMaster TAC1 TAC1 Manual
LiftMaster TAC1 Manual
 |
View all LiftMaster TAC1 manuals
Add to My Manuals
Save this manual to your list of manuals |
LiftMaster TAC1 manual content summary:
- LiftMaster TAC1 | TAC1 Manual - Page 1
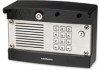
TAC1 Telephone Entry System 1 23 456 789 0 Installation and Programming Manual The Chamberlain Group 845 Larch Ave. Elmhurst, IL 60126-1196 www.liftmaster.com - LiftMaster TAC1 | TAC1 Manual - Page 2
9 9 10 10 11 11 11 TESTING Test the Gate/Door Relays Test the Telephone Connections PROGRAMMING From the TAC1 Keypad Code Setup Code Operation From the Telephone Telephone Commands Program a Pre-Installed Liftmaster Receiver Quick Reference TAC1 MASTER CODE LIMITED WARRANTY 12 12 12 13-19 13 14 14 - LiftMaster TAC1 | TAC1 Manual - Page 3
phone lines From the processor board Between processor boards on multiple entrance installation 2 - Conductor Cable 2 - Conductor Cable 12 AWG copper wire, PVC insulated or 12 AWG copper wire, uninsulated 24 AWG twisted pair telephone wire 24 AWG twisted pair telephone wire 24 AWG twisted pair - LiftMaster TAC1 | TAC1 Manual - Page 4
NOTE: Both the back panel and TAC1 unit must be oriented and mounted in damage to the board during installation. Mounting Surface DESCRIPTION OF THE PROCESSOR BOARD Top of Back Telephone return connection to home or office phones. 6 Line Input: Telephone input connection from "Telco" service - LiftMaster TAC1 | TAC1 Manual - Page 5
, there is no green, red, black or yellow wires, they have been replaced by white/blue, blue/white, white/orange, and Notes about wire connectors ( If the unit will be connected with an alarm system, you must connect the telephone line to the alarm system first in the series from the Telco box. If - LiftMaster TAC1 | TAC1 Manual - Page 6
run data wires and high voltage wires in the same conduit. The high voltage wires may interfere with the data wires and cause the system to malfunction. WIRING THE UNIT WITH A TELCO LINE Ringer Equivalence Number (REN) = 5 RING TIP RING TIP PHONE LINE Telco Entrance Box Demarcation Point Ring - LiftMaster TAC1 | TAC1 Manual - Page 7
OPERATOR (NORMALLY OPEN) AND WIRING AN AUTO-CALL SENSOR WIRING A GATE OPERATOR (NORMALLY OPEN) The gate operator can be connected to Relay 1 or Relay 2. See the Programming section for information about configuring Relays 1 and 2. Notes about wire connectors (terminal blocks): • Wire - LiftMaster TAC1 | TAC1 Manual - Page 8
be connected to Relay 1 or Relay 2. See the Programming section for information about configuring Relays 1 and 2. NO (Normally Open) DC Power Primary Gate Operator (Strike Open Input) Maglock NOTE: Install a 1N4001 diode or equivalent. NOTE: Do not use the unit's power supply for the maglock - LiftMaster TAC1 | TAC1 Manual - Page 9
INSTALLATION >> WIRING A DOOR STRIKE LOCK (NORMALLY OPEN) AND WIRING A MAGLOCK (NORMALLY CLOSED) WIRING A DOOR STRIKE LOCK (NORMALLY OPEN) The door strike can be connected to Relay 1 or Relay 2. See the Programming section for information about configuring Relays 1 and 2. Notes about wire - LiftMaster TAC1 | TAC1 Manual - Page 10
problems: • Other equipment cannot introduce spikes, noise, surges, or dips into the power circuit. • The system TAC1 MUST be grounded. Dedicated Outlet NOTE: Chamberlain is not responsible for conflicts between the information listed in the above table and the requirements of local building codes - LiftMaster TAC1 | TAC1 Manual - Page 11
unit's Master Code. The Master Code is used to unlock the programming functions of the TAC1. The Master Code should not be distributed as a User Code. MOUNT the key. IMPORTANT NOTE: Failure to correctly mount the unit to the back panel may cause damage to the board. SET THE UNIT MASTER CODE NOTE: - LiftMaster TAC1 | TAC1 Manual - Page 12
THE TELEPHONE CONNECTIONS TEST GATE/DOOR RELAYS TEST RELAY 1 Enter 4 digit Master Code + 1 (Key). The "1" Key indicates the Relay to be triggered. NOTE: Relay 1 status indicator LED will illuminate (Blue) to show activity when triggered. TEST RELAY 2 Enter 4 digit Master Code + 2 (Key). The "2" Key - LiftMaster TAC1 | TAC1 Manual - Page 13
PROGRAMMING >> FROM THE TAC1 KEYPAD 12 3 GENERAL INSTRUCTION 456 789 0 NOTE: Use the STAR Key "*" to cancel any input. PROGRAMMING INSTRUCTION SYNTAX KEYSTROKES General Programming Master Code + Command 1234 + 1 (12,123) Code Programming Master Code + Command + Code 1234 +1(12) + 1234 - LiftMaster TAC1 | TAC1 Manual - Page 14
Party Mode will latch relay and trigger corresponding channel. 1. Enter the Master Code: ? ? ? ? 2. Enter the Program Code: 5 4 To disengage party mode: Enter a valid code into the TAC1 keypad or enter "*9" into the local telephone. ENGAGE PARTY MODE (RELAY 2) Party Mode will latch relay and trigger - LiftMaster TAC1 | TAC1 Manual - Page 15
tone function may not work with all phones. DISABLE ALTERNATE DTMF PROGRAMMING Enter the command tone: # 1 6 CALL FORWARD PROGRAMMING ENTER CALL FORWARDING TELEPHONE NUMBER Enter the command tone: # Up to a 14 Digit Telco Number # VERIFY CALL FORWARDING NUMBER (VIA CALLER ID) Enter the - LiftMaster TAC1 | TAC1 Manual - Page 16
Refer to the gate or door operator manual for information about the location of the learn button. 2. Press and release the learn button on the receiver. The indicator light will light for 30 seconds indicating that receiver is in Learn Mode. 3. Within 30 seconds enter Master Code on the TAC1 keypad - LiftMaster TAC1 | TAC1 Manual - Page 17
Relay output time is ALWAYS 4 digits. Master Code (4 digits) + 025 + Relay Output Time (0000-8000 seconds) NOTE: Relay output time is ALWAYS 4 digits. DIRECT COMMANDS FROM THE TAC1 KEYPAD KEYSTROKES ACTION User Code + 1 Triggers Relay 1 User Code + 2 Triggers Relay 2 AUDIO FEEDBACK FROM THE - LiftMaster TAC1 | TAC1 Manual - Page 18
Do Not Disturb" Mode **12 DIRECT COMMANDS FROM THE FORWARDED TELEPHONE PROGRAMMING DESCRIPTION OF TASK NUMBER FACTORY PROGRAMMING PROCEDURE SETTING 0 Accepts Triggers Relay 2 *5 *9 Triggers Relay 1 *9 NOTE: Use the STAR Key "*" to cancel any input. NOTE: Keypad commands are to be entered - LiftMaster TAC1 | TAC1 Manual - Page 19
TAC1 MASTER CODE Write down the Master Code and store in a secure location. 19 - LiftMaster TAC1 | TAC1 Manual - Page 20
: 1-800-528-2806 www.liftmaster.com NOTICE: To comply with FCC and or Industry Canada rules (IC), adjustment or modifications of this receiver and/or transmitter are prohibited, except for changing the code setting or replacing the battery. THERE ARE NO OTHER USER SERVICEABLE PARTS. Tested to Comply
-
 1
1 -
 2
2 -
 3
3 -
 4
4 -
 5
5 -
 6
6 -
 7
7 -
8
-
9
-
10
-
11
-
12
-
13
-
14
-
15
-
16
-
17
-
18
-
19
-
20
 |
 |

Installation and Programming Manual
8
9
7
0
2
3
1
5
6
4
The Chamberlain Group
845 Larch Ave.
Elmhurst, IL 60126-1196
www.liftmaster.com
TAC1
Telephone Entry System