Linksys USB100TX User Guide - Page 21
Appendix - etherfast 10 100 usb
 |
UPC - 745883551750
View all Linksys USB100TX manuals
Add to My Manuals
Save this manual to your list of manuals |
Page 21 highlights
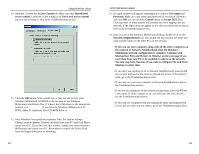
Appendix Linksys EtherFast® Series Client for Microsoft Setup for Windows 98 If you are installing the EtherFast 10/100 USB Network Adapter in a Windows 98 PC that you plan on logging into a NT domain server, follow the directions below. 1. Start up Windows. Click on Start, Settings, then Control Panel. Doubleclick on Network. The Network window appears. Click on the Configuration tab. 2. In the Primary Logon Box, you have two choices. Choose one Client for Microsoft Networks, which instructs your PC to log into an NT 4.0 or Windows 2000 server where you already have a username and password set up. 3. Under the the following network components are installed box, highlight Client for Microsoft Networks and click on the Properties button. 4. The Client for Networks Properties window will appear. Under the Logon Validation box, make sure that Log on to Windows NT domain is checked. Enter the name of your domain into the Windows NT Domain box 5. Optional: Click on the Access Control tab. Make sure that Share-level access control is selected; do not choose User-level access control. If Access Control is grayed out and cannot be selected, refer to Problem 5 in the Troubleshooting section. 6. When you're done, click OK. When asked if you want to restart your PC, choose to do so. The Microsoft Client portion of the Windows setup is complete. 10/100 USB Network Adapter Novell NetWare 3.x Client Setup for Windows 98 The instructions below explain how to set up the regular Novell NetWare 3.x client for use on a Windows 98 PC. 1. Follow the Windows 98 setup instructions. 2. Start up Windows 98. Click on Start, Settings, then Control Panel. Double-click on Network. The Network window appears. Click on the Configuration tab. 3. In the Primary Logon Box, choose Client for NetWare Networks. If you don't see this option, refer to the Manually Installing Network Components in Windows 98 section to install this component. 4. Under the The following network components are installed box, highlight Client for NetWare Networks and click on the Properties button. 5. The Client for NetWare Networks Properties window appears. Under the General tab, enter the name of your network's Preferred Server. Assign the First Network Drive Letter; the default is F. Make sure the Enable logon script processing is checked. 6. Click OK. Click on the Access Control tab. Make sure the Share-level access control option is selected; do not select User-level access control. 7. When you're done, click OK to restart your computer. The NetWare Client portion of your Windows setup is complete. 35 36
-
 1
1 -
2
-
3
-
4
-
5
-
6
-
7
-
8
-
9
-
10
-
11
-
12
-
13
-
14
-
15
-
 16
16 -
 17
17 -
 18
18 -
 19
19 -
 20
20 -
 21
21 -
 22
22 -
 23
23 -
 24
24 -
 25
25 -
 26
26 -
27
-
28
 |
 |
