Lowrance Elite-12 Ti Getting Started EN
Lowrance Elite-12 Ti Manual
 |
View all Lowrance Elite-12 Ti manuals
Add to My Manuals
Save this manual to your list of manuals |
Lowrance Elite-12 Ti manual content summary:
- Lowrance Elite-12 Ti | Getting Started EN - Page 1
ELITE Ti Getting Started ENGLISH lowrance.com - Lowrance Elite-12 Ti | Getting Started EN - Page 2
- Lowrance Elite-12 Ti | Getting Started EN - Page 3
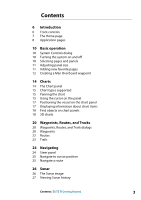
page 8 Application pages 10 Basic operation 10 System Controls dialog 10 Turning the system on and off 10 Selecting pages and panels 11 Adjusting panel size 11 Adding new favorite pages 12 Creating a Man Overboard waypoint 14 Charts 14 The Chart panel 15 Chart types supported 15 Panning the chart 15 - Lowrance Elite-12 Ti | Getting Started EN - Page 4
StructureScan image 31 Viewing StructureScan history 31 Setting up the StructureScan image 32 Stop sonar 33 Advanced StructureScan settings 34 Info panels 34 Dashboards 35 Customizing the Info panel Alarms 43 Settings 43 Vessels 44 Sun, Moon 44 Trip calculator 4 Contents | ELITE Ti Getting Started - Lowrance Elite-12 Ti | Getting Started EN - Page 5
44 Files 44 Find 44 GoFree Shop Contents | ELITE Ti Getting Started 5 - Lowrance Elite-12 Ti | Getting Started EN - Page 6
. For more detailed information about the features, functions and options, refer to the Operator manual. You can access the Operator manual from the Files option in the Tools panel, refer to "Files" on page 44 Controls dialog. 6 Card reader (behind logo) 6 Introduction | ELITE Ti Getting Started - Lowrance Elite-12 Ti | Getting Started EN - Page 7
The Home page The Home page is accessed from any operation by a short press on the Pages key. 1 Tools Select a button to access dialogs used for carrying out panel combination. Press and hold a favorite button to enter edit mode for the Favorites panel. Introduction | ELITE Ti Getting Started 7 - Lowrance Elite-12 Ti | Getting Started EN - Page 8
if dangerous situations or system faults occur. Split pages You can have up to 4 panels on each page. 2 panels page 3 panels page 4 panels page 8 Introduction | ELITE Ti Getting Started - Lowrance Elite-12 Ti | Getting Started EN - Page 9
the Home page. Favorite pages All preconfigured favorite pages can be modified and deleted, and you can create your own. You can have a total of 12 favorite pages. For more information, refer to "Adding new favorite pages" on page 11. Introduction - Lowrance Elite-12 Ti | Getting Started EN - Page 10
2 Basic operation System Controls dialog The System Controls dialog provides quick access to basic system settings. You display the the relevant application button on the Home page • Select a favorite page by selecting the relevant favorite button 10 Basic operation | ELITE Ti Getting Started - Lowrance Elite-12 Ti | Getting Started EN - Page 11
split page. Adding new favorite pages 1. Select the New icon in the favorite panel on the Home page to open the page editor dialog Basic operation | ELITE Ti Getting Started 11 - Lowrance Elite-12 Ti | Getting Started EN - Page 12
pressing the MOB buttons. The vessel continues to show navigation information to the initial MOB waypoint. Navigation to subsequent MOB waypoints needs to be done manually. 12 Basic operation | ELITE Ti Getting Started - Lowrance Elite-12 Ti | Getting Started EN - Page 13
Delete a MOB waypoint 1. Select the MOB waypoint to activate it 2. Select the delete option in the dialog. A MOB waypoint can also be deleted from the menu when it is activated. Basic operation | ELITE Ti Getting Started 13 - Lowrance Elite-12 Ti | Getting Started EN - Page 14
optional) 3 Route* 4 North indicator 5 Grid lines* 6 Range rings* 7 Trail* 8 Chart range scale 9 Range rings interval (only displayed when Range rings are turned on) 14 Charts | ELITE Ti Getting Started - Lowrance Elite-12 Ti | Getting Started EN - Page 15
supported Insight (Lowrance), Navionics, and C-MAP charts are supported. They each have common and specific chart options, view options, and chart settings. For more information about the different chart options and settings, refer to the unit's Operator manual Charts | ELITE Ti Getting Started 15 - Lowrance Elite-12 Ti | Getting Started EN - Page 16
item information. When you remove your finger from the screen the cursor reverts to normal cursor operation. Measuring distance The cursor can be used to measure the distance between your vessel and a function by selecting the Finish measuring menu option. 16 Charts | ELITE Ti Getting Started - Lowrance Elite-12 Ti | Getting Started EN - Page 17
information dialog from the menu. Ú Note: If you are viewing applicable C-MAP charts on your system, you can select marine objects to display information Charts | ELITE Ti Getting Started 17 - Lowrance Elite-12 Ti | Getting Started EN - Page 18
about services and available multimedia (photos) associated with the location or object. Ú Note: Pop-up information has to be enabled in chart to search for vessels. 3D charts The 3D option provides a three dimensional graphical view of land and sea contours. 18 Charts | ELITE Ti Getting Started - Lowrance Elite-12 Ti | Getting Started EN - Page 19
Ú Note: All chart types work in 3D mode, but without 3D cartography for the appropriate area the chart appears flat. When 3D chart option is selected, the Pan and the Rotate icons appear on the right side of the chart panel. Charts | ELITE Ti Getting Started 19 - Lowrance Elite-12 Ti | Getting Started EN - Page 20
generated mark positioned on a chart, or on the Sonar image. Each waypoint has an exact position with latitude and longitude coordinates. A waypoint positioned on the Sonar image has a depth value, in addition to position information. A - Lowrance Elite-12 Ti | Getting Started EN - Page 21
about a waypoint from the Edit Waypoint dialog. The dialog can also be accessed from the Waypoints tool on the Home page. Waypoints, Routes, and Tracks | ELITE Ti Getting Started 21 - Lowrance Elite-12 Ti | Getting Started EN - Page 22
menu. Ú Note: The menu changes depending on the selected edit option. All edits are confirmed or cancelled from the menu. 22 Waypoints, Routes, and Tracks | ELITE Ti Getting Started - Lowrance Elite-12 Ti | Getting Started EN - Page 23
new Trails You can start a new trail from the Trails dialog, activated by using the Trails tool on the Home page. Waypoints, Routes, and Tracks | ELITE Ti Getting Started 23 - Lowrance Elite-12 Ti | Getting Started EN - Page 24
Home page, either as a full page panel or as part of a multiple panel page. 1 Data fields 2 Vessel heading 3 Bearing to waypoint 4 Destination point 24 Navigating | ELITE Ti Getting Started - Lowrance Elite-12 Ti | Getting Started EN - Page 25
is started, the menu expands and shows options for canceling the navigation, for skipping a waypoint, and for restarting the route from current vessel position. Navigating | ELITE Ti Getting Started 25 - Lowrance Elite-12 Ti | Getting Started EN - Page 26
a view of the water and bottom beneath your vessel, allowing you to detect fish and examine the structure of the bottom. The Sonar image 1 Fish arches 2 History preview* 3 Temperature graph* 4 Depth at cursor 5 Amplitude scope* 6 Zoom (range) buttons 7 Water depth and Water temperature at cursor - Lowrance Elite-12 Ti | Getting Started EN - Page 27
to the normal Sonar menu. The range The range setting determines the water depth that is visible on the screen. Frequency The unit supports several transducer frequencies. Available frequencies depend on the transducer model that is connected. Ú Note: This unit cannot operate CHIRP frequencies and - Lowrance Elite-12 Ti | Getting Started EN - Page 28
the actual bottom. Adjusting Sensitivity and Colorline Select the Sensitivity or Colorline menu options in the Sonar menu and adjust them by dragging the bar vertically up/down. Minor adjustments can be made , while a low scroll speed presents a longer history. 28 Sonar | ELITE Ti Getting Started - Lowrance Elite-12 Ti | Getting Started EN - Page 29
speed controls the rate the transducer transmits the signal into the water sonar signals in the selected range. This allows the display to continue smooth scrolling if the bottom depth is out of transducer range. When the unit is in manual Advanced menu, the Record sonar log dialog is displayed where - Lowrance Elite-12 Ti | Getting Started EN - Page 30
images of structure and fish directly below your boat. The StructureScan page is accessed from the Home page when the TotalScan transducer is connected. Ú Note: This unit cannot operate CHIRP frequencies and SideScan at the same time. If you turn on StructureScan Left/Right view, you will not be - Lowrance Elite-12 Ti | Getting Started EN - Page 31
the cursor is active, some options in the menu are replaced with cursor mode features. Select Clear cursor to return to the normal menu. StructureScan | ELITE Ti Getting Started 31 - Lowrance Elite-12 Ti | Getting Started EN - Page 32
select between several preset range levels. StructureScan frequencies StructureScan supports two frequencies. 455 kHz provides ideal range and image sonar Use the Stop sonar menu option when you want to turn off the StructureScan transducer, but not turn off the unit. 32 StructureScan | ELITE Ti - Lowrance Elite-12 Ti | Getting Started EN - Page 33
match the direction of the transducer installation. Range Lines Range (SideScan). Preview You can turn off sonar history preview, have it always shown is active. By default, the sonar history preview appears when the cursor in the Advanced menu, the Record sonar log dialog is displayed where you - Lowrance Elite-12 Ti | Getting Started EN - Page 34
display vessel, navigation, and angler information. Ú Note: Only the Navigation dashboard is available on the ELITE-5Ti. You switch between the panel's dashboards by selecting the left and right arrow buttons on if other systems are present on the network. 34 Info panels | ELITE Ti Getting Started - Lowrance Elite-12 Ti | Getting Started EN - Page 35
. All edit options are available from the Info panel menu. Available editing options depend on which data sources are connected to your system. Info panels | ELITE Ti Getting Started 35 - Lowrance Elite-12 Ti | Getting Started EN - Page 36
, then the SmartSteer (autopilot) functionality is available on all units except the ELITE-5Ti. To use trolling motor autopilot functionality, you need the following: • MotorGuide navigator. Autopilot interface 1 Autopilot information bar 36 Trolling motor autopilot | ELITE Ti Getting Started - Lowrance Elite-12 Ti | Getting Started EN - Page 37
by pressing the Power key. Ú Note: As long as the Autopilot Controller is active, you cannot operate the background panel or its menu. The Autopilot Controller can also be set up as a panel in off when the autopilot is in standby mode. Trolling motor autopilot | ELITE Ti Getting Started 37 - Lowrance Elite-12 Ti | Getting Started EN - Page 38
system (tablet only). • Access the GoFree Shop. • Upload your Sonar logs to create custom maps at Insight Genesis. • Download software updates you transfer. If you are unsure, contact your service provider to confirm rates and restrictions. Connect and disconnect connection | ELITE Ti Getting Started - Lowrance Elite-12 Ti | Getting Started EN - Page 39
Note: For safety reasons, Autopilot and CZone functions cannot be controlled from a wireless device. Uploading log files to Insight Genesis To upload a recorded sonar log file to Insight Genesis, select the file you want to upload from the Files panel and select the upload to Insight Genesis option - Lowrance Elite-12 Ti | Getting Started EN - Page 40
if you have specified Upload to Insight Genesis in the Log Sonar dialog. For more information, refer to "Log sonar" on page 29. Bluetooth wireless technology The ELITE Ti includes built-in Bluetooth wireless technology. To connect the ELITE Ti to Bluetooth enabled devices you must pair them. Pairing - Lowrance Elite-12 Ti | Getting Started EN - Page 41
5. Select Pair to pair the ELITE Ti to the device. 6. Repeat these steps for each device you want to pair with the ELITE Ti. Wireless connection | ELITE Ti Getting Started 41 - Lowrance Elite-12 Ti | Getting Started EN - Page 42
alarm is recorded in the alarm listing so that you can see the details and take the appropriate corrective action. Alarms dialog All alarms are setup in the Alarms Settings dialog. The alarm dialogs can also be activated from the Tools panel. The alarm dialogs include information about active alarms - Lowrance Elite-12 Ti | Getting Started EN - Page 43
12 Tools By default, the Tools panel includes icons used for accessing options and tools that are not specific to any panel Provides access to application and system settings. Vessels Status listing List of all AIS and DSC vessels with available information. Tools | ELITE Ti Getting Started 43 - Lowrance Elite-12 Ti | Getting Started EN - Page 44
Waypoints, Routes, and Trails to a memory card. To view recorded sonar logs, use the view sonar log option in the Sonar settings dialog. Find Search function for chart items (waypoints, routes, . You can also upload your Sonar logs to be shared on Social Map 44 Tools | ELITE Ti Getting Started - Lowrance Elite-12 Ti | Getting Started EN - Page 45
charts. When you log on, the system automatically gives you a notification if a new software version is available for your system. If an update is available, you can download it to a card slot or defer the download until later. Tools | ELITE Ti Getting Started 45 - Lowrance Elite-12 Ti | Getting Started EN - Page 46
46 Tools | ELITE Ti Getting Started - Lowrance Elite-12 Ti | Getting Started EN - Page 47
- Lowrance Elite-12 Ti | Getting Started EN - Page 48
0980 *988-11049-002*
-
 1
1 -
 2
2 -
 3
3 -
 4
4 -
 5
5 -
 6
6 -
 7
7 -
8
-
9
-
10
-
11
-
12
-
13
-
14
-
15
-
16
-
17
-
18
-
19
-
20
-
21
-
22
-
23
-
24
-
25
-
26
-
27
-
28
-
29
-
30
-
31
-
32
-
33
-
34
-
35
-
36
-
37
-
38
-
39
-
40
-
41
-
42
-
43
-
44
-
45
-
46
-
47
-
48
 |
 |

ENGLISH
ELITE Ti
Getting Started
lowrance.com