Makita XJP03Z Makita XJP03 Instruction Manual - Page 9
For Frame Joint and Edge-To-Edge Joint only
 |
View all Makita XJP03Z manuals
Add to My Manuals
Save this manual to your list of manuals |
Page 9 highlights
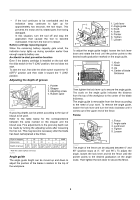
014903 Miter Joint (Fig. C) Fig. C 004586 014911 Frame Joint (Fig. D) Fig. D 004587 014912 Edge-To-Edge Joint (Fig. E) Fig. E 004588 012506 To make joints, proceed as follows: 1. Fit the two workpieces together as they will appear in the finished joint position. 2. Mark the center of the intended biscuit grooves on the workpiece using a pencil. NOTE: • • The center of grooves should be at least 50 mm (2") from the outer edge of the workpieces. Allow 100 mm - 150 mm (4"-6") between grooves in multiple biscuit application. 3. For Corner Joint and T-Butt Joint only Clamp the vertical workpiece to the workbench. For Miter Joint only Clamp one workpiece to the workbench with the mitered edge facing up. For Frame Joint and Edge-To-Edge Joint only Clamp one workpiece to the workbench. 4. Set the depth of groove according to the size of biscuit to be used. Refer to the table in the "Adjusting the depth of groove" section. 5. Adjust the angle guide height so that the blade is centered in the board thickness. 6. Align the center mark on the base with the pencil line on the workpiece. 9
-
 1
1 -
2
-
3
-
 4
4 -
 5
5 -
 6
6 -
 7
7 -
 8
8 -
 9
9 -
 10
10 -
 11
11 -
 12
12 -
 13
13 -
 14
14 -
15
-
16
-
17
-
18
-
19
-
20
-
21
-
22
-
23
-
24
-
25
-
26
-
27
-
28
-
29
-
30
-
31
-
32
-
33
-
34
-
35
-
36
 |
 |
