Maytag MGR4451BDS Use and Care Manual
Maytag MGR4451BDS - 30 Inch Gas Range Manual
 |
View all Maytag MGR4451BDS manuals
Add to My Manuals
Save this manual to your list of manuals |
Maytag MGR4451BDS manual content summary:
- Maytag MGR4451BDS | Use and Care Manual - Page 1
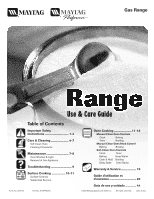
Gas Range ® Use & Care Guide Table of Contents Important Safety Instructions 1-4 Care & Cleaning 4-7 Self-Clean Oven Cleaning Procedures Maintenance 7-8 Oven Window & Light Removal of Gas Appliance Troubleshooting 9 Surface Cooking 10-11 Surface Controls Sealed Gas Burners Formm NNoo..AA/0/ - Maytag MGR4451BDS | Use and Care Manual - Page 2
the manufacturer about problems or conditions you do not understand. Recognize Safety Symbols, Words, Labels technician. Do not attempt to adjust, repair, service, or replace any part of your appliance unless it is specifically recommended in this guide. All other servicing should be referred - Maytag MGR4451BDS | Use and Care Manual - Page 3
in cabinets above an appliance or on backguard of a range. Children climbing on the appliance door to reach items appliance is not a toy. Children should not be allowed to play with controls or other parts of the unit. NEVER leave any items on the cooktop. The hot air from the vent might ignite - Maytag MGR4451BDS | Use and Care Manual - Page 4
are not specifically recommended in this Clothing may ignite or catch utensil handles. guide. Do not use eyelid covers for the surface recommended in this manual can create serious safety hazards, result in performance problems, and reduce the life of the components of the appliance. turn the - Maytag MGR4451BDS | Use and Care Manual - Page 5
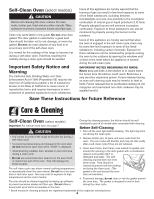
in the room where the appliance is located during the self models) Important: For manual clean oven, see page 7. During the cleaning process, the kitchen should be well ventilated to get rid of normal odors associated with cleaning. Before Self-Cleaning CAUTION • It is normal for parts of the range - Maytag MGR4451BDS | Use and Care Manual - Page 6
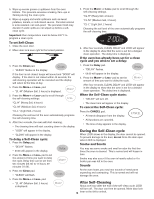
the oven is heavily soiled or if a broiler pan was left in the oven. Sounds As the oven heats, you may hear sounds of metal parts expanding and contracting. This is normal and will not damage the oven. After Self-Cleaning About one hour after the end of the self-clean - Maytag MGR4451BDS | Use and Care Manual - Page 7
cycle, wipe racks and rack supports with a small amount of CAUTION • Be sure appliance is off and all parts are cool before handling pan and insert can be cleaned in dishwasher. Cooktop and Control Panel - Porcelain Enamel of range. Side Panels, Storage Drawer, Lower Broiler Door (select models) - Maytag MGR4451BDS | Use and Care Manual - Page 8
during a self-clean operation. If this occurs, wipe the rack and embossed rack supports with a small amount of vegetable oil to restore ease of movement, then wipe off excess oil. Stainless Steel (select models) • DO NOT USE ANY CLEANING PRODUCT CONTAINING CHLORINE BLEACH. • DO NOT USE ABRASIVE - Maytag MGR4451BDS | Use and Care Manual - Page 9
. If this appliance has to be moved and/or removed for servicing, follow the procedure described in the installation instructions. For information, contact Maytag Customer Assistance at 1-800-688-9900 USA or 1-800-688-2002 Canada. To prevent range from accidentally tipping, range must be secured - Maytag MGR4451BDS | Use and Care Manual - Page 10
or a problem. If BAKE or LOCK appear in the display, press the CANCEL pad. If BAKE or LOCK continue to flash, disconnect power to the appliance. Wait a few minutes, and then reconnect power. If the flashing still continues, disconnect power to the appliance and call an authorized servicer. • If - Maytag MGR4451BDS | Use and Care Manual - Page 11
OFF position before supplying gas to the range. • NEVER touch cooktop until it has cooled. Expect some parts of the cooktop, especially around the burners the knob is turned past the LITE position. Pilotless Ignition Pilotless ignition eliminates the need for a constant standing pilot light. - Maytag MGR4451BDS | Use and Care Manual - Page 12
seconds and relight the burner. • The flame should be adjusted so it does not extend beyond the edge of the pan. Oven Cooking Manual Clean Oven Control (select models) • A beep will sound each time a function pad is pressed. There is no beep for the More+ or Less- pad. • A double beep will sound - Maytag MGR4451BDS | Use and Care Manual - Page 13
10 to 15 minutes for the oven to preheat. • To recall preset temperature during preheat, press the Bake pad. The temperature Setting the Controls For Broiling: (lower compartment - select models) For best results, use pan designed for broiling. guide. The times may vary with the food being cooked. 12 - Maytag MGR4451BDS | Use and Care Manual - Page 14
time of day will reappear in the display. Manual Clean Oven Knob Control (select models) Oven Control (select models) Broil Bake More+ or LessTimer Cook & , the last clock time before power was interrupted will flash. To recall the time of day when another time function is showing, press the - Maytag MGR4451BDS | Use and Care Manual - Page 15
problem. If BAKE or LOCK flash in the display, press CANCEL pad. If BAKE or LOCK continue to flash, disconnect power to the appliance power to the appliance and call an authorized servicer. To restore the and set the time to 00:00. • To recall the set temperature during preheat, press the Bake - Maytag MGR4451BDS | Use and Care Manual - Page 16
Baking Differences Between Your Old and New Ovens It is normal to notice some baking time differences between a new oven and an old one. See "Adjusting the Oven Temperature" on page 17. Cook & Hold Cook & Hold allows you to bake for a preset amount of time, followed by a one-hour Keep Warm cycle. To - Maytag MGR4451BDS | Use and Care Manual - Page 17
plates, check with the manufacturer. - do not set warm dishes on a cold surface as rapid temperature changes could cause crazing or breakage. Broiling (select models) To set Broil: 1. Press the Broil pad. • "BROIL" flashes. • SET is displayed. 2. Press the More+ pad to set HI broil or press the - Maytag MGR4451BDS | Use and Care Manual - Page 18
4 Flaky Flaky * The top rack position is #5. Important: This chart is a suggested guide. The times may vary with the food being cooked. TOTAL COOK TIME 15 - 20 or browning differences between a new oven and an old one. As ranges get older, the oven temperature can shift. You may adjust the oven - Maytag MGR4451BDS | Use and Care Manual - Page 19
cannot be adjusted. Pilotless Ignition Your range is equipped with pilotless ignition. With this type of ignition system, the gas automatically front of the rack and pull out. To replace: 1. Place rack on the rack support in the oven. 2. Tilt the front end up slightly. Slide rack back until it - Maytag MGR4451BDS | Use and Care Manual - Page 20
appliance is operated and maintained according to instructions attached to or furnished with the product, Maytag brand of Whirlpool Corporation or Whirlpool Canada LP (hereafter "Maytag") will pay for factory specified parts and repair labor to correct defects in materials or workmanship. Service - Maytag MGR4451BDS | Use and Care Manual - Page 21
Cuisinière à gaz ® Guide d'utilisation et d'entretien Table des matières Instructions de sécurité importantes 21-24 Nettoyage 25-28 Four autonettoyant Méthodes de nettoyage et maintien Gril Cuisson courante différé Grilles du four Garantie et service après-vente 43 Guía de uso y cuidado 44 - Maytag MGR4451BDS | Use and Care Manual - Page 22
: Service à la clientèle 1-800-688-9900 É.-U. 1-800-688-2002 Canada (lundi au vendredi, 8 h à 20 h, heure de l'Est) Internet: http://www.maytag.com Dans service après-vente. Instructions de sécurité importantes Les instructions de sécurité importantes et les paragraphes «avertissement» de ce guide - Maytag MGR4451BDS | Use and Care Manual - Page 23
à mousse ou produit chimique sec pour éteindre les flammes. Instructions générales AVERTISSEMENT • TOUTE CUISINIÈRE PEUT BASCULER ET PROVOQUER DES JAMAIS laisser des enfants seuls ou sans supervision lorsque l'appareil est en service ou encore chaud. NE JAMAIS laisser un enfant s'asseoir ou se tenir - Maytag MGR4451BDS | Use and Care Manual - Page 24
un risque de choc électrique ou d'incendie, ou une autre détérioration de l'appareil. Utiliser de la feuille d'aluminium uniquement selon les instructions de ce guide. Ustensiles et sécurité Utiliser des ustensiles à fond plat comportant une poignée qu'on peut facilement saisir et qui reste froide - Maytag MGR4451BDS | Use and Care Manual - Page 25
four sans risque de bris sous l'effet du choc thermique. Observer les instructions du fabricant lors de l'utilisation d'un ustensile en verre. La sécurit (certains modèles) Nettoyer uniquement les pièces mentionnées dans ce guide. Ne pas nettoyer le joint de porte; le joint joue un rôle - Maytag MGR4451BDS | Use and Care Manual - Page 26
Nettoyage Four autonettoyant (certains modèles) Important : Pour la nettoyage manual voir le page 27. ATTENTION • Il est normal que certaines pièces de la cuisinière deviennent très chaudes lors d'un cycle de nettoyage. • Pour é - Maytag MGR4451BDS | Use and Care Manual - Page 27
. Si les grilles ont été laissées à l'intérieur du four pendant le cycle d'autonettoyage et qu'elles glissent mal sur leurs supports, les enduire, ainsi que les supports, d'une fine couche d'huile végétale. De fines lignes peuvent apparaître dans la porcelaine parce qu'elle a subi chaleur et - Maytag MGR4451BDS | Use and Care Manual - Page 28
Four autonettoyant: • Exécuter les instructions présentées aux pages 25-26 pour l'autonettoyage du four. Nettoyage manual: • Nettoyer fréquemment avec appliquer par essuyage un peu d'huile végétale sur la grille et ses supports en relief pour faciliter le mouvement, et enlever l'excès d'huile. Acier - Maytag MGR4451BDS | Use and Care Manual - Page 29
• Nettoyage journalier/saleté légère - Essuyer avec l'un des produits suivants: eau savonneuse, vinaigre blanc/eau, produit de nettoyage pour verre et surface Formula 409* ou un produit semblable pour verre - avec un linge souple et une éponge. Rincer et sécher. Pour polir et enlever les marques de - Maytag MGR4451BDS | Use and Care Manual - Page 30
. Si cet appareil doit être déménagé et/ou enlevé pour être réparé, suivre la méthode décrite dans les instructions d'installation. Pour toute information, prendre contact avec le service à la clientèle de Maytag au 1-800-688-9900 É.-U. ou 1-800-688-2002 au Canada. Il faut que le pied arrière de la - Maytag MGR4451BDS | Use and Care Manual - Page 31
il peut devenir plus • Ceci est normal pour une cuisinière neuve et disparaît après chaud ou moins chaud. Voir page 40 les instructions d'ajustement quelques utilisations. Un cycle d'autonettoyage « brûlera » plus de la température du four (certains modèles). Important : Il n'est rapidement les - Maytag MGR4451BDS | Use and Care Manual - Page 32
contraction des pièces métalliques. Ceci est normal et n'endommage pas l'appareil. Il n'y a ni bip ni affichage. • Le four est peut-être en mode sabbat. Voir page 39. « SAb » clignote puis reste allumé. • Le four est en mode sabbat. Pour annuler, appuyer sur la touche Clock et maintener-la enfoncée - Maytag MGR4451BDS | Use and Care Manual - Page 33
qui déborde d'un ustensile ne s'infiltrera pas sous la surface de cuisson. On devrait cependant nettoyer les brûleurs après chaque utilisation. (Voir les instructions de nettoyage à la page 27.) Brûleur de haute performance (12,000 BTU*) Cette cuisinière est dotée d'un brûleur à haute vitesse, plac - Maytag MGR4451BDS | Use and Care Manual - Page 34
Cuisson dans le four Commandes du four à nettoyage manuel (certains modèles) Bake (Cuisson courante) S'utilise pour la cuisson courante et le rôtissage. Broil (Cuisson au gril) S'utilise pour la cuisson au gril et le rissolage sur partie supérieure. Timer (Minuterie) Programme la minuterie. - Maytag MGR4451BDS | Use and Care Manual - Page 35
• Pour changer la température du four pendant la cuisson, appuyer sur Bake, puis sur la touche More+ ou Less- jusqu'à ce que la température désirée soit affichée. • Pour changer la température du four lors du préchauffage, appuyer deux fois sur la touche Bake, puis sur la touche More+ ou Less- jusqu - Maytag MGR4451BDS | Use and Care Manual - Page 36
un format de 12 ou 24 heures. • Les deux points continuent à clignoter et le décompte de la durée commence. 3. Programmer l'heure en suivant les instructions données ci-dessous. • La dernière minute du décompte sera affichée sous forme de secondes. 4. À la fin de la durée programmée, un bip - Maytag MGR4451BDS | Use and Care Manual - Page 37
Annulation de la minuterie : 1. Appuyer sur la touche Timer (Minuterie) et la maintenir ainsi pendant trois secondes. OU 2. Appuyer sur la touche Timer et régler l'heure à 00:00. Verrouillage des commandes Les touches peuvent être verrouillées pour des raisons de sécurité, nettoyage ou pour empêcher - Maytag MGR4451BDS | Use and Care Manual - Page 38
3. Appuyer à nouveau sur la touche Cook & Hold (Cuisson et maintien) OU attendre quatre secondes. • Le mot HOLD (Maintien) clignote. • 00:00 clignote à l'afficheur. 4. Entrer la durée pendant laquelle l'on désire que la cuisson ait lieu en appuyant sur les touches More+ (Plus+) ou Less(Moins-). La - Maytag MGR4451BDS | Use and Care Manual - Page 39
Maintien au chaud Pour maintenir au chaud dans le four des aliments cuits et chauds ou pour réchauffer pains et assiettes. Programmation du maintien au chaud : 1. Appuyer sur la touche Keep Warm (Maintien au chaud). • Le mot WARM (Chaud) clignote. • 000 paraît à l'afficheur. 2. Sélectionner la tempé - Maytag MGR4451BDS | Use and Care Manual - Page 40
Filetes, 1,3 cm (1/2 po) 4 La chair se détache La chair se détache * Grille supérieure à la position n° 5. Remarque : Ce tableau n'est qu'un guide de suggestions. Les durées peuvent varier selon l'aliment à cuire. LO Broil Gril à température basse 30 - 45 minutes 10 - 15 minutes 8 - 12 minutes - Maytag MGR4451BDS | Use and Care Manual - Page 41
ce qu'elle s'arrête à la position de calage. 2. Soulever la grille à l'avant pour pouvoir l'extraire. Réinstallation : 1. Placer la grille sur les supports dans le four. 2. Soulever légèrement l'avant. Faire glisser la grille vers l'arrière au-delà de la position de calage. 3. Abaisser la grille et - Maytag MGR4451BDS | Use and Care Manual - Page 42
: Utiliser cette position pour la cuisson d'un gros rôti ou d'une dinde. Placer les deux grilles du four l'une sur l'autre, en appui sur les supports latéraux du fond du four. ATTENTION Ne pas essayer de sortir les grilles du four en les faisant glisser quand elles sont en position - Maytag MGR4451BDS | Use and Care Manual - Page 43
Remarques 42 - Maytag MGR4451BDS | Use and Care Manual - Page 44
dans une région éloignée où un service d'entretien Maytag autorisé n'est pas disponible. 10. La dépose et la réinstallation de votre gros appareil si celui-ci est installé dans un endroit inaccessible ou n'est pas installé conformément aux instructions d'installation fournies. 11. Les gros appareils - Maytag MGR4451BDS | Use and Care Manual - Page 45
Quemadores de gas sellados Cocinando en el horno 57-65 Controles del horno de limpieza manual Reloj Hornear Temporizador Asar Perilla del horno de limpieza manual Hornear Asar Controles del horno autolimpiante Reloj Temporizador Hornear Mantener caliente Cocción y Asar mantener - Maytag MGR4451BDS | Use and Care Manual - Page 46
de los clientes 1-800-688-9900 EE.UU. 1-800-688-2002 Canadá (Lunes a Viernes, 8:00 a.m. a 8:00 p.m. Hora del Este) Internet: http://www.maytag.com En nuestro continuo afán de mejorar la calidad y rendimiento de nuestros electrodomésticos, puede que sea necesario modificar el electrodoméstico sin - Maytag MGR4451BDS | Use and Care Manual - Page 47
esté caliente. NUNCA permita que los niños se sienten o se paren en ninguna parte del electrodoméstico pues se pueden lesionar o quemar. Se les debe enseñar a del horno. NUNCA cubra ninguna rendija, agujero o canal en la parte inferior del horno o cubra la rejilla completa con materiales tales como - Maytag MGR4451BDS | Use and Care Manual - Page 48
con el utensilio, los mangos no deben extenderse sobre el quemador superior adyacente. Siempre gire los mangos de los utensilios hacia el lado o hacia la parte trasera de la estufa, no hacia la habitación donde puede ser fácilmente golpeados o alcanzados por los niños pequeños. Nunca deje que un - Maytag MGR4451BDS | Use and Care Manual - Page 49
. No restriegue, dañe, ni mueva la junta de la puerta. No use limpiadores de horno de ninguna clase en el horno ni alrededor de cualquier parte del horno autolimpiante. Es normal que la cubierta de la estufa se caliente durante el ciclo de autolimpieza. Por lo tanto, se debe evitar tocar - Maytag MGR4451BDS | Use and Care Manual - Page 50
Horno autolimpiante (modelos selectos) Importante: Para la limpieza manual, ver página 51. 6. Limpie los derrames azucarados durante el ciclo de limpieza. 5. Limpie el exceso de grasa o derrames de la parte inferior del horno. Esto evita humo excesivo o llamaradas durante el ciclo de limpieza. - Maytag MGR4451BDS | Use and Care Manual - Page 51
3. Oprima la tecla 'Clean' (Limpieza). • "CLEAN" destellará. 4. Oprima la tecla 'More+' (Más+) o 'Less-' (Menos-). • 'CL-M' (Suciedad Moderada, 3 horas) se despliega en el indicador. 5. Oprima la tecla 'More+' o 'Less-' para desplazar los ajustes de autolimpieza. 'CL-H' (Suciedad Intensa, 4 horas) ' - Maytag MGR4451BDS | Use and Care Manual - Page 52
el vidrio. Interior del horno autolimpiante: • Siga las instrucciones en las páginas 49-50 para programar un ciclo de autolimpieza. Horno limpieza manual: • Limpie frecuentemente usando limpiadores abrasivos suaves y una esponja de plástico. • No use esponjas de fregar metálicas porque pueden rayar - Maytag MGR4451BDS | Use and Care Manual - Page 53
'Scotch-Brite'* húmeda; frote a favor del grano. Enjuague y seque. Para restaurar el lustre y sacar las vetas, aplique 'Stainless Steel Magic Spray'*. • Descoloración - Use una esponja mojada o un paño suave, Mantenimiento limpie con limpiador de acero 'Cameo Stainless Steel Cleaner'*. Enjuague - Maytag MGR4451BDS | Use and Care Manual - Page 54
la gaveta y deslícela hacia afuera hasta la primera posición tope. 2. Levante la parte delantera de la gaveta. 3. Tírela hasta la segunda posición de tope. 4. Sujete ón. Para información, póngase en contacto con el Servicio a los Clientes Maytag llamando al 1-800-688-9900 EE.UU. o al 1-800-688-2002 - Maytag MGR4451BDS | Use and Care Manual - Page 55
Importante: No se recomienda ajustar la temperatura si ha tenido problemas con solo una o dos recetas. • Use el utensilio correcto. Los utensilios oscuros producen dorado oscuro. Los utensilios brillantes producen dorado claro. • Verifique las posiciones de las parrillas y la colocación de los - Maytag MGR4451BDS | Use and Care Manual - Page 56
Cocinando en la estufa Controles superiores PRECAUCIÓN • Si la llama se apaga cuando esté cocinando, apague el quemador. Si se detecta un olor fuerte a gas, abra una ventana y espere cinco minutos antes de volver a encender el quemador. • Asegúrese de que todos los controles superiores estén en la - Maytag MGR4451BDS | Use and Care Manual - Page 57
Cubierta Para evitar que la cubierta se descolore o se manche: • Limpie la cubierta de la estufa después de cada uso. • Limpie los derrames ácidos o azucarados tan pronto como la cubierta se haya enfriado pues estos derrames pueden descolorar la porcelana. A diferencia de una estufa con quemadores - Maytag MGR4451BDS | Use and Care Manual - Page 58
Cocinando en el horno Controles del horno de limpieza manual (modelos selectos) 'Bake' (Hornear) 'Broil' (Asar) 'Timer' (Temporizador) 'Clock' (Reloj) 'CANCEL' (Cancelar) 'More+' o 'Less-' (Más+ o Menos-) Se usa para hornear y asar. Se usa para asar a la - Maytag MGR4451BDS | Use and Care Manual - Page 59
apagar el horno y retire el utensilio del horno. La hora del día volverá a desplegarse en el indicador visual. Perilla del horno de limpieza manual (modelos selectos) Perilla de la temperatura del horno La perilla 'Oven Temp' (Temperatura del Horno) se usa para seleccionar y mantener la temperatura - Maytag MGR4451BDS | Use and Care Manual - Page 60
3. Siga los tiempos sugeridos en la tabla para asar a la parrilla en 3. Programe la hora del día siguiendo las instrucciones indicadas página 67 que se incluye a continuación. La carne debe darse abajo. vuelta una vez cuando está a mitad del tiempo de cocción. Programación del reloj: 4. - Maytag MGR4451BDS | Use and Care Manual - Page 61
4. Al final del tiempo programado, se escuchará una señal sonora larga. Para cancelar el temporizador: 1. Oprima y mantenga oprimida la tecla 'Timer' (Temporizador) durante tres segundos. U 2. Oprima la tecla 'Timer' y coloque la hora a 00:00. Bloqueo de los controles El teclado pueden ser - Maytag MGR4451BDS | Use and Care Manual - Page 62
3. Oprima la tecla 'Cook & Hold' (Cocción y mantener caliente) nuevamente O espere cuatro segundos. • 'HOLD' destella. • '00:00' destella en el indicador visual. 4. Programe la cantidad de tiempo durante la cual usted desea hornear oprimiendo la tecla 'More+' (Más) o 'Less-' (Menos), El tiempo de - Maytag MGR4451BDS | Use and Care Manual - Page 63
'Keep Warm' (Mantener caliente) Para mantener calientes en forma segura alimentos calientes o para calentar panes y platos. Para programar 'Keep Warm': 1. Oprima la tecla 'Keep Warm'. • 'WARM' destella. • '000' se despliega en el indicador visual. 2. Seleccione la temperatura de 'Keep Warm'. La - Maytag MGR4451BDS | Use and Care Manual - Page 64
Tabla de asar a la parrilla del horno ALIMENTOS POSICION DE TERMINO DE TIEMPO TOTAL DE LA PARRILLA* COCCION COCCION (MINUTOS) Carne de res Biftec, 2,5 cm (1") Hamburguesas, 1,9 cm (3/4") de grosor 4 A medio asar 15 - 20 minutos 4 Bien asado 18 - 24 minutos 4 Bien asado 15 - 18 minutos - Maytag MGR4451BDS | Use and Care Manual - Page 65
Ajuste de la temperatura del horno La exactitud de las temperaturas del horno es cuidadosamente probada en la fábrica. Es normal notar alguna diferencia entre la temperatura de horneado , entre un horno nuevo y un horno antiguo. Con el correr del tiempo, la temperatura del horno puede cambiar. Usted - Maytag MGR4451BDS | Use and Care Manual - Page 66
más altos de carne de res o de pavo. Coloque ambas parrillas del horno, una sobre la otra, en las salientes laterales de la parte inferior del horno. HORNEADO CON VARIAS PARRILLAS: Dos parrillas: Use las posiciones 2 y 4, o 1 y 4. Importante: Nunca coloque los utensilios de cocina directamente en el - Maytag MGR4451BDS | Use and Care Manual - Page 67
Notas 66 - Maytag MGR4451BDS | Use and Care Manual - Page 68
de Maytag para determinar si corresponde otra garantía. Si necesita servicio, consulte primero la sección "Solución de problemas" del Manual de Maytag. En EE.UU., llame al 1-800-688-9900. En Canadá, llame al 1-800-807-6777. 9/07 Form No. A/01/08 Part No. 8113P704-60 ©2006 Maytag Appliances Sales
-
 1
1 -
 2
2 -
 3
3 -
 4
4 -
 5
5 -
 6
6 -
 7
7 -
8
-
9
-
10
-
11
-
12
-
13
-
14
-
15
-
16
-
17
-
18
-
19
-
20
-
21
-
22
-
23
-
24
-
25
-
26
-
27
-
28
-
29
-
30
-
31
-
32
-
33
-
34
-
35
-
36
-
37
-
38
-
39
-
40
-
41
-
42
-
43
-
44
-
45
-
46
-
47
-
48
-
49
-
50
-
51
-
52
-
53
-
54
-
55
-
56
-
57
-
58
-
59
-
60
-
61
-
62
-
63
-
64
-
65
-
66
-
67
-
68
 |
 |
Form No. A/06/03
Part No. 8113P384-60
©2003 Maytag Appliances Sales Co.
Litho U.S.A .
Important Safety
Instructions
...............................
1-4
Care & Cleaning
.......................
4-7
Self-Clean Oven
Cleaning Procedures
Maintenance
.............................
7-8
Oven Window & Light
Removal of Gas Appliance
Troubleshooting
...........................
9
Surface Cooking
..................
10-11
Surface Controls
Sealed Gas Burners
Table of Contents
Use & Care Guide
Oven Cooking
.......................
11-18
Manual Clean Oven Controls
Clock
Baking
Timer
Broiling
Manual Clean Oven Knob Control
Baking
Broiling
Self-Clean Oven Controls
Clock
Timer
Baking
Keep Warm
Cook & Hold
Broiling
Delay Bake
Oven Racks
Warranty & Service
....................
19
Guide d’utilisation et
d’entretien
...................................
20
Guía de uso y cuidado
..............
44
Gas Range
®
Form No. A/01/08
Part No. 8113P704-60
©2006 Maytag Appliances Sales Co.
All rights reserved.
Litho U.S.A.