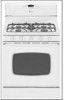
Maytag MGR5875QDW Use and Care Guide
Maytag MGR5875QDW - 30 Inch Gas Range Manual
 |
View all Maytag MGR5875QDW manuals
Add to My Manuals
Save this manual to your list of manuals |
Maytag MGR5875QDW manual content summary:
- Maytag MGR5875QDW | Use and Care Guide - Page 1
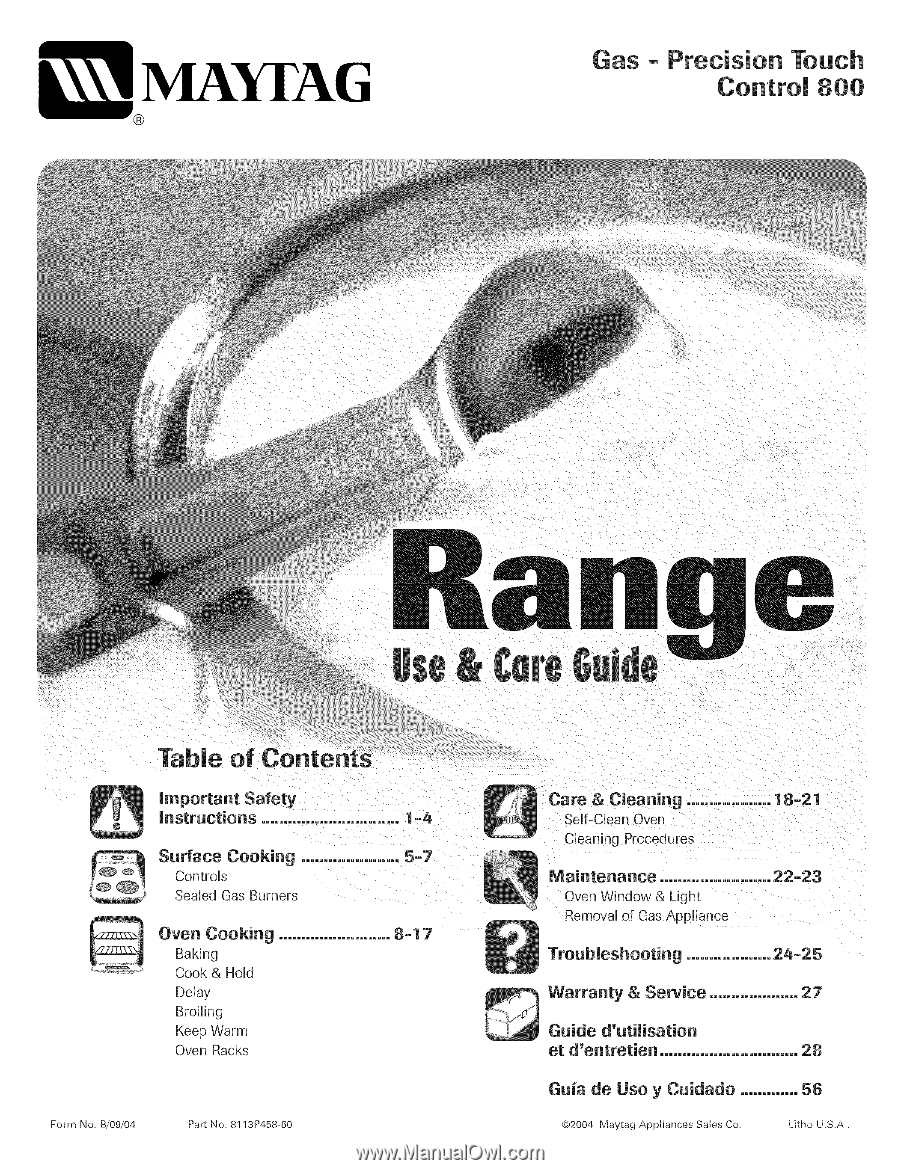
No, B/09/04 PaR No. 8113P458 60 Care & Cleaning Self-Clean Oven Cleaning Procedures 18-21 Maintenaace Oven Whldow & Light Removal ot Gas Appliance 22-23 Troubleshooting 24=25 Warranty & Service 27 Guide d'ntilisation et d'entretien 28 Guia de Use y Cnidado 56 (_P2004 Mavtag - Maytag MGR5875QDW | Use and Care Guide - Page 2
technician. Do not attempt to adjust, repair, service, or replace any part of your appliance unless it is specifV cally recommended in this guide. All other servicing should be referred to a qualified servicer. Have the installer show you the location of the gas shut off valve and how to shut - Maytag MGR5875QDW | Use and Care Guide - Page 3
to heat from oven door. above an appliance or on backguard of a range. Children climbing on the appliance door to reach items could be seriously injured. NEVER leave children alone or unsupervised near the appliance when it is in use or is still hot. NEVER allow children to sit or stand on any part - Maytag MGR5875QDW | Use and Care Guide - Page 4
. Do not use high heat for extended cooking operations. NEVER heat an unopened container on the surface burner or in the oven. Pressure build-up may can trail across hot surface burners and ignite or get caught on appliance parts. Always let quantities of hot fat used for deep fat frying cool before - Maytag MGR5875QDW | Use and Care Guide - Page 5
guide. Do not use eyelid covers for the surface units, stovetop grills, or add-on oven convection systems. The use of devices or accessories that are not expressly recommended in this manual can create serious safety hazards, result in performance problems combustion of natural gas or liquid - Maytag MGR5875QDW | Use and Care Guide - Page 6
position prior to su ppiying gas to the range. • NEVER touch cooktop until it has cooled. Expect some parts of the cooktop, especially around ignitor is broken, soiled or wet. Ports BURNER CAP gnitor BURNER BASE Surface Control Knobs Use to turn on the surface burners. An infinite choice of heat - Maytag MGR5875QDW | Use and Care Guide - Page 7
heat BTU ratings will vary when using LP gas. " A properly adjusted burner with clean ports wiii light within a few seconds. If using natural gas, the flame wiii be blue with a deeper blue inner cone. If the burner flame is yellow or is noisy, the air/gas mixture may be incorrect. Contact a service - Maytag MGR5875QDW | Use and Care Guide - Page 8
control shows thlle of day, thYlerand oven functions. Control panel shown includes Convect and other model specific features. [Styling may vary pad, the time or temperature will automatically be entered. If more than 30 seconds elapse between touching a function pad and the number pads or the - Maytag MGR5875QDW | Use and Care Guide - Page 9
is showing, press the CHockpad. CHocktime cannot be changed when the oven has been programmed for Dday cook or dean or Cook &Hoid. . _ Nthoeteo:veTnhetetmoupcehraptaudres aisnd40o0v°eFnodroaobrocvaen. not be locked if Faumt Codes BAKE or LOCK may flash rapidly in the display to alert servicer. - Maytag MGR5875QDW | Use and Care Guide - Page 10
an old one. See "Adjusting the OvenTemperature" on page 15. Baking with Convection (select models) When convection baking, enter year normal baking temperatare. The control wi[[ automatically reduce the set oven temperature by 25°. The entered temperature wi[[ be displayed. The convection fan will - Maytag MGR5875QDW | Use and Care Guide - Page 11
Roasting With Convection (select models) When convection roasting, enter your normaJ roasting allow the oven to preheat for 8-15 minutes. ° When the set oven temperature is reached, one long beep will sound. 5. Place food in the oven. ° Time will start counting down once oven starts heating up. ° - Maytag MGR5875QDW | Use and Care Guide - Page 12
that you want to delay before the oven turns on and how long you want to cook. The oven begins to heat at the selected time and cooks . 5. Press Bake, Convect Bake or Convect Roast pad (select models). 0. Set the oven temperature desired by pressing the Autoset 0 pad or the appropriate number - Maytag MGR5875QDW | Use and Care Guide - Page 13
before adding food. 5. Place food in the oven. Close the oven door. 6. Turn meat once about halfway 18 min. 6 - 10 min. 8 - 12 rain. 22 - 26 rain. 30 - 45 min. (Lo Broil} 8 - 12 rain. 10 - 15 min. heat source. Note: This chart is a suggested guide. The times may vary with the food being cooked. 12 - Maytag MGR5875QDW | Use and Care Guide - Page 14
warm for no Hongerthan 1 to 2 hours. , To keep foods from drying, cover HooseHwyith foiHor a Hid. . To warm dinner rolls: - cover roHHHs ooseHwyith foiHand pHacein oven. - press Keep Warm and Autoset 0 pads. - warm for 12-15 minutes. , To warm plates: - pHace2 stacks of up to four pHateseach in the - Maytag MGR5875QDW | Use and Care Guide - Page 15
be turned off. To cancel the 12-hour shut-off and run the oven continuously for 72 hours: 1= Press and hoid the CHockpad for five seconds . , BAKE will also be displayed if a bake cycle is in use while the oven is in Sabbath Mode. , All functions EXCEPTBAKE Crimer, Keep Warm, Clean, etc.} are - Maytag MGR5875QDW | Use and Care Guide - Page 16
to adjust the temperature. To adjust the oven temperature: 1. Press the Bake pad. .... no change is made, the range wi[[ return to the existing setting after 30 seconds=_ 4= To change the Press the Bake, Convect Bake or Convect Roast (select models) pad. , The Favorite cycle wi[[ begin immediately - Maytag MGR5875QDW | Use and Care Guide - Page 17
oven vent is located below the backgaard vent shield on your range. OVEN VENT LOCATION Do not place plastics near the vent opening as heat front the vent could distort or melt the plastic. Oven To replace: 1. Place rack on the rack support in the oven. 2. Tilt the front end up slightly. Slide - Maytag MGR5875QDW | Use and Care Guide - Page 18
bottom. Use for additional space when cooking large oven meals. MULTIPLE RACK COOKING: Two rack: Use rack positions 3 and 6, or 2 and 4. Three rack: (convection onH}OUse rack positions 1,3 and 6. Create-A-Space SeHectrange models are equipped with a convertible half rack. The left side of the rack - Maytag MGR5875QDW | Use and Care Guide - Page 19
to open the door when LOCK is displayed. • Avoid touching door, window or oven vent area during a clean cycle. , Do not use commercial oven cleaners on the oven finish or around any part of the oven. They will damage the finish o_ parts. The self-clean cycle uses above-normal cooking temperatures to - Maytag MGR5875QDW | Use and Care Guide - Page 20
will lessen in time. Smoke may also occur if the oven is heavily soiled or if a broiler pan was left in the oven. Sounds As the oven heats, you may hear sounds of metal parts expanding and contracting. This is normal and wi]] not damage the oven. After Seff-C eaning About one hour after the end - Maytag MGR5875QDW | Use and Care Guide - Page 21
-088-8408 Canada. PART Broimer Pan and insert Sealed Gas Burners Burner and soak for 30 minutes= Scrub again, rinse and dry= ° Do not clean in the dishwasher or self-cleaning oven. ° To . ° Never use oven cleaners, abrasive or caustic cleaning agents on exterior finish of range. Storage Drawer and - Maytag MGR5875QDW | Use and Care Guide - Page 22
Oven interior , Follow instructions on page 18-19 to set a sdf-dean cycle. Oven oven during a self-clean operation. If this occurs, wipe the rack and embossed rack supports prevent fingerprints, follow with Stainless Steel Magic Spray_ (Part No. 2000000d)_, * Moderate/Heavy Soil -- Wipe Canada. 21 - Maytag MGR5875QDW | Use and Care Guide - Page 23
volt electrical outlet. Always disconnect power to appiiance before servicing, The three-prong grounding plug offers protection against shock hazards the appliance owner to have the outlet replaced with a properly grounded three=home electrical oatmet. Oven Light • Disconnect power to range before - Maytag MGR5875QDW | Use and Care Guide - Page 24
gas appHiance for cHeaningor to reHocate.If this appHiancehas to be moved and/or removed for servicing, foHHowthe procedure described in the instaHHationinstructions. For information, contact Maytag Customer Assistance at 1-800-688-9900 U.S.A.or 1-800-688-2002 Canada. To prevent range the oven is in - Maytag MGR5875QDW | Use and Care Guide - Page 25
16 for location. , Check to make sure range is level. , Temperatures often vary between a new oven and an old one. As ovens age. the oven temperature often "drifts" and may become hotter or cooler. See page 16 for instructions on adjusting the oven temperature. NOT£: It is not recommended to adjust - Maytag MGR5875QDW | Use and Care Guide - Page 26
cycle. If the fault code reappears, contact an authorized servicer. Noises may be heard. ° The oven makes several low level noises. You may hear the oven relays as they go on and off. This is normal. ° As the oven heats and cools, you may hear sounds of metal parts expanding and contracting. This - Maytag MGR5875QDW | Use and Care Guide - Page 27
26 - Maytag MGR5875QDW | Use and Care Guide - Page 28
800-688-2002 Canada. U.S. customers using TTY for deaf, hearing impaired or speech impaired, call 1-800-688-2080. User's guides, service manuals and parts information are available from Maytag ServicessM,Maytag Customer Assistance. When writing or calling about a service problem, please include the - Maytag MGR5875QDW | Use and Care Guide - Page 29
B/IA AI3 ® gaz _ touches de pr6cision 800 m m m //|S|//|e Table des instructions de s6curit_ importantes 29-33 Cuisson sur masurface 34-35 Commandes de la surtace de cuisson Br0Heursscell6s Cuissen darts le four 36=46 CUiSSOHc1ourante Cuisson - Maytag MGR5875QDW | Use and Care Guide - Page 30
le setdce apr#s?ve#teo Les instructions de securitd importantes et bs paragraphes - Maytag MGR5875QDW | Use and Care Guide - Page 31
instructions generates ° TOUTE CUm$1NIEREPEUT BASCULER ET PROVOQUER DES BLESSURES. graves bbssure& NE JAMAIS iaisser des enfants seuis ou sans supervision Iorsque I'appareil est en service ou encore chaud, NE JAMAIS laisser un enfant s'asseoir ou se tenir sur une en un lieu sOr, hors d'atteinte 30 - Maytag MGR5875QDW | Use and Care Guide - Page 32
des enfants. II est important d'enseigner aux enfants qu'un appareiI menager n'est pas un jouet, et qulb ne doivent toucher aucune commande ou autre composant de rappare& Familiarisation avee l'appareil NE JAMAIS utHber la porte de four comme tabouret/siege/ escabeau: ceci pourrait faire bascubr I' - Maytag MGR5875QDW | Use and Care Guide - Page 33
le four sans risque de bris sous I'effet du choc thermique. Observer les instructions du fabricant Iors de I'utilisation d'un ustensile en verre. La secur[te un ustensile ou accessoire qui n'est pas specifiquement recommande darts ce guide. Ne pas utfliser de couvre-brQleur, grfl place sur la table - Maytag MGR5875QDW | Use and Care Guide - Page 34
etc, dans Uefour Uorsd'une operation dlautonettoyage, Nettoyer uniquement les pieces mentionnees dans ce guide, Ne pas nettoyer le joint de porte; le joint joue un rOle essentiel excessif dans un ustensiHea revetement antiadhesif, Conserver ces instructions pour consultation ulterieure 33 - Maytag MGR5875QDW | Use and Care Guide - Page 35
@ LO (BASSE) : S'utilise pour le mijotage ou le maintien de la temp6ratured'un mets, ou pour la fusion de chocoiatou beurre.Lorsquele plat ou I'ustens+Iest couvert,un d6but de cuisson peut se produire avec Ia puissancede chauffageLO. Pour r6duire Ia puissancede chauffage,tourner Ie bouton 8 Ia - Maytag MGR5875QDW | Use and Care Guide - Page 36
situ6 _ la position centrale,lI offre une plus faible puissancepour la cuissonde saucesd61icatesou la fusion O O du chocolat. 0_0 * LapuissanceNermique (BTU) desbrdeurs est diff_reate tots de f'a_;Jmentatioanu gaz de p6,trole/iqu_fi6,, Grilles de br leur Avant une op6rationde cuisson,v6rifier - Maytag MGR5875QDW | Use and Care Guide - Page 37
Le tabIeau de commanderepr6sent6comprend la convectionet d'autres caract6rJstiquessp6cifiquesau modele. (Lestyle pout varJerselon le mod_le.] Cuisson courante dur6e ou la temp6ratureseront automatiquement enregistr6es.Si plus de 30 secondess'6coulententre la pressionsur une touche de fonction et - Maytag MGR5875QDW | Use and Care Guide - Page 38
R6gmagede m'hormoge 1. Appuyer sur Ia touche CIock [Hodoge}. • L'heurecNgnote_ I'afficheur. 2. Appuyer sur bs touchesnumeriquesapproprieespour program- mer Pheuredu jour. • Deuxpoints clignotent _ I'afficheur. 3. Appuyer _ nouveausur B touche Clock ou attendre quatre secondes. •Les deux points - Maytag MGR5875QDW | Use and Care Guide - Page 39
@ Codes d'anoma ie Les roots BAKE {CUiSSON COURANTE) ou LOCK 07ERROUiLLAGE} peuvent c@noter et un four ancbn. Voir Ajustement de la temp6raturedu four a la page 44. C isso avec co vectio (certains modeles} + 38° 000 °} ou Ia temp6raturer@lle du four, si ia temperatureest de plus de 38 °C [100°F}, - Maytag MGR5875QDW | Use and Care Guide - Page 40
besoin+ 7+ LorsqueIacuissonest terminee,appuyer sur la touche CANCEL(ANNULER]+ 8+ Retirerla nourriture du four. R6tissage avec convection (certains modeles ) Pour le rStissage ave€ convection, entrer la temp6rature et la dur6e de r6tissage normales. Le programmateurindique automatiquementde verifier - Maytag MGR5875QDW | Use and Care Guide - Page 41
5. Phcer [anourriture darts le four. • La duree commence[e compte_ reboursdSsque le four se met chauffer. • Pourrappeterla temperatureprogramm6ependant [e pr_chauffage,appuyersur [a touche ConvectRoast. 6. Lorsquelostrois quarts de [a dur6e de cuissonprogramm6ese sont 6cou[6s,[e four se met en - Maytag MGR5875QDW | Use and Care Guide - Page 42
raide destouches numeriques. 5. Appuyer sur Ia touche Bake[CuissoncouranteD, ConvectBake(Cuissonavec convectionDou ConvectRoast(R0tissageavec convection) ..... [certains modeles). 6. Programmer la temperature du four desiree N en appuyant sur Ia touche Autoset 0 (Programmat+onautomatique)ou - Maytag MGR5875QDW | Use and Care Guide - Page 43
min. 8 - 12 min. 22 - 26 min. vomaimme Blancs, avec os 4 Bien cuJt (GriI _ temperaturebasse} 30 - 45 min. Fruits de met FiIetde poisson 5 Dame de poisson,2,5 cm (1 po} d'epaisseur 5 Queuede homard,85 Cetableau n'est qu'un guide de suggestions.Lesdur6es peuventvarJerselon I'aliment_ cuire. _2 - Maytag MGR5875QDW | Use and Care Guide - Page 44
Arr t autornatique/Mode Le four s'arr6teautomatiquementapr_s12 heuress'il a 6t6 accidentellementlaissden marche.Cettecaract6ristiquede s6curit6 peut 6tre arr6t6e. Pour annuler l'arr_t 12 heures et faire fonctionner le four en continu pendant 72 heures : 1. Appuyer sur la touche Clock (Hodoge:e) t la - Maytag MGR5875QDW | Use and Care Guide - Page 45
Ajustement du four de la temp6rature La precisiondes temperaturesdu four a 6t6 soigneusementverifiee rusine+Hiest normalde remarquerquetquesdifferencesdans la cuissonou ia couleur du rissohge obtenu entre un four neuf et un four ancien+Au fur et _ mesureque le four est moins neuf, sa temperature - Maytag MGR5875QDW | Use and Care Guide - Page 46
CUiSSOn au four sur une seulegriIIe avec une tOie biscuits.S'utilisepour une cuissonsur plusieurs griIIes. C_isSOn 8VeC ¢O_VeOtio_ sur trois grilles (certains modeles) So_e du fo_._r POSiTiON 5 : PourIa cuissonau gril et la cuissonau four sur une seulegriIle avec une tOIe_ biscuits. POSiTiON - Maytag MGR5875QDW | Use and Care Guide - Page 47
e pas utiliser la pattie sup6rieure si la grille du four est plac6edarts JaJ_chefrite. o La sectionamovibie de la grille peut 6tre utiJisSecomme support ou grille de refroidissement. o S'assurerque Ie four a refroidi avant de retirer ou de rSinstaller Jademi-grille. o Ne pas utiliser un ustensilequi - Maytag MGR5875QDW | Use and Care Guide - Page 48
n'est pas fens@, des hips retentissentet Ie mot - Maytag MGR5875QDW | Use and Care Guide - Page 49
cycled'autonettoyage. Si les grilles ont _t_ laiss6es _ l'int6rieur du four pendant le cycle d'uutonettoyuge et qu'elles gmissentreal sur leurs supports, lesenduire,ainsi que lessupports, d'une fine couche d'huile v6g_tale+ De fines lignes peuvent apparaitre duns la percelaine purce qu'elle a subi - Maytag MGR5875QDW | Use and Care Guide - Page 50
M6thodes de nettoyage et que _ous ruescompesantssont froids, afin d'_viter des dommages eu des br_lureSo i Pour e_iter la io[matiQnde taches Ouun changementde Couleur,n_ttoYerIappareflapr_s chaque utflisation, o Apr_stout demontagede composants,vei!ler _ effectuer un remontagecorrect, *Les noms de - Maytag MGR5875QDW | Use and Care Guide - Page 51
NETTOYAGE Panneaux mat6rauxt,iroir de remisage et poign_es de porte - , Une fois les piscesrefroidies,les laver_ I'eausavonneusetiSde, rinceret s6cher.Nejamais essuyerune surface tiede ou chaude avecun Iinge humide,ceci pouvantendommagerIa surfaceet entrainerune brOIurepar Ia vapeur. , Pour - Maytag MGR5875QDW | Use and Care Guide - Page 52
Porte du four Raccorde ent lectrique Ne Pas grimpe[ sur !a porte du four ouverte,ou Juiimposer une charge excessive.Cecip0ur[ait provoquerun basculementde !a CUiSini6rele, brisde Japorte ou des blessurespour la personne concern6e. fermeturede Ia porte du four d'une cuisini_re neuve:ceciest - Maytag MGR5875QDW | Use and Care Guide - Page 53
,suivre la m6thoded6crite darts Ies instructionsd'instailation.Pourtoute information,prendre contact avec le service_ Ia client6le de Maytag au 1-800-688-9900E.-U.ou 1-800-688-2002au Canada. II faut que Ie pied arri_re de Ia cuisiniSresoit engag6 dans la bride antibasculementpour que la cuisiniere - Maytag MGR5875QDW | Use and Care Guide - Page 54
PROBL_ME Pour la plupart des probl_mes observes, essayer d'abord lea sore,lions possibmes,_ droite. SOLUTION , Verifier que Ies commandesdu four sont correctementreglees. , Verifier si le four est biersraccord6au circuit 61ectrique. , Inspecter/r_armerle dis]oncteur.InspectedremplacerJesfusibles. , - Maytag MGR5875QDW | Use and Care Guide - Page 55
d'une forte odeur ou de fum emordsemmu seenmarche du four. Codes d'anomamie, Ceci est normalpour un four neuf et disparait aprasquetquesutitisations. LOCKpeuventclignoter rapidement_ ['afficheuprour pr6venird'uneerreur ou d'un probleme.Si le mot BAKEou LOCKparatt_ I'afficheur,appuyersur Iatouche - Maytag MGR5875QDW | Use and Care Guide - Page 56
garanties ." 1= Lesdommagesou d_rangementsdus _: a=Mise en service,Iivraisonou entretien effectu_s incorrectement= b=Toute reparation,modification, achetd,ou contacter Maytag SewicesS_/service_ la clientelede Maytag au 1-800-688-9900[.-U. ou 1-800-688-2002au Canada,pour obtenir lescoordonneesd - Maytag MGR5875QDW | Use and Care Guide - Page 57
Sensible al Tacto 800 ® Tabla de lVlaterias lnstrucciones lmportantes sobre Seguridad 57-61 Cocinando en la Estufa 62-83 Controles Quemadores de Gas Sellados Cocinando en el Homo 64=74 Horneado 'Cook & Hold' 'Cook & Hold' Diferido Asar a la Parrilla Mantener Caliente Parrillas del Homo Cuidado - Maytag MGR5875QDW | Use and Care Guide - Page 58
Todas las reparaciones deben ser realizadas por un t6cnico calificado, Pida al instalador que le indique la ubicaci6n de la v_lvula de cierre del gas y como oerrarla en oaso de una emergencia, Siempre desenchufe el electrodom6stico antes de efectuar alguna reparaci6n, = No almacene ni use gase!iaa - Maytag MGR5875QDW | Use and Care Guide - Page 59
deje a los nixies solos o sin supervisi6n cuando el electrodom6stico est6 en use o este caliente, NUNCA permita que los nixies se sienten o se paren en ninguna parte del electrodom6stico pues se pueden lesionar o quemar, 58 - Maytag MGR5875QDW | Use and Care Guide - Page 60
de la habitaci0n. Esto puede causar envenenamiento por monOxido de carbono } el sobrecalentamiento del homo, NUNCA cubra ninguna rendija, agujero o canal en la parte inferior dei homo o cubra la rejiiia completa con materiabs tales como ei papei de aluminio. Esto evita que ei aire fiuya a traves del - Maytag MGR5875QDW | Use and Care Guide - Page 61
utensilio, los mangos no deben extenderse sobre el quemador superior adyacente. Siempre gire los mangos de los utensilios hacia el lado o hacia la parte trasera de la estufa, no hacia la habitaci6n donde puede ser f_cilmente golpeados o alcanzados por los ni_os peque_os. Nunca deje que un utensilio - Maytag MGR5875QDW | Use and Care Guide - Page 62
a algunas de las sustancias publicadas en la lista, induyendo benceno, formddeh[do y hollin, debido principalmente a la combusti6n incompleta del gas natural o de los combustibles de petr61eo licuado. Los quemadores ajustados en forma debida reducir_n la combusti6n incompleta. La exposici6n a estas - Maytag MGR5875QDW | Use and Care Guide - Page 63
EIagua hiervea la misma temperaturasi est_ hiwiendo suaveo vigorosamente. o Si Jallamase apaga cuandoest6 codnando, apagueel quemador. SJsede_ectaun oJorfuerte a gas.aura una ven[ana y espereclnco mlnu[osan[es de volver a encenderel quemador. - Aseg0resede que todos JoscontroJessuper!oreses_6nen Ja - Maytag MGR5875QDW | Use and Care Guide - Page 64
,los quemadorespueden ser I[mpiadosdespuesde cadauso+ La parte de [a cabezade[ quemadorpuede set faciImente sacada alto rendimiento 06.000 BTU*}en su estufa, situado natural la llamaser_ azul con un cono interiorazul profundo. Si [a llamade[ quemadores amariIIao es ruidosa,[a mezcla de aire/gas - Maytag MGR5875QDW | Use and Care Guide - Page 65
: Cuatmsegundosdespu@de haber oprimido [as tecias num6rbas o [atec[a Autoset 0,se programar4autom4ticamente el tbmpo o [atemperatura.Si transcurrenm4s de 30 segundos despu6sde haber oprimido una tecIa de funci6n y antesde oprimir [as tecIas num6ricaso [a tecia Autoset 0, [a funciOnser_ canceIaday el - Maytag MGR5875QDW | Use and Care Guide - Page 66
Programaci6n demRemoj: 1. Opr[ma[atecla 'Clock'. + Ene[ indicadordestettata hora de[ alia+ 2+ Optima [astectas num6ricasapropiadaspara programarta hora deId[a. + Losdos puntos destellan en et indicador. 3. OprimaIatecla 'Clock' nuevamenteo esperecuatm segundos. + Losdos puntos permanecerSniluminados - Maytag MGR5875QDW | Use and Care Guide - Page 67
Diferenc+as tier homeado entre su homo Para programar +Bake' (HorneaO: antiguo y su homo nuevo 1. Oprima la tecla 'Bake'. Esnormal observaralgunas diferenciasen el tiempo de horneadode su horno antiguoy su homo nuevo+Vea "Ajustede la Temperatura • 'BAKE'y '0%' deste%r_ en el indicadorvisual - Maytag MGR5875QDW | Use and Care Guide - Page 68
tiempo si es necesario. 2= SeIeccioneIatemperaturade asar usandolasteclas num6ricas apropiadas. o La luzdel horno permanecer_encendidahasta que se oprima JatecJa'Oven Light'. • Eltiempo puede ser programadode 10 minutos (00:10)a 11 horas,59 minutos (11:59). o OprimacualquiertecJapara verJficarel - Maytag MGR5875QDW | Use and Care Guide - Page 69
ha programadoun cic[o de 'Cook & Hold' diferido. _otas: • No use 'Cook& Hold' diferido para art[culos que requierenun homo preca[entado,tales como paste[es,ga[[etasy panes. • No use 'Cook& Hold' diferido si el hornoya est_ ca[iente. 68 - Maytag MGR5875QDW | Use and Care Guide - Page 70
HojaIdrado HojaIdrado Bien cocidas 15 - 20 minutos 18 - 24 minutos 13 - 18 minutos 6 - 10 minutos 8 - 12 minutos 22 - 26 minutos 30 - 45 minutos ['Lo Broil') 8 - 12 minutos 10 - 15 minutos 7 - 10 minutos Paraun exterior m_sdorado y m_isasadoy un interior a mediococer, puedeser necesariodisminuir - Maytag MGR5875QDW | Use and Care Guide - Page 71
'Keep Warm' (Mantener Caliente) Paramantener calientesen forma seguraalimentoscalienteso para cabntar panesy phtos. Para programar 'Keep Warm': .......... 1. OprimaIatecia 'Keep Warm'en el indicador visual. Keep + 'WARM'deste!Iaen el indicadorvisual. + '000'destetlaen el indicadorvisual. 2. - Maytag MGR5875QDW | Use and Care Guide - Page 72
Cierte Autom tico/Modo El homo se apagar_ autom_ticamentedespu#sde 12 horassi usted Io deia accidentalmenteencendido. EstacaracterFsticade seguridad puede set desactivada. Para cancelar el cierre autom_tico de 12 horas y dejar que el homo funcione continuamente durante 72 horas: 1. Optimay - Maytag MGR5875QDW | Use and Care Guide - Page 73
serial sonoray e[ ajuste actual (°F o °C) se despiegar_en [apantaila. (Si no se reaiizaning0n cambio, [a estufa regresar_a[ ajuste actual despuesde 30 segundos). La exactitudde [as temperaturasde[ homo es cuidadosamente probada en [afSbrica. Es normalnotar alguna diferencia entre [a temperaturade - Maytag MGR5875QDW | Use and Care Guide - Page 74
equipadacon un sistemade encendidosin piioto. Con estetipo de encendido,e! gas seapaga automSticamentey el homo no opemr_ durante una i_tterrupddn de/a respiraderopues el calor que sale puede deformar o derretir el pl_stico= 'Oven Light' (Luz del Homo) La iuz det horno se enciendeautom_ticamente - Maytag MGR5875QDW | Use and Care Guide - Page 75
PARRIEEA1: Se usa para asarcortes de came grandesy came de ave. Media ParriJJa Panel Inferior del Homo: Cobque la parrilla del horno en bs soportesen reIievedel pane!inferior det horno. Use para disponerde espacio adicionalcuando cocine comidas Los mode!osde estufaselectos est_n equipadoscon una - Maytag MGR5875QDW | Use and Care Guide - Page 76
__4_ 7-=77_Fq 5. Limpieel excesode grasa o derrames de la parte inferior de[ homo+ Esto evita humo excesivoo ilamaradasdurante el se desplegar4en el indicadorvisual Si la puerta no es cerradadentro de 30 segundos,la operaci6nde autolimpieza set4 canceladay el indbador volver4a desplegarla hora - Maytag MGR5875QDW | Use and Care Guide - Page 77
5+ Oprima[atecla 'AutosetO' para desp[egar[os ajustesde autotimpieza+ 'HVy'(Suciedadintensa,4 horas) k3 /\utoset 'MEd' (Suciedadmediana,3 horas) 'LHTE('Suciedadteve,2 horas) At seteccionaret nivet de suciedadde! homo se programa autom_ticamenteet tiempo de timpieza. 6. Despu6sde cuatro segundos - Maytag MGR5875QDW | Use and Care Guide - Page 78
laveen eI lavavajillasni en un horno autolimpiante. Quemadores tie Gas Sellados , L[mpieloscon frecuencia=Dejeenfriar eI quemador=Limpie conjab6n 'CooktopCleaningCreme',cubracon unatoalla de pape!hlimeda y deje remojardurante 30 minutos.Restrieguenuevamente,enjuaguey seque. , No las laveen el - Maytag MGR5875QDW | Use and Care Guide - Page 79
PJEZA PROCEDmM_ENTO DE UMP_EZA Paneies Lateraies Gaveta de Almacenamiento y Manijas de las Puertas + Esmalte Pintado + Cuandoest6fda, Iave con agua tibia jabonosa,enjuaguey seque.Nunca Iimpie una super[icietibia o caliente con un patio h0medopues esto puede dafiar la superficley causaruna - Maytag MGR5875QDW | Use and Care Guide - Page 80
Puerta del Homo No coloque_esoexeesivnoisepare_n l@pueratdelhomoL Esto podda haeervo!eaFla estufa, quebrar !a puertao lesionaral usuaFio. "esponjosa"cuando se cierra=Estoes normaly disminuir_ con et Nora: La puerta del horno en una estufanuevapuede sentirse USO. Ventana dem Homo Para proteger - Maytag MGR5875QDW | Use and Care Guide - Page 81
gas para su Hmpiezao para ubicadoen otto Iugar. Si este artefactotiene que ser movido y/o retiradopara reparaci6n, siga e[ procedimientodescrito en [as instruccionesde instaiacidn. ParainformaciOn,p6ngaseen contacto con el Sewicio a los CIientes Maytag homo hacia la parte delanterade[ homo. - Maytag MGR5875QDW | Use and Care Guide - Page 82
PROBLEMA SOLUCION Para mamayor_a de mosprobmemas, verifique primero mesiguiente, ° RevisesJIos controbs deI horno est4n debJdamenteaiustados. , Verifique si el enchufe est4 firmemente insertadoen ettomacorriente. • Verifique o vuelva a reponer el disyuntor. VerJfiqueo reempBceel fusible. • - Maytag MGR5875QDW | Use and Care Guide - Page 83
PROBLErVlA Emhomo no se automimpiao SOLUC_ON ° Vedfique para asegurarsede que el cJclono est6 ajustado para un comienzodiferJdo.Ver p4ginas75-76. o Verifiquesi ia puerta est_ cerrada. o Verifiquesi el controI est4 en Modo Sab_iticoV. et p4g. 71. o E!homo puede estar a m4sde 205° C (400° F). La - Maytag MGR5875QDW | Use and Care Guide - Page 84
08SO= Si Necesita Servicio • Llameal distribuidor donde comprOsu electrodom6sticoo Ilamea Maytag ServicessM,Servicioa Ios CIientesMaytagIlamandoal 1-800-688-9900EE=UU= o al compra (recibo de compra)= Form No. B/09/04 Part No. 8113P458 60 ¢')2004 Maytag Appliances Sales Co. Litho U.S.A.
-
 1
1 -
 2
2 -
 3
3 -
 4
4 -
 5
5 -
 6
6 -
 7
7 -
8
-
9
-
10
-
11
-
12
-
13
-
14
-
15
-
16
-
17
-
18
-
19
-
20
-
21
-
22
-
23
-
24
-
25
-
26
-
27
-
28
-
29
-
30
-
31
-
32
-
33
-
34
-
35
-
36
-
37
-
38
-
39
-
40
-
41
-
42
-
43
-
44
-
45
-
46
-
47
-
48
-
49
-
50
-
51
-
52
-
53
-
54
-
55
-
56
-
57
-
58
-
59
-
60
-
61
-
62
-
63
-
64
-
65
-
66
-
67
-
68
-
69
-
70
-
71
-
72
-
73
-
74
-
75
-
76
-
77
-
78
-
79
-
80
-
81
-
82
-
83
-
84
 |
 |
M_A AG
®
Gas -
Precision Touch
Control 800
Form
No, B/09/04
Table
of
Contents
Umportant
Safety
Unstructions
...............................
1-4
Surface
Cooking
......................
5-7
ControHs
Sealed Gas Burners
Oven
Cooking
.........................
8=17
Bakhg
Cook & HoM
DeHay
Broiling
Keep Warm
Oven Racks
PaR No.
8113P458
60
Care
&
Cleaning
...................
18-21
Self-Clean
Oven
Cleaning Procedures
Maintenaace
.........................
22-23
Oven Whldow & Light
Removal ot Gas Appliance
Troubleshooting
...................
24=25
Warranty
& Service
....................
27
Guide
d'ntilisation
et
d'entretien
...............................
28
Guia
de
Use
y
Cnidado
.............
56
(_P2004 Mavtag
Appliances
Sales
Co.
Litho
U.S.A.