Maytag MGR6875ADW Use and Care Guide
Maytag MGR6875ADW - Gas Double Oven Range Manual
 |
UPC - 719881143750
View all Maytag MGR6875ADW manuals
Add to My Manuals
Save this manual to your list of manuals |
Maytag MGR6875ADW manual content summary:
- Maytag MGR6875ADW | Use and Care Guide - Page 1
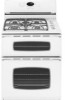
vlA AG Maytag Gas Double Oven Range Precision Touch 850 Series Important Safety Instructions 1-5 Surface Cooking 6-7 Controls Sealed Gas Burners @Oven Cooking Control Panel 8-17 Baking Cook & Hold Delay Broiling Keep Warm Favorite Oven Racks Form No A/01/08 Part No. 8113P740-60 - Maytag MGR6875ADW | Use and Care Guide - Page 2
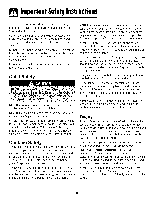
only for its intended purpose as described in this guide. General Instructions To ensure proper and safe operation: Appliance must be properly installed and grounded by a qualified technician. Do not attempt to adjust, repair, service, or replace any part of your appliance unless it is specifically - Maytag MGR6875ADW | Use and Care Guide - Page 3
You should check this anytime the range has been moved. In Case of move a flaming pan. • Ovens: Smother fire or flame by closing the oven doors. Do riot use water on air from the vent may ignite flammable items and may increase to heat. Keep plastics away from parts of the appliance that may become - Maytag MGR6875ADW | Use and Care Guide - Page 4
or other parts of the unit. Cooking Safety Always place a pan on a surface burner before turning it on. Be sure you know which knob controls which surface burner. Make sure the correct burner is turned on and that the burner has ignited. When cooking is completed, turn burner off before removing - Maytag MGR6875ADW | Use and Care Guide - Page 5
oven convection systems. The use of devices or accessories that are not expressly recommended in this manual can create serious safety hazards, result in performance problems, and reduce the life of the components of the appliarlce. Cleaning Safety Turn off all controls and wait for appliance parts - Maytag MGR6875ADW | Use and Care Guide - Page 6
these substances can be minimized by properly venting the oven to the outdoors by opening the windows and/ the kitchen could reach. Birds have a very sensitive respiratory system. Fumes released during an oven self-cleaning cycle may be harmful or fatal to birds. Fumes released due to overheated - Maytag MGR6875ADW | Use and Care Guide - Page 7
in a pressure cooker. Always reduce setting to a lower heat when liquids begin to boil or foods begin to cook. Surface Controls Pilotless Ignition Pilotless ignition eliminates the need for a constant standing pilot light. Each surface burner has a spark ignitor. Use care when cleaning around the - Maytag MGR6875ADW | Use and Care Guide - Page 8
burner on your range, located in gas mixture may be incorrect. Contact a service technician to adjust. (Adjustments are not covered by the warranty.) With LP gas gas, you may hear a "popping" sound when the surface burner is turned off. This is a normal operating sound of the burner. If the control - Maytag MGR6875ADW | Use and Care Guide - Page 9
control shows time of day, timer and oven functions Control panel shown includes Convect and other model specific features. (Styling may vary depending on model.) Bake Broil Clean KeepWarm Oven Light Number Pads CANCEL Convect on. Using the Touchpads • Press the desired A double beep 30 To recall the - Maytag MGR6875ADW | Use and Care Guide - Page 10
and press '0' using the number pads. Locking the Control and Oven Doors The touchpad and oven doors can be locked for safety, cleaning, or to prevent unwanted use. The touchpads will not function when locked. If the oven is currently in use, the touchpads and door cannot be locked. The current time - Maytag MGR6875ADW | Use and Care Guide - Page 11
temperature is reached, one long beep will sound. • The set temperature will display. • PREHEATwill turn off. When convection baking, enter your normal baking temperature. The control will automatically reduce the set oven temperature by 25° (even though normal baking temperature is displayed). The - Maytag MGR6875ADW | Use and Care Guide - Page 12
• Press any pad to recall the cook time remaining Roasting With Convection 7 When cooking is finished, press CANCEL pad (_CANCEL_ 8 Remove food from the oven (lower oven only) When convection roasting, enter your normal roasting time and temperature. The control will automatically prompt you to - Maytag MGR6875ADW | Use and Care Guide - Page 13
oven begins to heat immediately after the control has been set. Then, the oven cooks for a specified length of time. When that time has elapsed, the oven 00:10 to 11:59. 3. Press Bake, Convect Bake or Convect Roast 0ower oven only) and select the oven temperature. Press the Autoset pad for 350° F or - Maytag MGR6875ADW | Use and Care Guide - Page 14
the CANCEL pad. Remove food and broiler pan from the oven. Broil Notes: For best results when broiling, use a pan designed for broiling. oven rack or remove oven rack and place broiler pan on the oven bottom. If more than 30 seconds elapse between pressing the Broil pad and the Autoset pad, the oven - Maytag MGR6875ADW | Use and Care Guide - Page 15
and temperature from a Cook & Hold Bake, Cook & Hold Convect Bake or Cook & Hold Convect Roast (lower oven only) cycle. To set a Favorite cycle, a Cook & Hold setting will be saved. • A double then a single beep will sound to indicate that the control has accepted the Favorite setting. To start a - Maytag MGR6875ADW | Use and Care Guide - Page 16
the oven temperature if there is a power failure or interruption. Temperature adjustment applies to Bake, Convect Bake and Convect Roast (lower oven only pad will cancel a Bake cycle, however the control will stay in the Sabbath Mode. If power fails, the ovens will power up in Sabbath Mode with 72 - Maytag MGR6875ADW | Use and Care Guide - Page 17
With this type of ignition system, tile gas automatically shuts off and the eve// will not operate during a power failure. A lighted match will not light the oven burner. No attempt should be made to operate the oven during a power failure. Oven Racks Oven Fan A convection fan is used to circulate - Maytag MGR6875ADW | Use and Care Guide - Page 18
increase oven capacity, is available as an accessory. It fits in the left, upper portion of the oven and provides space for a vegetable dish when a large roaster is on the lower rack. Contact your Maytag dealer for the "HALFRACK" Accessory Kit or call 1-877-232-6771 USA or 1-800-688-8488 Canada to - Maytag MGR6875ADW | Use and Care Guide - Page 19
automatically programs the self-cleaning time. 5. After four seconds, the oven will start cleaning. • If the door is not closed, beeps will sound and 'door' will display. If the door is not closed within 30 seconds, the self-cleaning operation will be canceled and the display will return to the - Maytag MGR6875ADW | Use and Care Guide - Page 20
left in the oven and do not slide smoothly after a clean cycle, wipe racks and rack supports with a small amount of vegetable oil to make them easier to move. Fine lines may appear in the porcelain because it went through heating and cooling. This is normal and will not affect performance. A white - Maytag MGR6875ADW | Use and Care Guide - Page 21
pad or Cooktop Cleaning Creme* (Part #20000001)** and a sponge. If soil remains, reapply Cooktop Cleaning Creme, cover with a damp paper towel and soak for 30 minutes. Scrub again, rinse and dry. • Do not clean in the dishwasher or self-cleaning oven. Clock and Control Pad Area • To activate - Maytag MGR6875ADW | Use and Care Guide - Page 22
Oven Interior Oven Racks Stainless Steel (select models theywill scratch glass. • Follow instructions on page 18-19 to oven during a self-clean operation. If this occurs, wipe the rack and embossed rack supports follow with Stainless Steel Magic Spray* (Part No. 20000008)**. • Moderate/Heavy Canada. 21 - Maytag MGR6875ADW | Use and Care Guide - Page 23
. To assure the proper replacement bulb is used, order bulb from Maytag. Call 1-877-232-6771 USA and ] -800-688-8408 Canada, ask for part number 74009925 - halogen bulb. To replace oven light bulbs: ]. Disconnect power to the range. 2. When oven is cool, use fingertips to grasp edge of bulb cover - Maytag MGR6875ADW | Use and Care Guide - Page 24
this gas appliance for cleaning or to relocate. If this appliance has to be moved and/or removed for servicing, follow the procedure described in the installation instructions. For information, contact Maytag Customer Assistance at 1-800-688-9900 USA or 1800-688-2002 Canada. To prevent range from - Maytag MGR6875ADW | Use and Care Guide - Page 25
Troubleshooting For most concerns, try these first. • Check if oven controls have been properly set. • Check to be sure plug is securely inserted into receptacle. • Check or re-set circuit breaker. Check or replace fuse. • Check power or gas supply. Surface burner fails to light. • Check to be - Maytag MGR6875ADW | Use and Care Guide - Page 26
Troubleshooting Oven will not self-clean. Check to make sure the cycle is not set for a delayed start. See pages 18-19. Check if door is closed. Check if control is in Sabbath Mode. See page 15. Oven may be over 400° F. Oven temperature must be below 400 ° F to program a clean cycle. Oven did not - Maytag MGR6875ADW | Use and Care Guide - Page 27
Notes 26 - Maytag MGR6875ADW | Use and Care Guide - Page 28
and maintained according to instructions attached to or furnished with the product, Maytag brand of Whirlpool Corporation or Whirlpool Canada LP (hereafter "Maytag") will pay for factory specified parts and repair labor to correct defects in materials or workmanship. Service must be provided by - Maytag MGR6875ADW | Use and Care Guide - Page 29
ML& AG Cuisinibre _ gaz deux fours Precision Touch Maytag Sbrie 850 Cuisson sur la surface Comrnandes Brt'deurs _ gaz scelles ........ 33-34 Cuisson au hublots et lampes de four D@lacement d'un apparell a gaz Recherche des pannes ....... 52-53 Garantie et service 55 Gufa de Use y Cuidado 56 - Maytag MGR6875ADW | Use and Care Guide - Page 30
rentretien. Instructiondse securiti6mportuntes Les instructions de s6curit6 importantes et les paragraphes - Maytag MGR6875ADW | Use and Care Guide - Page 31
nettoyage ou flacons d'a_rosol. NE laissez JAMAIS des enfants seuls ou sans supervision Iorsque I'appareil est en service ou encore chaud. NE laissez JAMAIS un enfant s'asseoir ou se tenir sur une pantie quelconque de de cuisine. NE saisissez ou d@lacez JAMAIS un ustensile de cuisine enflamm& 30 - Maytag MGR6875ADW | Use and Care Guide - Page 32
de choc _lectrique ou d'ineendie, ou une autre d_t_rioration de rappareil. Utilisez de la feuille d'aluminium uniquement selon les instructions de ce guide. NE laissezJAMAIS un br01eur de surface allum_ sans surveil- lance, particuli_rement avec une puissance de chauffage _lev_e ou Iors d'une - Maytag MGR6875ADW | Use and Care Guide - Page 33
sans risque de bris sous I'effet du choc thermique. Observez les instructions du fabricant lots de I'utilisation d'un ustensile de verre. La securite ou systeme de convection additionnel. L'utilisation d'un dispositif ou accessoire qui n'est pas expressement recommande dans ce guide peut degrader la - Maytag MGR6875ADW | Use and Care Guide - Page 34
Cuissosnurlu surfuce R_glages sugg_r_s de la puissance de chauffage ! Low (Basse): S'utilise pour le mijotageou le maintien de la temp6ratured'un mets,ou pour la fusion de chocolat ou beurre.Lorsquele plat ou I'ustensileest couvert, un d6but de cuisson peut se produire avecla puissancede - Maytag MGR6875ADW | Use and Care Guide - Page 35
Cuissosnurla surface Surface de cuisson Pour _viter la formation de taches ou un changement de couleur de la surface de cuisson : • Nettoyezla surfacede cuissonapreschaque utilisation. • Enlevezles residusrenversesde produits acidesou sucresdes que la surfacede cuissen a refroidi; ces produits - Maytag MGR6875ADW | Use and Care Guide - Page 36
convection. convection Cuissonau four S'utilise pour cuire au four par convection . • Le four produit un hip double en cas d'erreur de pregrammation. REMARQUE Si plus de 30 secondess'6coulententre Hr. 3. ProgrammezI'heureen suivant les instructions donn6esdans la section{{R6glagede I'horloge_. - Maytag MGR6875ADW | Use and Care Guide - Page 37
Cuissonuufour 2. Appuyezsur lestouches num6riquesappropri6espour programmer I'heuredu jour. 3. Appuyez_ nouveausur la touche Clock ou attendezquatre secondes. • Les deux points restent, Lorsquele courant 61ectriquearriveou apres une interruption de courant,la derniere heure avant I'interruptionde - Maytag MGR6875ADW | Use and Care Guide - Page 38
Cuissounufour Codes d'anomalie BAKEou LOCKpeuventclignoter rapidementpour vous avertir d'une erreur ou d'un probleme. Si tel est le caa, appuyezsur la touche CANCEL.Si lea motsRAKEou LOCKcontinuent_ clignoter, debranchezI'appareil. Attendezquelques minutes,puis rebranchez I'appareil.Si un des - Maytag MGR6875ADW | Use and Care Guide - Page 39
. • L'ic6nePREHEATs'eteint. • Latemperatureprogrammees'affiche. • Pourrappeler la temperatureprogrammeependantle prechauffage,appuyezsur la touche ConvectBake. Cuisson par convection (four inf@ieur seulemenO Pour la cuissonavecconvection,entrez la temperaturede cuisson normale. La commandereduit - Maytag MGR6875ADW | Use and Care Guide - Page 40
ets'allume_ I'afficheur. • 100° F (30° C) ou la temp6raturer6elledu four sera affich6e. allum6ejusqu'_ ce que I'on appuiesur la touche Oven Light (Lampedu four). • Appuyezsur n'importequelle touche est pas n6cessairede pr6chaufferIors du r6tissageavec convection de gros morceauxde viande. Cuisson et - Maytag MGR6875ADW | Use and Care Guide - Page 41
soit UPPERsoit LOWERclignotent. 4. Entrezla dur6e d6sir_ede cuisson _ I'aidedestouches num6riques. 5. Appuyez sur Bake [fours sup6rieuret inf@ieur),Convect Bakeou ConvectRoast(four inf_rieur seulement). 6. Programmezla temp@aturedu four d6air6een appuyantsur la touche Autosetou sur lestouches num - Maytag MGR6875ADW | Use and Care Guide - Page 42
gril peutetre faite sur la grille du four ou enlevez la grille du four et placezla lechefritesur la soledu four. • Si plus de 30 secondess'ecoulententre la pressionsur la touche Broil et la touche Autoset, le four ne sera pas programmeet I'afficheur reviendra_ I'informationprecedente. • La plupart - Maytag MGR6875ADW | Use and Care Guide - Page 43
nouvellementprogrammeou en cours de fonctionnementsera sauvegarde. • Un hip double et un hip simple se feront entendre pour indiquer que programme,(( none }>seraaffiche]. 2. Appuyez sur la touche Bake,Convect Bakeou ConvectRoast (four inferieurseulement). • Le cycle Favoritecommenceimmediatement. • - Maytag MGR6875ADW | Use and Care Guide - Page 44
cas de panne ou d'interruption de courant. L'ajustement de la temperature s'applique seulement aux fonctions de cuisson, cuisson avec convection et rBtissage avec convection (four inferieur seulement). Remarques sur le mode Sabbat : • LemodeSabbat peut etre rnisen rearche_ tout moment,que le four - Maytag MGR6875ADW | Use and Care Guide - Page 45
superieur de la grille. Four inf_rieur Remarque : La ventilateur de convection s'arr_te automatiquement_ I'ouverturede la porte. I vent de four Lorsquele remettre les grilles en place : • Mettez la grille sur le support de grille du four; relevez16geremenlte rebord avant;poussezla grille jusqu'_ ce - Maytag MGR6875ADW | Use and Care Guide - Page 46
Cuissonuufour Position des grilles (four inf rieur) 5 CUISSON SUR PLUSIEURSGRILLES: Deux grilles : Utilisezles positions2 et 5, ou 2 et 4. Trois grilles : Utilisezlea positions 1,3 et 5, Reportez-vous I'illustration ci-dessus. NIVEAU 5 : Utilisezseulementpour I'op@ationgrille-pain, pour la - Maytag MGR6875ADW | Use and Care Guide - Page 47
la porte n'est pas ferm6e,des hips retentirontet {{dool_s>era affich& Si la porte n'est pas referm6edans los 30 secondes, I'autonettoyagesera annul6 et I'heureserade nouveauaffich6e. • CLEANparaitra _ I'afficheur. • LOCKclignote _ I'afficheur. Unefois que la porte severrouille, LOCKne clignote pas - Maytag MGR6875ADW | Use and Care Guide - Page 48
le cycle d'autonettoyageet qu'elles glissent mal sur leurs supports,enduisez-les,ainsi que les supports,d'une fine couche d'huile vegetale. De fines lignes peuvent n'appuyezpasde nouveausur la touche Clean. Si plus de 30 secondess'ecoulententre le momentcOvous appuyezsur la touche Cleanet celui - Maytag MGR6875ADW | Use and Care Guide - Page 49
aux t_.-U,ou le ]-800-688-8408au Canada. L_ehefrite Chapeaux de brOleur et br= recouvrezavec un essuie-tout humide, et laisseztremper pendant 30 minutes. Frottez de nouveau, rincez et faites Boutous de commande • Pour utiliser lafonction {{Control Lock >_(Verrouillagedes commandes) pour le nettoyage - Maytag MGR6875ADW | Use and Care Guide - Page 50
marque des produits de nettoyage sent des marques deposees des diffGrents fabricants. ** Pour commander directement, composer le 1-877-232-6771auxE.-U.ou le 1-800-688-8408au Canada. 49 - Maytag MGR6875ADW | Use and Care Guide - Page 51
resiliente. Ceci eat normal et diminuera avec le temps. Pours'assurerle remplacementde I'ampoulepar une ampoule appropriee,commandez-laaupresdu service-clientsde Maytag. Appelez le 1-877-232-6771aux E.-U.et le 1-800-688-8408au Canadaet commandezI'articlereference n° 74009925a, mpoule halogene. Pour - Maytag MGR6875ADW | Use and Care Guide - Page 52
demenageet/ou enlev6 pour etre r@are, suivezla m6thode decrite dans les instructions d'installation.Pour toute information, prenezcontact avec le service la clientele de Maytag au 1-800-688-9900aux E.-U.ou au 1-800-688-2002au Canada. II faut que le pied arriere de la cuisiniere soit engag6dans la - Maytag MGR6875ADW | Use and Care Guide - Page 53
llecherchdeespannes Pour la plupart des problbmes observbs,essayez d'abord ce qui suit. Un br_leur de surface ne s'allume pas. La lampe de four et/ou I'horloge ne fonctionnentpas. Flammes non uniformes. La flamme du br_leur s'_loigne des orifices. L'horloge,les icbnesetlou les lampes fonctionnent, - Maytag MGR6875ADW | Use and Care Guide - Page 54
. • Salet6importantesur la sole. Ex_cutezune op6rationd'autonettoyage. • {(BAKE})ou_ LOCK))peut clignoter rapidement pourvous avertir d'une erreur ou d'un probl_me. or a problem. Si tel eat le cas, appuyez sur la touche CANCEL. Si lea roots {( BAKE _)ou {(LOCK _}continuent _ clignoter, d_branchez - Maytag MGR6875ADW | Use and Care Guide - Page 55
Remarques 54 - Maytag MGR6875ADW | Use and Care Guide - Page 56
la section "Depannage" du Guide d'utilisation et d'entretien. Apres avoir verifie la section ".Depannage', de I'aide suppl6mentaire peut etre trouvee en v@ifiant la section "Assistance ou service" ou en appelant Maytag. Aux E.-U., composer le 1-800-688-9900. Au Canada, composer le 1-800-807-6777 - Maytag MGR6875ADW | Use and Care Guide - Page 57
"AG Estufa a Gas con Horno Doble Maytag Serie 'Precision Touch' 850 Instrucciones Importantes sobre Seguridad 57-60 1 Cocci6n en la Cubierta ....... 61-62 Controles Quemadores Sellados a Gas Cocci6n en el Homo 63-73 Panel de Contro Horneado 'Cook&Hold' (Cocinar_ Mantener Caliente) 'Delay' ( - Maytag MGR6875ADW | Use and Care Guide - Page 58
ser hechas per un tecnico calificado. Haga que el instalador le muestre la ubieaciOn de la v_lvula de cierre del gas y e6mo cerrarla en case de emergencia. Siempre desenchufe el electrodom_stico antes de realizar reparaciones. Instrucciones Importnntessobre Seguridnd Las advertencias e instrucciones - Maytag MGR6875ADW | Use and Care Guide - Page 59
uso o est_ caliente. NUNCA permita que los ni_os se sienten o se paren en ninguna parte del electrodomestico pues se pueden lesionar o quemar. Se le debe ensefiar a los ni_os debe permitir que los ni_os jueguen con los controles u otras piezas de la cubierta. Informaci6n sobre su Electrodomestico - Maytag MGR6875ADW | Use and Care Guide - Page 60
InstruccioneIms onuntessobreSe uridud El respiradero del horno se encuentra debajo del protector trasero. Evite tocar el _rea del respiradero mientras el horno est6 encendido y durante varios minutos despu6s de haberlo apagado. Algunas pares del respiradero y del _rea que Io rodea se calientan Io - Maytag MGR6875ADW | Use and Care Guide - Page 61
las manijas hacia un lade o Ilacia la parte trasera del electrodom_stico, y no Ilacia la de Seguridad sobre la Limpieza Apague todos los controles y espere hasta que las piezas del electrodom6stico electrodom6stico quedan advertidos que la combusti6n de gas puede resultar en una exposici6n de bajo - Maytag MGR6875ADW | Use and Care Guide - Page 62
una olla a presi6n.Siernprereduzcael ajuste a un calor rn_sbajo cuando los Ifquidos comiencena hervir o cuando los alirnentos corniencena cocinarse. Controles Superiores Encendido sin Piloto El encendidosin piloto elimina la necesidadde tener una luz piloto encendidaconstanternente.Cada TAPA DEL - Maytag MGR6875ADW | Use and Care Guide - Page 63
pocos segundos.Si est_ usandogas natural, la llamaser_ azulcon un cono interno azuloscuro. Si la llama del quemador es amarilla y ruidosa, la mezcla aire/gas puede ser incorrecta. P6ngase en contacto con un t6cnico de servicio para ajustar la llama. (Los ajustes de la llama no est_n cubiertos por la - Maytag MGR6875ADW | Use and Care Guide - Page 64
una tecla. • Escuchard dos serales sonoras si hubo un error en la programaci6n. Nota: El control aceptar4 el ajuste cuatro segundos despu_s de haber programado el tiempo o la temperatura. Si pasan mds de 30 segundos entre la activacion de una tecla de funci6n y la programaci6n num@ica, la funciOn - Maytag MGR6875ADW | Use and Care Guide - Page 65
(Temporizador)correspondientedurante tres segundos. O 2. Optima la tecla 'Timer' (Temporizador] y oprima el 0 nt3mero '0' en el teclado num6rico. Bloqueo del Control y de las Puertas de los Hornos Elteclado y las puertas de los hornos puedenbloquearsepara mayor seguridad,limpiezao para evitar - Maytag MGR6875ADW | Use and Care Guide - Page 66
sonido. 3. Espere4 segundospara guardar el nuevoajuste. 4. Si no seoprime la teela 'Autoset' (Autoajuste)dentro de los siguientes30 segundos,el control regresar_al ajuste existente. Cambio de la temperatura de °F/°C El ajustede f_brica de la medidade temperaturaes FahrenheitP. ara cambiarel ajuste - Maytag MGR6875ADW | Use and Care Guide - Page 67
Co¢¢i6nenel Horno 5. Coloque el alimento en el horno. 6. Verifique el proceso de cocci6n al haber transcurrido el tiempo m[nimo de cocciOn. Cocine durante un mayor tiempo si es necesario. 7. Cuando termine la cocci6n, optima la tecla t/_rA_._r_ 'CANCEL' (Anula0. 8. Retire el alimento del homo. - Maytag MGR6875ADW | Use and Care Guide - Page 68
programe el tiempo y temperaturas normales de asado. El control le avisar4cuaedo un 75%del tiempo de cocci6n hayapasadopara temperaturadel horno puedeprogramarseentre 170°F (77°C)y 550°F(288°C). 4. Oprima la tecla 'Convect Roast' (Asado por Convecci6n) nuevamente o espere cuatro seguedos. • 'ROAST'( - Maytag MGR6875ADW | Use and Care Guide - Page 69
usando las teclas num6ricas. 5. Oprima la tecla 'Bake' (Hornear)(para el homo superiore inferior), 'ConvectBake' (Horneadopor Convecci6n)o 'Convect Roast'[Asado por Convecci6n)(homo inferior solamente). 6, Programela temperaturadel homo deseada oprimiendo la tecla 'Autoset' (Autoajuste)o las teclas - Maytag MGR6875ADW | Use and Care Guide - Page 70
puede retirar la parrilla y colocar la asaderaen la parte inferior del horno. Si pasanm_sde 30 segundosentre la activaci6nde la tecla 'Broil' (Asar)y parrilla 'HI' ]8 - 25 Pan con Ajo ]" (2,54cnr) de grueso parte inferior del horno 'LO' ] -4 Cuandoase pescado,rode el inserto de la asaderacon - Maytag MGR6875ADW | Use and Care Guide - Page 71
activose guardar& • Escuchar_sonoradoble y luego una sencillalque indican que el control ha guardado el ajuste del favorite. Para iniciar un ciclo la tecla 'Bake' (Hornear),'ConvectBake'(Horneadopor Convecci6n)o 'Convect Roast'(Asadopor Convecci6n)(borne inferior solamente). 1. Oprinra la - Maytag MGR6875ADW | Use and Care Guide - Page 72
autom_ticode las puertas no funcienan durante el Modo Sab_tico. • Si oprime la tecla 'CANCEL'(Anular) se detendr_el ciclo de horneado,pere el control permanecer_en Modo Sab_tico. • Si ocurre una falla electric& los hornosse encender_nen Modo Sab_ticocon 72 heras restantesy ningt3nciclo activo. 71 - Maytag MGR6875ADW | Use and Care Guide - Page 73
Con este tipo de sistemade ignici6n,el gas se apaga autom4ticamentey el homo dejar_ de se enciendeautom_ticamentedespu6sde haber oprimido lasteclas'Convect Bake' (Horneado por Convecci6n hasta que se detengaen el tope de bloqueo,levantela parte delanterade la parrilla y tire de ella para sacarla. - Maytag MGR6875ADW | Use and Care Guide - Page 74
proporcionaespacio adicionalpara un plato de verdurascuando hay un asado grande en la parrilla inferior. P6ngaseen I_ r _: contacto con su distribuidor Maytag [_ para obtener el Kit del Accesorio"Media Parrilla"('HALFRACK')o Ilameal 1-877- 232-6771en EEUU.y Canad_para hacer un pedido. 73 - Maytag MGR6875ADW | Use and Care Guide - Page 75
YLimpieza Hornos Autolimpiantes resistenteal _cido, no a prueba del mismo. El acabadode porcelanase puededescolorarsi los derrames_cidos o azucaradosno se limpian antes de un ciclo de autolimpieza. Notas: La temperatura del homo debe estar por debajo de los 400°C (204°C) para poder programar un - Maytag MGR6875ADW | Use and Care Guide - Page 76
y escuchar4una sehalsonorahasta que se cierre la puerta y se presionela tecla 'Clean' (Limpieza) nuevamente. Si pasanm_s de 30 segundosentre la activaci6n de la tecla 'Clean' (Limpieza)y la activaci6nde la tecla 'Autoset' (Autoajuste),el programaregresar_autom_ticamenteal despliegueanterior - Maytag MGR6875ADW | Use and Care Guide - Page 77
y Quemadores Sellados a Gas Nunca cubra el inserto 30 minutes.Vuelvaa restregar,enjuague y seque. • No limpie en el lavavajillaso en el horno autolimpiante. Reloj y Area de las de Control control y de/indicador visual. Perillas de Control Cubierta y Panel de Control Porcelana Esmaltada Paneles - Maytag MGR6875ADW | Use and Care Guide - Page 78
CuidadVoLimpieza Ventanilla y Puerta del Horno- Vidrio * Eviteusarcantidadesexcesivasde agua,ya que puedeescurrirsedebajo o detr_s del vidrio y mancharlo. • Lavecon aguay jab6n. Enjuaguecon agua limpia y seque. Se pueden usarlimpiadoresde vidrio si se rocia en un pa_o primero. • - Maytag MGR6875ADW | Use and Care Guide - Page 79
nuevapuede sentirse "esponjosa"cuando se cierra. Estoes normaly se reducir4con el USO, Paraasegurarsede instalarel foeode repuestocorrecto,pida un foco de Maytag.Llameal 1-877-232-6771en EEUU.y al 1-800-688-8408en Canaday pida la piezant3mero74009925- foco de hal6geno. Para reemplazar los focos - Maytag MGR6875ADW | Use and Care Guide - Page 80
de un Electrodomestico a Gas Losconectoresque se usanpara conectar los electrodom6sticosa gas al suministrode gas no est_n dise5adospara ser movidos constantemente.Unavez que est6 instalado,NO muevaeste electrodom6sticoa gas para abrir espacioo para reubicarlo.Si este electrodom6sticodebe - Maytag MGR6875ADW | Use and Care Guide - Page 81
reemplaceel fusible. Verifiqueel suministro el@tricoo de gas. • Asegt3msede que el electrodom@sticeost@debidamenteconectadoal programadopara una funci6n de Cocinary Mantener Calientediferida. • El bloqueo de los controles puedeestar activado.Vea la p_gina 6/4. Los resultadosdel horneado no son los - Maytag MGR6875ADW | Use and Care Guide - Page 82
LocalizaciyGSnoluciGdneAverias El homo no se limpi6 adecuadamente. Esposibleque se requieraun ciclo de autolimpiezam_s largo. Losderramesexcesivose, n especiallosderramesazucaradosy/o _cidos,no selirapiaronantes del ciclo de autolimpieza. La puerta del homo no se desbloquea despu_s del ciclo de - Maytag MGR6875ADW | Use and Care Guide - Page 83
Horns 82 - Maytag MGR6875ADW | Use and Care Guide - Page 84
" del Manual de uso y cuidado. Despu6s de consultar la secci6n "Soluci6n de problemas", puede encontrar ayuda adicional en la seccion "Ayuda o servicio t_cnico," o Ilamando a Maytag. En EE.UU., Ilame al 1-800-688-9900. En Canada, Ilame al 1-800-807-6777. 9/07 Form No. A/0t/08 Part No 8113P740
-
 1
1 -
 2
2 -
 3
3 -
 4
4 -
 5
5 -
 6
6 -
 7
7 -
8
-
9
-
10
-
11
-
12
-
13
-
14
-
15
-
16
-
17
-
18
-
19
-
20
-
21
-
22
-
23
-
24
-
25
-
26
-
27
-
28
-
29
-
30
-
31
-
32
-
33
-
34
-
35
-
36
-
37
-
38
-
39
-
40
-
41
-
42
-
43
-
44
-
45
-
46
-
47
-
48
-
49
-
50
-
51
-
52
-
53
-
54
-
55
-
56
-
57
-
58
-
59
-
60
-
61
-
62
-
63
-
64
-
65
-
66
-
67
-
68
-
69
-
70
-
71
-
72
-
73
-
74
-
75
-
76
-
77
-
78
-
79
-
80
-
81
-
82
-
83
-
84
 |
 |

vlA AG
Maytag
Gas
Double Oven Range
Precision Touch 850 Series
@
Form No
A/01/08
Important
Safety
Instructions
...............................
1-5
Surface
Cooking
......................
6-7
Controls
Sealed Gas Burners
Oven
Cooking
.........................
8-17
Control Panel
Baking
Cook & Hold
Delay
Broiling
Keep Warm
Favorite
Oven Racks
Part No. 8113P740-60
...................
18-21
Self-Clean Oven
Cleaning Procedures
Maintenance
.........................
22-23
Oven Doors, Windows & Lights
Removal of Gas Appliance
Troubleshooting
...................
24-25
Warranty
& Service
....................
27
Guide d'utilisation
et
d'entretien
...............................
28
Guia
de
Uso
y
Cuidado
.............
56
_2006
Maylag
Appliances
Sales Co
Litho
O.SA