Maytag MTW6300TQ Use and Care Guide - Page 5
Companion, appliance spacing should also be considered. - weight
 |
UPC - 883049060019
View all Maytag MTW6300TQ manuals
Add to My Manuals
Save this manual to your list of manuals |
Page 5 highlights
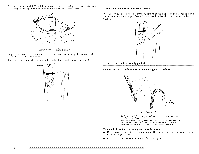
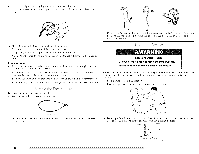
Tools needed for securing the drain hose and leveling the washer: • Adjustable or open end wrench %6" (14 mm) • I.eve[ • Wood block • Ruler or measuring tape Alternate Parts Your installation may require additional parts. If you are interested in purchasing one of the items listed here, call the toll-free number on the cover or in the "Assistance or Service" section. If You Have: Laundry tub or standpipe taller than 96" (2.4 m) You Will Need to Buy: Sump pump system (if not already available) 1" (2.5 cm) diameter standpipe 2" (5 cm) diameter to 1" (2.5 cm) diameter standpipe adapte_; Part Number 3363920 and connector kit Part Number 285835 Overhead sewer Floor drain Standard 20 gal. (76 I.) 39" (99 cm) tall drain tub or utility sink, sump pump and connectors (available from local plumbing suppliers) Siphon break, Part Number 285834; additional drain hose, Part Number 8318155 and connector kit, Part Number 285835 Water faucets beyond reach of fill hoses I.int clogged drain 2 longer water fill hoses: 6 fl (1.8 m) Part Number 76314, 10 ft (3.0 m) Part Number 350008 Drain protector, Part Number 367031 • Hot and cold water faucets located within 3 ft (90 cm) of the hot and cold water fill valves, and water pressure of 20-100 psi (138-690 kPa) for best performance. • A [eve[ floor with a maximum slope of 1" (2.5 cm) under entire washer. Installing the washer on carpeting is not recommended. • A sturdy floor to support the washer weight (washeb water and load) of 315 [bs (143 kgs). Do not store or operate your washer in temperatures at or below 32°F (0°C). Some water can remain in the washer and can cause damage in low temperatures. See "Washer Care" for winterizing information. Installation spacing for recessed area and closet installations The following spacing dimensions are recommended for this washer. This washer has been tested for installation with spacing of 0" (0 cm) clearance on the sides. Recommended spacing should be considered for the following reasons: • Additional spacing should be considered for ease of installation and servicing. • Additional spacing should be considered on all sides of the washer to reduce noise t ra n sfer. • For c[oset insta[[ation with a door, minimum venti[ation openings in the top and bottom of the door are required. I.ouvered doors with equivalent ventilation openings are .... acceptable. • Companion appliance spacing should also be considered. 3"* (7.6cm) f Selecting the proper location for your washer improves performance and minimizes noise and possible washer "walk." Your washer can be installed in a basement, laundry room, closet, or recessed area. See "Drain System." IMPORTANT: Do not install or store the washer where it will be exposed to the weathen Proper installation is your responsibility. You will need: • A water heater set to deliver 120°F (49°C) water to the washer. • A grounded electrical outlet located within 4 ft (1.2 m) of where the power cord is attached to the back of the washer. See "Electrical Requirements." *Required spacing A. Front view B. Side view C. Closet door with vents 3"* (7.6cm) T C
-
 1
1 -
 2
2 -
 3
3 -
 4
4 -
 5
5 -
 6
6 -
 7
7 -
 8
8 -
 9
9 -
 10
10 -
 11
11 -
12
-
13
-
14
-
15
-
16
-
17
-
18
-
19
-
20
-
21
-
22
-
23
-
24
-
25
-
26
-
27
-
28
-
29
-
30
-
31
-
32
-
33
-
34
-
35
-
36
-
37
-
38
-
39
-
40
-
41
-
42
-
43
-
44
-
45
-
46
-
47
-
48
-
49
-
50
-
51
-
52
-
53
-
54
-
55
-
56
-
57
-
58
-
59
-
60
-
61
-
62
-
63
-
64
-
65
-
66
-
67
-
68
-
69
-
70
-
71
-
72
-
73
-
74
-
75
-
76
 |
 |
