Motorola P1001 User Guide
Motorola P1001 Manual
 |
View all Motorola P1001 manuals
Add to My Manuals
Save this manual to your list of manuals |
Motorola P1001 manual content summary:
- Motorola P1001 | User Guide - Page 1
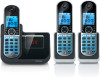
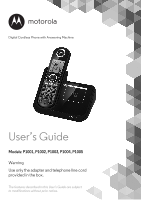
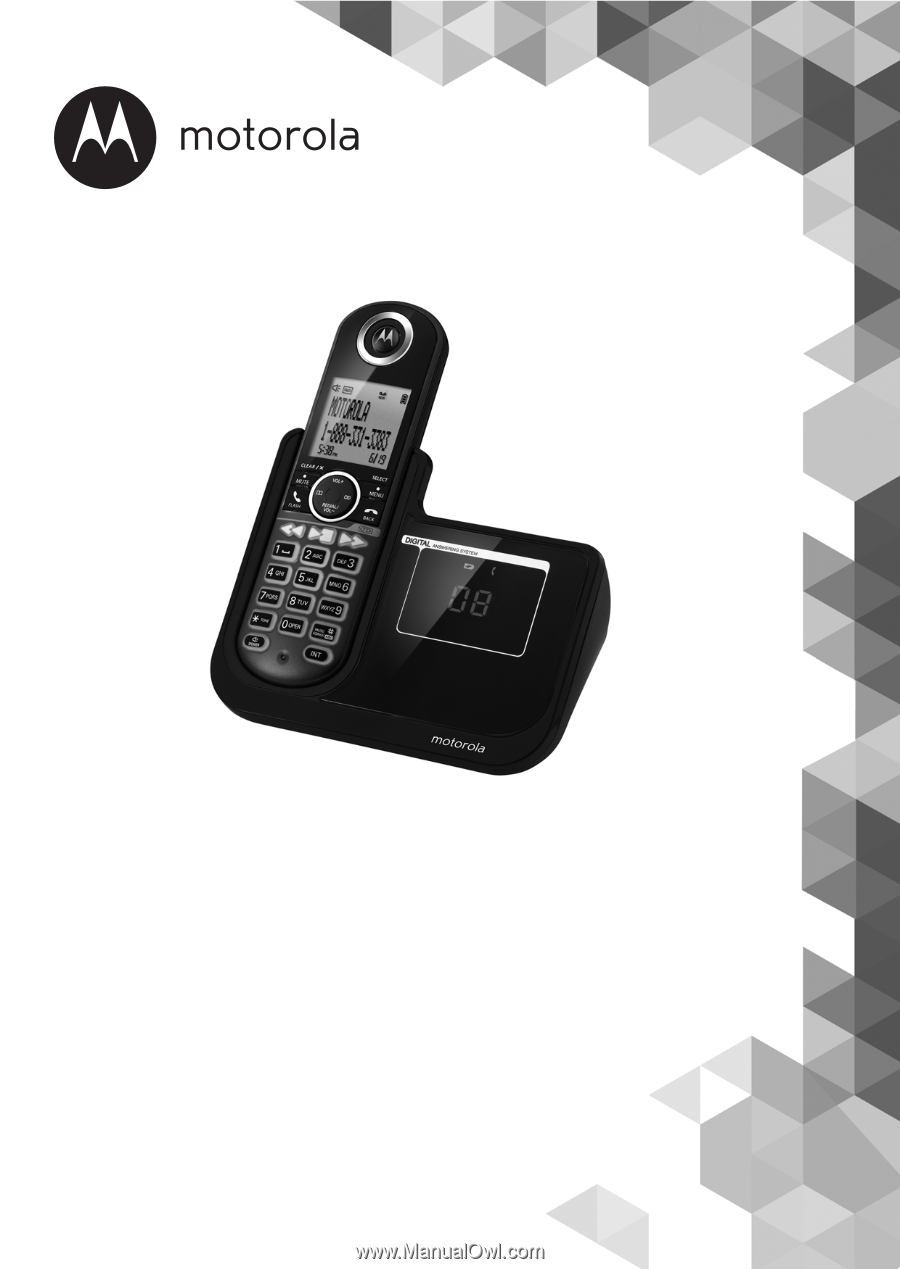
Digital Cordless Phone with Answering Machine User's Guide Models: P1001, P1002, P1003, P1004, P1005 Warning Use only the adapter and telephone line cord provided in the box. The features described in this User's Guide are subject to modifications without prior notice. - Motorola P1001 | User Guide - Page 2
. For warranty service of your Motorola product, you will need to provide a copy of your dated sales receipt to confirm warranty status. Registration is not required for warranty coverage. For product-related questions, please call: US and Canada 1-888-331-3383 Email: support - Motorola P1001 | User Guide - Page 3
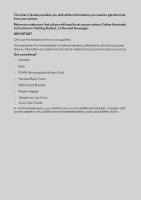
failures. Alternative arrangements should be made for access to emergency services. Got everything? • Handset • Base • Ni-MH Rechargeable Battery Pack • Handset Back Cover • Wall-mount Bracket • Power Adapter • Telephone Line Cord • Quick Start Guide In multi-handset packs, you will find one or more - Motorola P1001 | User Guide - Page 4
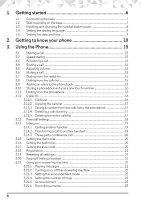
handset 19 3.14.3 Three-party conference call 20 3.15 Setting the dial mode 20 3.16 Setting the flash time 20 3.17 Setting the area code 20 3.18 Registration ...21 3.19 Resetting all settings 21 3.20 Paging/Finding a handset 21 3.21 Using your answering machine 21 3.21.1 Playing messages 21 - Motorola P1001 | User Guide - Page 5
ENGLISH 3.21.7 Call screening on/off 24 3.21.8 Deleting all old messages 24 3.21.9 Remote access 24 3.21.10 Setting the security code 25 4. Help 26 5. General information 27 5 - Motorola P1001 | User Guide - Page 6
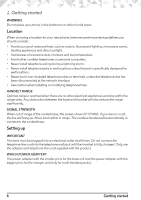
1. Getting started WARNING Do not place your phone in the bathroom or other humid areas. Location When choosing a location for your new phone, here are some important guidelines you should consider: • Avoid sources of noise and heat, such as motors, fluorescent lighting, microwave ovens, heating - Motorola P1001 | User Guide - Page 7
1.1 Connecting the base ENGLISH 1. Plug the power adapter and the telephone line cord into the base. The power adapter with the bigger pin is for the charger (only in multi- handset packs). 2. Plug the other end of the power adapter into a power outlet and the telephone line cord into a telephone - Motorola P1001 | User Guide - Page 8
Make sure the wall is capable of supporting the weight of the phone, and use the proper type of anchoring device for the wall material. 1.3 Installing and charging the handset battery pack 1. Take - Motorola P1001 | User Guide - Page 9
the date and time 1. Press MENU and then VOL+ or REDIAL/VOL- to select DATE&TIME. If you're a subscriber to your network's Caller ID service, the date and time is automatically set when a call is received. 2. Press MENU and then use the keypad to enter the year and the date - Motorola P1001 | User Guide - Page 10
2. Getting to know your phone Overview of your cordless handset 1 SCROLL UP / VOLUME UP a) In menu mode: Press to scroll up. b) In editing mode: Press to move cursor to the left. c) During a call: Press to increase volume. d) Calls list / phonebook / redial list entry: Press to scroll up the list. - Motorola P1001 | User Guide - Page 11
ENGLISH 4 TALK OFF / BACK a) In menu / editing mode: Press to exit to previous level. b) In pre-dial mode / phonebook / calls list / redial list entry / answering machine mode: Press to exit to idle. c) During a call: Press to end a call. 5 SKIP FORWARD a) During message playback: Press skip to - Motorola P1001 | User Guide - Page 12
12 * / TONE a) In idle / pre-dial / editing mode: Press to insert a *. b) During a call: Press to switch from pulse to tone dialing temporarily if pulse mode was selected before. After the call has ended, the dial mode will change back to pulse. c) In Calls List / Phonebook / Redial list entry: If - Motorola P1001 | User Guide - Page 13
Cordless Handset LCD display ENGLISH Display Icons On when speakerphone is turned on. On when answering machine is turned on. Flashes when new answering machine message is received. Indicates when new call is received. Off when new call has been viewed. On when ringer volume is turned off. On when - Motorola P1001 | User Guide - Page 14
Overview of the base 1 CHARGING LED - GREEN a) On when the handset is put into base cradle for charging. 2 IN USE LED - RED a) Steadily ON: During a call or when an extension phone is engaged. b) Flashing at a rate similar to the incoming ring pattern: During an incoming call. c) Flashing briefly - Motorola P1001 | User Guide - Page 15
ENGLISH 3. Using the Phone 3.1 Making a call 1. Enter the phone number then press number. /FLASH or / SPEAKER to dial the phone 3.2 Speed dialing 1. In idle mode, press and hold a key from displayed and dialed. /1 to WXYZ/9 until the number is 3.3 Answering a call 1. Press /FLASH or /SPEAKER - Motorola P1001 | User Guide - Page 16
2 will show the entries starting with A. Pressing 2 again will show the entries starting with B, etc. 3.12 Caller ID If you have subscribed to Caller ID service, and provided the identity of the caller is not withheld, the number of the caller will be displayed together with the date and time of - Motorola P1001 | User Guide - Page 17
ENGLISH • If you receive more than one call from the same number, only the most recent call is kept in the calls list. When you have missed calls (incoming calls that you haven't answered) the icon will be displayed in the display on all handsets registered to the base. If one handset is used to - Motorola P1001 | User Guide - Page 18
SUB MENU DATE & TIME YEAR DATE TIME PHONEBOOK VIEW ADD EDIT DELETE DELETE ALL PB CAPACITY SPEED DIAL SETUP BS DIAL MODE FLASH TIME AREA CODE ANSWER MACHINE ANSWERER ON (if answering machine is off) Or ANSWERER OFF (if answering machine is on) ANSWERER MODE # OF RINGS ANNOUNCEMENT RECORD MEMO CALL - Motorola P1001 | User Guide - Page 19
ENGLISH 1. Press MENU. 2. Press VOL+ or REDIAL/VOL- to scroll through the menu. 3. Press MENU for opening sub-menus and/or saving. Press /BACK to go back to the previous menu level or cancel an action. If you do not press any button on the handset for 30 seconds, the display will automatically - Motorola P1001 | User Guide - Page 20
the flash time you want. (8 options are available : 90, 100, 110, 250, 300, 400, 600 and 700MS) 4. Press MENU to save. 3.17 Setting the area code 1. Press MENU and then VOL+ or REDIAL/VOL- to select SETUP BS. 2. Press MENU and then VOL+ or REDIAL/VOL- to select AREA - Motorola P1001 | User Guide - Page 21
ENGLISH 3.18 Registration The original handset is pre-registered to use. Additional handsets must be registered to the base before you can use them. To register an additional handset, 1. Press MENU and then VOL+ or REDIAL/VOL- to select SETUP HS. 2. Press MENU and then VOL+ or REDIAL/VOL- to select - Motorola P1001 | User Guide - Page 22
2. During the message playback, press the keys below on the handset to perform the following functions: MUTE VOL+ VOL- /SPEAKER /BACK Press to playback or stop playing messages. Skip to play the next message. Press to repeat the current message from the beginning. Press twice to playback the - Motorola P1001 | User Guide - Page 23
ENGLISH 3.21.5 Announcement This is the message your callers hear on the answering machine. There are two prerecorded outgoing messages, or you can record your own. 3.21.5.1 Recording the announcement 1. Press MENU and then VOL+ or REDIAL/VOL- to select ANSWER MACHINE. 2. Press MENU and then VOL+ - Motorola P1001 | User Guide - Page 24
, dial your phone number from another phone, when you hear the announcement, press TONE/* on your another phone and then enter the 4- digit remote security code (the default code is 0000). 24 Using the Phone - Motorola P1001 | User Guide - Page 25
Off/Announce Only/Announce and Record modes Delete the message Listen to the Main Menu (for full voice prompts only) 3.21.10 Setting the security code This is used to change the remote access PIN if necessary. 1. Press MENU and then VOL+ or REDIAL/VOL- to select ANSWER MACHINE. 2. Press MENU - Motorola P1001 | User Guide - Page 26
a DSL filter between the telephone base and the telephone wall jack. The filter will prevent noise and caller ID problems caused by DSL interference. Please contact your DSL service provider for more information about DSL filters. A phonebook entry cannot be stored • The phonebook is full. Delete an - Motorola P1001 | User Guide - Page 27
Canada: 1-888-331-3383 Email: [email protected] Please download full user manual from our website Website: http://www.motorolahome.com/support To order a replacement battery pack contact customer service or visit our website. Important safety instructions Follow these safety precautions when - Motorola P1001 | User Guide - Page 28
or table. This product may fall, causing serious damage to the product. 6. Adjust only those controls that are covered by the operating instructions. Improper adjustment of other controls may result in damage and will often require extensive work to restore the product to normal operation. 7. Clean - Motorola P1001 | User Guide - Page 29
. Contact your local recycling center for proper disposal methods. SAVE THESE INSTRUCTIONS Consumer Products and Accessories Limited Warranty ("Warranty") Thank you for purchasing this Motorola branded product manufactured under license by Binatone Electronics International LTD ("BINATONE"). What - Motorola P1001 | User Guide - Page 30
are not the fault of MOTOROLA or BINATONE., are excluded from coverage. Use of Non-Motorola branded Products and Accessories. Service or Other Information? To obtain service or information, please call: US and Canada: 1-888-331-3383 Email: [email protected] You will receive instructions - Motorola P1001 | User Guide - Page 31
the serial number of the Product; (d) a written description of the problem; and, most importantly; (e) your address and telephone number. These terms energy and, if not installed and used in accordance with the instructions, may cause harmful interference to radio communications. However, there is - Motorola P1001 | User Guide - Page 32
single line and an RJ14 jack for two lines. See Installation Instructions in the User's Guide. The Ringer Equivalence Number (REN) is used to determine how service. If advance notice is not practical, you will be notified as soon as possible. You will be given the opportunity to correct the problem - Motorola P1001 | User Guide - Page 33
ENGLISH Industry Canada Operation is subject to the following two conditions: (1) this device may not cause harmful interference, and (2) this device must accept any interference, including interference that may cause undesired operation. The term "IC: " before the certification/registration number - Motorola P1001 | User Guide - Page 34
Manufactured, distributed or sold by Binatone Electronics International LTD., official licensee for this product. MOTOROLA and the Stylized M Logo, are trademarks or registered trademarks of Motorola Trademark Holdings, LLC. and are used under license. All other trademarks are the property of their
-
 1
1 -
 2
2 -
 3
3 -
 4
4 -
 5
5 -
 6
6 -
 7
7 -
8
-
9
-
10
-
11
-
12
-
13
-
14
-
15
-
16
-
17
-
18
-
19
-
20
-
21
-
22
-
23
-
24
-
25
-
26
-
27
-
28
-
29
-
30
-
31
-
32
-
33
-
34
 |
 |
Digital Cordless Phone with Answering Machine
User’s Guide
Models: P1001, P1002, P1003, P1004, P1005
Warning
Use only the adapter and telephone line cord
provided in the box.
The features described in this User’s Guide are subject
to modifications without prior notice.