NEC NP-PX800X-08ZL PX750CM Installation Guide
NEC NP-PX800X-08ZL Manual
 |
View all NEC NP-PX800X-08ZL manuals
Add to My Manuals
Save this manual to your list of manuals |
NEC NP-PX800X-08ZL manual content summary:
- NEC NP-PX800X-08ZL | PX750CM Installation Guide - Page 1
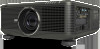
Model: PX750CM Model PX-750U IMPORTANT! Read entire instruction sheet before you start installation and assembly. Installation and Assembly: Projector Adapter Plate Model: NP750CM WARNING • Installer must verify that the ceiling will safely support four times the combined weight of all attached - NEC NP-PX800X-08ZL | PX750CM Installation Guide - Page 2
NOTE: Read entire instruction sheet before you start installation and assembly. Parts List Description Qty. Part # A adapter assembly 1 056-1061 B M4 x 12 mm socket pin serrated washer head screw 4 - NEC NP-PX800X-08ZL | PX750CM Installation Guide - Page 3
The use of an "edge to edge" stud finder is highly recommended. • It is the responsibility of the installer to verify that the supporting surface will safely support the combined load of all attached hardware and components. Q fig. 1.1 IMPORTANT: Be sure to drill holes into the joist CENTER! WOOD - NEC NP-PX800X-08ZL | PX750CM Installation Guide - Page 4
over anchors and secure using two #14 x 2.5" screws (Q). IMPORTANT: It is the responsibility of the installer to verify that the ceiling will safely support the combined load of all attached hardware and components. Skip to step 2 for flush mount installation. Skip to step 3 for extension column - NEC NP-PX800X-08ZL | PX750CM Installation Guide - Page 5
Flush Mount Installation 2 Hand thread projector mount assembly (H) into ceiling plate (J) as shown in figure 2.1. Align the notch of projector mount assembly with one of the four holes in ceiling plate (J) and secure with an M5 x 10 mm socket pin screw (S) as shown in detail 1. NOTE: Slotted - NEC NP-PX800X-08ZL | PX750CM Installation Guide - Page 6
Extension Column Installation 3 Hand thread extension column into ceiling place (J). Align notch of extension column with one of the four holes in ceiling plate (J) and secure with an M5 x 10 mm socket pin screw (S) using allen wrench (E) as shown in detail 2. Hand thread column connector (I) - NEC NP-PX800X-08ZL | PX750CM Installation Guide - Page 7
4 Fasten adapter assembly (A) to bottom of projector using two M4 x 40 mm socket pin serrated washer head screws (D) with spacers (F and G), and four M4 x 12 mm socket pin serrated washer head screws (B) in orientation as shown below. D B A F FRONT OF PROJECTOR M4 X 40 MM SOCKET PIN SERRATED - NEC NP-PX800X-08ZL | PX750CM Installation Guide - Page 8
Attaching Adapter Plate to Projector Mount 7 Attach projector to projector mount assembly (H) by inserting the mount into the adapter plate and twisting until the adapter plate will no longer turn. The spring loaded captive screw should line up with a corresponding hole on the adapter plate.
-
 1
1 -
 2
2 -
 3
3 -
 4
4 -
 5
5 -
 6
6 -
 7
7 -
8
 |
 |

1 of 8
ISSUED: 09-15-11
SHEET #:125-9244-1
• It is the responsibility of the installer to ensure
that the projector is properly ventilated. Spacers
are provided to raise the mount off the projector
surface.
CAUTION
• Installer must verify that the ceiling will safely
support four times the combined weight of all
attached equipment and hardware.
WARNING
Model:
PX750CM
Installation and Assembly:
Adapter Plate for NEC Projector
Model PX-750U
IMPORTANT!
Read entire instruction sheet before you start installation and assembly.
Max Load Capacity:
60 lb (22.3 kg)