NEC NP-PX800X-08ZL PX750CM Installation Guide - Page 8
Attaching Adapter Plate to Projector Mount
 |
View all NEC NP-PX800X-08ZL manuals
Add to My Manuals
Save this manual to your list of manuals |
Page 8 highlights
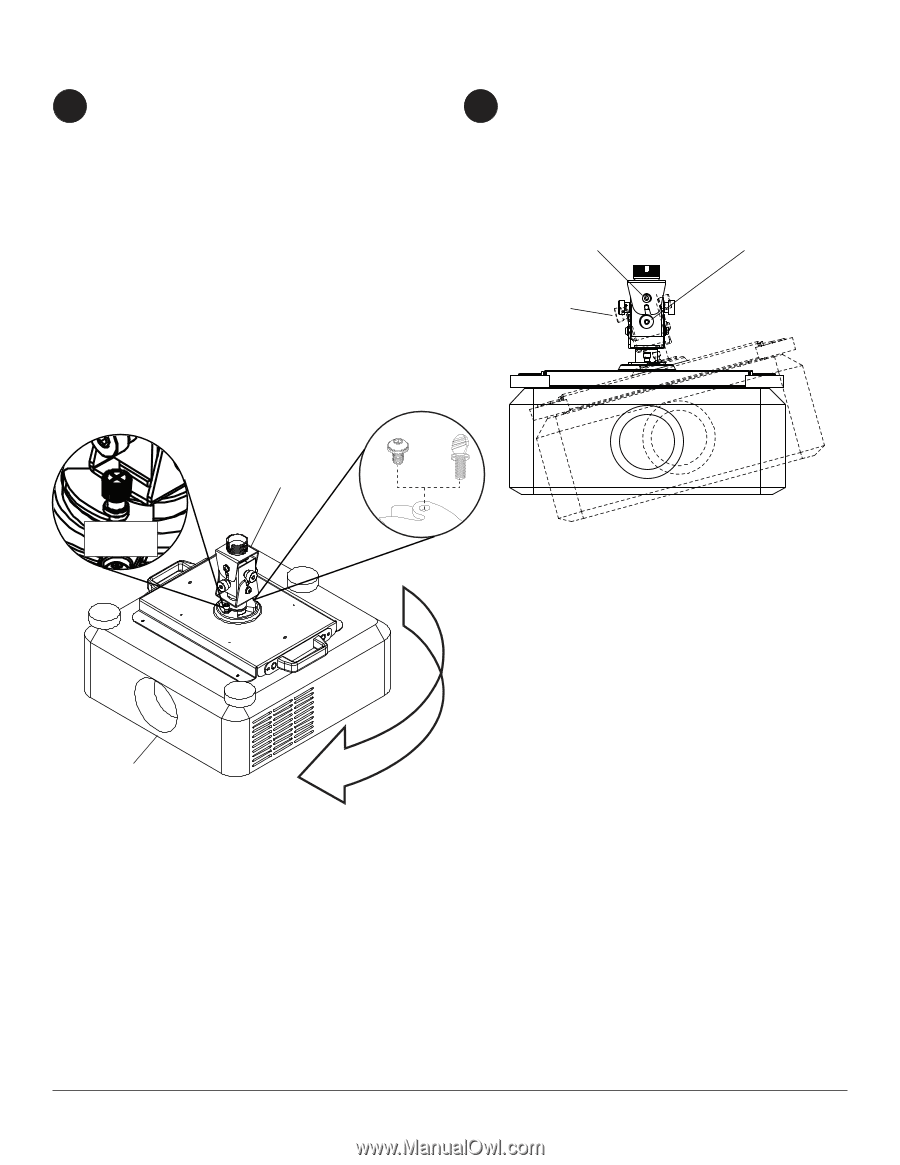
Attaching Adapter Plate to Projector Mount 7 Attach projector to projector mount assembly (H) by inserting the mount into the adapter plate and twisting until the adapter plate will no longer turn. The spring loaded captive screw should line up with a corresponding hole on the adapter plate. Push down and tighten the spring loaded captive screw to secure the adapter plate to the mount. If not using the optional security feature, fasten thumb screw (L) in the hole opposite the spring loaded captive screw. OPTIONAL: For Armor Lock™ security, insert #10-32 x 3/8" serrated washer head screw (M) in the hole opposite the spring loaded captive screw. Tighten with 4 mm security allen wrench (E). This will prevent the projector from being removed. 8 Use knobs to adjust projector mount roll and pitch. Knobs also may be adjusted using allen wrenches (E,R). Tighten socket pin screw using allen wrench (E) to lock roll and pitch position. SOCKET PIN SCREW ROLL ADJUSTMENT KNOB PITCH ADJUSTMENT KNOB CAPTIVE SCREW L H M PROJECTOR 8 of 8 ISSUED: 09-15-11 SHEET #:125-9244-1 © 2011, Peerless Industries, Inc. All rights reserved. All other brand and product names are trademarks or registered trademarks of their respective owners.
-
 1
1 -
2
-
 3
3 -
 4
4 -
 5
5 -
 6
6 -
 7
7 -
 8
8
 |
 |