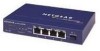
Netgear DS104 DS104 Installation Guide - Page 11
Verify the Installation, Troubleshooting Information, by any port in the hub - driver
 |
View all Netgear DS104 manuals
Add to My Manuals
Save this manual to your list of manuals |
Page 11 highlights
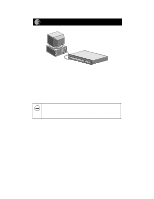
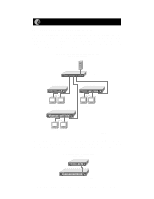
Verify the Installation When installation is complete and power has been applied to the hub, the following conditions should exist: • Power LED is on. • Link LED on each connected port is on. • Utilization LEDs on the front panel are blinking when data is being received by any port in the hub, and the Link/Receive LED on the connected port is blinking when data is being received by that port. If there are any problems, refer to the Troubleshooting table. Troubleshooting Information Symptom Cause Solution Link LED off or intermittent Port connection not functioning Collision LED on or blinking Collisions taking place on network segment(s) Make sure the power cord is properly connected and functioning. Check the crimp on the RJ-45 connectors and make sure that the plug is properly inserted and locked into the port at both the hub and the device. Make sure cabling is Category 5 and meets the requirements for 100 Mbps operation. Check installation of the network interface cards and verify that they are 100 Mbps capable. Be sure that the proper software driver is loaded. Check link LEDs on the network adapter card and PC or workstation. Make sure cables and connectors are correct. Excessive collisions can be caused by incorrect cabling, connectors, or wiring techniques or can occur when the network is too busy. Ensure that the PC at the far end is set to half-duplex mode and is operating properly. Problems with port 4 (DS104) or port 6 (DS106) or port 8 (DS108) or port 16 (DS116) Normal/ Uplink push button in the wrong position Check the Normal/Uplink push button on the front panel. Model DS104/DS106/DS108/DS116 Dual Speed Hub Installation Guide
-
 1
1 -
2
-
3
-
4
-
5
-
 6
6 -
 7
7 -
 8
8 -
 9
9 -
 10
10 -
 11
11 -
 12
12 -
 13
13 -
 14
14 -
 15
15
 |
 |
