Netgear FS728TPv1 FS728TP Installation Guide - Page 2
Troubleshooting Tips, Technical Support
 |
View all Netgear FS728TPv1 manuals
Add to My Manuals
Save this manual to your list of manuals |
Page 2 highlights
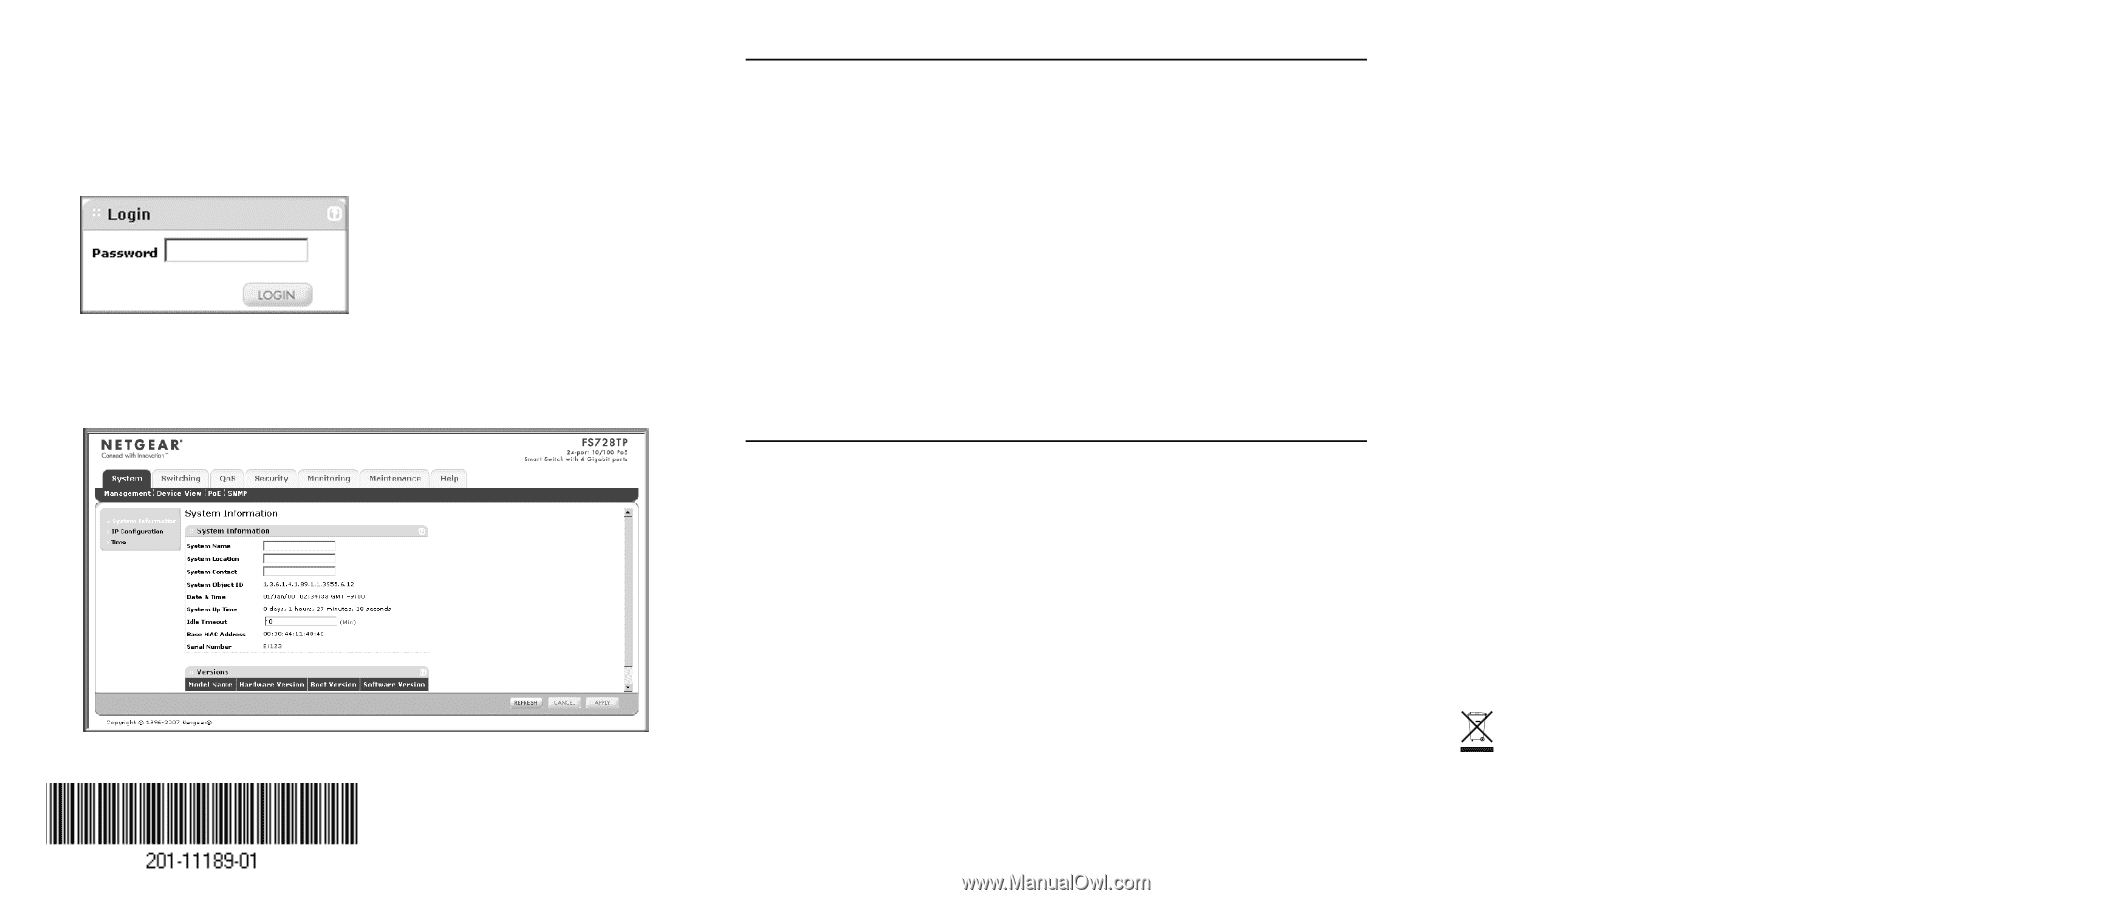
cable connections are secure, that the IP address configuration of the PC is in the same subnet as the switch. 3. Click Discover and select the line displaying the details of your switch. If there are multiple smart switches in your network, ensure you have selected the correct switch to configure. 4. Click Web Access to view the switch log in screen. Figure 4 5. Enter the default password of password in lower case letters and click Login. The Main Web Access Menu displays. Figure 5 Troubleshooting Tips Following are some tips for correcting simple problems you may have. • Be sure to power on your PC and smart switch in the correct sequence. • Follow this sequence. Turn off the smart switch and computer. First, turn on the smart switch and wait two minutes. Next turn on the computer. Ensure the Ethernet cables are securely plugged in. • For each powered on computer connected to the smart switch with a securely plugged in Ethernet cable, the corresponding smart switch LAN port status light will be lit. Ensure the network settings of the computer are correct. • In most cases, computers should be configured to obtain an IP address automatically via DHCP. For help with this, please see the animated tutorials on the CD or the Reference Manual Appendix C on the CD. If your network uses static IP addresses, be sure the switch and computer are configured with valid IP addresses. Technical Support Thank you for selecting NETGEAR products. After completing setup and configuration, locate the serial number on the bottom label of the Smart switch and use it to register your product at http://www.netgear.com/register. Registration on the web site or over the phone is required before you can use our telephone support service. The phone numbers for worldwide regional customer support centers are on the Warranty and Support Information card that came with your product. Go to http://www.netgear.com/support for product updates and web support. October 2007 This symbol was placed in accordance with the European Union Directive 2002/96 on the Waste Electrical and Electronic Equipment (the WEEE Directive). If disposed of within the European Union, this product should be treated and recycled in accordance with the laws of your jurisdiction implementing the WEEE Directive. © 2007 by NETGEAR, Inc. All rights reserved. NETGEAR and the NETGEAR logo are registered trademarks of NETGEAR, Inc. in the United States and/or other countries. Other brand and product names are trademarks or registered trademarks of their respective holders. Information is subject to change without notice.
-
 1
1 -
 2
2
 |
 |