Netgear RNR4425 ReadyNAS 1100 Installation Guide - Page 2
Technical Support - nas
 |
UPC - 606449055948
View all Netgear RNR4425 manuals
Add to My Manuals
Save this manual to your list of manuals |
Page 2 highlights
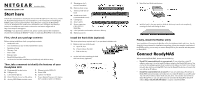
ReadyNAS connected directly to your network. Initialize hard disks (if installed separately) Duration 2 minutes 10 minutes up to 2 hours Act Description Initial boot up Perform RAID configuration on RAIDar (optional) Volume Creation ReadyNAS is not accessible during this time ReadyNAS connected directly to your PC (no cross-over cable needed). RAIDar Status Click Setup Installing Creating/Booting up to 10 hours Errora RAID synchronization. ReadyNAS is accessible during this time. Firmware Version Normal status. ReadyNAS is fully redundant. Firmware Version No disks detected if all disk LEDs flash at once, and if disk 2 flashes No disks detected repeatedly Errora Errora Bad disk detected if one disk LED flashes once per second. The disk corresponding to this LED is bad. Root image needs repair if all 4 disk LEDs flash, and then disk 1 and disk 2 LEDs flash repetitively. Firmware Version Corrupt root a. Installation will abort if an error is detected. Legend: LED off; LED on; LED slow blinking; LED fast blinking; Repetitive pattern October 2007 If you purchased a diskless ReadyNAS, after you install the hard disks and perform the optional RAID Configuration (see the ReadyNAS User Guide for complete instructions), you must wait until the volume creation has completed before accessing the FrontView™ Setup Wizard (see theReadyNAS Setup Manual). It will take up to 2 hours, depending on disk capacity. An additional 2 to 10 hours are required before the RAID synchronization has completed and the system is fully redundant. During the background RAID synchronization, access to the NAS will be slower than normal. The RAIDar Status column, shown in the preceding table, will indicate progress. Caution: While synchronization is underway, do not turn off the ReadyNAS 1100. Set up ReadyNAS 1100 Start RAIDar (see the ReadyNAS Setup Manual for complete instructions), and then power on the ReadyNAS. The ReadyNAS system will appear in the RAIDar scan list. Click Setup to start the FrontView Setup Wizard. The default user name is admin and the password is netgear1. Technical Support Thank you for selecting NETGEAR products. At the conclusion of FrontView Setup Wizard configuration, complete your product registration or, if you choose to register later, you can register your product at http://www.netgear.com/register. Registration on the website or over the phone is required before you can use our telephone support service. The phone numbers for worldwide regional customer support centers are on the Warranty and Support Information card that came with your product. Go to http://www.netgear.com/support for product updates and Web support. This symbol was placed in accordance with the European Union Directive 2002/96 on the Waste Electrical and Electronic Equipment (the WEEE Directive). If disposed of within the European Union, this product should be treated and recycled in accordance with the laws of your jurisdiction implementing the WEEE Directive. © 2007 by NETGEAR, Inc. All rights reserved. NETGEAR and the NETGEAR logo are registered trademarks of NETGEAR, Inc. in the United States and/or other countries. Other brand and product names are trademarks or registered trademarks of their respective holders. Information is subject to change without notice.
-
 1
1 -
 2
2
 |
 |
