Nextar 43LT Hardware Manual - Page 18
If you prefer to mount the unit to the dashboard, you may, use the adhesive disk - mounting bracket
 |
UPC - 714129888561
View all Nextar 43LT manuals
Add to My Manuals
Save this manual to your list of manuals |
Page 18 highlights
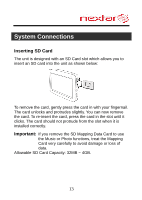
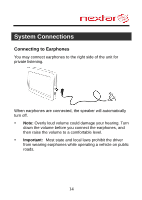
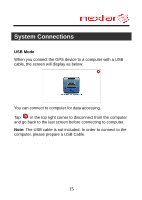
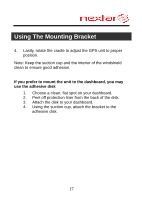
Using The Mounting Bracket 4. Lastly, rotate the cradle to adjust the GPS unit to proper position. Note: Keep the suction cup and the interior of the windshield clean to ensure good adhesion. If you prefer to mount the unit to the dashboard, you may use the adhesive disk 1. Choose a clean, flat spot on your dashboard. 2. Peel off protection liner from the back of the disk. 3. Attach the disk to your dashboard. 4. Using the suction cup, attach the bracket to the adhesive disk. 17
-
 1
1 -
2
-
3
-
4
-
5
-
6
-
7
-
8
-
9
-
10
-
11
-
12
-
 13
13 -
 14
14 -
 15
15 -
 16
16 -
 17
17 -
 18
18 -
 19
19 -
 20
20 -
 21
21 -
 22
22 -
 23
23 -
24
-
25
-
26
-
27
-
28
-
29
-
30
-
31
-
32
-
33
-
34
-
35
-
36
-
37
-
38
-
39
-
40
-
41
-
42
-
43
-
44
-
45
-
46
-
47
-
48
-
49
-
50
-
51
-
52
-
53
-
54
-
55
-
56
-
57
-
58
-
59
-
60
-
61
-
62
-
63
-
64
-
65
-
66
-
67
-
68
-
69
-
70
-
71
-
72
-
73
-
74
-
75
-
76
-
77
-
78
-
79
-
80
 |
 |

17
Using The Mounting Bracket
4.
Lastly, rotate the cradle to adjust the GPS unit to proper
position.
Note: Keep the suction cup and the interior of the windshield
clean to ensure good adhesion.
If you prefer to mount the unit to the dashboard, you may
use the adhesive disk
1.
Choose a clean, flat spot on your dashboard.
2.
Peel off protection liner from the back of the disk.
3.
Attach the disk to your dashboard.
4.
Using the suction cup, attach the bracket to the
adhesive disk.