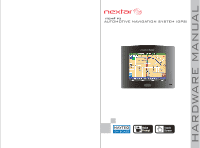
Nextar P3 P3 Hardware Manual - Page 5
Nextar P3 - Automotive GPS Receiver Manual
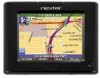 |
UPC - 714129920841
View all Nextar P3 manuals
Add to My Manuals
Save this manual to your list of manuals |
Page 5 highlights
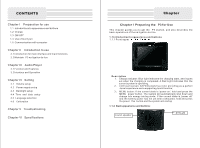
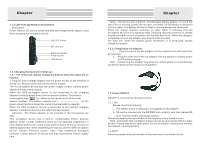
Chapter 1.1.3 Left-side appearance and buttons Description Power Socket: DC port is connected with the charge power supply; used when charging the navigation device ON OFF button SD card slot Earphone Socket Power Socket USB Socket 1.2 Charging the device for initial use 1.2.1 For initial use, please charge the battery fully; the steps are as follows: 1 Plug DC end of charge adapter into the power socket on the left-side of the device; Plug the other end into the main's supply; The P3 navigation device has two power supply modes: battery power supply and main power supply. When the GPS navigation device is not connected to the charging adapter,it obtains power from a lithium polymer battery. The battery consumption sign [ ] is visible on the up left corner of the main system interface. The battery capacity bar [ ] of the power-setup interface shows the current residual battery capacity. When the GPS navigation device is connected to the external charging adapter, it obtains power from the external power supply. Attention The Power Adaptor is not included in the accessories we offer. This navigation device has a built-in, irreplaceable lithium polymer battery. Under normal conditions (such as low backlight brightness), a fully charged battery can continuously work for about 10 hours. The actual battery supply time varies depending on how you use the GPS navigation device. Certain functions (audio, video, high brightness backlight) consume a large amount of energy and may significantly reduce supply time. CChhaappteter r Note The device has a built-in, irreplaceable lithium battery. To avoid the risk of fire or burning, please do not open, perforate, hit the battery or discard it in fire or water. The battery will burst, blast or release dangerous chemicals. When the charge indicator switches on (blue light), it indicates that the navigation device is in a charging state. Charging requires a few hours, please be patient and do not cut off power until the blue light is off. When the charge is completed, remove the adaptor plug from the mains supply. For later use, when the battery power decreases or is exhausted, please charge it promptly. 1.2.2 Charging by car adapter: 1. Plug one end of the car adapter into the socket on the left side of the device body; 2. Plug the other end of the car adapter into the ignition to supply power for P3 while charging. Note Please plug the adapter only after the vehicle starts, to avoid damage caused by instant power impact on equipment. 1.3 Power ON/OFF ON/OFF is controlled by the power button. 1.3.1 ON Please check the following: 1 The battery power is adequate, or plugged into the adapter 2 SD card is inserted into the SD/MMC slot correctly, and the inserted SD card has the system operating program Press the power button at the back of the machine to turn the device on. Note During the first orientation please choose an open space with no upper shelter; Please stay at the same place, for the orientation needs a few minutes to complete, so wait patiently. 1.3.2OFF Press the power button at the back of the machine to turn the device off.
-
 1
1 -
 2
2 -
 3
3 -
 4
4 -
 5
5 -
 6
6 -
 7
7 -
 8
8 -
 9
9 -
 10
10 -
 11
11 -
12
 |
 |
