Nikon D60 Body Only Black & Gold D60 User's Manual - Page 101
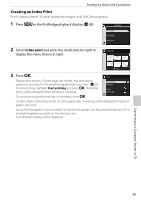
Creating an Index Print, Index print
 |
UPC - 018208254590
View all Nikon D60 Body Only Black & Gold manuals
Add to My Manuals
Save this manual to your list of manuals |
Page 101 highlights
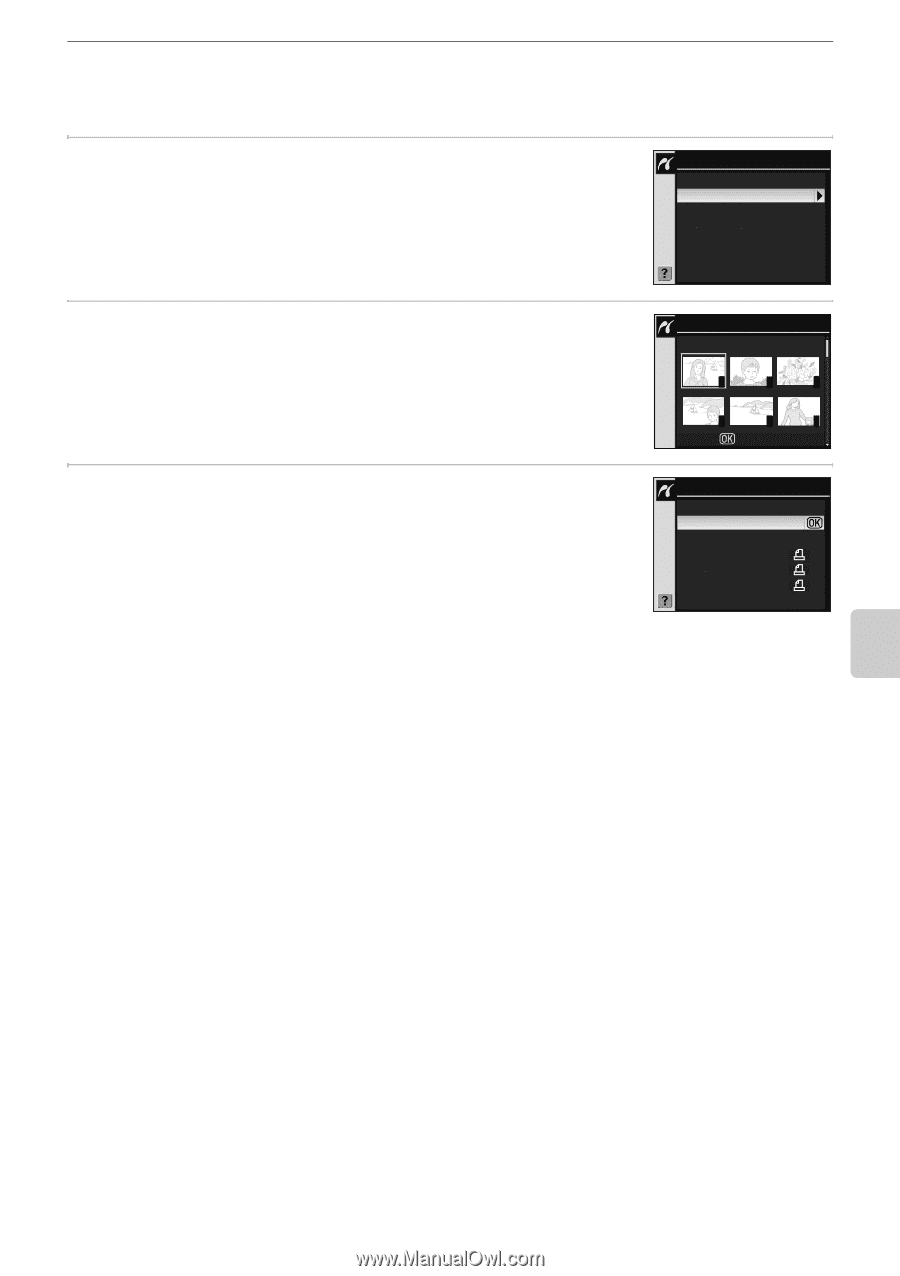
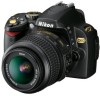
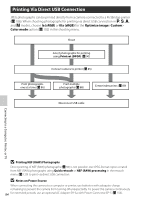
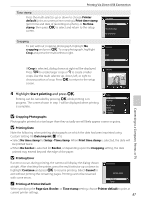
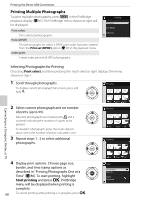
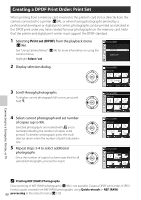
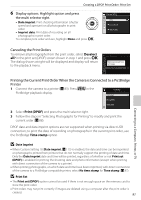
Printing Via Direct USB Connection Creating an Index Print Print "contact sheets" of small thumbnail images of all JPEG photographs. 1 Press O in the PictBridge playback display (A 85). PictBridge Print select Print (DPOF) Index print 2 Select Index print and press the multi selector right to display the menu shown at right. Index print 1 2 3 4 5 6 Print 3 Press Q. Setup Display print options. Choose page size, border, and time stamp options as described in "Printing Photographs One at a Time" (A 86). To start printing, highlight Start printing and press Q. PictBridge menu will be displayed when printing is complete. To cancel printing while printing is in progress, press Q. Start printing Page size Border Time stamp Contact sheets cannot be printed on some paper sizes. A warning will be displayed if selected page is too small. Up to 256 photographs can be printed. Not all of photographs can be printed if there are 257 or more photographs recorded on the memory card. A confirmation dialog will be displayed. Connecting to a Computer, Printer, or TV 89
-
 1
1 -
2
-
3
-
4
-
5
-
6
-
7
-
8
-
9
-
10
-
11
-
12
-
13
-
14
-
15
-
16
-
17
-
18
-
19
-
20
-
21
-
22
-
23
-
24
-
25
-
26
-
27
-
28
-
29
-
30
-
31
-
32
-
33
-
34
-
35
-
36
-
37
-
38
-
39
-
40
-
41
-
42
-
43
-
44
-
45
-
46
-
47
-
48
-
49
-
50
-
51
-
52
-
53
-
54
-
55
-
56
-
57
-
58
-
59
-
60
-
61
-
62
-
63
-
64
-
65
-
66
-
67
-
68
-
69
-
70
-
71
-
72
-
73
-
74
-
75
-
76
-
77
-
78
-
79
-
80
-
81
-
82
-
83
-
84
-
85
-
86
-
87
-
88
-
89
-
90
-
91
-
92
-
93
-
94
-
95
-
 96
96 -
 97
97 -
 98
98 -
 99
99 -
 100
100 -
 101
101 -
 102
102 -
 103
103 -
 104
104 -
 105
105 -
 106
106 -
107
-
108
-
109
-
110
-
111
-
112
-
113
-
114
-
115
-
116
-
117
-
118
-
119
-
120
-
121
-
122
-
123
-
124
-
125
-
126
-
127
-
128
-
129
-
130
-
131
-
132
-
133
-
134
-
135
-
136
-
137
-
138
-
139
-
140
-
141
-
142
-
143
-
144
-
145
-
146
-
147
-
148
-
149
-
150
-
151
-
152
-
153
-
154
-
155
-
156
-
157
-
158
-
159
-
160
-
161
-
162
-
163
-
164
-
165
-
166
-
167
-
168
-
169
-
170
-
171
-
172
-
173
-
174
-
175
-
176
-
177
-
178
-
179
-
180
-
181
-
182
-
183
-
184
-
185
-
186
-
187
-
188
-
189
-
190
-
191
-
192
-
193
-
194
-
195
-
196
-
197
-
198
-
199
-
200
-
201
-
202
-
203
-
204
 |
 |