NordicTrack E4.1 Instruction Manual
NordicTrack E4.1 Manual
 |
View all NordicTrack E4.1 manuals
Add to My Manuals
Save this manual to your list of manuals |
NordicTrack E4.1 manual content summary:
- NordicTrack E4.1 | Instruction Manual - Page 1
serial number in the space above for reference. Serial Number Decal CUSTOMER SERVICE UNITED KINGDOM Call: 08457 089 009 From Ireland: 053 92 36102 Website precautions and instructions in this manual before using this equipment. Keep this manual for future reference. USER'S MANUAL www.iconeurope.com - NordicTrack E4.1 | Instruction Manual - Page 2
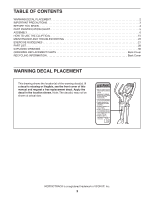
ASSEMBLY 6 HOW TO USE THE ELLIPTICAL 15 MAINTENANCE AND TROUBLESHOOTING 25 EXERCISE GUIDELINES 27 PART LIST 28 EXPLODED DRAWING 30 (s). If a decal is missing or illegible, see the front cover of this manual and request a free replacement decal. Apply the decal in the location shown. Note: - NordicTrack E4.1 | Instruction Manual - Page 3
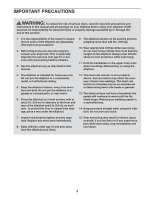
risk of serious injury, read all important precautions and instructions in this manual and all warnings on your elliptical before using your over age 35 or persons with pre-existing health problems. 3. Use the elliptical only as described in this manual. 9. The elliptical should not be used by - NordicTrack E4.1 | Instruction Manual - Page 4
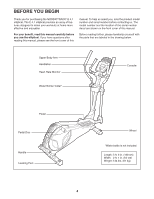
BEFORE YOU BEGIN Thank you for purchasing the NORDICTRACK® E 4.1 elliptical. The E 4.1 elliptical provides an array of features designed to make your workouts at home more effective and enjoyable. For your benefit, read this manual carefully before you use the elliptical. If you have questions after - NordicTrack E4.1 | Instruction Manual - Page 5
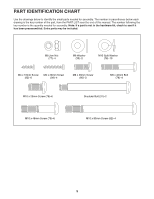
for assembly. The number in parentheses below each drawing is the key number of the part, from the PART LIST near the end of this manual. The number following the key number is the quantity needed for assembly. Note: If a part is not in the hardware kit, check to see if - NordicTrack E4.1 | Instruction Manual - Page 6
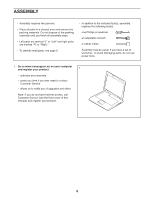
. 1. Go to www.iconsupport.eu on your computer and register your product. 1 • activates your warranty • saves you time if you ever need to contact Customer Service • allows us to notify you of upgrades and offers Note: If you do not have Internet access, call Customer - NordicTrack E4.1 | Instruction Manual - Page 7
2. While a second person lifts the rear of the Frame (1), attach the Rear Stabilizer (70) to the Frame 2 with two M10 x 95mm Screws (82). 70 82 3. While a second person lifts the front of the Frame (1), attach the Front Stabilizer (73) to the 3 Frame with two M10 x 95mm Screws (82). 1 73 - NordicTrack E4.1 | Instruction Manual - Page 8
4. Orient the Upright (2) and the Top Shield Cover (37) as shown. Slide the Top Shield Cover 4 upward onto the Upright. Have a second person hold the Upright (2) near the Frame (1). See the inset drawing. Locate the wire tie in the Upright (2). Tie the lower end of the wire tie to the Wire - NordicTrack E4.1 | Instruction Manual - Page 9
6. Orient the Console Cover (32) as shown. Then, slide the Console Cover onto the Upright (2). Orient the Handlebar (39) as shown. Make sure to pull the Pulse Wire (28) and the Chest Pulse Wire (103) out of the Handlebar. Tip: Avoid pinching the wires. Attach the Handlebar (39) to the Upright (2) - NordicTrack E4.1 | Instruction Manual - Page 10
8. Slide the Console Cover (32) upward to the Console (4). 8 Attach the Console Cover (32) to the Upright (2) with an M4 x 16mm Screw (92). Then, attach the Console Cover (32) to the Console (4) with two M4 x 16mm Screws (92). 4 92 2 92 32 9. Identify the Left and Right Upper Body Arms (8, - NordicTrack E4.1 | Instruction Manual - Page 11
10. Apply a generous amount of the included grease to the axles on the Upright (2). Orient the Left and Right Upper Body Arms (8, 9) as shown, and slide them onto the left and right sides of the Upright (2). Attach each Upper Body Arm (8, 9) with an M8 x 20mm Screw (80) and an M8 Washer (33). 10 8 - NordicTrack E4.1 | Instruction Manual - Page 12
12. See the inset drawing. Identify a Pivot Cover A (19), which has hooks, and a Pivot Cover B (22), 12 which has tabs. Press a Pivot Cover A (19) and a Pivot Cover B (22) together around the Right Upper Body Arm (9). Repeat this step for the other side of the elliptical. Tip: Make sure that the - NordicTrack E4.1 | Instruction Manual - Page 13
14. Press a Front Leg Cover (20) and a Rear Leg Cover (21) together around the right Upper Body 14 Leg (6). Repeat this step for the other side of the elliptical. 6 20 21 15. Identify the Right Pedal (13). 15 Attach the Right Pedal (13) to the Right Pedal Arm (49) with three M10 x 48mm - NordicTrack E4.1 | Instruction Manual - Page 14
16. See the upper drawing. Press the Rear Shield Cover (59) onto the Left and Right Shields (44, 45). Plug the Power Adapter (100) into the Power Receptacle (104) on the Frame (1). If necessary, plug the Power Adapter (100) into the Plug Adapter (101). Note: To plug the Power Adapter (100) into an - NordicTrack E4.1 | Instruction Manual - Page 15
HOW TO USE THE ELLIPTICAL HOW TO PLUG IN THE POWER ADAPTER IMPORTANT: If the elliptical has been exposed to cold temperatures, allow it to warm to room temperature before plugging in the power adapter. If you do not do this, you may damage the console displays or other electronic components. Plug - NordicTrack E4.1 | Instruction Manual - Page 16
HOW TO EXERCISE ON THE ELLIPTICAL To mount the elliptical, hold the handlebars or the upper body arms and step onto the pedal that is in the lowest position. Then, step onto the other pedal. Push the pedals until they begin to move with a continuous motion. Note: The pedal discs can turn in either - NordicTrack E4.1 | Instruction Manual - Page 17
the pedals and prompts you to vary your pedaling speed as it guides you through an effective workout. In addition, the console offers two heart purchase iFit cards, go to www.iFit.com or see the front cover of this manual. iFit cards are also available at select stores. You can even connect your MP3 - NordicTrack E4.1 | Instruction Manual - Page 18
will turn on and the console will be ready for use. HOW TO USE THE MANUAL MODE 1. Begin pedaling or press any button on the console to turn on the mode. The displays can show the following workout information: Time-When the manual mode is selected, this display will show the elapsed time. When a - NordicTrack E4.1 | Instruction Manual - Page 19
Pulse-This display will show your heart rate when you use the handgrip heart rate monitor or the optional heart rate monitor (see step 5). Resistance-This display will show the resistance level of the pedals for a few seconds each time the resistance level changes. Profile-When a workout is selected - NordicTrack E4.1 | Instruction Manual - Page 20
pedal at a speed that is comfortable for you. If the resistance level for the current segment is too high or too low, you can manually override the setting by turning the resistance dial. IMPORTANT: When the current segment of the workout ends, the pedals will automatically adjust to the resistance - NordicTrack E4.1 | Instruction Manual - Page 21
to pedal at a speed that is comfortable for you. If the resistance level for the current segment is too high or too low, you can manually override the setting by turning the resistance dial; however, if you change the resistance level, you might not maintain the target heart rate. Also, when - NordicTrack E4.1 | Instruction Manual - Page 22
level will appear in the display for a few seconds to alert you. If the target watts setting is too high or too low, you can manually override the setting by turning the resistance dial. Watts workout 2 or 3 is divided into 40 one-minute segments. One resistance level and one target watts - NordicTrack E4.1 | Instruction Manual - Page 23
adjust to the resistance level for the next segment. If the resistance level for the current segment is too high or too low, you can manually override the setting by turning the resistance dial. IMPORTANT: When the current segment of the workout ends, the pedals will automatically adjust to the - NordicTrack E4.1 | Instruction Manual - Page 24
your personal fitness goals. To purchase a chest heart rate monitor, please see the front cover of this manual. A moment after you select a workout, the voice of a personal trainer will begin guiding you through your workout. iFit workouts function in the same way as preset workouts. To use the - NordicTrack E4.1 | Instruction Manual - Page 25
from the console and keep the console out of direct sunlight. CONSOLE TROUBLESHOOTING If the handgrip heart rate monitor does not function properly, see step shield cover, the rear shield cover, and the left shield (see the instructions below). First, unplug the power adapter. Then, see step 15 on - NordicTrack E4.1 | Instruction Manual - Page 26
right disc cover and the right pedal disc. First, unplug the power adapter. Then, using a flat screwdriver, remove the right Disc Cover (18) (see the instructions below). Locate the Reed Switch (58). Loosen, but do not remove, the M4 x 16mm Screw (92). 27 81 18 Then, remove the M8 x 12mm Screws - NordicTrack E4.1 | Instruction Manual - Page 27
especially important for persons over age 35 or persons with pre-existing health problems. The heart rate monitor is not a medical device. Various factors may key to achieving results. You can use your heart rate as a guide to find the proper intensity level. The chart below shows recommended heart - NordicTrack E4.1 | Instruction Manual - Page 28
PART LIST Key No. Qty. 1 1 2 1 3 1 4 1 5 1 6 2 7 1 8 1 9 1 10 2 11 2 12 1 13 1 14 1 15 2 16 1 17 4 18 2 19 2 20 2 21 2 22 2 23 4 24 1 25 1 26 1 27 2 28 1 29 4 30 2 31 2 32 1 33 4 34 2 35 1 36 1 37 1 38 2 39 1 40 2 41 - NordicTrack E4.1 | Instruction Manual - Page 29
4 106 4 * - * - * - * - Description Resistance Bracket Receiver/Chest Pulse Wire Power Receptacle/Wire M8 x 10mm Screw M8 x 15mm Screw User's Manual Assembly Tool Grease Packet Wire Tie Note: Specifications are subject to change without notice. For information about ordering replacement - NordicTrack E4.1 | Instruction Manual - Page 30
EXPLODED DRAWING A Model No. NTEVEL75012.2 R0413A 30 - NordicTrack E4.1 | Instruction Manual - Page 31
31 59 27 92 81 92 92 44 46 81 92 106 91 86 24 106 26 95 48 41 92 47 82 70 92 41 56 87 7 64 83 35 34 77 7110255 40 71 66 38 878243 37 51 94 54 69 3653 52 74 77 1 50 98 73 63 92 96 42 45 105 105 92 90 6538 57 58 40 104 101 25 67 68 60 43 61 62 92 95 100 - NordicTrack E4.1 | Instruction Manual - Page 32
) • the key number and description of the replacement part(s) (see the PART LIST and the EXPLODED DRAWING near the end of this manual) RECYCLING INFORMATION This electronic product must not be disposed of in municipal waste. To preserve the environment, this product must be recycled after its useful
-
 1
1 -
 2
2 -
 3
3 -
 4
4 -
 5
5 -
 6
6 -
 7
7 -
8
-
9
-
10
-
11
-
12
-
13
-
14
-
15
-
16
-
17
-
18
-
19
-
20
-
21
-
22
-
23
-
24
-
25
-
26
-
27
-
28
-
29
-
30
-
31
-
32
 |
 |
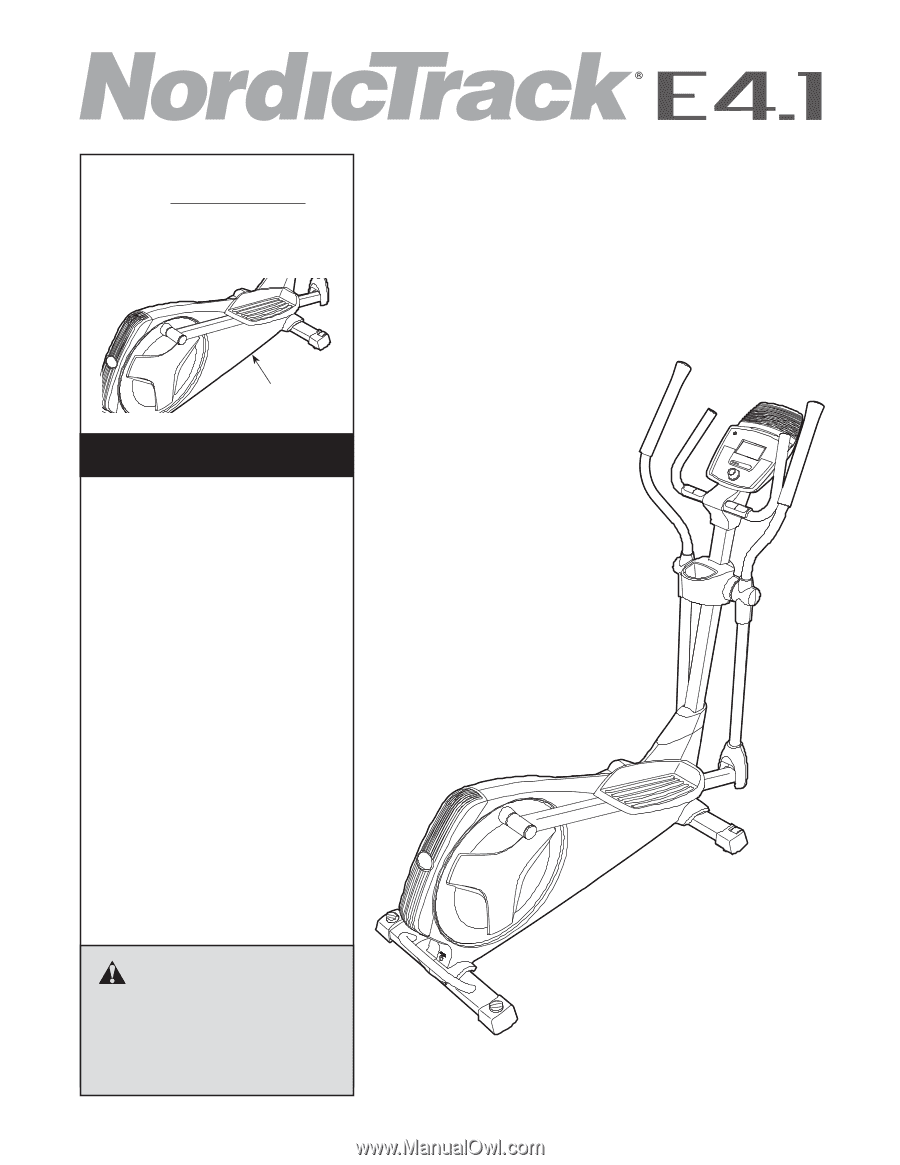
Serial Number
Decal
Model No. NTEVEL75012.2
Serial No.
Write the serial number in the space
above for reference.
USER’S MANUAL
www.iconeurope.com
CAUTION
Read all precautions and instruc-
tions in this manual before using
this equipment. Keep this manual
for future reference.
CUSTOMER SERVICE
UNITED KINGDOM
Call:
08457 089 009
From Ireland:
053 92 36102
Website:
www.iconsupport.eu
E-mail:
Write:
ICON Health & Fitness, Ltd.
c/o HI Group PLC
Express Way
CASTLEFORD
WF10 5QJ
UNITED KINGDOM
AUSTRALIA
Call:
1800 993 770
E-mail:
Write:
ICON Health & Fitness
PO Box 635
WINSTON HILLS NSW 2153
AUSTRALIA