NordicTrack Ebu Nt 9600 International Bike Canadian English Manual - Page 20
How To Use The Fitness Test Program
 |
View all NordicTrack Ebu Nt 9600 International Bike manuals
Add to My Manuals
Save this manual to your list of manuals |
Page 20 highlights
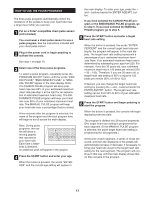
HOW TO USE THE FITNESS TEST PROGRAM 5 Press the START button and enter your weight. The FITNESS TEST program measures your VO2 max level. For the best results, the program should be used at a time when your energy level is high; the program should not be used if you have already exercised during the day. Follow the steps below to use the program. 1 Put on a Polar®-compatible chest pulse sensor (not included). You must wear a chest pulse sensor to use the FITNESS TEST program. See the instructions included with your chest pulse sensor. 2 Plug in the power cord or begin pedaling to activate the console. See step 1 on page 10. 3 Select the FITNESS TEST program. To select the FITNESS TEST program, press the PROGRAM SELECT button repeatedly until the words "FITNESS TEST" appear in the main display. A few seconds after the program is selected, the name of the program will begin to scroll across the main display. Note: During the FITNESS TEST program, the matrix will show a moving graphic that represents your heart rate. Each time a heartbeat is detected, an additional peak will appear in the graphic. When the button is pressed, the words "ENTER WEIGHT" and the current weight setting will scroll across the main display. To enter your weight, press the + and - buttons beside the ENTER AGE/WT. button. 6 Press the START button and begin pedaling to start the program. When the button is pressed, the console will begin displaying exercise data. The FITNESS TEST program is divided into threeminute segments. During the program, the console will automatically control the resistance of the pedals and prompt you to pedal at a cadence of 50 revolutions per minute (RPM). If you pedal more than 5 RPM faster or slower than 50 RPM, a tone will sound and the words, "PLEASE PEDAL AT 50 RPM" will scroll across the main display. When the first three-minute segment of the program is completed, a tone will sound and the second segment will begin. The program will continue until the console has measured your VO2 max level. Your VO2 max level will then begin to scroll across the main display. Note: The RESISTANCE + and - buttons and the QUICK RESISTANCE buttons will not function while the FITNESS TEST program is selected. If your pulse is not detected during the program, the letters "PLS" will flash in the main display. If your pulse is not detected at the end of any segment, the program will end and the main display will show the words "VO2 MAX NOT FOUND." 7 Follow your progress with the main display. See step 5 on page 10. 4 Press the START button and enter your age. When the button is pressed, the words "ENTER AGE" and the current age setting will appear in the main display. To enter your age, press the + and - buttons beside the ENTER AGE/WT. button. 8 When you are finished using the upright bike, the console will automatically enter an idle mode or turn off. See step 7 on page 11. 19
-
 1
1 -
2
-
3
-
4
-
5
-
6
-
7
-
8
-
9
-
10
-
11
-
12
-
13
-
14
-
 15
15 -
 16
16 -
 17
17 -
 18
18 -
 19
19 -
 20
20 -
 21
21 -
 22
22 -
 23
23 -
 24
24 -
 25
25 -
26
-
27
-
28
-
29
-
30
-
31
-
32
-
33
-
34
-
35
 |
 |
