NordicTrack Elite 3700 Treadmill English Manual - Page 12
If You Do Not Connect
 |
View all NordicTrack Elite 3700 Treadmill manuals
Add to My Manuals
Save this manual to your list of manuals |
Page 12 highlights
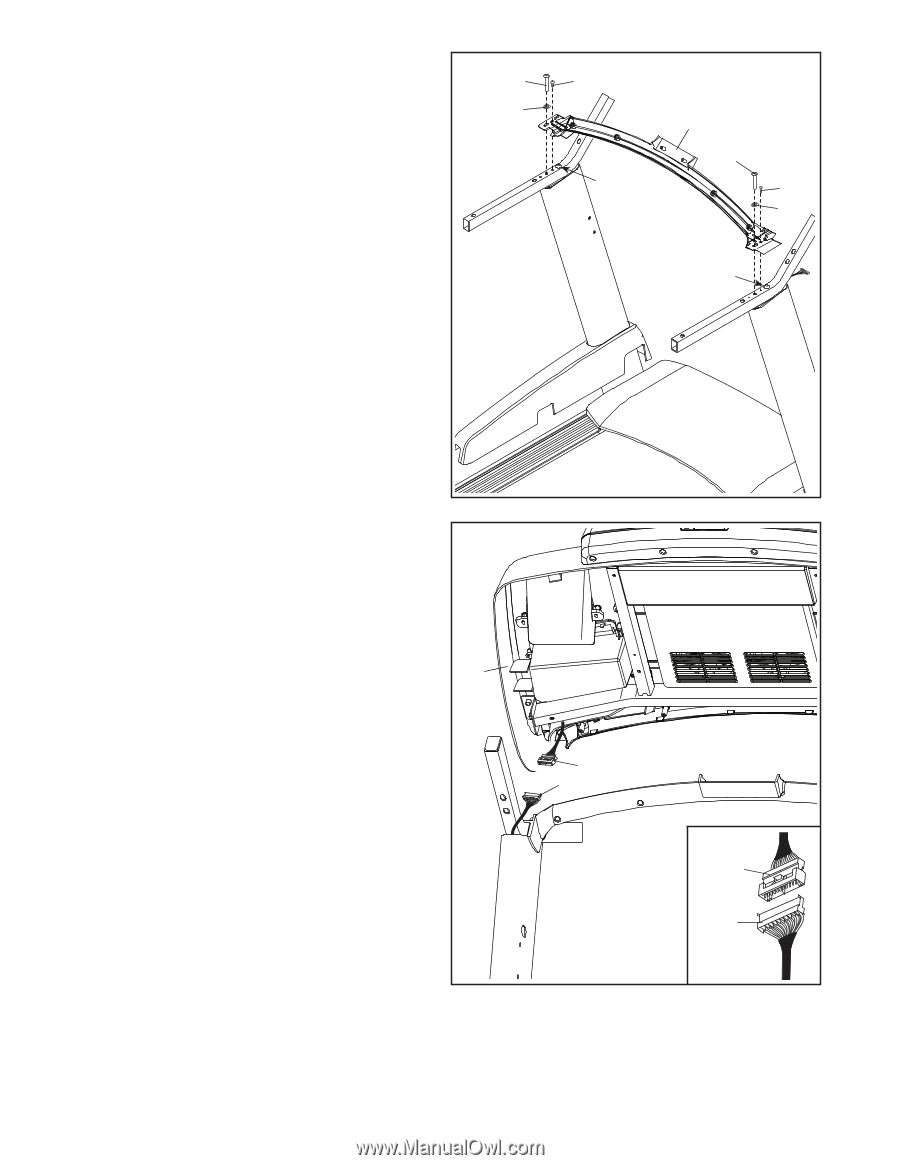
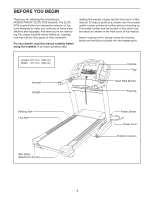
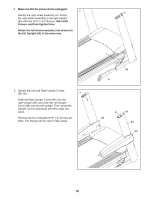
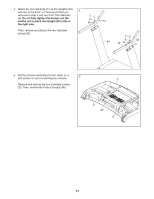
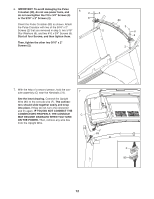
6. IMPORTANT: To avoid damaging the Pulse Crossbar (80), do not use power tools, and do not overtighten the #10 x 3/4" Screws (6) or the 5/16" x 2" Screws (2). 6 2 8 Orient the Pulse Crossbar (80) as shown. Attach the Pulse Crossbar with two of the 5/16" x 2" Screws (2) that you removed in step 3, two 5/16" Star Washers (8), and two #10 x 3/4" Screws (6). Start all four Screws, and then tighten them. Then, tighten the other two 5/16" x 2" Screws (2). 6 2 80 2 6 8 2 7. With the help of a second person, hold the console assembly (C) near the Handrails (74). 7 See the inset drawing. Connect the Upright Wire (83) to the console wire (F). The connec- tors should slide together easily and snap into place. If they do not, turn one connector and try again. IF YOU DO NOT CONNECT THE CONNECTORS PROPERLY, THE CONSOLE C MAY BECOME DAMAGED WHEN YOU TURN ON THE POWER. Then, remove any wire ties from the Upright Wire. F 83 F 83 12
-
 1
1 -
2
-
3
-
4
-
5
-
6
-
 7
7 -
 8
8 -
 9
9 -
 10
10 -
 11
11 -
 12
12 -
 13
13 -
 14
14 -
 15
15 -
 16
16 -
 17
17 -
18
-
19
-
20
-
21
-
22
-
23
-
24
-
25
-
26
-
27
-
28
-
29
-
30
-
31
-
32
-
33
-
34
-
35
-
36
-
37
-
38
-
39
-
40
 |
 |