NordicTrack T9.1 Instruction Manual
NordicTrack T9.1 Manual
 |
View all NordicTrack T9.1 manuals
Add to My Manuals
Save this manual to your list of manuals |
NordicTrack T9.1 manual content summary:
- NordicTrack T9.1 | Instruction Manual - Page 1
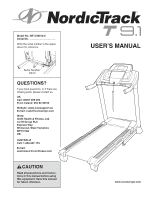
. c/o HI Group PLC Express Way Whitwood, West Yorkshire WF10 5QJ UK AUSTRALIA Call: 1-800-237-173 E-mail: [email protected] CAUTION Read all precautions and instructions in this manual before using this equipment. Save this manual for future reference. USERʼS MANUAL www.iconeurope.com - NordicTrack T9.1 | Instruction Manual - Page 2
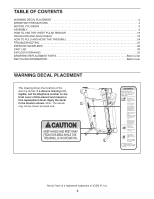
SENSOR 15 OPERATION AND ADJUSTMENT 16 HOW TO FOLD AND MOVE THE TREADMILL 24 TROUBLESHOOTING 25 EXERCISE GUIDELINES 28 PART LIST 30 EXPLODED or illegible, call the telephone number on the front cover of this manual and request a free replacement decal. Apply the decal in the location shown. - NordicTrack T9.1 | Instruction Manual - Page 3
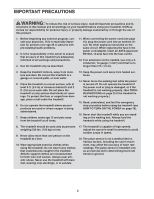
and in- structions in this manual and all warnings on your treadmill before using your treadmill. ICON assumes no responsibility for operate the treadmill if the power cord or plug is damaged, or if the treadmill is not working properly. (See TROUBLESHOOTING on page 25 if the treadmill is not - NordicTrack T9.1 | Instruction Manual - Page 4
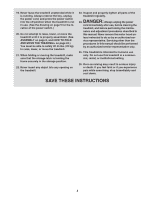
procedures described in this manual. Never remove the motor hood un- less instructed to do so by an authorized ser- vice representative. Servicing other than the procedures in this manual should be performed by an authorized service representative only. 25. This treadmill is intended for in - NordicTrack T9.1 | Instruction Manual - Page 5
NordicTrack® T 9.1 treadmill. The T 9.1 treadmill offers an impressive selection of features designed to make your workouts at home more enjoyable and effective. And when youʼre not exercising, the unique treadmill can be folded cover of this manual. Before reading further, please review the drawing - NordicTrack T9.1 | Instruction Manual - Page 6
walking belt or the shipping carton. This is normal and does not affect treadmill performance. If there is lubricant on top of the walking belt, simply wipe number of the part, from the PART LIST near the end of this manual. The number after the parentheses is the quantity needed for assembly. Note: - NordicTrack T9.1 | Instruction Manual - Page 7
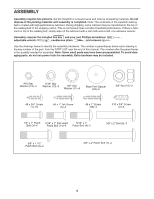
the shipping brackets. A 8 10 2. With the help of a second person, carefully tip the treadmill onto its left side. Partially fold the 2 Frame (55) so that the treadmill is more stable; do not fully fold the Frame yet. Remove and discard the two indicated bolts (B) and the shipping bracket - NordicTrack T9.1 | Instruction Manual - Page 8
3. Attach a Wheel (96) to the Base (95) with the 3/8" x 2" Bolt (8) and the 3/8" Nut (10) that you 3 removed in step 1. Do not overtighten the Nut; the Wheel must turn freely. Press a Base Cap (89) into the Base (95). 8 95 96 10 4. Identify the Right Upright (85), which is marked 4 with a " - NordicTrack T9.1 | Instruction Manual - Page 9
6. With the help of a second person, carefully tip the treadmill onto its right side. Partially fold the 6 Frame (55) so that the treadmill is more stable; do not fully fold the Frame yet. Remove and discard the two indicated bolts (B) B and the shipping bracket (C). Attach a Wheel (96) to - NordicTrack T9.1 | Instruction Manual - Page 10
8. Identify the Left Base Cover (88) and the Right Base Cover (91). Slide the Left Base Cover onto 8 the Left Upright (84) and the Right Base Cover 84 onto the Right Upright (85). 88 85 91 9. Identify the Left Upright Cover (80). Slide the Left Upright Cover onto the Left Upright (84). 9 - NordicTrack T9.1 | Instruction Manual - Page 11
10. Slide the Right Upright Cover (86) onto the Right Upright (85). Remove the tie from the bracket on the Right Handrail (83). If necessary, press the 5/16" Cage Nut (38) back into place. Hold the Right Handrail (83) near the Right Upright (85). Insert the Upright Wire (87) through the bracket on - NordicTrack T9.1 | Instruction Manual - Page 12
12. IMPORTANT: To avoid damaging the Crossbar (107), do not use power tools and 12 do not overtighten the #10 x 3/4" Screws (2). First 102 Orient the Crossbar (107) as shown. Attach the Crossbar to the Handrails (82, 83) with four #10 29 12 x 3/4" Screws (2) and four #10 Star Washers (12); - NordicTrack T9.1 | Instruction Manual - Page 13
14. Set the console assembly on the Left and Right Handrails (82, 83). Be careful not to pinch any wires. Insert the excess Upright Wire (87) into the Right Handrail. Attach the console assembly to the Crossbar (107) with six #8 x 3/4" Screws (1). Start all six Screws, and then tighten each of them. - NordicTrack T9.1 | Instruction Manual - Page 14
necessary to move the Frame back and forth to align the Storage Latch with the bracket. Lower the Frame (55) (see HOW TO LOWER THE TREADMILL FOR USE on page 24). 16 55 10 8 Latch Knob 51 Large Barrel 6 95 10 8 17. Make sure that all parts are properly tightened before - NordicTrack T9.1 | Instruction Manual - Page 15
electrode areas are dried. If the chest pulse sensor is not dried after each use, it TROUBLESHOOTING The instructions on the following pages explain how the chest pulse sensor is used with the console. If the sources. If it is suspected that this is a problem, try relocating the treadmill. 15 - NordicTrack T9.1 | Instruction Manual - Page 16
OPERATION AND ADJUSTMENT THE PRE-LUBRICATED WALKING BELT Your treadmill features a walking belt coated with highperformance lubricant. IMPORTANT: Never apply silicone spray or other substances to the walking belt or the walking platform. Such substances - NordicTrack T9.1 | Instruction Manual - Page 17
and incline of the treadmill as it guides you through an effective instructions in this section refer to metric measurements. The console also features an iFit Live mode that enables the treadmill the telephone number on the front cover of this manual. IMPORTANT: If there are sheets of plastic on - NordicTrack T9.1 | Instruction Manual - Page 18
gradually adjust to the selected incline setting. 5. Follow your progress with the displays. As you walk or run on the treadmill, the display can show the following workout information: HOW TO USE THE MANUAL MODE 1. Insert the key into the console. See HOW TO TURN ON THE POWER above. 2. Select the - NordicTrack T9.1 | Instruction Manual - Page 19
. Step onto the foot rails, press the Stop button, and adjust the incline of the treadmill to the lowest setting. The incline must be at the lowest setting or you may damage the treadmill when you fold it to the storage position. Next, remove the key from the console and put it in - NordicTrack T9.1 | Instruction Manual - Page 20
different speed and/or incline setting is programmed for the next segment, the treadmill will automatically adjust to the new speed and/or incline setting. Note: If In addition, if you manually change the speed or incline of the treadmill during the workout, the number of calories you burn will - NordicTrack T9.1 | Instruction Manual - Page 21
can manually override the setting by pressing the Speed or Incline buttons; however, when the next segment of the workout begins, the treadmill will an 802.11b router with SSID broadcast enabled (hidden networks are not supported). 3. Select a user. If more than one user is registered, - NordicTrack T9.1 | Instruction Manual - Page 22
.iFit.com. During some workouts, the voice of a personal trainer will guide you through your workout. You can select an audio setting for your personal of the workout. When the next segment of the workout begins, the treadmill will automatically adjust to the speed and incline settings for the next - NordicTrack T9.1 | Instruction Manual - Page 23
button. The console features a display demo mode, designed to be used if the treadmill is displayed in a store. While the demo mode is turned on, the console press the Home button. Press the Enter button repeatedly to select the manual main screen or the iFit Live main screen as the default menu. If - NordicTrack T9.1 | Instruction Manual - Page 24
arrow below. CAUTION: Do not hold the frame by the plastic foot rails. Bend your legs and keep your back straight. HOW TO MOVE THE TREADMILL Before moving the treadmill, fold it as described at the left. CAUTION: Make sure that the latch knob is locked in the storage position. Moving the - NordicTrack T9.1 | Instruction Manual - Page 25
TROUBLESHOOTING Most treadmill problems can be solved by following the simple steps below. Find the symptom that applies, and follow the steps listed. If further assistance is needed, see the front cover of this manual. PROBLEM: The power does not turn on SOLUTION: a. Make sure that the power - NordicTrack T9.1 | Instruction Manual - Page 26
treadmill for a few Top View minutes to check for a correct speed reading. PROBLEM: The incline of the treadmill The treadmill will from the console. PROBLEM: The walking belt walking belt is overtightened, treadmill performance may decrease and key, and run the treadmill for a few minutes. - NordicTrack T9.1 | Instruction Manual - Page 27
PROBLEM: The walking belt is off-center or slips when walked on SOLUTION: Be careful not to overtighten the walking belt. Then, plug in the power cord, insert the key, and run the treadmill for a few minutes. Repeat until the walking belt is centered. b. If the walking belt slips when walked on, - NordicTrack T9.1 | Instruction Manual - Page 28
important for persons over age 35 or persons with pre-existing health problems. The pulse sensor is not a medical device. Various factors may affect key to achieving results. You can use your heart rate as a guide to find the proper intensity level. The chart below shows recommended heart rates - NordicTrack T9.1 | Instruction Manual - Page 29
SUGGESTED STRETCHES The correct form for several basic stretches is shown at the right. Move slowly as you stretch-never bounce. 1. Toe Touch Stretch Stand with your knees bent slightly and slowly bend forward from 1 your hips. Allow your back and shoulders to relax as you reach down toward - NordicTrack T9.1 | Instruction Manual - Page 30
-Model No. NETL99810.0 To locate the parts listed below, see the EXPLODED DRAWING near the end of this manual. Key No. Qty. 1 33 2 4 3 2 4 2 5 4 6 1 7 4 8 Decal Left Foot Rail Latch Warning Decal Platform Cushion Belt Guide Walking Platform Frame Cap Frame Spacer Magnet Front Roller/ - NordicTrack T9.1 | Instruction Manual - Page 31
112 2 113 1 114 1 115 1 116 4 * - Filter Transformer Motor Bushing Motor Isolator Power Cord Adapter Chest Pulse Strap #8 x 1/2" Module Screw Userʼs Manual Note: Specifications are subject to change without notice. For information about ordering replacement parts, see the back cover of this - NordicTrack T9.1 | Instruction Manual - Page 32
EXPLODED DRAWING A-Model No. NETL99810.0 R0810A 32 30 39 40 30 30 42 18 41 18 28 21 19 56 34 60 33 24 36 59 18 24 61 19 28 33 34 30 43 20 36 32 18 44 21 56 36 57 58 18 55 30 45 46 47 48 49 18 30 54 23 20 36 43 32 30 18 42 18 46 45 30 39 10 6 51 10 10 8 8 8 - NordicTrack T9.1 | Instruction Manual - Page 33
EXPLODED DRAWING B-Model No. NETL99810.0 1 R0810A 37 1 63 64 22 66 37 1 37 62 112 31 72 111 28 68 28 28 28 28 109 113 28 110 67 73 76 18 74 28 65 15 15 22 15 78 79 15 75 77 28 114 69 71 70 33 - NordicTrack T9.1 | Instruction Manual - Page 34
EXPLODED DRAWING C-Model No. NETL99810.0 9 80 82 14 81 13 14 84 81 38 9 83 1 38 86 87 3 11 7 14 4 13 88 R0810A 89 11 35 85 27 92 95 90 8 5 25 94 96 10 90 5 97 35 93 26 35 10 87 92 27 35 89 90 5 98 96 94 91 8 90 5 34 11 3 11 7 - NordicTrack T9.1 | Instruction Manual - Page 35
EXPLODED DRAWING D-Model No. NETL99810.0 R0810A 103 1 101 1 102 100 105 17 99 106 1 1 105 53 1 53 1 116 1 1 1 1 2 12 107 1 108 1 52 29 116 104 50 1 1 1 2 12 1 1 1 35 115 16 - NordicTrack T9.1 | Instruction Manual - Page 36
) • the key number and description of the replacement part(s) (see the PART LIST and the EXPLODED DRAWING near the end of this manual) RECYCLING INFORMATION This electronic product must not be disposed of in municipal waste. To preserve the environment, this product must be recycled after its useful
-
 1
1 -
 2
2 -
 3
3 -
 4
4 -
 5
5 -
 6
6 -
 7
7 -
8
-
9
-
10
-
11
-
12
-
13
-
14
-
15
-
16
-
17
-
18
-
19
-
20
-
21
-
22
-
23
-
24
-
25
-
26
-
27
-
28
-
29
-
30
-
31
-
32
-
33
-
34
-
35
-
36
 |
 |
Serial Number
Decal
Model No. NETL99810.0
Serial No.
Write the serial number in the space
above for reference.
CAUTION
Read all precautions and instruc-
tions in this manual before using
this equipment. Save this manual
for future reference.
QUESTIONS?
If you have questions, or if there are
missing parts, please contact us:
UK
Call: 08457 089 009
From Ireland: 053 92 36102
Website: www.iconsupport.eu
E-mail: [email protected]
Write:
ICON Health & Fitness, Ltd.
c/o HI Group PLC
Express Way
Whitwood, West Yorkshire
WF10 5QJ
UK
AUSTRALIA
Call: 1-800-237-173
E-mail:
USERʼS MANUAL
www.iconeurope.com