Oki B6100 B6100 User's Guide - Page 32
either Windows 95 or Windows 98 \Software\USB\Win95 or \Software\USB\Win98
 |
View all Oki B6100 manuals
Add to My Manuals
Save this manual to your list of manuals |
Page 32 highlights
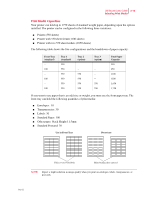
2-8 Oki B6100 User Guide Connecting the Printer to the Host Computer Installation for Windows Use the following procedure to install USB for Windows: 1. Verify that your system supports USB and has an available USB connector. If you do not have an available connector, you may need to purchase a USB hub. NOTE: You may use an unpowered USB hub, since the printer is considered a self-powered device and will not draw power from the USB port. 2. Power on the host system and the printer and allow the two systems to finish booting. 3. Attach the USB cable to both the printer and the host. It does not matter which host connector you attach the cable to; however, make sure you always attach it to the same connector. NOTE: The USB printer port created is associated with the actual port to which the device is attached. If the printer is attached to a different hardware port, a new USB printer port will be created, even though it is attached to the same printer. The maximum length of a USB cable is 16 feet (5 meters). Longer distances may be spanned if intervening hubs are used. There is a limit of 5 hubs between the host and any given device, giving a maximum distance of 98 feet (30 meters). 4. Windows displays a dialog box stating that new hardware has been found and Windows is searching for a driver. 5. Browse to the location of the USB port software and select the appropriate version for either Windows 95 or Windows 98 (\Software\USB\Win95 or \Software\USB\Win98 on your CD-ROM or the location where you expanded the driver files). 6. Windows creates a GNUSBn printer port. 7. At this point, you may install the printer normally, either by using the "Add Printer" wizard or by running the appropriate setup program, or your system may announce that "New Hardware has been found." In either case, install the driver required for your printer at this time. 8. After the printer has been installed, make sure that it prints to the GNUSBn port. 9. Ensure that the Spooler settings for the printer have "Disable bi-directional support for this printer" checked. 10. Your USB printer is now ready to print. Oct 02
-
 1
1 -
2
-
3
-
4
-
5
-
6
-
7
-
8
-
9
-
10
-
11
-
12
-
13
-
14
-
15
-
16
-
17
-
18
-
19
-
20
-
21
-
22
-
23
-
24
-
25
-
26
-
 27
27 -
 28
28 -
 29
29 -
 30
30 -
 31
31 -
 32
32 -
 33
33 -
 34
34 -
 35
35 -
 36
36 -
 37
37 -
38
-
39
-
40
-
41
-
42
-
43
-
44
-
45
-
46
-
47
-
48
-
49
-
50
-
51
-
52
-
53
-
54
-
55
-
56
-
57
-
58
-
59
-
60
-
61
-
62
-
63
-
64
-
65
-
66
-
67
-
68
-
69
-
70
-
71
-
72
-
73
-
74
-
75
-
76
-
77
-
78
-
79
-
80
-
81
-
82
-
83
-
84
-
85
-
86
-
87
-
88
-
89
-
90
-
91
-
92
-
93
-
94
-
95
-
96
-
97
-
98
-
99
-
100
-
101
-
102
-
103
-
104
-
105
-
106
-
107
-
108
-
109
-
110
-
111
-
112
-
113
-
114
-
115
-
116
-
117
-
118
-
119
-
120
-
121
-
122
-
123
-
124
-
125
-
126
-
127
-
128
-
129
-
130
-
131
-
132
-
133
-
134
-
135
-
136
-
137
-
138
-
139
-
140
-
141
-
142
-
143
-
144
-
145
-
146
-
147
-
148
-
149
-
150
-
151
-
152
-
153
-
154
-
155
-
156
-
157
-
158
-
159
-
160
-
161
-
162
-
163
-
164
-
165
-
166
-
167
-
168
-
169
-
170
-
171
-
172
-
173
-
174
-
175
-
176
-
177
-
178
-
179
-
180
-
181
-
182
-
183
-
184
-
185
-
186
-
187
-
188
-
189
-
190
-
191
-
192
-
193
-
194
-
195
-
196
-
197
-
198
-
199
-
200
-
201
-
202
-
203
-
204
-
205
-
206
-
207
-
208
-
209
-
210
 |
 |