Oki B6200n B6200/6300 Series Setup Guide - English - Page 26
Installing A Network Software Kit, Hard, Disk, Compact Flash Disk, Or Additional, Memory
 |
View all Oki B6200n manuals
Add to My Manuals
Save this manual to your list of manuals |
Page 26 highlights
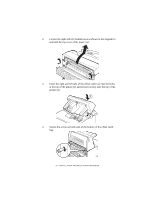
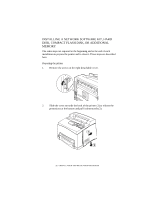
INSTALLING A NETWORK SOFTWARE KIT, HARD DISK, COMPACT FLASH DISK, OR ADDITIONAL MEMORY The same steps are required at the beginning and at the end of each installation to prepare the printer and to close it. These steps are described here. Preparing the printer 1. Remove the screw on the right detachable cover. 2. Slide the cover towards the back of the printer (1) to release the protrusions at the bottom and pull it downwards (2). 26 > INSTALLATION AND RELOCATION PROCEDURE
-
 1
1 -
2
-
3
-
4
-
5
-
6
-
7
-
8
-
9
-
10
-
11
-
12
-
13
-
14
-
15
-
16
-
17
-
18
-
19
-
20
-
 21
21 -
 22
22 -
 23
23 -
 24
24 -
 25
25 -
 26
26 -
 27
27 -
 28
28 -
 29
29 -
 30
30 -
 31
31 -
32
-
33
-
34
-
35
-
36
-
37
-
38
-
39
-
40
-
41
-
42
-
43
-
44
-
45
-
46
-
47
-
48
-
49
-
50
-
51
-
52
-
53
-
54
-
55
-
56
-
57
-
58
-
59
-
60
-
61
-
62
-
63
-
64
-
65
-
66
 |
 |
26 > INSTALLATION AND RELOCATION PROCEDURE
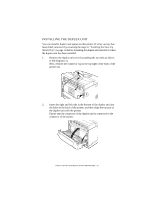
INSTALLING A NETWORK SOFTWARE KIT, HARD
DISK, COMPACT FLASH DISK, OR ADDITIONAL
MEMORY
The same steps are required at the beginning and at the end of each
installation to prepare the printer and to close it. These steps are described
here.
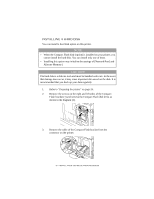
Preparing the printer
1.
Remove the screw on the right detachable cover.
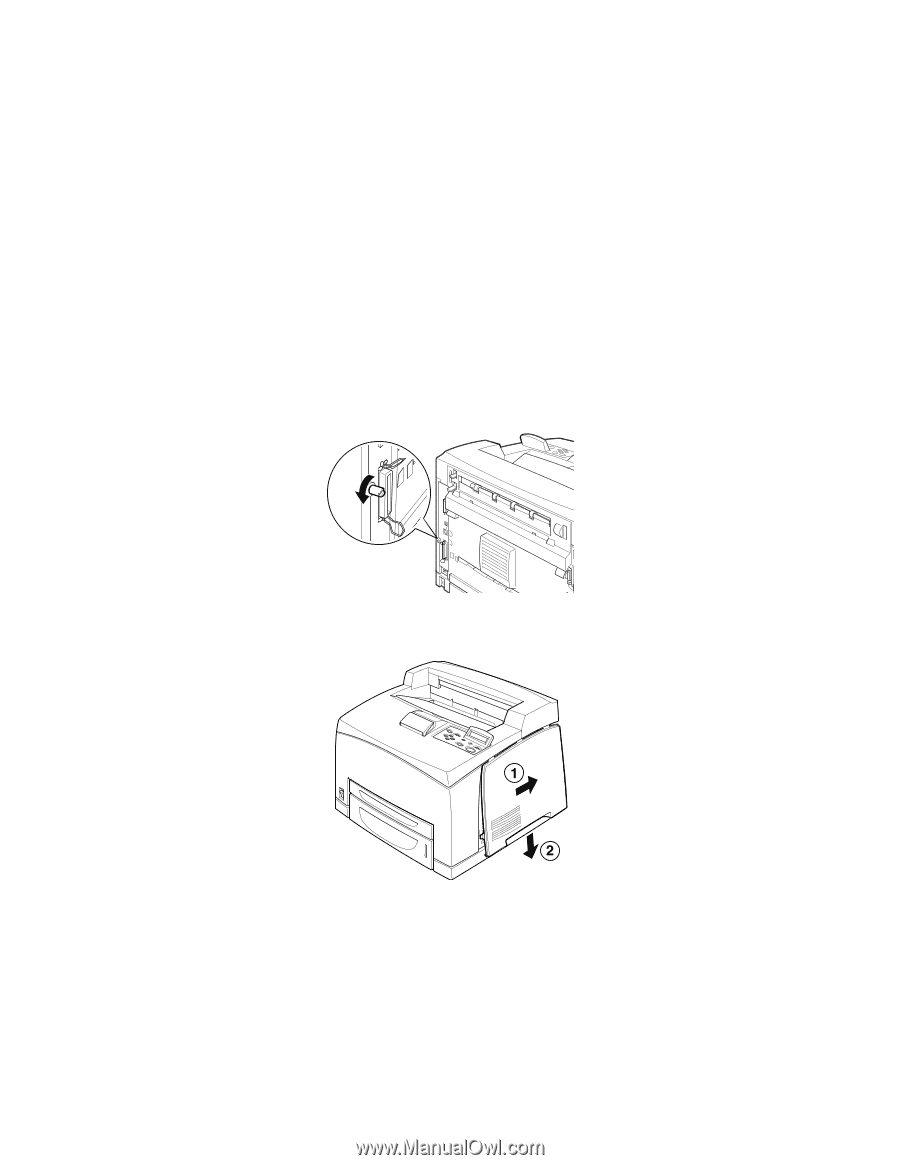
2.
Slide the cover towards the back of the printer (1) to release the
protrusions at the bottom and pull it downwards (2).