Oki ML591 Cut Sheet Feeder Instructions for ML 5500 Series Printers - Page 1
Oki ML591 Manual
 |
View all Oki ML591 manuals
Add to My Manuals
Save this manual to your list of manuals |
Page 1 highlights
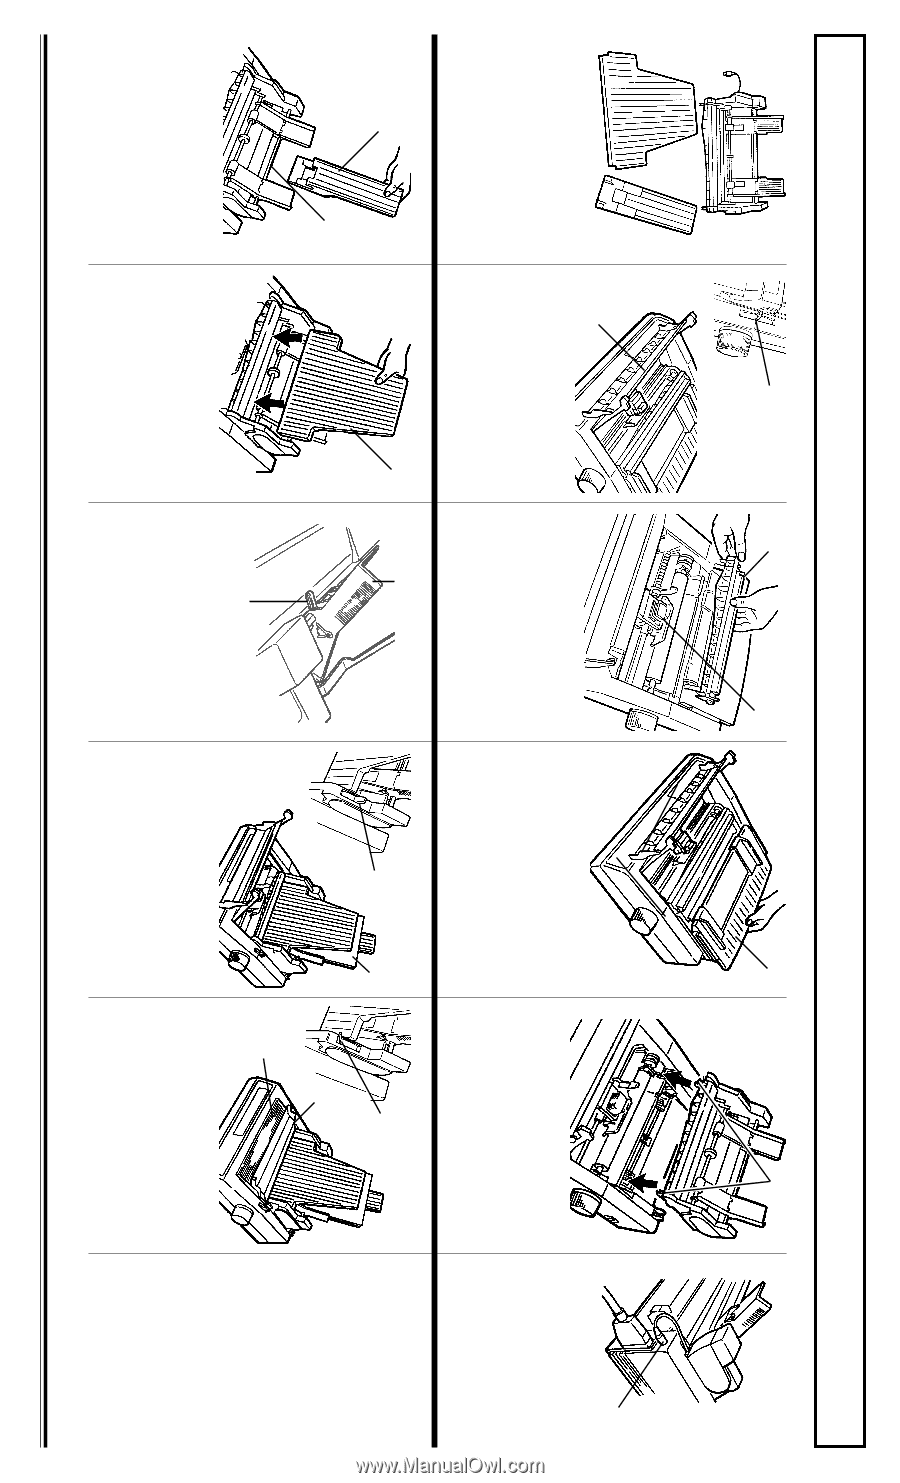
Cut Sheet Feeder (CSF) Instructions for ML 520/521/590/591 Printers 1 2 1 1 1 1 2 3 1 2 2 The Cut Sheet Feeder includes the CSF unit (1), receive tray (2) and sheet support (3). When it is installed, you can still quickly and easily switch to the continuous feed path at any time. 1 Turn off printer and move the paper lever to postion "TOP" (1). Then open the access cover (2). Caution! The printhead may be HOT! 2 Center the printhead (1) on the platen, then grasp the pull-up roller assembly (2) and pivot it back to remove it. 3 Remove paper separator (1) and set it aside for storage. 1 4 Hook the CSF brackets (1) over the ends of the platen; push firmly into place. 5 Plug the CSF interface cable into the DIN receptacle on the back of the rinter (1), making sure arrow on plug lines up with arrow on printer. 1 2 1 2 1 2 1 3 2 1 6 Install the sheet support (1) for the feed bin-ribbed side facing the front of the printer- on the square rod (2) at the back. 7 Slide the receive tray (1)- ribbed side facing front of printer-into the channels behind the metal frame. 8 Pull down the lock levers (1) on the back of the CSF and set the guides (2) to the correct position for the width of the paper you'll be using. Push the levers back up to lock them. 9 Push the CSF paper lever back to the RESET position (1) and place a stack of paper in the feed bin (2). The CSF holds up to 100 sheets of 20-lb paper. 10 Pull the CSF paper lever forward to the SET position (1), then close the access cover (2), leaving the carriage cover (3) open. 11 Turn on the printer (the printhead travels back and forth, and the SEL and POWER lights come on) and set the Top of Form (see the back of this sheet). Oki Data Americas, Inc., 2000 Bishops Gate Blvd., Mt. Laurel, NJ 08054-4620 TEL: (856) 235-2600 FAX: (856) 778-4184 www.okidata.com © 1992, 2001 by Okidata 58087102
-
 1
1 -
 2
2
 |
 |