Olympus FE 120 FE-120 Advanced Manual (English)
Olympus FE 120 - Digital Camera - 6.0 Megapixel Manual
 |
UPC - 050332156029
View all Olympus FE 120 manuals
Add to My Manuals
Save this manual to your list of manuals |
Olympus FE 120 manual content summary:
- Olympus FE 120 | FE-120 Advanced Manual (English) - Page 1
DIGITAL CAMERA FE-120 X-700 Advanced Manual Detailed explanations of all the functions for getting the most out of your camera. Basic Operation Shooting Playing Back Printing Online Pictures Camera Settings Troubleshooting Thank you for purchasing an Olympus digital camera. Before you start to - Olympus FE 120 | FE-120 Advanced Manual (English) - Page 2
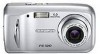
How to use this manual (Basic and Advanced Manuals The instruction manual accompanying this camera is divided into two parts: the Basic Manual and the Advanced Manual (this document). Basic Manual This manual helps you get used to the camera. It gives you easy-tofollow explanations on how to - Olympus FE 120 | FE-120 Advanced Manual (English) - Page 3
manual You'll find important points for getting the most out of your camera here. Read this part before taking pictures. Explanations of techniques from basics to advanced . To use OLYMPUS Master. Printing pictures P. 77 7 Connecting the camera to a computer P. 91 8 Troubleshooting. For when - Olympus FE 120 | FE-120 Advanced Manual (English) - Page 4
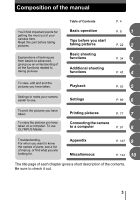
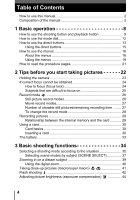
you start taking pictures 22 Holding the camera 23 If correct focus cannot be obtained 24 How to focus (focus lock 24 Subjects that are difficult to focus Relationship between the internal memory and the card 29 Using a card 30 Card basics 30 Inserting a card 30 The battery 33 3 Basic - Olympus FE 120 | FE-120 Advanced Manual (English) - Page 5
detailed shooting information 64 Protecting pictures 64 Copying pictures to a card (BACKUP 65 Erasing pictures 66 Single-frame erase 66 All-frame erase 67 Formatting 68 6 Settings 69 Saving camera settings (ALL RESET 70 Changing the display language 71 Selecting - Olympus FE 120 | FE-120 Advanced Manual (English) - Page 6
101 Viewing still pictures and movies 103 Printing pictures 104 To download and save images to a computer without using OLYMPUS Master 106 9 Appendix 107 Troubleshooting 108 Error codes 108 Troubleshooting 110 Camera care 116 AC adapter (optional 117 Safety Precautions 118 Glossary of - Olympus FE 120 | FE-120 Advanced Manual (English) - Page 7
Table of Contents 10 Miscellaneous 124 Menu list 125 List of factory default settings 129 Modes and shooting functions 130 Names of parts 131 Camera 131 Monitor indications 133 Index 136 7 - Olympus FE 120 | FE-120 Advanced Manual (English) - Page 8
many attractive functions, you are unable to use them confidently? Now all you have to do is simply press the buttons on your digital camera. By setting the menus, you can easily do things like adjust the coloration of your picture or select the picture that is displayed at power - Olympus FE 120 | FE-120 Advanced Manual (English) - Page 9
. You are ready to take pictures. POWER switch (The monitor turns on. (The lens extends. # Shooting button ( ) $ Playback button ( ) To turn the camera off → Press the POWER switch. The lens retracts, and the monitor turns off. To enable playback mode → Press $. The lens remains extended, and - Olympus FE 120 | FE-120 Advanced Manual (English) - Page 10
is displayed on the monitor. POWER switch (The monitor turns on. (The lens is retracted. # Shooting button ( ) $ Playback button ( ) To turn the camera off → Press the POWER switch. Or else, press $. The monitor turns off. To enable shooting mode → Press #. The lens extends, and shooting mode - Olympus FE 120 | FE-120 Advanced Manual (English) - Page 11
on the monitor. Press #. '05.08.30 15:30 5 • The last picture taken is displayed on the monitor. Shooting mode/Playback mode notation In this manual, the following icons indicate the camera mode necessary for using functions. Indicates shooting mode Indicates playback mode 11 - Olympus FE 120 | FE-120 Advanced Manual (English) - Page 12
"Selecting a shooting mode according to the situation" (P. 35). • You can change the mode dial before and after turning the camera on. Mode dial notation In this manual, the following icons indicate the mode dial position for using shooting mode functions. This indicates that the function is used - Olympus FE 120 | FE-120 Advanced Manual (English) - Page 13
Basic operation How to use the direct buttons The buttons that can be used in shooting mode and playback mode differ. (Shooting mode c 1 d h c $ (Playback) button Enables playback mode d Zoom button W : For wide-angle photography T : For telephoto photography e a& (Macro) button Enables macro - Olympus FE 120 | FE-120 Advanced Manual (English) - Page 14
Basic operation How to use the direct buttons (Playback mode c 1 e d c # (Shooting) button Enables shooting mode d S (Erase) button Erases pictures displayed on the monitor e Zoom button G : For index display U : For close-up playback gP. 11 gP. 66 gP. 54 14 - Olympus FE 120 | FE-120 Advanced Manual (English) - Page 15
mode. • The flash mode selection screen is displayed. FLASH MODE AUTO The flash fires automatically in low light. Current setting SELECT GO OK Operation guide 2 Press ac to select the flash mode. FLASH MODE AUTO Thisfunctionreducesred-eye. Selected setting SELECT GO OK 3 Press Z. • The - Olympus FE 120 | FE-120 Advanced Manual (English) - Page 16
the menus The menu is displayed on the monitor when Z is pressed in shooting mode or playback mode. This menu is used to make all camera settings. 1 Press Z. About the menus The menu items displayed in shooting mode and playback mode differ. Top menu Menus are divided into shortcut menus and - Olympus FE 120 | FE-120 Advanced Manual (English) - Page 17
operation Shortcut menus P f / k j z l i mode (for still pictures) j MODE MENU SCENE SELECT gP. 48 gP. 37 gP. 26 How to use the menus 1 n mode (for movies) DIGITAL ZOOM MODE MENU WB gP. 40 gP. 46 gP. 26 Still picture Movie m INFO MODE MENU 0 gP. 56 gP. 64 gP. 64 MOVIE PLAY INFO - Olympus FE 120 | FE-120 Advanced Manual (English) - Page 18
SET MEM EDIT PLAY How to use the menus Mode menu 1 CAMERA tab PICTURE tab MEMORY/ CARD tab SETUP tab DIGITAL ZOOM OFF PANORAMA 2 IN 1 PLAY tab EDIT tab MEMORY/ CARD tab SETUP tab y 0 < CAMERA For setting shooting- tab related functions. PLAY tab For rotating pictures and making print - Olympus FE 120 | FE-120 Advanced Manual (English) - Page 19
TIPS • The [MEMORY] tab is displayed when using the internal memory and the [CARD] tab is displayed when a card is inserted in the camera. • Menu arrow pad and Z to select and set menu items. Follow the operation guide and arrows on the screen to select and make settings. This section explains - Olympus FE 120 | FE-120 Advanced Manual (English) - Page 20
FILE NAME ON ENGLISH 1 ON RESET ALL RESET PW ON SETUP REC VIEW FILE NAME RESET AUTO SETUP MEM PIC CAM Menu notation In this manual, procedures for using the menus are expressed as follows. • Ex: Steps 1 to 5 of making the [FILE NAME] setting Top menu [MODE MENU] [SETUP] [FILE NAME - Olympus FE 120 | FE-120 Advanced Manual (English) - Page 21
the menus" (P. 19), "Menu notation" (P. 20) (Procedures differ for h and n modes. (Available languages vary depending on the area where you purchased this camera. g"Changing the display language" (P. 71) (Set the mode dial to one of these symbols. g"Mode dial notation" (P. 12) This sample page is - Olympus FE 120 | FE-120 Advanced Manual (English) - Page 22
to press or which setting to change can help you solve these problems. And did you know that by selecting an image size according to how you plan to use the pictures afterwards, you can store more pictures on the memory card? These are just some of the hints provided in this chapter - Olympus FE 120 | FE-120 Advanced Manual (English) - Page 23
firmly with both hands while keeping your elbows at your sides. When taking pictures with the camera in the vertical position, hold the camera so that the flash is positioned higher than the lens. Keep your fingers and the strap away from the lens and flash. Horizontal grip Vertical - Olympus FE 120 | FE-120 Advanced Manual (English) - Page 24
a hard-to-focus or fastmoving subject, focus the camera on an object about the same distance away as the subject. P HQ 2816 2112 5 2 Press the shutter button halfway until the green lamp lights. AF target mark • When the focus and exposure are locked, the green lamp lights. • When the green - Olympus FE 120 | FE-120 Advanced Manual (English) - Page 25
on 2 Under certain types of conditions, the auto focus may not work properly. The green lamp blinks. The subject cannot be brought into focus hold the camera vertically and focus the camera using the focus lock function by pressing the shutter button halfway, then return the camera to the - Olympus FE 120 | FE-120 Advanced Manual (English) - Page 26
record mode for your purpose (printing, editing on a computer, website editing, etc.). For information on the image sizes for each record mode and memory capacity, see the table on P. 27. Still picture record modes 2 Record mode depicts the image size and compression rate of pictures you wish to - Olympus FE 120 | FE-120 Advanced Manual (English) - Page 27
331 Movies Record mode HQ SQ Image size 320 × 240 (30 frames/sec.) 320 × 240 (15 frames/sec.) Remaining recording time (sec.) Internal memory Card (Using a 32 MB card) 21 sec. 48 sec. 42 sec. 96 sec. P HQ 2816 2112 5 Number of storable still pictures HQ 00:15 Remaining recording time - Olympus FE 120 | FE-120 Advanced Manual (English) - Page 28
240 30fps SQ 320 240 15fps GO OK For movies TIPS • To save the selected picture quality mode for the next time you use the camera, set [ALL RESET] to [OFF]. g "Saving camera settings (ALL RESET)" (P. 70) 28 - Olympus FE 120 | FE-120 Advanced Manual (English) - Page 29
pictures Pictures taken are stored in the internal memory. You can also use an xD-Picture Card (referred to as "card" in this manual) to store pictures. The card has greater capacity than the internal memory, and so is able to store more pictures. The card is convenient, for example, when you are - Olympus FE 120 | FE-120 Advanced Manual (English) - Page 30
. d Contact area The part where the data transferred from the camera c enters the card. d Compatible cards • xD-Picture Card (16 MB to 1 GB) Note • This camera may not recognize a non-Olympus card or a card that was formatted on another device (computer, etc.). Before use, be sure to format - Olympus FE 120 | FE-120 Advanced Manual (English) - Page 31
you start taking pictures 2 Open the card cover. 3 Open the card lock. Using a card Card cover 2 (Inserting the card 4 Orient the card as shown, and insert it into the card slot as shown in the illustration. • Insert the card while keeping it straight. • The card stops with a click when it is - Olympus FE 120 | FE-120 Advanced Manual (English) - Page 32
release slowly. • The card protrudes slightly and stops. 2 Caution Releasing your finger quickly after pushing the card all the way in may cause it to eject forcefully out of the slot. • Grasp the card and remove. 5 Close the card lock. • Close the card lock or else the card cover does not - Olympus FE 120 | FE-120 Advanced Manual (English) - Page 33
purchase. Charge the batteries with the battery charger specified by Olympus before use. For details, refer to the instruction manual for your charger. This camera uses two NiMH batteries. (Lithium battery pack (CR-V3) The Olympus CR-V3 lithium battery pack has a long service life allowing you to - Olympus FE 120 | FE-120 Advanced Manual (English) - Page 34
according to the subject. With a digital camera, you don't need to learn how to make difficult settings. Your camera will adjust the settings for you! a landscape, a night scene, a portrait-style image or whatever, and the camera will set the best exposure and white balance. There's nothing to it - - Olympus FE 120 | FE-120 Advanced Manual (English) - Page 35
vividly reproduced in this mode, it is excellent for shooting natural scenery. z Night Scene* Suitable for shooting pictures in the evening or at night. The camera sets a slower shutter speed than is used in normal shooting. For example, if you take a picture of a street at night in P mode, the lack - Olympus FE 120 | FE-120 Advanced Manual (English) - Page 36
at night. Since the shutter speed is slow, make sure that you stabilize the camera by using a tripod. f 3 This function allows you to select from 10 subject (SCENE SELECT)" (P. 37) n Movie Records movies. The camera automatically maintains the focus and exposure even when the distance to the - Olympus FE 120 | FE-120 Advanced Manual (English) - Page 37
the shutter button. (Scene modes o Self Portrait 3 Lets you take pictures of yourself while holding the camera. As the camera is set to focus on a subject that is close, the zoom is locked to wide-angle, and cannot be changed. H Indoor Optimum for taking pictures of gatherings. This mode reproduces - Olympus FE 120 | FE-120 Advanced Manual (English) - Page 38
Light Portrait* This mode lets you take pictures in low light without using the flash. Since the shutter speed is slow, stabilize the camera before taking pictures. * Noise reduction is automatically enabled when the subject is dark. Processing time between shots is doubled and you cannot take - Olympus FE 120 | FE-120 Advanced Manual (English) - Page 39
resulting picture will be. The following zoom magnifications are available on this camera. Optical zoom 3× (equivalent to 38 mm to 114 mm on a 35 mm camera) 3 Optical zoom × digital zoom Max. 12× Note that camera movement is likely to occur at higher magnifications. 1 Press the zoom button - Olympus FE 120 | FE-120 Advanced Manual (English) - Page 40
a distant subject Using the digital zoom To use the digital zoom, set [DIGITAL ZOOM] to [ON]. Top menu [MODE MENU] [CAMERA] [DIGITAL ZOOM] g"How to use the menus" (P. 16) • In : Top menu [DIGITAL ZOOM] 1 3 Select [ON], and press Z. 2 Press T on the zoom button. DIGITAL ZOOM OFF PANORAMA ON - Olympus FE 120 | FE-120 Advanced Manual (English) - Page 41
Basic shooting functions Taking close-up pictures (macro/ super macro) Focusing is usually slow when you get close to a subject (wide-angle: 20 cm/7.9" to 50 cm/19.7"; telephoto: 60 cm/23.6" to 90 cm/35.4"). However, in macro mode focusing is performed quickly. & This mode lets you shoot from as - Olympus FE 120 | FE-120 Advanced Manual (English) - Page 42
the flash mode best suited to the light conditions and the effect you want to achieve. Flash working range W (max.): Approx. 0.2 m to 3.7 m (0.7 ft. to 12.1 ft.) it takes about 1 second before the shutter is released. Hold the camera firmly, and prevent it from moving. • Effectiveness may be limited - Olympus FE 120 | FE-120 Advanced Manual (English) - Page 43
Basic shooting functions Flash shooting 1 Press d#. • The flash mode settings screen is displayed. g"How to use the direct buttons" (P. 13) 2 Select a flash mode, and press Z. FLASH MODE AUTO The flash fires automatically in low light. 3 Press the shutter button halfway. • In conditions where - Olympus FE 120 | FE-120 Advanced Manual (English) - Page 44
adjust toward - when taking dark subjects. • In some situations, you may get better results when the exposure that the camera sets is compensated (adjusted) manually. Note • If the flash is used, the image brightness (exposure) may differ from the intended brightness. • Exposure compensation cannot - Olympus FE 120 | FE-120 Advanced Manual (English) - Page 45
Additional 4 Additional shooting functions shooting functions 4 At a sporting event... Use movie mode to capture thrilling action. Or use sequential shooting mode to take a succession of shots of a goal and pick out the best ones later. In the country or at a tourist spot... Use panorama mode to - Olympus FE 120 | FE-120 Advanced Manual (English) - Page 46
Additional shooting functions SET MEM PICTURE CAM Adjusting picture coloration The color of the subject differs depending on lighting conditions. For instance, when daylight, the setting sun, or tungsten lighting are reflected on white paper, the shade of white produced will be slightly different - Olympus FE 120 | FE-120 Advanced Manual (English) - Page 47
on the camera. During recording, the correct exposure is automatically maintained even if the subject moves, but the focus and zoom are locked. If the When there is space in the internal memory or card, the remaining recording time (P. 27) is displayed, and the camera is ready to shoot. Note • Audio - Olympus FE 120 | FE-120 Advanced Manual (English) - Page 48
pictures in succession. The focus, exposure, and white balance are locked at the first frame. Approx. 14 frames at 1.2 frames/sec sequential shooting. • If the battery power is low and the battery check blinks during sequential shooting, shooting stops and the camera starts saving the picture you - Olympus FE 120 | FE-120 Advanced Manual (English) - Page 49
function lets you take pictures using the self-timer. Fix the camera securely on a tripod for self-timer shooting. This function is shutter button fully to take the picture. • Pressing the shutter button halfway locks the focus and exposure. • The self-timer lamp lights for approximately 10 - Olympus FE 120 | FE-120 Advanced Manual (English) - Page 50
Olympus xDPicture Card. Panorama shooting lets you connect pictures with overlapping edges into a single panoramic picture, using the OLYMPUS Master software you 4 are connecting pictures from right to left). Top menu [MODE MENU] [CAMERA] [PANORAMA] g"How to use the menus" (P. 16) 1 Use the arrow - Olympus FE 120 | FE-120 Advanced Manual (English) - Page 51
used when there is a card in the camera. Moreover, panorama mode is only available with Olympus cards. • During panorama shooting, the flash and sequential shooting modes are not available. • The camera itself cannot connect panorama pictures. The OLYMPUS Master software is necessary to connect the - Olympus FE 120 | FE-120 Advanced Manual (English) - Page 52
The subject will be positioned on the right in the combined picture. • The [BUSY] bar is displayed during editing. After the image is saved, the camera returns to the mode menu. HQ 2816 2112 5 P 2nd HQ 2816 2112 5 Picture when shooting Note • When using two-in-one pictures, panorama mode and - Olympus FE 120 | FE-120 Advanced Manual (English) - Page 53
several pictures of the same scene because you weren't sure whether they would come out or not. That's no way to record important memories! With a digital camera, you can review your pictures immediately. Just play the picture back as soon as you've taken it. If you don't like what you see, erase - Olympus FE 120 | FE-120 Advanced Manual (English) - Page 54
Playing back still pictures When a card is in the camera, a picture from the card is displayed. To play back pictures from the internal memory, remove the card. 1 Press $. • The last picture taken is displayed on the monitor (single-frame playback). • Use the arrow pad to navigate between pictures. - Olympus FE 120 | FE-120 Advanced Manual (English) - Page 55
use the menus" (P. 16) 1 Select [4], [9], or [16], and press Z. X G 4 m SETUP 9 16 SETUP MEM EDIT PLAY 5 Picture rotation Pictures taken with the camera held vertically are displayed horizontally. This function lets you rotate such pictures 90° clockwise or counterclockwise so that they are - Olympus FE 120 | FE-120 Advanced Manual (English) - Page 56
is turned off. Slideshow This function displays still pictures stored in the internal memory or card one after another. Only the first frame of each movie is displayed. long period of time. When using batteries, the camera will enter sleep mode after about 30 minutes and stop the slideshow automatically - Olympus FE 120 | FE-120 Advanced Manual (English) - Page 57
format You can choose how the pictures go from one to the next during the slideshow. NORMAL Displays the pictures stored in the internal memory or card one at a time. SLIDE Displays the pictures by sliding the next picture over the previous picture from right to left. FADER Displays the pictures - Olympus FE 120 | FE-120 Advanced Manual (English) - Page 58
:15 / Playing time/ total recording time n 00:00/00:15 / / Note • The card access lamp blinks while the camera is reading pictures from the internal memory or card. This may take some time. Do not open the card cover while the card access lamp is blinking. Doing so may damage the image data, or - Olympus FE 120 | FE-120 Advanced Manual (English) - Page 59
EEditdingitsitnill pgictsurteisl(lADpDicFRtuAMrEe/sBLA(CAKD&DWHFITRE/SAEMPIAE/R/esizing) BLACK & WHITE/SEPIA/ ) This function lets you edit still pictures and save them as new pictures. The following editing operations are possible. ADD FRAME BLACK & WHITE SEPIA Q This function lets you frame - Olympus FE 120 | FE-120 Advanced Manual (English) - Page 60
not available in the following cases: Movies, pictures that have been edited on a computer, pictures taken with another camera, or when there is insufficient space in the internal memory or card. • When a frame is added, the picture is saved at an image size of 1,584 × 1,056. Adding a frame to - Olympus FE 120 | FE-120 Advanced Manual (English) - Page 61
. Creating an index Top menu [MODE MENU] [EDIT] [INDEX] g"How to use the menus" (P. 16) • When there is insufficient space in the internal memory or card, a warning screen is displayed before returning to the [EDIT] screen. 1 Select the first frame of the index, 5 and press Z. 00:00/00:15 - Olympus FE 120 | FE-120 Advanced Manual (English) - Page 62
[OK], and press Z. • The [BUSY] bar is displayed and the camera returns to the playback mode. The index is stored as a new picture. • You cannot create an index if there is insufficient space in the internal memory or card. Editing a movie Top menu [MODE MENU] [EDIT] [EDIT] g"How to use the - Olympus FE 120 | FE-120 Advanced Manual (English) - Page 63
. After the edited movie is stored as a new movie or the original movie is overwritten, the camera returns to the playback mode. Note • You cannot select [NEW FILE] if there is insufficient space in the internal memory or card. • The editing process of long movies is more time-consuming. 63 - Olympus FE 120 | FE-120 Advanced Manual (English) - Page 64
15:30 5 When [INFO] is on 5 Note When [INFO] is off • If the picture has been taken with a different camera, only the date and time, frame number, and battery check indication are displayed when [INFO] is set on. Protecting pictures You are recommended to protect important pictures to avoid - Olympus FE 120 | FE-120 Advanced Manual (English) - Page 65
BACKUP YES NO 5 SELECT GO OK Note • When the card has insufficient memory, [CARD FULL] is displayed, and copying is canceled. • When the f mark is blinking, pictures cannot be backed up because of insufficient battery power. • If the battery power is exhausted while copying, the image data may - Olympus FE 120 | FE-120 Advanced Manual (English) - Page 66
one at a time or all the pictures in the internal memory or card at once. • When you want to erase pictures in the internal memory, do not insert the card. • Insert the card when you want to erase pictures on the card. Note • You cannot erase protected pictures. Cancel protection before erasing - Olympus FE 120 | FE-120 Advanced Manual (English) - Page 67
Erasing pictures All-frame erase This function erases all the pictures in the internal memory or card. Top menu [MODE MENU] [MEMORY(CARD)] [ALL ERASE] g"How to use the menus" (P. 16) 1 Select [YES], and press Z. • All the pictures are erased. ALL ERASE CAUTION ERASING ALL YES SELECT NO - Olympus FE 120 | FE-120 Advanced Manual (English) - Page 68
to receive data. • To format the internal memory, do not insert the card. • To format the card, have it inserted. • Before using non-OLYMPUS cards or cards which have been formatted on a computer, you must format them with this camera. All existing data, including protected pictures, are erased - Olympus FE 120 | FE-120 Advanced Manual (English) - Page 69
digital camera is that you can view the pictures you have taken immediately. But that isn't all. For example, you can set the startup screen so that one of the pictures you have taken is displayed when you turn the camera how much fun you get out of your camera. Why not try them out? START Which - Olympus FE 120 | FE-120 Advanced Manual (English) - Page 70
([ON]/[OFF]) applies to all modes. It applies whether the camera is in shooting mode or playback mode. ON OFF All settings default settings when [ALL RESET] is set [ON]. Function F FLASH MODE & j SCENE SELECT DIGITAL ZOOM K WB INFO Factory default setting 0.0 AUTO OFF OFF o OFF HQ AUTO OFF Ref. - Olympus FE 120 | FE-120 Advanced Manual (English) - Page 71
language for on-screen display. Available languages vary depending on the area where you purchased this camera. Top menu [MODE MENU] [SETUP] [W] g"How to use the menus" (P. 16 add other languages to your camera with the provided OLYMPUS Master software. For details, refer to the online help in the - Olympus FE 120 | FE-120 Advanced Manual (English) - Page 72
PW ON SETUP) You can set a screen that is displayed when the camera is turned on. You can also register your favorite picture and display it when the power is turned on. Register a picture saved in the internal memory or card. To display the registered picture, make the settings in [PW ON SETUP]. - Olympus FE 120 | FE-120 Advanced Manual (English) - Page 73
cannot register a picture or movie frame that cannot be played back on this camera. Viewing pictures immediately (REC VIEW) You can choose whether or not to have just taken. During rec view, the camera is ready to shoot. The picture being recorded to the card is not displayed. This is useful when - Olympus FE 120 | FE-120 Advanced Manual (English) - Page 74
that is best for you when transferring images to a computer. RESET AUTO 6 The file number and folder number are reset every time a new card is inserted in the camera. The folder number returns to No. 100 and the file number returns to No. 0001. This method is useful when grouping files on - Olympus FE 120 | FE-120 Advanced Manual (English) - Page 75
When pixel mapping is finished, the screen returns to the mode menu. PIXEL MAPPING s X START SETUP MEM PIC CAM Note • If you turn the camera off during pixel mapping, start again from Step 1. 6 Adjusting the brightness of the monitor This function lets you adjust the brightness of the monitor - Olympus FE 120 | FE-120 Advanced Manual (English) - Page 76
. • To move back to the previous setting, press b. • The first two digits of the year are fixed. 3 Repeat this procedure until the date and time are camera is left without batteries for approximately 3 days. The settings will be canceled more quickly if batteries were only loaded in the camera - Olympus FE 120 | FE-120 Advanced Manual (English) - Page 77
, it is a good idea to store the print reservation data on the card first. This lets you select the pictures you want to print and decide home, you can either connect the camera directly to the printer or you can connect the camera to a computer and download the pictures to the computer first. - Olympus FE 120 | FE-120 Advanced Manual (English) - Page 78
with PictBridge, refer to the printer's instruction manual. What is PictBridge?... It is the standard for connecting digital cameras and printers of different manufacturers and printing out pictures directly. STANDARD... All printers that support PictBridge have standard print settings. If - Olympus FE 120 | FE-120 Advanced Manual (English) - Page 79
printer end of the USB cable into the printer's USB port. • For details of how to turn the printer on and the position of the USB port, refer to the printer's instruction manual. 2 Plug the USB cable into the camera's USB connector. Connector cover • The camera turns on automatically. • The - Olympus FE 120 | FE-120 Advanced Manual (English) - Page 80
Direct printing (PictBridge) 5 Press Z without changing the [SIZE] or [BORDERLESS] settings. • When the [PRINTPAPER] screen is not displayed, go to Step 6. 6 Press bd to select the picture you want to print, and press Z. • The [PRINT] screen is displayed. 7 Select [OK], and press Z. • Printing - Olympus FE 120 | FE-120 Advanced Manual (English) - Page 81
press b. • A message is displayed. 9 Remove the USB cable from the camera. • The camera turns off. Direct printing (PictBridge) PRINT MODE SELECT PRINT ALL PRINT MULTI PRINT ALL INDEX EXIT SELECT GO OK 10Remove the USB cable from the printer. Note • When the [USB] mode is set to [PC], the [PRINT - Olympus FE 120 | FE-120 Advanced Manual (English) - Page 82
index of all the pictures stored in the internal ALL PRINT MULTI PRINT ALL INDEX memory or card. EXIT SELECT GO OK Prints the pictures according to the print reservation data. If Operation guide no print reservations have been made, this option is not available. g"Print settings (DPOF)" (P. 85 - Olympus FE 120 | FE-120 Advanced Manual (English) - Page 83
Direct printing (PictBridge) Selecting the picture you want to print Press bd to select the picture you want to print. You can also make your selection by pressing the zoom button, and using the index display. PRINT SINGLE PRINT MORE Prints one copy of the picture. Makes a print reservation for - Olympus FE 120 | FE-120 Advanced Manual (English) - Page 84
, refer to the printer's instruction manual. Monitor indication NO CONNECTION NO PAPER NO INK Possible cause The camera is not connected to the is a problem with the Turn off the camera and printer and/or camera. printer. Check the printer and 7 PRINT ERROR remedy any problems before turning - Olympus FE 120 | FE-120 Advanced Manual (English) - Page 85
at a photo store that supports DPOF. DPOF is a standard format used to record automatic print information from digital cameras. You can print out 's instruction manual. A PC card adapter may also be necessary. To use print services without using DPOF Pictures stored in the internal memory cannot - Olympus FE 120 | FE-120 Advanced Manual (English) - Page 86
DPOF reservations set by another device, entering reservations using this camera may overwrite the previous reservations. • If there is not enough space in the card memory, you may not be able to enter the reservation data. [CARD FULL] will be displayed. • You can make DPOF print reservations - Olympus FE 120 | FE-120 Advanced Manual (English) - Page 87
apply [ - Olympus FE 120 | FE-120 Advanced Manual (English) - Page 88
[END]. • The [ - Olympus FE 120 | FE-120 Advanced Manual (English) - Page 89
15:30 30 SELECT GO OK Resetting print reservation data This function allows you to reset the print reservation data for pictures stored on the card. You can reset all the print reservation data or just for selected pictures. (To reset the print reservation data for all the pictures 7 Top menu - Olympus FE 120 | FE-120 Advanced Manual (English) - Page 90
[MODE MENU] [PLAY] [ - Olympus FE 120 | FE-120 Advanced Manual (English) - Page 91
computer is just one of the many ways you can enjoy your pictures. You can print out your favorite pictures, use the application software to download your pictures from your camera and edit them or arrange them by date or category, or attach them to e-mail and send them over the Internet. There - Olympus FE 120 | FE-120 Advanced Manual (English) - Page 92
the internal memory or on the card. If the data cannot be downloaded from the camera using the USB cable → Image files on xD-Picture Card may be downloaded using the optional PC card adapter. For details, visit the Olympus web site at the address shown on the back cover of this manual. Note • It - Olympus FE 120 | FE-120 Advanced Manual (English) - Page 93
image files, install the OLYMPUS Master software from the provided CD-ROM. What is OLYMPUS Master? OLYMPUS Master is application software for editing images taken with a digital camera on a computer. Installing it on your computer lets you do the following: Download images from the camera or other - Olympus FE 120 | FE-120 Advanced Manual (English) - Page 94
Windows XP Professional/Home Edition. • Windows 2000 corresponds to Windows 2000 Professional. • If you are using Windows 98SE, the USB driver is installed automatically. Macintosh 8 OS CPU RAM Hard disk capacity Connector Monitor Mac OS X 10.2 or later Power PC G3 500 MHz or later 128 MB or more - Olympus FE 120 | FE-120 Advanced Manual (English) - Page 95
and the need to reboot. • Disconnect the cable connecting the camera to the computer • Turn off the camera • Open the camera's card cover • Open the camera's battery compartment cover Windows 1 Insert the CD-ROM into the CD-ROM drive. • The OLYMPUS Master setup screen is displayed. • If the - Olympus FE 120 | FE-120 Advanced Manual (English) - Page 96
Reader is displayed. Adobe Reader is required to read 8 the OLYMPUS Master instruction manual. If this screen is not displayed, Adobe Reader is already installed on your computer. 5 To install Adobe Reader, click "OK". • To cancel installation, click "Cancel". Go to Step 7. • The Adobe Reader - Olympus FE 120 | FE-120 Advanced Manual (English) - Page 97
Connecting the camera to a computer 6 Follow the on-screen instructions. • The screen confirming that installation is completed is displayed. Click "Finish". Using OLYMPUS Master 7 Select the option to restart immediately when the screen asking you if you wish to restart the computer is displayed - Olympus FE 120 | FE-120 Advanced Manual (English) - Page 98
is retracted. Connecting the camera to a computer Monitor 2 Plug the USB cable into the USB port on the computer. • Refer to your computer's instruction manual to locate the position of the USB port. 3 Plug the other end of the USB cable into the camera's USB Connector cover connector. • The - Olympus FE 120 | FE-120 Advanced Manual (English) - Page 99
Connecting the camera to a computer Starting up OLYMPUS Master Windows 1 Double-click the "OLYMPUS Master" icon desktop. on the • The main menu is displayed. • When OLYMPUS Master is started up for the first time after installation, the "Registration" dialog box is displayed before the main menu - Olympus FE 120 | FE-120 Advanced Manual (English) - Page 100
to a computer Starting up OLYMPUS Master (OLYMPUS Master main menu h c g d e f c "Transfer Images" button Downloads images from the camera or other media. d "Browse Images" button Displays the browse window. e "Print Images" button Displays the print menu. f "Create and Share" button - Olympus FE 120 | FE-120 Advanced Manual (English) - Page 101
to the main menu, click "Menu" in the "Browse" window. 8 Note • The card access lamp blinks while downloading images. Do not do any of the following while the lamp is blinking. • Open the camera's card cover. • Open the camera's battery compartment cover. • Connect or disconnect the AC adapter. 101 - Olympus FE 120 | FE-120 Advanced Manual (English) - Page 102
You can disconnect the camera after downloading the images to your computer. 1 Make sure that the card access lamp is off. 2 Make the following preparations for disconnecting the USB cable. Windows 98SE 1 Double-click the "My Computer" icon and right-click the "Removable Disk" icon to display the - Olympus FE 120 | FE-120 Advanced Manual (English) - Page 103
. Make sure that image data is not being downloaded from the camera and that all applications are closed. Click the "Unplug or Eject Hardware" icon again and disconnect the cable. Viewing still pictures and movies 1 Click "Browse Images" on the OLYMPUS Master main menu. 2 • The "Browse" window is - Olympus FE 120 | FE-120 Advanced Manual (English) - Page 104
1 Double-click the movie thumbnail that you want to see in the "Browse" window. • The camera switches to view mode and the first frame of the movie is displayed. 2 To play back the uses the photo menu. 1 Click "Print Images" on the OLYMPUS Master main menu. • The print menu is displayed. 104 - Olympus FE 120 | FE-120 Advanced Manual (English) - Page 105
Connecting the camera to a computer 2 Click "Photo" . • The "Photo Print" window is displayed. Printing pictures 3 Click "Settings" in the "Photo Print" window. • The printer settings screen is displayed. - Olympus FE 120 | FE-120 Advanced Manual (English) - Page 106
is running Windows 98SE, you will need to install the USB driver. Before connecting the camera to your computer with the USB cable, double-click the files from the following folders on the OLYMPUS Master CD-ROM provided. (Drive name):\USB\INSTALL.EXE 8 • Data transfer is not guaranteed in the - Olympus FE 120 | FE-120 Advanced Manual (English) - Page 107
Appendix Appendix 9 This chapter contains useful information from OLYMPUS. Here you will find what to do when you are stuck or don't understand the meaning of the terms used in this manual. Refer to this section for basic troubleshooting, camera care and a full glossary to understanding the terms - Olympus FE 120 | FE-120 Advanced Manual (English) - Page 108
erasing. There are no pictures in The internal memory or the card the internal memory or contain no pictures. Record the card. pictures. There is a problem with the selected picture and it cannot be played back on this camera. Use image processing software to view the picture on a computer. If - Olympus FE 120 | FE-120 Advanced Manual (English) - Page 109
Troubleshooting Monitor indication Possible cause g BATTERY EMPTY The battery power is exhausted. CARD SETUP POWER OFF FORMAT SELECT GO OK This card cannot be used with this camera or the card is not formatted. Corrective action Replace the batteries with new ones, or charge the batteries. - Olympus FE 120 | FE-120 Advanced Manual (English) - Page 110
42 9 The power is off. Press the POWER switch. The internal memory or Erase unwanted pictures or insert a new card is full. card. Before erasing, download important images to a computer. P. 9 P. 66 The battery power was Replace the batteries with new ones, or - exhausted during charge the - Olympus FE 120 | FE-120 Advanced Manual (English) - Page 111
Troubleshooting Possible cause Corrective action Ref. page There is a problem with See "Error codes". the card. P. 108 The monitor is hard to see. There is condensation* inside the camera. The brightness of the monitor is not adjusted properly. Turn the camera off and wait until it dries - Olympus FE 120 | FE-120 Advanced Manual (English) - Page 112
Troubleshooting Possible cause Corrective action The monitor goes off. The camera is in the sleep mode. the panorama mode. The battery run time is brief. You are using the camera in a cold environment. Battery performance deteriorates in low temperatures. Keep the camera warm by putting it - Olympus FE 120 | FE-120 Advanced Manual (English) - Page 113
Troubleshooting (Playback of recorded images Possible cause Corrective action Ref. page Pictures in the internal memory cannot be played back. A card is inserted in the When a card is inserted, only pictures on the P. 29, camera. card can be played back. Remove the card. 32 The picture is - Olympus FE 120 | FE-120 Advanced Manual (English) - Page 114
Troubleshooting Possible cause Corrective camera on in playback mode. The camera is in the Press $ to switch to playback mode. shooting mode. P. 10 P. 10, 11 There are no pictures in [NO PICTURE] is displayed on the monitor. - internal memory or card. Record pictures. There is a problem - Olympus FE 120 | FE-120 Advanced Manual (English) - Page 115
not support PictBridge. Refer to the printer's instruction manual or contact the manufacturer. The camera is not recognized by the computer. The computer failed to Disconnect the USB cable from the camera, recognize the camera. and connect it again. The USB driver has not Install OLYMPUS Master - Olympus FE 120 | FE-120 Advanced Manual (English) - Page 116
is left dirty. ( Storage • When storing the camera for extended periods, remove batteries, AC adapter and card, and keep in a cool, dry place that is well ventilated. • Periodically insert batteries and test the camera functions. Note • Avoid leaving the camera in places where chemical products are - Olympus FE 120 | FE-120 Advanced Manual (English) - Page 117
AC adapter (optional) An AC adapter is useful for time-consuming tasks such as image downloads to a computer. An optional Olympus AC adapter allows you to power your digital camera from a common AC wall outlet. AC wall outlet Power plug Connector cover Connection cord plug AC adapter DC-IN jack - Olympus FE 120 | FE-120 Advanced Manual (English) - Page 118
high or go through extreme changes. Direct sunlight, beaches, locked cars, or near other heat sources (stove, radiator, etc camera's manual. Battery Handling Precautions • Olympus NiMH batteries (included in some areas) are intended for use only with Olympus digital cameras. Never use these batteries - Olympus FE 120 | FE-120 Advanced Manual (English) - Page 119
batteries outside these ranges could shorten battery life or affect battery performance. Always unload the batteries from the camera before storing the camera for a long period. • Before using NiMH or NiCd batteries, always read the provided instructions Notices 9 • Olympus makes no representations - Olympus FE 120 | FE-120 Advanced Manual (English) - Page 120
the use of the information contained in these written materials or software, or for damages resulting from the use of the information contained therein. Olympus reserves the right to alter the features and contents of this publication or software without obligation or advance notice. 9 120 Appendix - Olympus FE 120 | FE-120 Advanced Manual (English) - Page 121
installation. This equipment generates, uses, and can radiate radio frequency energy and, if not installed and used in accordance with the instructions TV technician for help. Only the OLYMPUS-supplied USB cable should be used to connect the camera to USB enabled personal computers (PC). Any - Olympus FE 120 | FE-120 Advanced Manual (English) - Page 122
Order Format) This is for saving desired print settings on digital cameras. By entering which images to print and the number of copies of each, the user can easily have the desired images printed by a printer or print lab that supports the DPOF format. Eclipsing (Vignetting) This refers to when an - Olympus FE 120 | FE-120 Advanced Manual (English) - Page 123
this camera are recorded in JPEG format. By downloading these images to a computer, users can edit them using graphics application software or noise reduction works, the camera automatically reduces the noise to produce clearer images. PictBridge A standard for connecting digital cameras and printers - Olympus FE 120 | FE-120 Advanced Manual (English) - Page 124
in Chapters 1 to 8. Refer here for the names of the camera parts and buttons, the names and meanings of the icons that are item that you are looking for appears. For effective use of the manual, reference page numbers are listed next to the names of the camera parts and in the menu lists. 124 - Olympus FE 120 | FE-120 Advanced Manual (English) - Page 125
Shooting mode (P, i, l, z, j, k, /, f) Top menu Tab Item Setting Ref. page MODE MENU CAMERA DIGITAL ZOOM PANORAMA 2 IN 1 PICTURE WB OFF, ON P. 40 P. 50 P. 52 AUTO, 5, 3, 1, > P. 46 MEMORY MEMORY FORMAT YES, NO (CARD) (FORMAT) BACKUP YES, NO P. 68 P. 65 SETUP ALL RESET W*2 PW ON SETUP - Olympus FE 120 | FE-120 Advanced Manual (English) - Page 126
Item Setting Ref. page MODE MENU MEMORY MEMORY FORMAT YES, NO (CARD) (FORMAT) BACKUP YES, NO DIGITAL ZOOM OFF, ON P. 40 *1 Available languages vary depending on the area where you purchased this camera. Shooting mode (h) Top menu Item Setting Ref. page Miscellaneous SETUP 10 j MEMORY - Olympus FE 120 | FE-120 Advanced Manual (English) - Page 127
CANCEL SEPIA, CANCEL 640 × 480, 320 × 240, CANCEL P. 59 P. 59 P. 59 P. 59 MEMORY ALL ERASE YES, NO (CARD) MEMORY FORMAT YES, NO (FORMAT) BACKUP YES, NO P. 67 P. 68 P. 65 SETUP ALL RESET W*1 0 P. 64 10 *1 Available languages vary depending on the area where you purchased this camera. 127 - Olympus FE 120 | FE-120 Advanced Manual (English) - Page 128
(movies) Top menu Tab Item Setting Ref. page MODE MENU EDIT INDEX EDIT OK, RESET, CANCEL OK, RESET, CANCEL P. 61 P. 62 MEMORY ALL ERASE YES, NO (CARD) MEMORY FORMAT YES, NO (FORMAT) BACKUP YES, NO P. 67 P. 68 P. 65 SETUP ALL RESET W*1 PW ON SETUP s X G OFF, ON OFF, 1, 2 4, 9, 16 - Olympus FE 120 | FE-120 Advanced Manual (English) - Page 129
List of factory default settings The functions are set as follows when the camera leaves the factory. Shooting mode Zoom F FLASH MODE Y & j SCENE SELECT DIGITAL ZOOM PANORAMA 2 IN 1 K WB REC VIEW FILE NAME 38 mm 0.0 AUTO (n: $) OFF OFF OFF o OFF OFF OFF HQ AUTO ON RESET Playback mode INFO 0 y < - Olympus FE 120 | FE-120 Advanced Manual (English) - Page 130
Modes and shooting functions Function Mode Zoom DIGITAL ZOOM FLASH MODE & % Y j PANORAMA 2 IN 1 SCENE SELECT K F WB ALL RESET W PW ON SETUP REC VIEW FILE NAME PIXEL MAPPING s X MEMORY FORMAT (FORMAT) BACKUP h ilz jk/ - - - - - - - - - f 9*1 9*1 9*2 9*3 9*1, *3 9 9*4 9*1 9 9 9 9 - Olympus FE 120 | FE-120 Advanced Manual (English) - Page 131
VISUAL INDEX Names of parts Camera Shutter button gP. 24 POWER switch gP. 9 Flash gP. 42 Miscellaneous Lens Self-timer lamp gP. 49 USB connector gP. 79, 98 DC-IN jack gP. 117 10 Connector cover gP. 79, 98, 117 131 - Olympus FE 120 | FE-120 Advanced Manual (English) - Page 132
133 Shooting button (#) gP. 9, 14 Playback button ($) gP. 9, 13 Erase button (S) gP. 14, 66 Card access lamp gP. 102 Zoom button (W/T, GU) gP. 39, 54 Mode dial gP. 12 Strap eyelet Battery compartment cover Miscellaneous Card cover gP. 30 OK/MENU button (Z) gP. 16, 19 Arrow pad (acbd) gP. 16, 19 - Olympus FE 120 | FE-120 Advanced Manual (English) - Page 133
12 13 Movie Item 1 Shooting mode Indications P, h, N, I, J, K, L, |, = 2 Exposure compensation -2.0 - +2.0 3 Battery check e = full power, f = low power 4 Green lamp 5 Flash stand-by Flash charge { = Auto Focus Lock # (Lights) # (Blinks) 6 Macro mode & Super macro mode % 7 Flash mode - Olympus FE 120 | FE-120 Advanced Manual (English) - Page 134
when the internal memory is used. [xD] is displayed when the card is used. *2 Every time you press the shutter button, the memory gauge lights indicating that the picture you have just taken is being recorded. The memory gauge changes according to how many pictures the camera is processing. This - Olympus FE 120 | FE-120 Advanced Manual (English) - Page 135
Movie Item Indications 1 Battery check e = full power, f = low power 2 Memory * 3 Print reservation/ number of prints Movie 4 Protect [IN], [xD] - Olympus FE 120 | FE-120 Advanced Manual (English) - Page 136
camera Battery check 133, 135 BEACH 37 BEHIND GLASS 38 BLACK & WHITE 59 C CANDLE 38 Card 27, 29, 30 CCD 75, 122 Close-up playback U 54 Cloudy day 3 46 Compression 26 10 CUISINE G 38 D Date and time X 76 DCF 122 DIGITAL Fluorescent lamp 46 Focus 25 Focus lock 24 Folder name 74 Format - Olympus FE 120 | FE-120 Advanced Manual (English) - Page 137
37 SPORT j 35 SQ 26, 28 STANDARD 78 Sunny day 5 46 SUNSET 37 Super macro shooting % ........ 41 Index T Top menu 16 Tungsten light 1 46 U 10 USB cable 79, 98 USB driver 94, 106 W White balance WB 46 X xD-Picture Card 29, 30 137 - Olympus FE 120 | FE-120 Advanced Manual (English) - Page 138
GLOSSARY INDEX Index Z ZOOM 57 Zoom 13, 39 10 138 Index - Olympus FE 120 | FE-120 Advanced Manual (English) - Page 139
: Tel. 1-888-553-4448 (Toll-free) Our phone customer support is available from 8 am to 10 pm (Monday to Friday) ET E-Mail: [email protected] Olympus software updates can be obtained at: http://www.olympus.com/digital Premises: Wendenstrasse 14-18, 20097 Hamburg, Germany Tel: +49 40-23 77 3-0 / Fax
-
 1
1 -
 2
2 -
 3
3 -
 4
4 -
 5
5 -
 6
6 -
 7
7 -
8
-
9
-
10
-
11
-
12
-
13
-
14
-
15
-
16
-
17
-
18
-
19
-
20
-
21
-
22
-
23
-
24
-
25
-
26
-
27
-
28
-
29
-
30
-
31
-
32
-
33
-
34
-
35
-
36
-
37
-
38
-
39
-
40
-
41
-
42
-
43
-
44
-
45
-
46
-
47
-
48
-
49
-
50
-
51
-
52
-
53
-
54
-
55
-
56
-
57
-
58
-
59
-
60
-
61
-
62
-
63
-
64
-
65
-
66
-
67
-
68
-
69
-
70
-
71
-
72
-
73
-
74
-
75
-
76
-
77
-
78
-
79
-
80
-
81
-
82
-
83
-
84
-
85
-
86
-
87
-
88
-
89
-
90
-
91
-
92
-
93
-
94
-
95
-
96
-
97
-
98
-
99
-
100
-
101
-
102
-
103
-
104
-
105
-
106
-
107
-
108
-
109
-
110
-
111
-
112
-
113
-
114
-
115
-
116
-
117
-
118
-
119
-
120
-
121
-
122
-
123
-
124
-
125
-
126
-
127
-
128
-
129
-
130
-
131
-
132
-
133
-
134
-
135
-
136
-
137
-
138
-
139
 |
 |

Thank you for purchasing an Olympus digital camera. Before you start to use your
new camera, please read these instructions carefully to enjoy optimum performance
and a longer service life. Keep this manual in a safe place for future reference.
We recommend that you take test shots to get accustomed to your camera before
taking important photographs.
In the interest of continually improving products, Olympus reserves the right to update
or modify information contained in this manual.
DIGITAL CAMERA
Advanced
Manual
FE-120
X-700
Detailed explanations of all the
functions for getting the most out
of your camera.
Camera Settings
Basic Operation
Shooting
Playing Back
Printing
Online Pictures
Troubleshooting