Olympus SP 320 SP-320 Advanced Manual (English)
Olympus SP 320 - Digital Camera - 7.1 Megapixel Manual
 |
UPC - 050332157958
View all Olympus SP 320 manuals
Add to My Manuals
Save this manual to your list of manuals |
Olympus SP 320 manual content summary:
- Olympus SP 320 | SP-320 Advanced Manual (English) - Page 1
Shooting Playing Back Printing Online Pictures Camera Settings Thank you for purchasing an Olympus digital camera. Before you start to use your new camera, please read these instructions carefully to enjoy optimum performance and a longer service life. Keep this manual in a safe place for future - Olympus SP 320 | SP-320 Advanced Manual (English) - Page 2
How to use this manual (Basic and Advanced Manuals The instruction manual accompanying this camera is divided into two parts: the Basic Manual and the Advanced Manual (this document). Basic Manual This manual gives you easy-to-follow explanations on how to take pictures and view them so that you - Olympus SP 320 | SP-320 Advanced Manual (English) - Page 3
manual You'll find important points for getting the most out of your camera camera easier to use. To print the pictures you have taken. To enjoy the pictures you have taken on a computer. To use OLYMPUS P. 120 8 Connecting the camera to a computer P. 136 9 Troubleshooting. For when you want to - Olympus SP 320 | SP-320 Advanced Manual (English) - Page 4
28 Changing the record mode 30 The internal memory and memory card 32 The card 33 Inserting and removing the card 33 3 Basic shooting functions 35 Selecting a scene mode according to the situation 36 Zooming in on your subject 40 Using the zoom 40 Using the digital zoom 40 Using macro - Olympus SP 320 | SP-320 Advanced Manual (English) - Page 5
47 Camera movement compensation 48 Recording sound with movies 49 4 Advanced shooting functions 50 Changing the aperture value for shooting pictures 51 Changing the shutter speed for shooting pictures 52 Changing the aperture value and shutter speed for shooting pictures 53 My Mode 53 - Olympus SP 320 | SP-320 Advanced Manual (English) - Page 6
cover (SELECT TITLE IMAGE 83 Undoing album entries Video output 100 Protecting pictures 101 Copying pictures in the internal memory to the card (BACKUP)..... 101 Erasing pictures 102 Single-frame erase 103 All-frame erase 103 Formatting the internal memory or card (MEMORY FORMAT/FORMAT - Olympus SP 320 | SP-320 Advanced Manual (English) - Page 7
modes and print settings 127 If an error message is displayed 130 Print settings (DPOF 131 How to make print reservations 131 Single-frame reservation 133 All-frame reservation 134 Resetting print reservation data 135 9 Connecting the camera to a computer - - - - 136 Flow 137 Using OLYMPUS - Olympus SP 320 | SP-320 Advanced Manual (English) - Page 8
152 Troubleshooting 153 Error messages 153 Troubleshooting 155 Camera care 162 Batteries 163 Accessories (optional 164 AC adapter 164 Safety Precautions 165 Glossary of terms 169 11 Miscellaneous 172 Menu list 173 List of factory default settings 182 Functions available in shooting modes - Olympus SP 320 | SP-320 Advanced Manual (English) - Page 9
you too can achieve such effects simply by pressing the buttons on your digital camera. You can use the various functions available to adjust the brightness and explanations of the various functions. SET MEM PIC CAMERA MODE MENU RESET OK HOLD ESP/ DRIVE ISO 1/2/3/4 ESP OFF AUTO HQ - Olympus SP 320 | SP-320 Advanced Manual (English) - Page 10
(P. 51) Shooting modes This function allows you to set the shutter speed manually. The S camera sets the aperture modes set to the shooting conditions. g"Selecting a scene mode according to the situation" (P. 36) n This function lets you record movies. g"Recording movies" (P. 47) Playback mode - Olympus SP 320 | SP-320 Advanced Manual (English) - Page 11
Mode dial Mode dial notation In this manual, the following icons indicate the position of the mode dial 1 necessary for operating functions. This indicates an operation when the mode dial is set to n. This indicates an operation when the mode dial is set to any of the following modes - Olympus SP 320 | SP-320 Advanced Manual (English) - Page 12
Direct buttons This camera features buttons for setting functions directly. 1 The direct buttons have different functions in shooting mode and in playback mode. Using the direct buttons in shooting mode 12 Basic operation 3 4 5 1 # button (Flash mode) Selects the flash mode. 2 [ button (AE lock)/ - Olympus SP 320 | SP-320 Advanced Manual (English) - Page 13
mode 1 12 Basic operation 3 4 1 S button (Erase) Erases pictures displayed on the monitor. gP. 85, P. 102 2 < button (Print) Prints pictures displayed on the monitor. gP. 122 3 DISP./GUIDE displaying movies. The playback screen is displayed. Detailed camera information is displayed. 100- - Olympus SP 320 | SP-320 Advanced Manual (English) - Page 14
top menu to jump directly to one of the following functions. Shooting mode (except r) The [RESET] screen is displayed. g"Resetting the settings to the default (RESET)" (P. 106) Playback mode The [ALBUM ENTRY] screen is displayed. g"Adding pictures to an album (ALBUM ENTRY)" (P. 80) Album playback - Olympus SP 320 | SP-320 Advanced Manual (English) - Page 15
Menus Basic operation Shortcut menus (Shooting mode For still pictures (default value) MODE MENU RESET OK HOLD (Playback mode For still pictures gP. 69 gP. 41 gP. 26 1 For movies DIGITAL ZOOM MODE MENU RESET OK HOLD gP. 40 gP. 48 gP. 26 For movies EDIT ALBUM MODE MENU gP. 89 92, 95 - Olympus SP 320 | SP-320 Advanced Manual (English) - Page 16
the camera easier to use. (Playback mode OFF 0° SET MEM EDIT PLAY PLAY tab For setting playback-related functions. EDIT tab For editing saved pictures. The same screen is displayed when [EDIT] is selected from the top menu. MEMORY/ For formatting internal memory or a card, and erasing all image - Olympus SP 320 | SP-320 Advanced Manual (English) - Page 17
the arrow pad and Z to set menu items. Follow the operation guide and arrows on the screen to select and change settings. Ex: Setting [&] Mode dial srpq buttons Z button 1 Set the mode dial to any of the following modes: PASMrf. 2 Press Z. Top menu • The top menu is displayed. 3 Press q to - Olympus SP 320 | SP-320 Advanced Manual (English) - Page 18
& % BEEP OFF 1 LOW 2 HIGH Operation guide Press psr to select a setting. Press Z to finalize the setting. SELECT GO OK Menu operation notation In this manual, procedures for using the menus are expressed as follows: • Ex: Steps 1 to 5 for setting [&] Top menu [MODE MENU] [CAMERA] [&] 18 - Olympus SP 320 | SP-320 Advanced Manual (English) - Page 19
Basic operation Menus Using the GUIDE function 1 This camera has a GUIDE function. Pressing the DISP./GUIDE button during menu display in shooting mode or playback mode automatically displays a menu guide explaining the menus. 1 With a menu selected, hold down the DISP./GUIDE button. • The menu - Olympus SP 320 | SP-320 Advanced Manual (English) - Page 20
), "Mode dial notation" (P. 11) Select the menus in the order indicated by . g"Using the menus" (P. 17), "Menu operation notation" (P. 18) Procedures differ for h mode, n mode, and album playback mode. This sample page is only for your reference. It may differ from the actual page in this manual. 20 - Olympus SP 320 | SP-320 Advanced Manual (English) - Page 21
almost guaranteed to come out well just by setting the mode dial to h and pressing the shutter button. But problems. And did you know that by selecting an image size according to how you plan to use the pictures afterwards, you can store more pictures in the internal memory and on the memory card - Olympus SP 320 | SP-320 Advanced Manual (English) - Page 22
press the POWER button. • The monitor turns on. • When you turn on the camera in shooting mode, the lens extends. (Turning the camera off Press the POWER button. • The monitor turns off. • The lens retracts. TIPS • The screen on the right is displayed when the date and time setting has returned - Olympus SP 320 | SP-320 Advanced Manual (English) - Page 23
easily When close to a subject, the and subjects may be difficult to image in the viewfinder differs Disadvantages see in bright/dark places. The slightly from the picture that the monitor uses more battery power camera actually records. than the viewfinder. Use the monitor when you need Use the - Olympus SP 320 | SP-320 Advanced Manual (English) - Page 24
lights. SQ1 1600×1200 4 AF target mark • The green lamp lights when the focus and exposure are locked. Shutter button • When the green lamp blinks, shutter button fully. • The camera takes the picture. The orange lamp blinks while the picture is recorded. 24 SQ1 1600×1200 4 Shutter button - Olympus SP 320 | SP-320 Advanced Manual (English) - Page 25
the subject in the center of the frame g"AF mode (iESP/SPOT/AREA)" (P. 54) When the frame blinking. Doing so could destroy stored pictures and prevent storage of pictures you have just taken. • Recorded pictures are saved in the camera regardless of whether the camera is turned off or the batteries - Olympus SP 320 | SP-320 Advanced Manual (English) - Page 26
and the number of storable still pictures/movie recording time, see the tables on P. 28 to 29. 2 Still picture record modes Still pictures (other than those in raw data format) are recorded in JPEG format. Record mode depicts the image size and compression rate of your pictures. Pictures are made - Olympus SP 320 | SP-320 Advanced Manual (English) - Page 27
by installing the Plug-in available from the Olympus website. Raw data cannot be displayed using ordinary software, and print reservations cannot be made. Pictures taken with the record mode set to raw data can be edited with this camera. g"Editing still pictures (RAW DATA EDIT/Q/P/REDEYE FIX - Olympus SP 320 | SP-320 Advanced Manual (English) - Page 28
Record mode Movie record modes Movies are recorded in Motion-JPEG format. 2 Number of storable still pictures/remaining recording time Tips before you start taking pictures For still pictures Record mode Image storable still pictures Internal memory Using a 128 MB card With Without With - Olympus SP 320 | SP-320 Advanced Manual (English) - Page 29
time Record mode Image size Internal memory Using a 128 MB card With Without With Without SHQ 640 × 480 (30 frames/sec.) sound 14 sec. sound 14 sec. sound 1 min. 10 sec. sound 1 min. 10 sec. 2 HQ 640 × 480 (15 frames/sec.) 29 sec. 29 sec. 2 min. 20 sec. 2 min. 21 sec. SQ1 320 - Olympus SP 320 | SP-320 Advanced Manual (English) - Page 30
15fps]. For still pictures SHQ 640×480 30fps HQ 640×480 15fps SQ1 320×240 30fps SQ2 320×240 15fps SELECT GO OK 2 Select the image size of the record mode. If you selected [SQ1] or [SQ2], press q after choosing the image size, then select [HIGH] or [NORMAL]. 3 Press Z. For movies SQ2 1280×960 - Olympus SP 320 | SP-320 Advanced Manual (English) - Page 31
same time as they are recorded in raw data. To record pictures in JPEG format you can select [SHQ], [HQ], [SQ1] or [SQ2] for the record mode, but you cannot select the image size. Pictures are recorded in the size currently set for each record mode. 1 In the [K] screen, select [RAW], and press - Olympus SP 320 | SP-320 Advanced Manual (English) - Page 32
pictures The internal memory and memory card Pictures taken are recorded in the internal memory. Pictures can also be recorded to an optional xD-Picture Card ("card"). The card can be used to record more pictures than is possible with the internal memory of the camera. A card can be convenient - Olympus SP 320 | SP-320 Advanced Manual (English) - Page 33
Compatible cards xD-Picture Card (16 MB to 1 GB) Note • This camera may not recognize a non-OLYMPUS card or a card that was formatted on another device (such as a computer, etc.). Make sure to format the card on this camera before use. g"Formatting the internal memory or card (MEMORY FORMAT/FORMAT - Olympus SP 320 | SP-320 Advanced Manual (English) - Page 34
The internal memory and memory card (Inserting the card Tips before you start taking pictures 3 Orient the card as shown, and insert it into the card slot as 2 shown in the illustration. • Insert the card straight in. • Insert the card until it clicks into place. • Inserting the card in the - Olympus SP 320 | SP-320 Advanced Manual (English) - Page 35
subject. With a digital camera, you don't need to learn how to make difficult settings. Your camera will adjust the settings for you! All you have to do is choose a scene mode for whatever you want to take, whether a landscape, a night scene, or a portrait-style image, and the camera will set the - Olympus SP 320 | SP-320 Advanced Manual (English) - Page 36
. When you select a scene according to the situation or conditions, the camera automatically selects the optimal settings. (f mode J D image stabilization 3 Reduces blurring in images caused by shaking or motion when the image was taken. Photos shot in dark areas may appear grainy. B Portrait - Olympus SP 320 | SP-320 Advanced Manual (English) - Page 37
3 Suitable for shooting subjects in low light conditions without a flash. S Sunset Suitable for taking pictures of the evening sunlight. Reds and yellows are vividly reproduced. X Fireworks Suitable for taking pictures of fireworks displays. The camera sets a slower shutter speed than is - Olympus SP 320 | SP-320 Advanced Manual (English) - Page 38
. H Under Water Macro Suitable for taking pictures under water in macro mode. Be sure to use the underwater housing. Note • If you select a scene that does not use the flash or a scene with a slower shutter speed, camera movement may occur. It is recommended that you use a tripod to prevent - Olympus SP 320 | SP-320 Advanced Manual (English) - Page 39
Basic shooting functions Selecting a scene mode according to the situation 1 Press sr to select a scene, and press Z. 1 D IMAGE STABILIZATION SELECT GO OK 3 2 Take the picture. • For shoot & select, hold down the shutter button. • To change the scene, press r. Or, press Z to display the - Olympus SP 320 | SP-320 Advanced Manual (English) - Page 40
or pull the zoom lever. • Zoom out: Push the zoom lever toward W. • Zoom in: Pull the zoom lever toward T. Zoom lever Using the digital zoom Top menu [MODE MENU] [CAMERA] [DIGITAL ZOOM] [ON] g"Using the menus" (P. 17) • For n: Top menu [DIGITAL ZOOM] [ON] 1 Pull the zoom lever toward T. Optical - Olympus SP 320 | SP-320 Advanced Manual (English) - Page 41
) Note • During super macro mode, the zoom is not available. • If you are close to a subject, the picture in the viewfinder is different from the area that the camera actually records. For macro mode shooting, use the monitor. • During super macro shooting, the built-in flash is not available. 41 - Olympus SP 320 | SP-320 Advanced Manual (English) - Page 42
physical characteristics may also limit effectiveness. Red-eye fill-in flash (H) The flash always fires after pre-flashes for red-eye reduction are emitted. Fill-in flash (#) The flash fires regardless of the available light. This mode is useful for eliminating shadows on the subject's face (such - Olympus SP 320 | SP-320 Advanced Manual (English) - Page 43
from being blurred by camera movement. 1 Press the # button repeatedly to set the flash mode. g"Direct buttons" (P. 12) • After 2 seconds of non-operation, the selection is set and the mode selection screen disappears. • Each time you press # (flash mode), the flash mode changes in the following - Olympus SP 320 | SP-320 Advanced Manual (English) - Page 44
Examples include small subjects, distant backgrounds, or situations when increased contrast is desired. Basic shooting functions SET MEM PIC CAMERA Top menu [MODE MENU] [CAMERA] [w] g"Using the menus" (P. 17) 1 Press sr to adjust the flash intensity, and press Z. 0.0 SYNCRO FLASH DIGITAL ZOOM 44 - Olympus SP 320 | SP-320 Advanced Manual (English) - Page 45
lights streaming backwards. The slower the shutter speed, the better the effects turn out. If the 3 shutter speed is faster than 1/200, the flash curtain rear curtain flash fires Shutter closes front curtain flash fires Shutter button fully pressed Top menu [MODE MENU] [CAMERA] [#SYNCRO] [# - Olympus SP 320 | SP-320 Advanced Manual (English) - Page 46
(QFLASH) This setting is for when using a commercially available slave flash that is synchronized with the camera flash. The amount of light emitted by the flash can be adjusted in 10 levels. The flash can fire in sequential shooting mode, but the interval between shots will be longer if a high - Olympus SP 320 | SP-320 Advanced Manual (English) - Page 47
there is space in the internal memory or the card, the remaining recording time (P. 29) is displayed, and the camera is ready to shoot. TIPS To record audio with the movie j Set [R] to [ON]. g"Recording sound with movies" (P. 49) To use the zoom during movie recording j If you set [R] to [OFF], you - Olympus SP 320 | SP-320 Advanced Manual (English) - Page 48
time may drop rapidly during recording. Try using the internal memory or card again after formatting it with your camera. g"Formatting the internal memory or card (MEMORY FORMAT/FORMAT)" (P. 104) • In n mode, the flash and manual focus are not available. 3 Camera movement compensation This function - Olympus SP 320 | SP-320 Advanced Manual (English) - Page 49
sound with movies Sound can be recorded while shooting a movie. Recording movies Top menu [MODE MENU] [R] [ON] g"Using the menus" (P. 17) Note 3 • If the camera is more than 1 m (3.3 ft.) away from the source of the sound, sound may not be recorded clearly by the built-in microphone. Basic - Olympus SP 320 | SP-320 Advanced Manual (English) - Page 50
start enjoying your camera's more advanced functions. You can adjust the shooting conditions manually and try out night sky. By setting the white balance to 1(tungsten light), you can give the dark sky a blue tone. Adjusting PIC CAMERA 50 NOISE REDUCTION AF MODE FOCUS MODE FULLTIME AF PANORAMA iESP - Olympus SP 320 | SP-320 Advanced Manual (English) - Page 51
set the aperture manually. The camera sets the shutter speed automatically. By decreasing the aperture value (F-number), the camera will focus the camera to focus over a wider range, resulting in increased depth of field in which both the subject and the background are in focus. Use this mode when - Olympus SP 320 | SP-320 Advanced Manual (English) - Page 52
Changing the shutter speed for shooting pictures This function allows you to set the shutter speed manually. The camera sets the aperture automatically. Set the shutter speed according to the subject and the type of effect you want. Setting a fast shutter speed lets you - Olympus SP 320 | SP-320 Advanced Manual (English) - Page 53
registered in [s MY MODE 1] to [d MY MODE 4]. Only the settings in [s MY MODE 1] are preset. g"Customizing the camera (MY MODE SETUP/SHORT CUT/ CUSTOM BUTTON)" (P. 115) Top menu [MODE MENU] [CAMERA] [r 1/2/3/4] [s MY MODE 1] / [E MY MODE 2] / [c MY MODE 3] / [d MY MODE 4] g"Using the menus - Olympus SP 320 | SP-320 Advanced Manual (English) - Page 54
mode (iESP/SPOT/AREA) This function allows you to select how the camera focuses on your subject. iESP SPOT AREA The camera determines which subject within the screen to focus on. Even when the subject is not in the center of the screen the mode dial is turned or the zoom lever is operated. 54 - Olympus SP 320 | SP-320 Advanced Manual (English) - Page 55
accurately focused on with auto focus, set manual focus and manually adjust the focus. Top menu [MODE MENU] [CAMERA] [FOCUS MODE] [MF] g"Using the menus" camera cannot focus at ) (infinity). j Press sr to make fine adjustments to the cursor position while viewing the monitor. Note • Using the zoom - Olympus SP 320 | SP-320 Advanced Manual (English) - Page 56
kept in focus during movie recording. Press the shutter button halfway to focus. Advanced shooting functions Top menu [MODE MENU] [CAMERA] [FULLTIME AF] [ON] / [OFF] g"Using the menus" (P. 17) 4 Note • Setting [FULLTIME AF] to [ON] consumes more battery power. • [FULLTIME AF] cannot be - Olympus SP 320 | SP-320 Advanced Manual (English) - Page 57
the AF memory mark. The focus is locked while the AF AF MEMORY memory mark is displayed. Press the [ button again to cancel the AF memory. When the When the camera reactivates after sleep mode, or the power or monitor is turned off, the AF lock is canceled. Note • If the zoom is operated - Olympus SP 320 | SP-320 Advanced Manual (English) - Page 58
brightness over a wide area with emphasis on the center of the screen. This method is used when you do not want to allow surrounding light to affect the picture. Advanced shooting functions Top menu [MODE MENU] [CAMERA] [ESP/n] [ESP] / [n] / [4] g"Using the menus" (P. 17) AE lock This function is - Olympus SP 320 | SP-320 Advanced Manual (English) - Page 59
[ button again to cancel the AE memory. When the AE lock was canceled even though it was engaged j Do not operate any of the buttons or the mode dial after performing the AE lock. Doing so will cancel the AE lock. j When the camera reactivates after sleep mode, or the power or monitor is - Olympus SP 320 | SP-320 Advanced Manual (English) - Page 60
the ISO, the better the camera's light sensitivity and ability to shoot in low light conditions. However, high sensitivity a low ISO setting, you can shoot clear, sharp images in daylight. With a high ISO setting, you can shoot in dark places. Top menu [MODE MENU] [CAMERA] [ISO] [AUTO] / [64] / [100 - Olympus SP 320 | SP-320 Advanced Manual (English) - Page 61
brighter, adjust toward [-] when shooting dark subjects. Note • Sometimes, using the flash may not produce the brightness (exposure) that was intended. • The effects of the shooting conditions, point the camera at a white object under the light source you want to use and save the white balance. 61 - Olympus SP 320 | SP-320 Advanced Manual (English) - Page 62
the white balance Top menu [MODE MENU] [PICTURE] [WB] [AUTO] / [PRESET] / [V] g"Using the menus" (P. 17) (When [PRESET] is selected 1 Select a white balance setting, and press Z. PRESET WB 4 (When [V] is selected 1 With the [ONE TOUCH WB] screen displayed, point the camera at a sheet of white - Olympus SP 320 | SP-320 Advanced Manual (English) - Page 63
When the flash is fired with a white balance setting other than [AUTO], colors may appear different in the resulting picture from the colors you see on the monitor. • When setting the white balance by pointing the camera at a sheet of white paper, the correct setting may not be obtained if the light - Olympus SP 320 | SP-320 Advanced Manual (English) - Page 64
for recording vivid. This function adjusts the color strength. 4 Top menu [MODE MENU] [PICTURE] [SHARPNESS] / [CONTRAST] / [SATURATION] image look crisper. • Toward - : The light and dark areas become less defined, giving the image a softer impression. Use this setting when you want to edit images - Olympus SP 320 | SP-320 Advanced Manual (English) - Page 65
where no light is focused and are recorded on the picture as noise. When [NOISE REDUCTION] is set to [ON], the camera automatically effects of noise reduction. They are not actual pictures taken with this camera. Top menu [MODE MENU] [CAMERA] [NOISE REDUCTION] [ON] / [OFF] g"Using the menus - Olympus SP 320 | SP-320 Advanced Manual (English) - Page 66
a party or family gathering... Use the self-timer function to take group photos at school reunions or birthday parties. At a sporting event... Use sequential shooting mode to take a succession of shots of a goal and pick out the best ones later. In the outdoors or at scenic sites... Use panorama - Olympus SP 320 | SP-320 Advanced Manual (English) - Page 67
the first frame. The sequential shooting speed varies depending on the record mode setting. Pictures can be taken at a faster speed than normal of frames is set to [×3] -1.0 0.0 (j / i / k 5 +1.0 Top menu [MODE MENU] [CAMERA] [DRIVE] [j] / [i] / [k] g"Using the menus" (P. 17) 1 Take the - Olympus SP 320 | SP-320 Advanced Manual (English) - Page 68
modes, the built-in flash record mode is set to [RAW]. • As the maximum shutter speed is set to 1/30 sec., adequate exposure is not obtained when shooting a dark subject in modes other than S and M. • If the battery power is low and f blinks during sequential shooting, shooting stops and the camera - Olympus SP 320 | SP-320 Advanced Manual (English) - Page 69
has been taken, all operation buttons, the mode dial and zoom lever do not function. • If the internal memory/card becomes full or the battery power runs out during sleep mode, a warning is displayed, timelapse stops and the camera automatically turns off. Additional shooting functions Self-timer - Olympus SP 320 | SP-320 Advanced Manual (English) - Page 70
lamp lights for approximately 10 seconds, then starts blinking. After blinking for approximately 2 seconds, the picture is taken. • The self-timer mode is automatically canceled after one shot. Panorama shooting You can take advantage of panorama shooting with Olympus cards (xD- Picture Card - Olympus SP 320 | SP-320 Advanced Manual (English) - Page 71
there is no card in the camera. Panorama mode is only available with Olympus cards. • During panorama shooting, the flash, sequential shooting, and recording sound with still pictures are not available. • The camera itself cannot connect panorama pictures. The OLYMPUS Master software is necessary to - Olympus SP 320 | SP-320 Advanced Manual (English) - Page 72
, or timelapse. • Sound recording may also pick up camera noises, such as button operations, shutter movement, etc. • Sound recording may not be possible if there is insufficient space in the internal memory or the card. Changing the monitor display (DISP./GUIDE) This function displays histograms - Olympus SP 320 | SP-320 Advanced Manual (English) - Page 73
in n mode. This screen is not displayed if [FRAME ASSIST] is [OFF]. TIPS • Information is displayed on the monitor when the display is changed or menu operations are performed. For details about displayed information, refer to "Monitor Symbols & icons" in the "Basic Manual". Histogram This - Olympus SP 320 | SP-320 Advanced Manual (English) - Page 74
display (y) Top menu [MODE MENU] [SETUP] [u] [OFF] / [ON] / [DIRECT] g"Using the menus" (P. 17) TIPS How to read the histogram 1 1 If the peak fills too much of the frame, the image will appear mostly black. 2 2 If the peak fills too much of the frame, the image will appear mostly white - Olympus SP 320 | SP-320 Advanced Manual (English) - Page 75
you took several pictures of the same scene because you weren't sure whether they would come out or not. That's no way to record important memories! With a digital camera, you can review your pictures immediately. Just play the picture back as soon as you've taken it. If you don't like what you see - Olympus SP 320 | SP-320 Advanced Manual (English) - Page 76
pictures The pictures on a card are played back if a card is inserted in the camera. Remove the card to play back pictures stored in the internal memory. • The last picture taken is displayed on the monitor (single-frame playback). • You can use this function in shooting mode by pressing the QUICK - Olympus SP 320 | SP-320 Advanced Manual (English) - Page 77
format. When a still picture or movie is recorded, it is automatically registered to the calendar by the date of recording. You need to have the date and time set on the camera 6 Top menu [MODE MENU] [PLAY] [y] [+90°] / [0°] / [-90°] g"Using the menus" (P. 17) • For album playback mode: Top menu [ - Olympus SP 320 | SP-320 Advanced Manual (English) - Page 78
PLAY] screen is displayed. Playing time/Total recording time 00:00 / 00:36 Note • The orange lamp blinks while the camera is reading the movie. Reading of movies may take some time. Do not open the card cover while the orange lamp is blinking. Doing so may damage the data in the internal memory or - Olympus SP 320 | SP-320 Advanced Manual (English) - Page 79
with a time index, allowing you to play back the movie from the desired frame. Top menu [MODE MENU] [PLAY] [INDEX PLAY] g"Using the menus" (P. 17) 1 Press srpq to select a frame. • Push or pull the zoom lever to change the number of displayed index frames. 2 Press Z. • Movie playback begins from the - Olympus SP 320 | SP-320 Advanced Manual (English) - Page 80
. Pictures stored in the internal memory cannot be entered in albums. You can enter up to 100 pictures into each of the available 12 albums. Using the provided OLYMPUS Master software, you can enter pictures from a computer into an album on a card. (Album playback mode menu To enable album playback - Olympus SP 320 | SP-320 Advanced Manual (English) - Page 81
an album, and press Z. SEL. ALBUM 1 2 3 4 5 6 7 8 (SEL. IMAGE 9 10 11 12 SELECT GO OK 3 Press srpq to select a picture to enter the 3 to enter multiple pictures. • Pull the zoom lever toward T to display a picture using single-frame playback. 6 SEL. IMAGE 1 2 3 4 5 6 7 8 9 - Olympus SP 320 | SP-320 Advanced Manual (English) - Page 82
be entered in multiple albums. GO OK Playback Viewing pictures in albums (SEL. ALBUM) Top menu [ALBUM] 1 Press Z. • The top menu of the album playback mode is displayed. 2 Select [SEL. ALBUM]. g"Using the menus" (P. 17) CLOSE ALBUM ALBUM MENU SEL. ALBUM UNDO ENTRY OK HOLD 82 - Olympus SP 320 | SP-320 Advanced Manual (English) - Page 83
to the picture 10 frames ahead. • When playing back still pictures, pull the zoom lever toward T for close-up playback. During close-up playback, use the arrow cover (SELECT TITLE IMAGE) You can change the title image (first frame in album) displayed on the [SEL. ALBUM] screen. Select the album to - Olympus SP 320 | SP-320 Advanced Manual (English) - Page 84
entered in an album. The picture will still be saved on the card. This only removes the picture from the album. Select the album containing Step 2 to undo multiple pictures. • Pull the zoom lever toward T to display a picture using single-frame playback. SEL. IMAGE 1 2 3 4 5 6 7 8 9 - Olympus SP 320 | SP-320 Advanced Manual (English) - Page 85
Erasing pictures from albums You can erase pictures entered in an album. Unlike undoing album pictures, this erases the picture from the card. Display and erase a picture from an album. Note • You cannot erase protected pictures. Cancel protection before erasing such pictures. g"Protecting pictures - Olympus SP 320 | SP-320 Advanced Manual (English) - Page 86
the current picture until it disappears into the center of the screen. The next picture then appears in the center of the screen, and the camera gradually zooms in on the picture until it is full size. ZOOM UP The camera gradually zooms in on the current picture until it disappears. The next picture - Olympus SP 320 | SP-320 Advanced Manual (English) - Page 87
not stop until you cancel it by pressing Z. NORMAL SCROLL FADER ZOOM DOWN CANCEL SELECT GO OK Note • You are recommended to use the optional AC adapter when running a slideshow for a long period of time. The camera will enter sleep mode after about 30 minutes and stop the slideshow automatically - Olympus SP 320 | SP-320 Advanced Manual (English) - Page 88
than 1 m (3.3 ft.) from the subject, sound may not be recorded properly. • If you re-record the sound, the original sound is erased. • Sound recording is not possible if there is insufficient space in the internal memory or on the card. • The microphone may pick up the sound of buttons operated - Olympus SP 320 | SP-320 Advanced Manual (English) - Page 89
recorded in raw data format and stores them as new pictures in JPEG format Q Changes the image size to 640 × 480 or 320 × 240 and saves the picture as a new file. 6 P Crops part of a picture and saves it as a new file. REDEYE FIX Corrects the red-eye phenomenon caused by the flash - Olympus SP 320 | SP-320 Advanced Manual (English) - Page 90
the trimming position and size. srpq Adjusts the position of the picture. Zoom lever Adjusts the size of the picture. 3 Press Z. 4 Select and press Z. RAW DATA EDIT WB SHARPNESS CONTRAST AUTO PRESET CANCEL SELECT 640×480 320×240 CANCEL GO OK GO OK (When [REDEYE FIX] is selected 1 Select [ - Olympus SP 320 | SP-320 Advanced Manual (English) - Page 91
• The [BUSY] bar is displayed and after the image is saved, the camera returns to the playback mode. Note • Editing with [RAW DATA EDIT], [Q], [P], internal memory or the card, or for movies, pictures edited with a computer, pictures taken with another camera, or pictures in raw data format (not - Olympus SP 320 | SP-320 Advanced Manual (English) - Page 92
the picture 90° clockwise or counterclockwise. 3 Adjust the position and size of the picture, and press Z. srpq Adjusts the position of the picture. Zoom lever Adjusts the size of the picture. When you select a frame that can accommodate more than one picture, repeat Steps 2 and 3 to add pictures - Olympus SP 320 | SP-320 Advanced Manual (English) - Page 93
to rotate the picture 90° clockwise or counterclockwise. 3 Adjust the position and size of the title, and press Z. srpq Adjusts the position of the title. Zoom lever Adjusts the size of the title. 4 Press srpq to select the color of the title, and press Z. TITLE SELECT TITLE GO OK MOVE TITLE - Olympus SP 320 | SP-320 Advanced Manual (English) - Page 94
ALL IMAGES All pictures in the ALL IMAGES internal memory or ALBUM the card are added to the layout. gGo to Step 3. CALENDAR SEL. IMAGE ALBUM When [SEL. IMAGE] is selected • Press pq to select a picture, and press Z. Repeat this step and select additional pictures until the screen in Step 3 - Olympus SP 320 | SP-320 Advanced Manual (English) - Page 95
the internal memory or the card, or for movies, pictures edited with a computer, pictures taken with another camera, or pictures in raw data format. TIPS • You can change frames and titles using OLYMPUS Master software. For details, refer to the "Help" guide and the OLYMPUS Master reference manual - Olympus SP 320 | SP-320 Advanced Manual (English) - Page 96
The [BUSY] bar is displayed and after the image is saved, the camera returns to the playback mode. NEW FILE CANCEL CANCEL SELECT GO OK When [ internal memory or the card, or for movies, pictures edited with a computer, pictures taken with another camera, or pictures in raw data format. - Olympus SP 320 | SP-320 Advanced Manual (English) - Page 97
index, and press Z. GO OK Playback 4 Select [OK], and press Z. • The [BUSY] bar is displayed. The 9 frames extracted from the movie are displayed in index format, and the camera returns to playback mode. The index is stored as a new picture. 00:00/00:36 INDEX SELECT OK RESET CANCEL GO OK 97 - Olympus SP 320 | SP-320 Advanced Manual (English) - Page 98
picture in a different record mode from the original movie. • The interval between the frames that are automatically extracted varies depending on the length of the movie. • You cannot create an index if there is insufficient memory space in the internal memory or the card. Editing a movie Top - Olympus SP 320 | SP-320 Advanced Manual (English) - Page 99
internal memory or the card. • The editing process of long movies is more time-consuming. 6 Playing back pictures on a TV Use the provided AV cable to play back recorded images on your TV. You can play back both still pictures and movies on your TV. 1 Make sure that the TV and camera are turned - Olympus SP 320 | SP-320 Advanced Manual (English) - Page 100
on a TV. Note • Make sure that the camera's video output signal is the same as the TV's video signal. g"Video output" (P. 100) • Be sure to use the provided AV cable to connect the camera to the TV. • The picture may appear off-center on the TV screen. 6 Video output You can select [NTSC] or [PAL - Olympus SP 320 | SP-320 Advanced Manual (English) - Page 101
internal memory to the card (BACKUP) Pictures recorded to the internal memory can be copied to a card (backup). A backup does not erase the pictures in the internal memory. You need an optional card to use the backup function. Insert a card into the camera before using this function. Top menu [MODE - Olympus SP 320 | SP-320 Advanced Manual (English) - Page 102
Select [YES], and press Z. • All image data in the internal memory is copied to the card. BACKUP YES NO SELECT GO OK Note • If there is not enough space left on the card, [CARD FULL] is displayed and backup is canceled. • If the battery power runs out while the camera is backing up the data, the - Olympus SP 320 | SP-320 Advanced Manual (English) - Page 103
" (P. 12) 2 Select [YES], and press Z. • The displayed picture is erased. All-frame erase ERASE SELECT YES NO GO OK Top menu [MODE MENU] [MEMORY (CARD)] [ALL ERASE] g"Using the menus" (P. 17) 6 1 Select [YES], and press Z. • All the pictures are erased. ALL ERASE CAUTION ERASING ALL YES - Olympus SP 320 | SP-320 Advanced Manual (English) - Page 104
camera. All existing data, including protected pictures, are erased when the internal memory or the card is formatted. Make sure that you save or transfer important data to a computer before formatting the internal memory or the card. Top menu [MODE MENU] [MEMORY (CARD)] [MEMORY FORMAT (FORMAT - Olympus SP 320 | SP-320 Advanced Manual (English) - Page 105
7 Settings Settings 7 One of the key features of a digital camera is that you can view the pictures you have taken immediately. But that isn't all. For example, you can customize the startup screen with your own picture or select the beep or shutter sounds. Making use of these functions will make - Olympus SP 320 | SP-320 Advanced Manual (English) - Page 106
. Settings Top menu [MODE MENU] [SETUP] [W] g"Using the menus" (P. 17) 1 Select a language, and press Z. ENGLISH FRANCAIS ESPAÑOL PORTUGUES SELECT GO OK TIPS To increase the number of languages j You can add other languages to your camera with the provided OLYMPUS Master software. For details - Olympus SP 320 | SP-320 Advanced Manual (English) - Page 107
SETUP) You can select the picture displayed and the sound played when the camera is turned on and turned off. You can also register your favorite picture and display it on the screen. g"Screen setup" (P. 107) Top menu [MODE MENU] [SETUP] [PW ON SETUP] / [PW OFF SETUP] g"Using the menus" (P. 17 - Olympus SP 320 | SP-320 Advanced Manual (English) - Page 108
MODE MENU] [SETUP] [SCREEN SETUP] [PW ON SETUP] / [PW OFF SETUP] g"Using the menus" (P. 17) • If a picture is already registered, the [IMAGE EXISTING] screen View lets you resume shooting immediately. The picture being recorded is not displayed. This is useful when you want to prepare for - Olympus SP 320 | SP-320 Advanced Manual (English) - Page 109
/VOLUME) 8 Select [OFF], [LOW] or [HIGH] for the camera warning sound. BEEP Select [OFF], [1] or [2] for the sound are 5 levels to choose from. (8 Top menu [MODE MENU] [SETUP] [8] [OFF] / [LOW] / [HIGH] g"Using the menus" (P. 17) ( BEEP Top menu [MODE MENU] [SETUP] [BEEP] g"Using the menus" - Olympus SP 320 | SP-320 Advanced Manual (English) - Page 110
the menus" (P. 17) • For album playback mode: Top menu [ALBUM MENU] [VOLUME] 1 Press sr to set the volume, and press Z. Resetting file names (FILE NAME) File names and their folder names for recorded pictures are automatically 7 generated by the camera. File names and folder names respectively - Olympus SP 320 | SP-320 Advanced Manual (English) - Page 111
can choose: [RESET] or [AUTO]. Choose the one that is best for you when transferring images to a computer. RESET AUTO The file number and folder number are reset every time a new card is inserted in the camera. The folder number returns to No. 100 and the file number returns to No. 0001. This - Olympus SP 320 | SP-320 Advanced Manual (English) - Page 112
is finished, the screen returns to the mode menu. PIXEL MAPPING START DUAL TIME SETUP m/ft Note • If you turn the camera off during pixel mapping make it easier to see the image. Top menu [MODE MENU] [SETUP] [s] 7 g"Using the menus" (P. 17) • For album playback mode: Top menu [ALBUM MENU] [s] - Olympus SP 320 | SP-320 Advanced Manual (English) - Page 113
each image, and is used in the file name. Top menu [MODE MENU] [SETUP] [X] g"Using the menus" (P. 17) 1 Select one of the following date formats: camera is left without batteries for approximately 3 days. The settings will be canceled more quickly if the batteries were only loaded in the camera - Olympus SP 320 | SP-320 Advanced Manual (English) - Page 114
you can switch between the new setting and the time set in [X]. Top menu [MODE MENU] [SETUP] [DUAL TIME SETUP] g"Using the menus" (P. 17) (Setting back to the previous setting, 7 press p. • The first two digits of the year are fixed. • The date format is the same as that set in Step 1 of [X]. 3 - Olympus SP 320 | SP-320 Advanced Manual (English) - Page 115
[DUAL TIME SETUP] is set to [OFF]. Setting the measurement unit (m/ft) The measurement unit can be selected from either meters or feet in the manual focus mode. m At long ranges, the camera measures in meters, and at short ranges in centimeters. ft At long ranges, the - Olympus SP 320 | SP-320 Advanced Manual (English) - Page 116
camera (MY MODE F 9 - - P. 60 MONITOR*1 9 - - P. 72 ZOOM*2 9 - - - FLASH MODE 9 - - P. 42 AE LOCK (factory default settings) - QFLASH 9 9 9 P. 46 DIGITAL ZOOM 9 9 9 P. 40 NOISE REDUCTION 9 9 9 P. 65 AF MODE 9 9 9 P. 54 FOCUS MODE 9 9 9 P. 55 FULLTIME - Olympus SP 320 | SP-320 Advanced Manual (English) - Page 117
ASSIST 9 - - P. 74 *1 Set to light the monitor when the camera is turned on. *2 For [ZOOM], select from 38 mm, 50 mm, 80 mm, 100 mm, 114 mm (these numbers are based on the focal length of a 35mm camera). (Setting My Mode Top menu [MODE MENU] [SETUP] [MY MODE SETUP] g"Using the menus" (P. 17 - Olympus SP 320 | SP-320 Advanced Manual (English) - Page 118
[CURRENT] in Step 1 Select [SET], and press Z. • The current camera settings are saved in the selected My Mode. MY MODE SETUP SET CURRENT SETTING SET CANCEL SELECT GO OK If you selected [RESET] be saved in the [CURRENT] setting, the zoom position will be saved as the closest of the 5 settings in - Olympus SP 320 | SP-320 Advanced Manual (English) - Page 119
be set. SHORT CUT A B C SELECT GO OK 2 Select a function, and press Z. • The screen in Step 1 is displayed. SHORT CUT ESP/ 3 Press Z. (Setting the custom button DRIVE ISO SELECT GO OK 7 Top menu [MODE MENU] [SETUP] [CUSTOM BUTTON] g"Using the menus" (P. 17) 1 Select a function, and press - Olympus SP 320 | SP-320 Advanced Manual (English) - Page 120
store, it is a good idea to store the print reservation data on the card first. This lets you select the pictures you want to print and decide how pictures at home, you can either connect the camera directly to the printer or you can connect the camera to a computer and download the pictures to the - Olympus SP 320 | SP-320 Advanced Manual (English) - Page 121
lost. • Images recorded in movie mode and raw data cannot be printed. • The camera will not enter sleep mode when connected to a printer with the USB cable. Print modes and settings Available printing modes, paper sizes etc., vary depending on the printer you use. Refer to the instruction manual for - Olympus SP 320 | SP-320 Advanced Manual (English) - Page 122
of the provided USB cable into the camera's multi-connector and the other end into the printer's USB connector. • The [EASY PRINT START] screen is displayed. • For details of how to turn the printer on and the position of the USB port, refer to the printer's instruction manual. 3 Press the < button - Olympus SP 320 | SP-320 Advanced Manual (English) - Page 123
. Printing pictures TIPS • You can use [EASY PRINT] even when the camera is turned off or in shooting mode. With the camera turned off or in shooting mode, connect the USB cable. The selection screen for the USB connection is displayed. Select [EASY PRINT]. g"Printing pictures (CUSTOM PRINT)" Step - Olympus SP 320 | SP-320 Advanced Manual (English) - Page 124
camera and printer are connected. The USB P C EASY PRINT [PRINT MODE SELECT] screen is CUSTOM PRINT displayed on the monitor. Select the EXIT print settings on the camera is a card in the camera, a screen is displayed for selecting the pictures you want to print. Select [ALL IMAGES] or [ALBUM - Olympus SP 320 | SP-320 Advanced Manual (English) - Page 125
OK MORE 7 Select [PRINT], and press Z. • Printing starts. • When printing is finished, the [PRINT MODE SELECT] screen is displayed. (To cancel printing Pressing Z during print data transfer displays the screen for selecting whether to continue or cancel printing. To cancel printing, select [CANCEL - Olympus SP 320 | SP-320 Advanced Manual (English) - Page 126
printing (PictBridge) 8 In the [PRINT MODE SELECT] screen, press p. • A message is displayed. 9 Remove the USB cable from the camera. • The camera turns off. PRINT MODE SELECT PRINT ALL PRINT MULTI PRINT ALL INDEX EXIT SELECT GO OK 10Remove the USB cable from the printer. 8 Printing pictures - Olympus SP 320 | SP-320 Advanced Manual (English) - Page 127
in the same print mode. If the following screen is displayed, perform the operations according to the operation guide. Selecting the picture to print (available only when a card is inserted) ALL IMAGES ALBUM Allows you to select from all pictures in the internal memory or the card to print. Select - Olympus SP 320 | SP-320 Advanced Manual (English) - Page 128
is printed filling the entire page. CANCEL SELECT GO OK Available in [MULTI PRINT] mode only. The number of prints that can be printed varies depending on the printer. Note • If the [PRINTPAPER] screen is not displayed, [SIZE], [BORDERLESS] and [PICS/SHEET] are set to [STANDARD]. Selecting the - Olympus SP 320 | SP-320 Advanced Manual (English) - Page 129
WITHOUT SELECT SET GO OK Setting the trimming position and size [P] 1 Use the zoom lever to adjust the trimming size and the arrow pad to adjust the trimming image increases at the time of printing, creating a grainy picture. • You are recommended to take a picture in SHQ or HQ record mode if - Olympus SP 320 | SP-320 Advanced Manual (English) - Page 130
Direct printing (PictBridge) If an error message is displayed If an error message is displayed on the camera's monitor during direct print setting or printing, see the following table. For more details, refer to the printer's instruction manual. Monitor indication NO CONNECTION NO PAPER NO INK - Olympus SP 320 | SP-320 Advanced Manual (English) - Page 131
at a photo store that supports DPOF. DPOF is a standard format used to record automatic print information from digital cameras. It allows you to store 's instruction manual. A PC card adapter may also be necessary. To use print services without using DPOF Pictures stored in the internal memory cannot - Olympus SP 320 | SP-320 Advanced Manual (English) - Page 132
If there is not enough space in the card memory, you may not be able to enter the reservation data. [CARD FULL] will be displayed. • You can make DPOF print reservations for up to 999 images per card. • Even if an image is displayed with the message [PICTURE ERROR], it may be possible to make print - Olympus SP 320 | SP-320 Advanced Manual (English) - Page 133
picture is shown below. Follow the operation guide to make settings. For album playback mode, select the album that you want to 8 (Trimming the picture 1 Push or pull the zoom lever toward W or T. • The trimming frame is displayed. 2 Use the zoom lever to adjust the trimming size and the arrow - Olympus SP 320 | SP-320 Advanced Manual (English) - Page 134
CANCEL SELECT GO OK All-frame reservation Reserves all the pictures stored on the card. The number of prints is set at one print per picture. You can set to print the shooting date and time. For album playback mode, print reservations are made for all pictures in the album. Select the - Olympus SP 320 | SP-320 Advanced Manual (English) - Page 135
Using the menus" (P. 17) • For album playback mode: Top menu [ALBUM MENU] [ - Olympus SP 320 | SP-320 Advanced Manual (English) - Page 136
is just one of the many ways you can enjoy your pictures. You can print out your favorite pictures, use the application software to download your pictures from your camera and edit them or organize them by date or category, or attach them to e-mail and send them over the Internet. There - Olympus SP 320 | SP-320 Advanced Manual (English) - Page 137
first. Depending on the software, the image files may be damaged if the images are processed (rotated, etc.) while they are still in the internal memory or on the card. If the data cannot be downloaded from the camera using the USB cable jImage files on xD-Picture Card may be downloaded using the - Olympus SP 320 | SP-320 Advanced Manual (English) - Page 138
Master For editing and managing image files, install the OLYMPUS Master software from the provided CD-ROM. What is OLYMPUS Master? OLYMPUS Master is application software for editing images taken with a digital camera on a computer. Installing it on your computer lets you do the following: Download - Olympus SP 320 | SP-320 Advanced Manual (English) - Page 139
recommended) 300 MB or more USB port 1,024 × 768 pixels, 65,536 colors or more Note • Data transfer is only guaranteed on computers with a factory installed OS. • To install the software in Windows 2000 Professional/XP, you must log on as a user with administrators' privileges. • Internet Explorer - Olympus SP 320 | SP-320 Advanced Manual (English) - Page 140
reboot. • Disconnect the cable connecting the camera to the computer • Turn off the camera • Open the camera's card cover • Open the camera's battery compartment cover Windows 1 Insert the CD-ROM into the CD-ROM drive. • The OLYMPUS Master setup screen is displayed. • If the screen is not displayed - Olympus SP 320 | SP-320 Advanced Manual (English) - Page 141
screen instructions. • When the OLYMPUS Master licensing agreement is displayed, read the agreement and click "Yes" to proceed with the installation. • When the "User Information" dialog box is displayed, enter your "Name" and "OLYMPUS the OLYMPUS Master instruction manual. If this screen is not - Olympus SP 320 | SP-320 Advanced Manual (English) - Page 142
screen asking you if you wish to restart the computer is displayed and click "OK". • The computer restarts. • Remove the CD-ROM from the CD-ROM drive and store it. Connecting the camera The OLYMPUS Master installer starts up. • Follow the on-screen instructions. • When the OLYMPUS Master - Olympus SP 320 | SP-320 Advanced Manual (English) - Page 143
• Refer to your computer's instruction manual to locate the position of the USB port. 3 Plug the USB cable into the Connector cover multi-connector of the camera. • The camera turns on automatically. • The monitor turns on and the selection screen for the USB connection is displayed. Multi - Olympus SP 320 | SP-320 Advanced Manual (English) - Page 144
"OLYMPUS Master" icon "OLYMPUS Master" folder. • The main menu is displayed. • When OLYMPUS Master is started up for the first time, the "User Information menu. Enter your "Name" and "OLYMPUS Master Serial Number", and select your region. • After the "User Information" dialog box, the "Registration" - Olympus SP 320 | SP-320 Advanced Manual (English) - Page 145
Master main menu Starting up OLYMPUS Master 7 1 6 2 3 5 4 1 "Transfer Images" button Downloads images from the camera or other media. 2 "Browse Images" button Displays the browse window. 3 "Online Print" button The online print window is displayed. 4 "Print Images at Home" button Displays - Olympus SP 320 | SP-320 Advanced Manual (English) - Page 146
the main menu, click "Menu" in the "Browse" window. Note • The orange lamp blinks while downloading images. Do not do any of the 9 following while the lamp is blinking. • Open the camera's card cover. • Open the camera's battery compartment cover. • Connect or disconnect the AC adapter. 146 - Olympus SP 320 | SP-320 Advanced Manual (English) - Page 147
the camera to a computer Displaying camera images on a computer (To disconnect the camera You can disconnect the camera after downloading the images to your computer. 1 Make sure that the orange lamp has stopped blinking. 2 Make the following preparations for disconnecting the USB cable. Windows - Olympus SP 320 | SP-320 Advanced Manual (English) - Page 148
and movies 3 Disconnect the USB cable from the camera. Connecting the camera to a computer Note • Windows Me/2000/XP: When you click "Unplug or Eject Hardware", a warning message may be displayed. Make sure that image data is not being downloaded from the camera and that all applications are - Olympus SP 320 | SP-320 Advanced Manual (English) - Page 149
the camera to a computer Printing pictures (To view a movie 1 Double-click the movie thumbnail that you want to see in the "Browse" window. • View mode is enabled and the first frame of the movie is displayed. 2 To play back the movie, click playback button at the bottom of the screen. The - Olympus SP 320 | SP-320 Advanced Manual (English) - Page 150
camera to a computer Printing pictures 2 Click "Photo" . • The "Photo Print" window is displayed. 3 Click "Settings" in the "Photo Print" window. • The printer settings screen is displayed. Make the necessary printer settings. 4 Select a layout and size. • To print the date and time with your image - Olympus SP 320 | SP-320 Advanced Manual (English) - Page 151
using OLYMPUS Master This camera is compatible with USB mass storage. You can connect the camera to your computer using the USB cable provided with the camera to download and save images without using OLYMPUS Master. The following environment is required to use the USB cable to connect the camera to - Olympus SP 320 | SP-320 Advanced Manual (English) - Page 152
chapter contains useful information from OLYMPUS. • When you get an error message while using the camera... • When you press the POWER button but nothing happens... • When you want to know how to safely store your camera... • When you don't understand a term used in the manual...Here is where you'll - Olympus SP 320 | SP-320 Advanced Manual (English) - Page 153
There are no pictures in The internal memory or the card the internal memory or contains no pictures. on the card. Record pictures. r PICTURE ERROR There is a problem with the selected picture and it cannot be played back on this camera. Use image processing software to view the picture on - Olympus SP 320 | SP-320 Advanced Manual (English) - Page 154
be used in this camera. Or, the card is not formatted. Format the card or replace the card. • Select [POWER OFF] and press Z. Insert a new card. • Select [FORMAT] and press Z. All data on the card is erased. MEMORY SETUP POWER OFF MEMORY FORMAT SELECT GO OK There is an error in the internal - Olympus SP 320 | SP-320 Advanced Manual (English) - Page 155
the batteries. - power during shooting or (Wait until the orange lamp turns off when while the images were blinking.) being written to the internal memory or the card. The memory gauge is full. Wait until there is space in the memory gauge. - There is a problem with See "Error messages - Olympus SP 320 | SP-320 Advanced Manual (English) - Page 156
during shooting. on the screen. This is not a malfunction. The date recorded with the image data is wrong. The date and time is not Set the date/time. The clock is not preset. set. The camera has been left without batteries. If the camera is left for 3 days without batteries, the date and time - Olympus SP 320 | SP-320 Advanced Manual (English) - Page 157
Troubleshooting Possible cause Corrective action Ref. page The monitor goes off. The camera is in the Operate the camera with the shutter button or - sleep mode. zoom lever. The flash does not fire. The flash is set to [$]. Select a flash mode other than [$]. P. 42 The subject is - Olympus SP 320 | SP-320 Advanced Manual (English) - Page 158
Troubleshooting (Playback of recorded images Possible cause Corrective action The pictures in the internal memory cannot be played back. The card is inserted in When a card is inserted, only pictures on the the camera. card can be played back. Remove the card. The picture is out of focus. A - Olympus SP 320 | SP-320 Advanced Manual (English) - Page 159
Troubleshooting Possible cause Corrective action The picture is too dark. The flash was blocked Hold the camera correctly, keeping your by your finger. fingers away from the flash. The subject was out of Shoot within the flash working range. the working range of the flash. The flash was set - Olympus SP 320 | SP-320 Advanced Manual (English) - Page 160
. Press the QUICK VIEW button or set the mode dial to q. There are no pictures in [NO PICTURE] is displayed on the monitor. the internal memory or Record pictures. on the card. There is a problem with See "Error messages". the card. The camera is connected to a TV. The monitor does not function - Olympus SP 320 | SP-320 Advanced Manual (English) - Page 161
does not support PictBridge. Refer to the instruction manual for your printer. Or, contact your printer manufacturer. The camera is not recognized by the computer. The computer failed to Disconnect the USB cable from the camera, recognize the camera. and connect it again. The USB driver has not - Olympus SP 320 | SP-320 Advanced Manual (English) - Page 162
as benzene or alcohol, or chemically treated cloth. • Mold may form on the lens surface if the lens is left dirty. ( Storage • When storing the camera for extended periods, remove the batteries, AC adapter and card, and keep in a cool, dry place that is well ventilated. • Periodically insert the - Olympus SP 320 | SP-320 Advanced Manual (English) - Page 163
conditions. AA NiMH batteries Olympus NiMH batteries are rechargeable and economical. For more details, refer to the instruction manual attached to the charger. Lithium battery pack (CR-V3) The Olympus CR-V3 lithium battery pack has a long service life allowing you to use the camera longer than with - Olympus SP 320 | SP-320 Advanced Manual (English) - Page 164
Accessories (optional) AC adapter An AC adapter is useful for time-consuming tasks such as image downloads to a computer. Use the Olympus AC adapter to power your digital camera from a common AC wall outlet. Do not use any other AC adapter with this camera. DC-IN jack AC wall outlet Power plug - Olympus SP 320 | SP-320 Advanced Manual (English) - Page 165
• Always observe the operating environment restrictions described in the camera's manual. Battery Handling Precautions • Olympus NiMH batteries (included in some areas) are intended for use only with Olympus digital cameras. Never use these batteries with any other device. • Always charge NiMH - Olympus SP 320 | SP-320 Advanced Manual (English) - Page 166
you throw away dead batteries, be sure to cover their terminals and always observe local laws and regulations. LCD Monitor • Do not push the monitor forcibly; otherwise the image may become vague, resulting in a playback mode failure or damage to the monitor. • A strip of light may appear on the - Olympus SP 320 | SP-320 Advanced Manual (English) - Page 167
use these written materials or software or equipment. Some countries do not allow the exclusion or limitation of liability for consequential or incidental damages, so the above limitations may not apply to you. • Olympus reserves all rights to this manual. Warning Unauthorized photographing or use - Olympus SP 320 | SP-320 Advanced Manual (English) - Page 168
not installed and used in accordance with the instructions, may cause harmful interference to radio communications. OLYMPUS-supplied USB cable should be used to connect the camera to USB enabled personal computers (PC). Any unauthorized changes or modifications to this equipment would void the user - Olympus SP 320 | SP-320 Advanced Manual (English) - Page 169
is for saving desired print settings on digital cameras. By entering which images to print and the number of copies of each, the user can easily have the desired images printed by a printer or print lab that supports the DPOF format. Eclipsing (Vignetting) This refers to when an object obscures - Olympus SP 320 | SP-320 Advanced Manual (English) - Page 170
. Photographs (pictures) taken using this camera are recorded onto the card in JPEG format. By downloading these images to a computer, users can edit them using graphics application software or view the images using an Internet web browser. M (Manual) Mode The user sets both the aperture and shutter - Olympus SP 320 | SP-320 Advanced Manual (English) - Page 171
exposure. Slave Flash A wireless flash that is not connected to the camera by a synchronization cord. It flashes in phase with the flash on the camera and can be used for lighting techniques, such as changing the way shadows are cast on a subject. Sleep Mode A mode designed to save battery life. The - Olympus SP 320 | SP-320 Advanced Manual (English) - Page 172
This chapter contains all the camera functions described in Chapters 1 to 9. Refer here for lists of the top menus and mode menus. The index helps you find the pages containing a function or item that you are looking for. For effective use of the manual, reference page numbers are listed - Olympus SP 320 | SP-320 Advanced Manual (English) - Page 173
menus (P, A, S, M, r, f) Top menu Tab Item Sub menu Settings Ref. Page MODE MENU CAMERA ESP/n & DRIVE ISO r1/2/3/4*1 Y w #SYNCRO QFLASH DIGITAL ZOOM NOISE REDUCTION AF MODE FOCUS MODE FULLTIME AF PANORAMA R TIMELAPSE ESP, n, 4 OFF, &, % o, j, i, k, 7 P. 58 P. 41 P. 67 AUTO, 64, 100, 200 - Olympus SP 320 | SP-320 Advanced Manual (English) - Page 174
P. 61 5, 3, 4, 1, w, x, P. 61 y P. 61 RED7 - BLUE7 P. 63 -5 - +5 P. 64 -5 - +5 P. 64 -5 - +5 P. 64 MEMORY MEMORY FORMAT (CARD) (FORMAT) BACKUP YES, NO YES, NO P. 104 P. 101 SETUP RESET W* YES, NO P. 106 P. 106 PW ON SCREEN SETUP SOUND OFF, 1, 2 OFF, 1, 2 P. 107 P. 107 PW OFF - Olympus SP 320 | SP-320 Advanced Manual (English) - Page 175
Sub menu Settings Ref. Page (Y)*2 P. 69 (K)*2 P. 30 SCENE/(&)*3 P. 36, 41 *1 Only available in r mode. *2 The function registered in [SHORT CUT] is displayed. *3 In f mode, [SCENE] is displayed. In other modes, the function registered in [SHORT CUT] is displayed. Miscellaneous 11 175 - Olympus SP 320 | SP-320 Advanced Manual (English) - Page 176
BLUE7 P. 63 -5 - +5 P. 64 -5 - +5 P. 64 -5 - +5 P. 64 MEMORY MEMORY FORMAT (CARD) (FORMAT) BACKUP YES, NO YES, NO P. 104 P. 101 SETUP RESET W* PW ON SCREEN SETUP SOUND PW OFF SCREEN SETUP SOUND 8 BEEP FILE NAME PIXEL MAPPING s X DUAL TIME SETUP VIDEO OUT YES, NO OFF, 1, 2 OFF, 1, 2 OFF - Olympus SP 320 | SP-320 Advanced Manual (English) - Page 177
MODE MENU MEMORY MEMORY FORMAT (CARD) (FORMAT) BACKUP YES, NO YES, NO P. 104 P. 101 SETUP RESET W* PW ON SCREEN SETUP SOUND PW OFF SCREEN SETUP SOUND REC VIEW 8 BEEP SHUTTER SOUND FILE NAME PIXEL MAPPING s X DUAL TIME SETUP m/ft VIDEO depending on the area where you purchased this camera. 177 - Olympus SP 320 | SP-320 Advanced Manual (English) - Page 178
MODE MENU PLAY 0 y m < R ALBUM ENTRY OFF, ON +90°, 0°, -90° NORMAL, SCROLL, FADER, ZOOM DOWN, ZOOM UP, CHECKERBOARD, BLINDS, SWIVEL, RANDOM - Olympus SP 320 | SP-320 Advanced Manual (English) - Page 179
Settings Ref. Page MODE MENU EDIT*2 SETUP RESET W*1 PW ON SCREEN SETUP SOUND PW OFF SCREEN SETUP SOUND SCREEN SETUP VOLUME 8 BEEP s X DUAL TIME SETUP VIDEO OUT YES, NO on the area where you purchased this camera. *2 This is the same as the [MODE MENU] [EDIT] menu. Miscellaneous 11 179 - Olympus SP 320 | SP-320 Advanced Manual (English) - Page 180
, CANCEL P. 97 NEW FILE, OVERWRITE, P. 98 CANCEL MEMORY ALL ERASE (CARD) MEMORY FORMAT (FORMAT) BACKUP YES, NO YES, NO YES, NO P. 103 P. 104 P. 101 SETUP RESET W* PW ON SCREEN SETUP SOUND PW OFF SCREEN SETUP SOUND VOLUME 8 BEEP s X DUAL TIME SETUP VIDEO OUT YES, NO OFF, 1, 2 OFF, 1, 2 OFF - Olympus SP 320 | SP-320 Advanced Manual (English) - Page 181
Menu list Playback mode menus for album playback mode (q) Top menu Item Settings Ref. Page ALBUM MENU 0 y*1 SELECT TITLE IMAGE UNDO ENTRY - Olympus SP 320 | SP-320 Advanced Manual (English) - Page 182
are set as follows when the camera leaves the factory. Shooting mode Miscellaneous Information display (DISP./GUIDE) Optical zoom FNo. SHUTTER SPEED F Flash AEL ESP/n & DRIVE ISO r1/2/3/4 Y w #SYNCRO QFLASH DIGITAL ZOOM NOISE REDUCTION AF MODE FOCUS MODE FULLTIME AF R (still pictures) TIMELAPSE - Olympus SP 320 | SP-320 Advanced Manual (English) - Page 183
mode Information display (DISP./GUIDE) 0 y m R VOLUME Information off screen OFF 0° NORMAL OFF 3 Others Monitor ON W* PW ON SETUP SCREEN: OFF, SOUND: OFF PW OFF SETUP 8 SCREEN: OFF, SOUND: OFF LOW Miscellaneous BEEP 1 - LOW s ±0 X Y-M-D 2006.01.01 00:00 DUAL TIME SETUP OFF VIDEO - Olympus SP 320 | SP-320 Advanced Manual (English) - Page 184
to "Functions with limited operations by scene" (P.186). Modes and shooting functions Function Shooting mode h P A S M f A Flash AUTO 9 - - ! # H 9 - - 9 - 9 - $ 9 - Information display 9 Optical zoom 9 9 F AE LOCK - 9 - 9 - 9 -9- AF LOCK - 9 - AREA - 9 - ESP - Olympus SP 320 | SP-320 Advanced Manual (English) - Page 185
- 9 SATURATION - 9 MEMORY FORMAT (FORMAT) 9 BACKUP 9 RESET 9 W 9 PW ON SETUP 9 PW OFF SETUP 9 REC VIEW 9 - 8 9 BEEP 9 SHUTTER SOUND 9 - Miscellaneous MY MODE SETUP - 9 - FILE NAME 9 PIXEL MAPPING 9 s 9 X 9 DUAL TIME SETUP m/ft 9 9 - 11 VIDEO OUT 9 AF - Olympus SP 320 | SP-320 Advanced Manual (English) - Page 186
l Z a Flash 9 -9 - 9 Optical zoom 9 - 9 - AREA & % 9 - 9 - 9 - 9- 9 9*1 9 9 - 9- 9 - 9 DRIVE ISO Y w #SYNCRO 9 -9- 9 9*4 9 9 -9 - 9 -9 - - 9 9 -9 9 9 DIGITAL ZOOM 9 - 9 - NOISE REDUCTION - 9*2 - 9*2 - AF MODE 9 - 9 - Miscellaneous FOCUS MODE - Olympus SP 320 | SP-320 Advanced Manual (English) - Page 187
value 51 AREA 54 Arrow pad 17 AUCTION i 37 AUTO (Flash 42 AUTO (ISO 60 AUTO (shooting mode) h ...10 AUTO (white balance) WB AUTO 61 Auto bracketing 7 67 Auto focus AF 25 AV cable 99 AVAILABLE LIGHT PORTRAIT c 37 B BACKUP 101 Battery 163, 165 BEACH Z 38 BEEP 109 Beep sound 8 109 - Olympus SP 320 | SP-320 Advanced Manual (English) - Page 188
26, 31, 170 L LANDSCAPE F 36 LANDSCAPE+PORTRAIT D 36 LAYOUT 92 Lithium battery pack 163 M m/ft 115 Macro mode 41 Manual focus MF 55 Manual mode M 53, 170 MEMORY FORMAT 104 Memory indicator 32 Menu guide 19 Metering ESP/n 58 Microphone 72, 88 Mode dial 10 MODE MENU 14, 16 Monitor 12 - Olympus SP 320 | SP-320 Advanced Manual (English) - Page 189
fill-in flash H ........ 42 REDEYE FIX 89 Red-eye reduction flash !.... 42 Remaining recording time ........ 28 RESET 106 RESET (MY MODE SETUP) 117 Resizing Q 89 S Miscellaneous SATURATION 95 SATURATION 6 64 SCENE 10, 36 SCREEN SETUP 107 SCROLL 86 SEL. ALBUM 82 SEL. IMAGE 81, 84 - Olympus SP 320 | SP-320 Advanced Manual (English) - Page 190
light 1 61 U UNDER WATER MACRO H 38 UNDER WATER WIDE 1/2 kl 38 UNDO ALL 84 UNDO ENTRY (ALBUM ENTRY) 84 USB cable ...... 122, 123, 143, 151 USB driver 139, 151 V VIDEO OUT 100 Viewfinder 23 VOLUME 109 W WB 61 White balance compensation 63 X xD 32 xD-Picture Card 33 Z Zoom 40 ZOOM - Olympus SP 320 | SP-320 Advanced Manual (English) - Page 191
: Tel. 1-888-553-4448 (Toll-free) Our phone customer support is available from 8 am to 10 pm (Monday to Friday) ET E-Mail: [email protected] Olympus software updates can be obtained at: http://www.olympus.com/digital Premises: Wendenstrasse 14-18, 20097 Hamburg, Germany Tel: +49 40-23 77 3-0 / Fax
-
 1
1 -
 2
2 -
 3
3 -
 4
4 -
 5
5 -
 6
6 -
 7
7 -
8
-
9
-
10
-
11
-
12
-
13
-
14
-
15
-
16
-
17
-
18
-
19
-
20
-
21
-
22
-
23
-
24
-
25
-
26
-
27
-
28
-
29
-
30
-
31
-
32
-
33
-
34
-
35
-
36
-
37
-
38
-
39
-
40
-
41
-
42
-
43
-
44
-
45
-
46
-
47
-
48
-
49
-
50
-
51
-
52
-
53
-
54
-
55
-
56
-
57
-
58
-
59
-
60
-
61
-
62
-
63
-
64
-
65
-
66
-
67
-
68
-
69
-
70
-
71
-
72
-
73
-
74
-
75
-
76
-
77
-
78
-
79
-
80
-
81
-
82
-
83
-
84
-
85
-
86
-
87
-
88
-
89
-
90
-
91
-
92
-
93
-
94
-
95
-
96
-
97
-
98
-
99
-
100
-
101
-
102
-
103
-
104
-
105
-
106
-
107
-
108
-
109
-
110
-
111
-
112
-
113
-
114
-
115
-
116
-
117
-
118
-
119
-
120
-
121
-
122
-
123
-
124
-
125
-
126
-
127
-
128
-
129
-
130
-
131
-
132
-
133
-
134
-
135
-
136
-
137
-
138
-
139
-
140
-
141
-
142
-
143
-
144
-
145
-
146
-
147
-
148
-
149
-
150
-
151
-
152
-
153
-
154
-
155
-
156
-
157
-
158
-
159
-
160
-
161
-
162
-
163
-
164
-
165
-
166
-
167
-
168
-
169
-
170
-
171
-
172
-
173
-
174
-
175
-
176
-
177
-
178
-
179
-
180
-
181
-
182
-
183
-
184
-
185
-
186
-
187
-
188
-
189
-
190
-
191
 |
 |
Thank you for purchasing an Olympus digital camera. Before you start to use your
new camera, please read these instructions carefully to enjoy optimum performance
and a longer service life. Keep this manual in a safe place for future reference.
We recommend that you take test shots to get accustomed to your camera before
taking important photographs.
In the interest of continually improving products, Olympus reserves the right to update
or modify information contained in this manual.
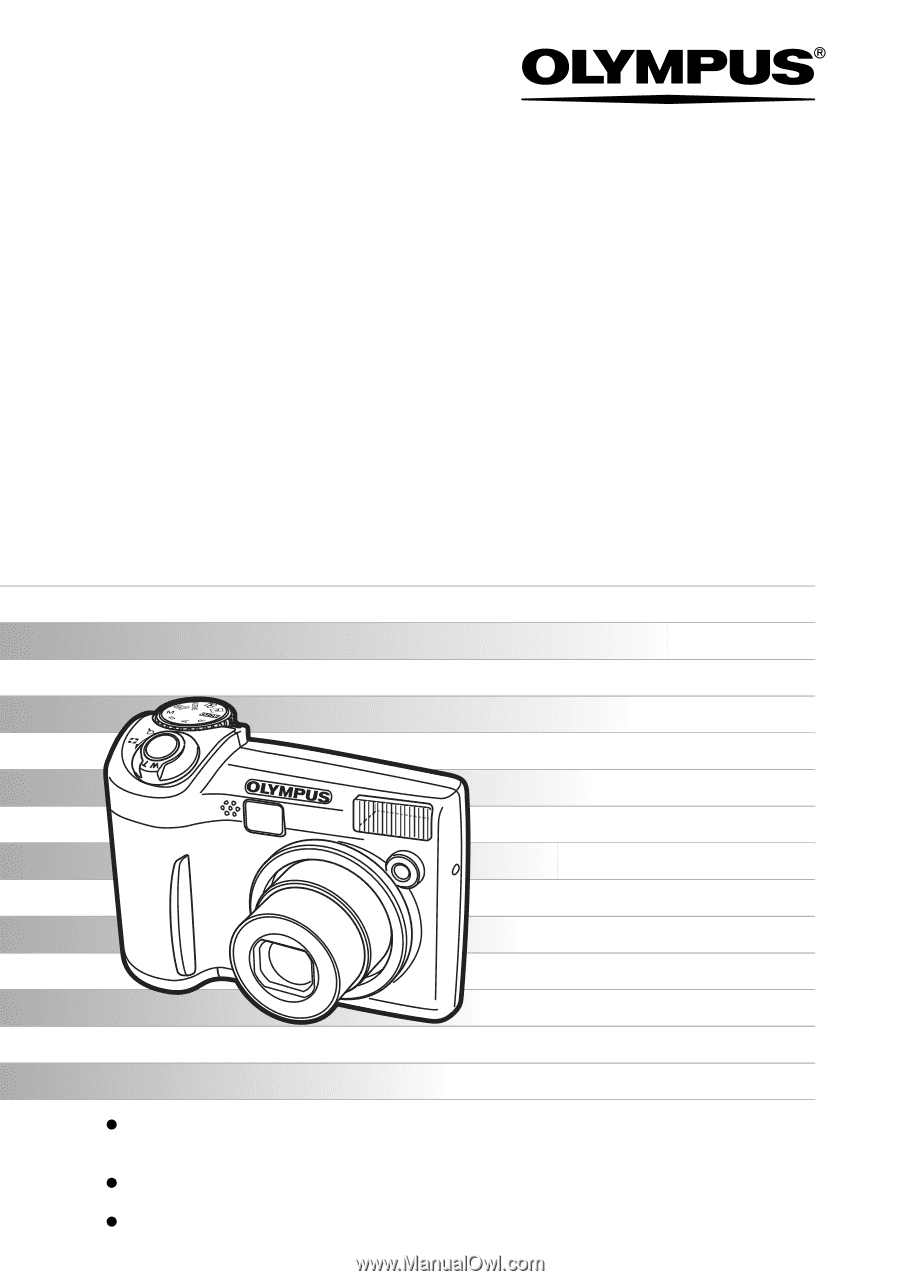
DIGITAL CAMERA
Advanced
Manual
Detailed explanations of all the
functions for getting the most out
of your camera.
SP-320
Online Pictures
Basic Operation
Basic Shooting
Advanced Shooting
Playing Back
Printing
Camera Settings