Onkyo HT-S7800 Owners Manual - English - Page 13
HDMI Setup, Source Connection, Network Connection, Multi Zone Setup, Audio Return Channel
 |
View all Onkyo HT-S7800 manuals
Add to My Manuals
Save this manual to your list of manuals |
Page 13 highlights
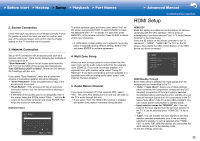
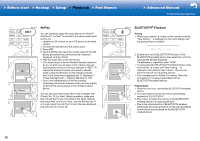
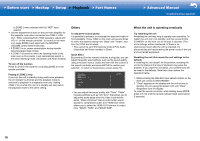
> Before start > Hookup > Setup > Playback > Part Names 2. Source Connection Check that each input source is connected correctly. Follow the guidance, select the input you want to confirm, start play of the selected player, and confirm that the images appear on the TV and that sound is played. 3. Network Connection Set up Wi-Fi connection with an access point such as a wireless LAN router. There are the following two methods of connecting by Wi-Fi: "Scan Networks": Search for an access point from this unit. Find out the SSID of the access point beforehand. "Use iOS Device (iOS7 or later)": Share the iOS device's Wi-Fi settings with this unit. If you select "Scan Networks", there are a further two choices of connection method. Check the following. 0 "Enter Password": Enter the password (or key) of the access point to connect. 0 "Push Button": If the access point has an automatic connection button, you can connect without entering a password. 0 If the SSID of the access point is not displayed, then in the screen listing the SSIDs, select "Other..." with the cursor on the remote controller and press ENTER, then follow the onscreen instructions. Keyboard input To switch between upper and lower case, select "A/a" on the screen and press ENTER. To select whether to mask the password with " ˎ " or display it in plain text, press MEMORY on the remote controller. Press CLEAR to delete all the input characters. 0 A confirmation screen asking you to agree to the privacy policy is displayed during network setting. Select "Yes" and press ENTER to indicate agreement. 4. Multi Zone Setup When you want to enjoy audio in a room other than the main room, set the audio output method for the separate room (ZONE 2). If you have connected speakers in a separate room with speaker cable, select "Using AV Receiver". If you have connected a pre-main amplifier in a separate room with an analog audio cable, select "with External Premain Amplifier". 5. Audio Return Channel If you have connected a TV that supports ARC, select "Yes". This unit's ARC setting turns on and you can listen to the TV's audio through this unit. 0 If you select "Yes", the HDMI CEC function is enabled and power consumption increases during standby. Wi-Fi Setup SSID abcde f gh i j k l m nopq r s t uvwx y z 1234567890 A/a Ɵ ơ OK When finished, select the "OK" key. All Erase A/a > Advanced Manual Troubleshooting | Appendix HDMI Setup HDMI CEC Make this setting to enable the control feature for devices complying with the CEC standard. This is set to on automatically if you have selected "Yes" in "5. Audio Return Channel" in the Initial Setup. Press the button on the remote controller to set "5. Hardware" - "HDMI" - "HDMI CEC" to "On" on the TV screen. Also enable the CEC control feature on the CEC device you have connected. 5-1 HDMI HDMI CEC HDMI Standby Through Audio TV Out Audio Return Channel Auto Lip Sync On Auto(Eco) Auto Auto On HDMI Standby Through Even if this unit is in standby, the input signals from AV components are transmitted to the TV. 0 "Auto" / "Auto (Eco)": Select one of these settings when connected AV components comply with the CEC standard. Irrespective of the input selector selected immediately before switching the unit to standby, you can transmit the input signals from AV components to the TV. Select "Auto (Eco)" if the TV is also CEC-compliant. You can reduce power consumption in standby mode. 0 Input selector names for "BD/DVD", etc.: You can transmit the input signals from the set input selector to the TV. It can be selected when "HDMI CEC" is set to "Off". 0 "Last": You can transfer the input signals of the input selector selected immediately prior to the unit being switched to standby. It can be selected when "HDMI CEC" is set to "Off". With this setting, you can switch the input selector even in the standby mode. To exit the settings, press . 13
-
 1
1 -
2
-
3
-
4
-
5
-
6
-
7
-
 8
8 -
 9
9 -
 10
10 -
 11
11 -
 12
12 -
 13
13 -
 14
14 -
 15
15 -
 16
16 -
 17
17 -
 18
18 -
19
-
20
-
21
-
22
-
23
-
24
-
25
-
26
-
27
-
28
-
29
-
30
-
31
-
32
-
33
-
34
-
35
-
36
-
37
-
38
-
39
-
40
-
41
-
42
-
43
-
44
-
45
-
46
-
47
-
48
-
49
-
50
-
51
-
52
-
53
-
54
-
55
-
56
-
57
-
58
-
59
-
60
-
61
-
62
-
63
-
64
-
65
-
66
-
67
-
68
-
69
-
70
-
71
-
72
-
73
-
74
-
75
-
76
-
77
-
78
-
79
-
80
-
81
-
82
-
83
-
84
-
85
-
86
-
87
-
88
-
89
-
90
 |
 |
