Onkyo TX SR606 Instruction Manual
Onkyo TX SR606 - AV Receiver Manual
 |
UPC - 751398008092
View all Onkyo TX SR606 manuals
Add to My Manuals
Save this manual to your list of manuals |
Onkyo TX SR606 manual content summary:
- Onkyo TX SR606 | Instruction Manual - Page 1
AV Receiver TX-SR606 Instruction Manual Contents Introduction 2 Connection 14 Turning On & First Time Setup ..... 37 Basic Operation Playing your AV components ....... 47 Listening to the Radio 51 Thank you for purchasing an Onkyo AV Receiver. Please read this manual thoroughly before making - Onkyo TX SR606 | Instruction Manual - Page 2
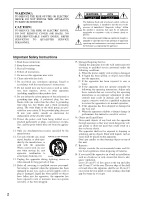
OR BACK). NO USER-SERVICEABLE PARTS INSIDE. REFER SERVICING TO QUALIFIED SERVICE PERSONNEL. WARNING AVIS Install in accordance with the manufacturer's instructions. 8. Do not install near any heat the rear. The rear edge of the shelf or board above the apparatus shall be set 10 cm (4") away from - Onkyo TX SR606 | Instruction Manual - Page 3
L FRONT SPEAKERS L R CENTER SPEAKER 120V VOLTAGE SELECTOR 220-240V R REMOTE CONTROL R unit, have it checked by your Onkyo dealer. 6. Handling Notes • device, pursuant to Part 15 of the the instructions, may the receiving antenna. • Increase the separation between the equipment and receiver. - Onkyo TX SR606 | Instruction Manual - Page 4
fied service personnel. IMPORTANT The wires in the mains lead are coloured in accordance with the following code: Blue ONKYO product described in this instruction manual Remote controller and two batteries (AA/R6) Speaker setup microphone Indoor FM antenna AM loop antenna 1 2 3 Speaker Cable Speaker - Onkyo TX SR606 | Instruction Manual - Page 5
an RI Dock 35 Connecting Onkyo Components 36 Turning On the AV Receiver 37 Connecting the Power Cord 37 Turning On and Standby 37 First Time Setup 38 Automatic Speaker Setup 38 Speaker Settings 42 HDMI Input Setup 43 Component Video Input Setup 44 Digital Input Setup 44 Changing - Onkyo TX SR606 | Instruction Manual - Page 6
and Speaker Cali- bration • Audyssey Dynamic EQ Loudness Correction • Crossover Adjustment (40/50/60/80/100/120/150/200Hz) • A/V Sync Control Function (up to 100 ms) • On-Screen Display • Compatible with RI Dock for the iPod • Aluminum Front Panel • Preprogrammed -Compatible Remote *1. Manufactured - Onkyo TX SR606 | Instruction Manual - Page 7
Multiroom Capability You can use two speaker systems with this AV receiver-a surround-sound speaker system (up to 7.1 channels) in your main listening room, a stereo speaker system in a second room, or Zone 2, as we call it. And, you can select a different audio source for each room. Main Room: In - Onkyo TX SR606 | Instruction Manual - Page 8
RT/PTY/TP MEMORY TUNING MODE CLEAR SETUP MIC AUX INPUT VIDEO L AUDIO R AV RECEIVER TX-SR606 Y T The actual front panel has Remote-control sensor (13) Receives control signals from the remote controller. F Display See "Display" on page 9. G SETUP button Opens and closes the setup menus - Onkyo TX SR606 | Instruction Manual - Page 9
mode is selected. TUNED (52): Lights up when tuned to a radio station. 5 Message area Displays various information. 6 Audio input indicators Indicate the type of audio input that's selected as the audio source: PCM, MULTI CH, or HDMI. 7 Audyssey indicator Flashes during automatic speaker setup. 9 - Onkyo TX SR606 | Instruction Manual - Page 10
. See "Bi-amping Front Speakers" on page 17. J REMOTE CONTROL This (Remote Interactive) jack can be con- nected to the jack on another -capable Onkyo component for remote and system control. To use , you must make an analog audio connection (RCA) between the AV receiver and the other component - Onkyo TX SR606 | Instruction Manual - Page 11
input jacks for connecting the video signal. N CBL/SAT IN A cable or satellite receiver can be connected here. There are S-Video and composite video input jacks for connecting the video signal, and there are analog audio input jacks for connecting the audio signal. O VCR/DVR IN/OUT A video component - Onkyo TX SR606 | Instruction Manual - Page 12
VOL [ ]/[ ] button (47) Adjusts the volume of the AV receiver regardless of the currently selected remote controller mode. K RETURN button Returns to the previous display when changing settings. L AUDIO button (69) Used to change audio settings. M SLEEP button (48) Used with the Sleep function. * SP - Onkyo TX SR606 | Instruction Manual - Page 13
removed as soon as possible to prevent damage from leakage or corrosion. 30˚ 30˚ Approx. 16 ft. (5 m) Notes: • The remote controller may not work reliably if the AV receiver is subjected to bright light, such as direct sunlight or inverter-type fluorescent lights. Keep this in mind when installing - Onkyo TX SR606 | Instruction Manual - Page 14
DTS Neo:6, or Onkyo's original DSP listening modes. Front left and right speakers These output the main sound. Their role in a home theater is to provide a subwoofer handles the bass sounds of the LFE (Low-Frequency Effects) channel. The volume and quality of the bass output from your subwoofer will - Onkyo TX SR606 | Instruction Manual - Page 15
) IN 2 HDMI ASSIGNABLE (VCR/DVR REMOTE CONTROL CD TAPE GAME/TV CBL/SAT VCR/DVR SUB WOOFER DVD LINE INPUT PRE OUT SUB WOOFER Attaching the Speaker Labels The AV receiver's positive (+) speaker speaker labels are color-coded and you should attach them to the positive (+) side of each speaker - Onkyo TX SR606 | Instruction Manual - Page 16
. • Read the instructions supplied with your speakers. • Pay close attention to speaker wiring polarity. Connect receiver. • Don't connect more than one cable to each speaker terminal. Doing so may damage the AV receiver. • Don't connect a speaker to several terminals. Connecting the Speaker - Onkyo TX SR606 | Instruction Manual - Page 17
(high) and woofer (low) terminals. • Bi-amping can only be used with speakers that support bi-amping. Refer to your speaker manual. Bi-amping Speaker Hookup 1 Connect the AV receiver's FRONT R positive (+) terminal to the right speaker's positive (+) tweeter (high) terminal. And connect the AV - Onkyo TX SR606 | Instruction Manual - Page 18
commercially available outdoor FM and AM antennas. The AV receiver won't pick up any radio signals without any antenna connected, so you must connect the . Keep the antenna as far away as possible from your AV receiver, TV, speaker cables, and power cords. If you cannot achieve good reception with - Onkyo TX SR606 | Instruction Manual - Page 19
It's best not to use the same antenna for both FM and TV reception, as this can cause interference problems. If circumstances demand it, use a TV/FM antenna splitter, as shown. Connecting an Outdoor AM Antenna electrical shock hazards. TV/FM antenna splitter To AV receiver To TV (or VCR) 19 - Onkyo TX SR606 | Instruction Manual - Page 20
in all the way to make good connections (loose connections can cause noise or malfunctions). • To prevent interference, keep audio and video cables away from power cords and speaker cables. Right! Wrong! Video HDMI Component video cable Cable Y PB PR S-Video cable Composite video cable Jack - Onkyo TX SR606 | Instruction Manual - Page 21
simply by changing the input source on the AV receiver. : Signal Flow Video Video Audio Audio TV, projector, etc. DVD player, etc. Speakers (see page 16 for hookup details) Which Connections Should I Use? The AV receiver supports several connection formats for compatibility with a wide range - Onkyo TX SR606 | Instruction Manual - Page 22
the AV receiver as shown, with composite video, SVideo, and component video sources all being upconverted for the HDMI output. The composite video, S-Video, and component video outputs pass through their respective input signals as they are. When you connect audio equipment to an HDMI or COMPONENT - Onkyo TX SR606 | Instruction Manual - Page 23
receiver COMPONENT VIDEO OUT MONITOR OUT S MONITOR OUT V GAME/TV IN L/R DIGITAL IN COAXIAL 2 DIGITAL IN OPTICAL 1 Signal flow TV Component video input S-Video input Composite video input Analog audio V VCR/DVR DVD MONITOR OUT V AM SURR BACK SPEAKER Bi-AMP for FRONT SPEAKE L ANTENNA C FM 75 - Onkyo TX SR606 | Instruction Manual - Page 24
receiver COMPONENT VIDEO IN 1 DVD IN S DVD IN V DVD IN FRONT L/R DIGITAL IN COAXIAL 1 DIGITAL IN OPTICAL 1 Signal flow DVD player Component video output S-Video output Composite video output Analog audio L WOOFER A R a R R REMOTE CONTROL CD TAPE GAME/TV CBL/SAT VCR/DVR SUB WOOFER - Onkyo TX SR606 | Instruction Manual - Page 25
DVD player has a 5.1-channel analog audio output, don't connect anything to the AV receiver's SURR BACK L/R jacks. To select the multichannel input, see "Basic AV Receiver Operation" on page 47. To adjust the subwoofer sensitivity for the multichannel input, see "Hardware Setup" on page 79. DIGITAL - Onkyo TX SR606 | Instruction Manual - Page 26
b , or a and c .) Connection A B C a b c b c AV receiver COMPONENT VIDEO IN 2 VCR/DVR IN S VCR/DVR IN V VCR/DVR IN L/R DIGITAL IN COAXIAL 2 DIGITAL IN OPTICAL 1 Signal flow VCR or DVR Component video output S-Video output Composite video output Analog audio L/R output Digital coaxial output - Onkyo TX SR606 | Instruction Manual - Page 27
source without going through the AV receiver, connect the audio and video outputs from your TV or other video component directly to the recording VCR/DVR's audio and video inputs. See the manuals supplied with your TV or VCR/DVR for details. • Video signals connected to composite video inputs can - Onkyo TX SR606 | Instruction Manual - Page 28
Composite video output Analog audio L/R output Digital coaxial output Digital optical output Picture quality Best Better Standard IN 4 (GAME/TV) IN 3 (CBL/SAT) IN 2 HDMI ASSIGNABLE (VCR/DVR) IN 1 (DVD) OUT SIRIUS AM SURR BACK SPEAKERS Bi-AMP for FRONT SPEAKERS DIGITAL IN COMPONENT VIDEO - Onkyo TX SR606 | Instruction Manual - Page 29
IN 1 Signal flow Game console Component video output S-Video output Composite video output Analog audio L/R output Digital coaxial output Picture quality Best Better Standard IN 4 (GAME/TV) IN 3 (CBL/SAT) IN 2 HDMI ASSIGNABLE (VCR/DVR) IN 1 (DVD) OUT SIRIUS AM SURR BACK SPEAKERS Bi - Onkyo TX SR606 | Instruction Manual - Page 30
will display a picture. The AV receiver's HDMI interface is based on the following standard: Repeater System, Deep Color, Lip Sync, DTS-HD Master Audio, DTS-HD High Resolution Audio, Dolby TrueHD, Dolby Digital Plus, SA-CD and Multichannel PCM Supported Audio Formats • 2-channel linear PCM (16/20/24 - Onkyo TX SR606 | Instruction Manual - Page 31
receiver or the sound may be cut off. • The HDMI audio signal (sampling rate, bit length, etc.) may be restricted by the connected source component. If the picture is poor or there's no sound from a component connected via HDMI, check its setup. Refer to the connected component's instruction manual - Onkyo TX SR606 | Instruction Manual - Page 32
MASTER VOLUME a AUX INPUT L AUDIO R SETUP ENTER RETURN TUNING MODE SETUP MIC AUX INPUT VIDEO L AUDIO R AV RECEIVER TX-SR606 A AUX INPUT VIDEO L AUDIO R OUT VIDEO OUT Camcorder, etc. Connection A a AV receiver AUX INPUT VIDEO AUX INPUT L-AUDIO-R Signal flow ⇐ ⇐ Camcorder or console - Onkyo TX SR606 | Instruction Manual - Page 33
CBL/SAT) ASSIGNABLE 1 (GAME/TV) OPTICAL 2 (CD) REMOTE CONTROL IN 4 (GAME/TV) IN 3 (CBL/SAT) IN 2 HDMI ASSIGNABLE (VCR/DVR) IN 1 (DVD) OUT SIRIUS AM b c AV receiver CD IN L/R DIGITAL IN COAXIAL 2 DIGITAL IN OPTICAL 2 Signal flow ⇐ ⇐ ⇐ CD or turntable Analog audio L/R output Digital - Onkyo TX SR606 | Instruction Manual - Page 34
GAME/TV) IN 3 (CBL/SAT) IN 2 HDMI ASSIGNABLE (VCR/DVR) IN 1 (DVD) OUT SIRIUS CENTER SURR BACK L REMOTE CONTROL R CD TAPE GAME/ receiver TAPE IN L/R TAPE OUT L/R DIGITAL IN COAXIAL 2 DIGITAL IN OPTICAL 2 Signal flow Cassette, CDR, MD, or DAT recorder Analog audio L/R output Analog audio - Onkyo TX SR606 | Instruction Manual - Page 35
Components-Continued Connecting an RI Dock Not all iPod models output video. For information about which iPod models are supported by the RI Dock, see the RI Dock's instruction manual. ■ If Your iPod Supports Video: Connect your RI Dock's audio output jacks to the AV receiver's GAME/TV IN L/R jacks - Onkyo TX SR606 | Instruction Manual - Page 36
select Multich to hear all channels (see page 47), as the Direct Change function selects the DVD IN FRONT L/R jacks. Remote Control You can use the AV receiver's remote controller to control your other -capable Onkyo components. You must enter the appropriate remote control code first (see page 88 - Onkyo TX SR606 | Instruction Manual - Page 37
MUSIC GAME DISPLAY DIGITAL INPUT RT/PTY/TP MEMORY TUNING MODE CLEAR SETUP MIC AUX INPUT VIDEO L AUDIO R AV RECEIVER TX-SR606 ON/STANDBY RECEIVER Connecting the Power Cord • Before connecting the power cord, connect all your speakers and AV components. • Plug the end of the power cord into - Onkyo TX SR606 | Instruction Manual - Page 38
listening environment in which several people can enjoy your home theater simultaneously, Audyssey 2EQ takes measurements at three positions within DIGITAL INPUT RT/PTY/TP MEMORY TUNING MODE CLEAR SETUP MIC AUX INPUT VIDEO L AUDIO R AV RECEIVER TX-SR606 2, 8 TV TV TV TV TV TV 3-7 TV - Onkyo TX SR606 | Instruction Manual - Page 39
. Close windows, silence cell phones, televisions, radios, air conditioners, fluorescent lights, home appliances, light dimmers, or other devices, and refrain from talking. The following screen appears. Auto Speaker Setup AUDYSSEY Please place microphone at right end of listening area at ear height - Onkyo TX SR606 | Instruction Manual - Page 40
are com- Error Messages plete, the following screen While the automatic speaker setup is in progress, one of appears. the following error messages may appear: Auto Speaker Setup AUDYSSEY Review Speaker configuration Subwoofer : No Front : 40Hz Center : 40Hz Surround : 40Hz Surr - Onkyo TX SR606 | Instruction Manual - Page 41
or Direct. Refer to your subwoofer's instruction manual for details. Writing Error! Retry Cancel This message appears if saving fails. Try saving again. If this message appears after 2 or 3 attempts, the AV receiver is probably malfunctioning. Contact your Onkyo dealer. Retry: Return to step 2 and - Onkyo TX SR606 | Instruction Manual - Page 42
Speaker Setup," and then press [ENTER]. ENTER SETUP RECEIVER 3 Use the Up and Down [ ]/[ ] buttons to select "1. Speaker Settings," and then press [ENTER]. If the impedance of any speaker is 4 ohms or more but less than 6, set the Speaker Impedance to 4 ohms. North American models do not support - Onkyo TX SR606 | Instruction Manual - Page 43
to an input selector as explained here, the digital audio input for that input selector is automatically set to the same HDMI IN. See "Digital Input Setup" on page 44. • This procedure can also be performed on the AV receiver by using its [SETUP], [ENTER], and arrow buttons. 3 Use the Up and Down - Onkyo TX SR606 | Instruction Manual - Page 44
by the [SETUP] button. receiver by using its [SETUP], [ENTER], and arrow The main menu appears onscreen. buttons. If the main menu doesn't appear, make sure the appropriate external input is selected on your TV. Digital Input Setup If you connect a component to a digital audio input, you - Onkyo TX SR606 | Instruction Manual - Page 45
TONE MOVIE/TV MUSIC GAME DISPLAY DIGITAL INPUT RT/PTY/TP MEMORY TUNING MODE CLEAR SETUP MIC AUX INPUT VIDEO L AUDIO R AV RECEIVER TX-SR606 iPod photo: If you're using an iPod photo with the DS-A1 Remote Interactive Dock, connect the DS-A1 to the GAME/TV IN jacks. 1 TAPE or Press the - Onkyo TX SR606 | Instruction Manual - Page 46
DIGITAL INPUT RT/PTY/TP MEMORY TUNING MODE CLEAR SETUP MIC AUX INPUT VIDEO L AUDIO R AV RECEIVER TX-SR606 1 2, 3 When an input source is selected, the AV receiver checks the relevant audio inputs for the presence of an audio signal and automatically selects an input. With this setting, you - Onkyo TX SR606 | Instruction Manual - Page 47
. On some DVD players, you may need to change the digital or HDMI audio output settings. To adjust the volume, use the MASTER VOLUME control or the remote controller's [VOL] button. Since the AV receiver is designed for home theaters, it has a wide volume range for precise adjustment. The volume can - Onkyo TX SR606 | Instruction Manual - Page 48
GAME DISPLAY DIGITAL INPUT DIMMER MEMORY TUNING MODE CLEAR SETUP MIC AUX INPUT VIDEO L AUDIO R AV RECEIVER TX-SR606 PHONES DIMMER Setting the Display Brightness You can adjust the brightness of the display. Remote controller Press the [RECEIVER] REMOTE MODE button, and then press the - Onkyo TX SR606 | Instruction Manual - Page 49
DVD input is selected, only the front left and front right channels can be heard in the headphones. Displaying Source Information You can display various information about the current input source as follows. Press the [RECEIVER] REMOTE MODE button, and then press the [DISPLAY] button repeatedly to - Onkyo TX SR606 | Instruction Manual - Page 50
/TV MUSIC GAME DISPLAY DIGITAL INPUT RT/PTY/TP MEMORY TUNING MODE CLEAR SETUP MIC AUX INPUT VIDEO L AUDIO R AV RECEIVER TX-SR606 DIGITAL INPUT 1 DIGITAL INPUT Press and hold the AV receiver's [DIGITAL INPUT] button for about 3 seconds. 2 DIGITAL INPUT While "Auto" is displayed (about - Onkyo TX SR606 | Instruction Manual - Page 51
AM frequency step used in your area. Note that when this setting is changed, all radio presets are deleted. 1 Press the [RECEIVER] button, followed by the [SETUP] button. The main menu appears onscreen. If the main menu doesn't appear, make sure the appropriate external input is selected on - Onkyo TX SR606 | Instruction Manual - Page 52
TUNING MODE CLEAR SETUP MIC AUX INPUT VIDEO L AUDIO R AV RECEIVER TX-SR606 TUNING MODE With signal from a stereo FM station is weak, it may be impossible to get good reception. In this case, switch to Manual Tuning mode and listen to the station in mono. Note: • You can also use the remote - Onkyo TX SR606 | Instruction Manual - Page 53
ZONE 2 LEVEL TONE MOVIE/TV MUSIC GAME DISPLAY DIGITAL INPUT RT/PTY/TP MEMORY TUNING MODE CLEAR SETUP MIC AUX INPUT VIDEO L AUDIO R AV RECEIVER TX-SR606 DISPLAY Press the [DISPLAY] button to display the available information. Number buttons D.TUN Band Frequency Preset # Listening - Onkyo TX SR606 | Instruction Manual - Page 54
/PTY/TP MEMORY TUNING MODE CLEAR SETUP MIC AUX INPUT VIDEO L AUDIO R AV RECEIVER TX-SR606 CH +/- PRESET To select a preset, use the PRE- SET [ ]/[ ] buttons or the remote controller's CH [+/-] but- ton. Remote controller You can also use the remote controller's number buttons to select - Onkyo TX SR606 | Instruction Manual - Page 55
for Radio Data System and is a method of transmitting data in FM radio signals. It was developed by the European Broadcasting Union (EBU) and is available news, sport, rock, etc.). The AV receiver supports four types of RDS information: PS (Program Service) When tuned to an RDS station that's - Onkyo TX SR606 | Instruction Manual - Page 56
PHONES ZONE 2 OFF ZONE 2 LEVEL TONE MOVIE/TV MUSIC GAME DISPLAY DIGITAL INPUT RT/PTY/TP MEMORY TUNING MODE CLEAR SETUP MIC AUX INPUT VIDEO L AUDIO R AV RECEIVER TX-SR606 When tuned to an RDS station that's broadcasting text information, the text can be displayed. RT/PTY/TP Press the - Onkyo TX SR606 | Instruction Manual - Page 57
VIDEO L AUDIO R AV RECEIVER TX-SR606 PURE AUDIO GAME MOVIE/TV ■ [PURE AUDIO] button (not North American model) This button selects the Pure Audio listening mode. When this mode is selected, the AV receiver's display is turned off and only the HDMI outputs output video signals. Pressing this - Onkyo TX SR606 | Instruction Manual - Page 58
channel kHz*1 192kHz*2 Analog Multichannel 32-96kHz*1 176.4/192kHz*2 Multichannel 2ch Mono/ MultiMultiplex channel DVD-Audio discs output multichannel 176.4/192kHz PCM only via HDMI. *3. North American model doesn't have Pure Audio listening mode. *4. If there are no surround back speakers, - Onkyo TX SR606 | Instruction Manual - Page 59
✔ ✔✔ ✔ ✔✔ ✔ ✔✔ ✔ ✔✔ *1. North American model doesn't have Pure Audio listening mode. *2. If there are no surround back speakers, depending on the input signal, Dolby Digital may be used. *3. If there are no surround back speakers, or Powered Zone 2 is being used, Dolby Pro Logic II is used - Onkyo TX SR606 | Instruction Manual - Page 60
, DTS 96/24 2ch DVD, CD, etc. ✔ ✔ ✔ ✔ ✔ *1. North American model doesn't have Pure Audio listening mode. *2. If there are no surround back speakers, or Zone 2 is being used, DTS is used. *3. If there are no surround back speakers, or Powered Zone 2 is being used, Dolby Pro Logic II is used - Onkyo TX SR606 | Instruction Manual - Page 61
Multichannel 2ch Mono/ Multiplex Blu-ray, HD DVD ✔ ✔ ✔ ✔ ✔ ✔ ✔ ✔ ✔ ✔ ✔ ✔ ✔ ✔ ✔ ✔ ✔ ✔ *1. North American model doesn't have Pure Audio listening mode. *2. If there are no surround back speakers, or Powered Zone 2 is being used, Dolby Pro Logic II is used. *3. Cannot be selected - Onkyo TX SR606 | Instruction Manual - Page 62
FullMono ✔ ✔ ✔ [STEREO] AllChStereo Stereo ✔ ✔ ✔ ✔ ✔ ✔ *1. 192kHz DTS-HD Master Audio sources are processed at 96kHz. *2. North American model doesn't have Pure Audio listening mode. *3. If there are no surround back speakers, or Powered Zone 2 is being used, Dolby Pro Logic II is used - Onkyo TX SR606 | Instruction Manual - Page 63
✔ ✔ ✔ ✔ ✔ ✔ ✔ ✔ ✔ ✔ ✔ ✔ ✔ ✔ ✔ ✔ ✔ *1. DSD signals are processed after conversion to PCM. *2. North American model doesn't have Pure Audio listening mode. *3. If there are no surround back speakers, or Powered Zone 2 is being used, Dolby Pro Logic II is used. *4. Cannot be selected - Onkyo TX SR606 | Instruction Manual - Page 64
Dolby format offers up to 7.1 discrete channels of digital audio with 48/96 kHz, up to 5.1-channels with 192 kHz sampling rate. For the signals supported by the AV receiver, see page 61. DTS The DTS digital surround-sound format supports up to 5.1 discrete channels and uses less compression for high - Onkyo TX SR606 | Instruction Manual - Page 65
, this new DTS format offers up to 7.1 discrete channels of digital audio with 48/96 kHz, up to 5.1-channels with 192 kHz sampling rate. For the signals supported by the AV receiver, see page 62. DTS Express This format supports up to 5.1 channels and a lower sampling rate of 48 kHz. Applications - Onkyo TX SR606 | Instruction Manual - Page 66
21 to see which signals GAME/TV AUX TAPE can be output and recorded. TUNER CD Remote controller You can watch the source while recording it. The AV receiver's MASTER VOLUME control has no effect on recording. Recording from Different AV Sources You can overdub audio onto your video recordings - Onkyo TX SR606 | Instruction Manual - Page 67
(2 ch Input) These settings apply to only 2-channel stereo sources. 3. Audio Adjust 1. Multiplex/Mono 2. PL II x/Neo:6 If you're not using any surround back speakers, these settings apply to Dolby Pro Logic II, not Dolby Pro 3. Dolby EX 4. Theater-Dimensional Logic IIx. ■ Panorama With this - Onkyo TX SR606 | Instruction Manual - Page 68
speaker, the center channel sound is output by only the center speaker. (If you're not using a center speaker, the center channel sound will be distributed to the front left and right speakers signals are handled. Auto: When the source is Dolby EX, you can select the Dolby EX listening mode. Manual: - Onkyo TX SR606 | Instruction Manual - Page 69
speakers from -10 dB to +10 dB in 2 dB steps. Notes: • To bypass the bass and treble tone circuits, select the Direct or Pure Audio (not North American model) listening mode. • This procedure can also be performed on the AV receiver for reproduction in a movie theater. CinemaFILTER can be used with - Onkyo TX SR606 | Instruction Manual - Page 70
the problem of deteriorating audio input signals. The Music Optimizer is disabled when the Pure Audio or Direct listening mode is selected. Speaker Levels You can adjust the volume of each speaker while listening to an input source. These temporary adjustments are cancelled when the AV receiver - Onkyo TX SR606 | Instruction Manual - Page 71
signal. You can still select the other listening modes, although the default listening mode will be used the next time you turn on the AV receiver. 1 Press the [RECEIVER] REMOTE MODE button, followed by the [SETUP ]. The audio formats supported by that 2-channel Audio (input via HDMI). 192k - Onkyo TX SR606 | Instruction Manual - Page 72
crossover fre- quency will then be output by the subwoofer instead of the speaker. Refer to your speakers' manuals to deter- mine the optimum crossover frequencies. 1 Press the [RECEIVER] button fol- lowed by the [SETUP] button. The main menu appears onscreen. If the main menu doesn't appear - Onkyo TX SR606 | Instruction Manual - Page 73
cannot be changed while headphones are connected or the multichannel DVD input is being used. Low-Pass Filter for the LFE Channel This setting is not set automatically by the Automatic Speaker Setup function (see page 38). With this setting, you can specify the cutoff frequency of the LFE - Onkyo TX SR606 | Instruction Manual - Page 74
to the listening position. 1 Measure and make a note of the distance from each speaker to the listening position. 2 Press the [RECEIVER] REMOTE MODE button, followed by the [SETUP] button. The main menu appears onscreen. If the main menu doesn't appear, make sure the appropriate external - Onkyo TX SR606 | Instruction Manual - Page 75
can be heard equally at the listening position. Note: 6 • The speaker levels cannot be adjusted while a pair of headphones is connected or the AV receiver is muted. 1 Press the [RECEIVER] REMOTE MODE button, followed by the [SETUP] button. 7 The main menu appears onscreen. If the main menu - Onkyo TX SR606 | Instruction Manual - Page 76
speakers. To set the volume of individual speakers, see page 75. 1 Press the [RECEIVER] REMOTE MODE button, followed by the [SETUP] Right [ ]/[ ] buttons to select a speaker. 2-5. Equalizer Settings Equalizer Channel 63Hz 250Hz 1000Hz 4000Hz 16000Hz Manual Front 0dB 0dB 0dB 0dB 0dB Use the - Onkyo TX SR606 | Instruction Manual - Page 77
RECEIVER] REMOTE MODE button. 2 Press the [SETUP a delay to the audio signal. The delay can be supports HDMI Lip Sync, the displayed delay time will be the A/V Sync delay time. The HDMI Lip Sync delay time is displayed underneath in parentheses. Note: • A/V Sync is disabled when the Pure Audio - Onkyo TX SR606 | Instruction Manual - Page 78
setting you usually use when listening through your speakers. The headphone level can be set from -12 dB to +12 dB. OSD Setup ■ Immediate Display This setting determines whether operation details are displayed onscreen immediately after an AV receiver function is used. On: Displayed (default). Off - Onkyo TX SR606 | Instruction Manual - Page 79
[SETUP] button. Remote Control The main menu appears onscreen. If the main menu doesn't appear, make sure the appropriate external input is selected on your TV. ■ Remote ID When several Onkyo components are used in the same room, their remote ID codes may overlap. To differentiate the AV receiver - Onkyo TX SR606 | Instruction Manual - Page 80
Guide for more information. Analog Multich ■ Subwoofer Input Sensitivity Some DVD players output the LFE channel HDMI ■ Output Resolution You can specify the output resolution for the HDMI outputs and have the AV receiver upconvert the picture resolution as necessary to match the resolution supported - Onkyo TX SR606 | Instruction Manual - Page 81
and you want to listen to audio from an HDMI component through your TV's speakers. Normally, it should be set to Off. Off: HDMI audio is not output (default). On: HDMI audio is output. Notes: • If On is selected and the signal can be output by the TV, the AV receiver will output no sound through its - Onkyo TX SR606 | Instruction Manual - Page 82
components off and then back on again. Refer to the instruction manuals for your other components. Lock Setup With this setting, you can protect your settings by locking the setup menus. 1 Press the [RECEIVER] button, followed by the [SETUP] button. The main menu appears onscreen. If the main - Onkyo TX SR606 | Instruction Manual - Page 83
to the AV receiver's ZONE 2 SPEAKERS L/R speaker terminals. Connecting Your Zone 2 Speakers to an Amp in Zone 2 This setup allows 7.1-channel playback in your main listening room and 2-channel stereo playback in Zone 2, with a different source in each room. Hookup • Use an RCA audio cable to - Onkyo TX SR606 | Instruction Manual - Page 84
terminals not activated (Powered Zone 2 disabled). Act: ZONE 2 SPEAKERS L/R speaker terminals activated (Powered Zone 2 enabled). 1 Press the [RECEIVER] REMOTE MODE button, followed by the 5 Press the [SETUP] button. [SETUP] button. Setup closes. The main menu appears onscreen. If the main - Onkyo TX SR606 | Instruction Manual - Page 85
PHONES ZONE 2 OFF ZONE 2 LEVEL TONE MOVIE/TV MUSIC GAME DISPLAY DIGITAL INPUT RT/PTY/TP MEMORY TUNING MODE CLEAR SETUP MIC AUX INPUT VIDEO L AUDIO R AV RECEIVER TX-SR606 • While Zone 2 is on, the Auto Power On/Standby and Direct Change functions do not work. • While Powered Zone 2 is - Onkyo TX SR606 | Instruction Manual - Page 86
button first. Adjusting the Volume of Zones Remote controller On the remote controller, press the [ZONE 2] REMOTE MODE button, and then use the VOL [ ]/[ ] button. AV receiver/ On the AV receiver, use the ZONE 2 LEVEL [ ]/[ ] buttons. If your Zone 2 speakers are connected to an amp in Zone 2, use - Onkyo TX SR606 | Instruction Manual - Page 87
seconds). Note: • Remote control codes cannot be entered for the [RECEIVER] and [ZONE 2] REMOTE MODE buttons. • Only TV remote control codes can be entered for the [TV] REMOTE MODE button. • Apart from the [RECEIVER], [TV], and [ZONE 2] REMOTE MODE buttons, remote control codes from any category can - Onkyo TX SR606 | Instruction Manual - Page 88
a remote con- trol code. When a button is reset, its preprogrammed code is restored. Resetting the Remote Controller You can reset the remote controller to its default settings. 1 While holding down the [RECEIVER] REMOTE MODE but- ton, press and hold down the [AUDIO] button until the Remote - Onkyo TX SR606 | Instruction Manual - Page 89
page 87. The [TV] and [GAME/TV] REMOTE MODE buttons are preprogrammed with the remote control code for controlling a TV that supports the RIHD*. The TV must be able to receive remote control commands via RIHD and be connected to the AV receiver via HDMI. If controlling your TV via RIHD doesn't work - Onkyo TX SR606 | Instruction Manual - Page 90
on a DVD changer. Selects TV channels on a component with a built-in tuner. O VOL [ ]/[ ] button (47) Adjusts the volume of the AV receiver. P MENU button Displays a DVD's menu. Q RETURN button Exits the DVD player's setup menu or returns to the previous menu. R AUDIO button Selects foreign language - Onkyo TX SR606 | Instruction Manual - Page 91
some may not work at all. Note: • If you enter the remote control code for a HD DVD or Blu-ray player that has A, B, C, receiver. L CH +/- button Selects TV channels on the video recorder. M VOL [ ]/[ ] button (47) Adjusts the volume of the AV receiver. N PREV CH button Selects the previous channel - Onkyo TX SR606 | Instruction Manual - Page 92
Controlling Other Components-Continued Controlling a Satellite Receiver or Cable Receiver By pressing the REMOTE MODE button that's been programmed with the remote control code for your satellite receiver, cable receiver, or DVD recorder (DBS/PVR combination or cable/PVR combination), you can - Onkyo TX SR606 | Instruction Manual - Page 93
REMOTE MODE button is preprogrammed with the remote control code for controlling an Onkyo CD player. For details on entering a remote control code unmutes the AV receiver. K DISC +/- button Selects discs on a CD changer. L VOL [ ]/[ ] button (47) Adjusts the volume of the AV receiver. M RETURN button - Onkyo TX SR606 | Instruction Manual - Page 94
on entering a remote control code, see page 87. When Using an RI Dock: • Connect the RI Dock to the TAPE IN or GAME/TV IN L/R jacks. • Set the RI Dock's RI MODE switch to HDD or HDD/DOCK. • Set the AV receiver's Input Display to DOCK (see page 45). • See to the RI Dock's instruction manual for more - Onkyo TX SR606 | Instruction Manual - Page 95
remote control code for a different component, see page 87. Press the appropriate REMOTE MODE button first A TAPE F G 2 2 3 3 4 H 5 Works as a Resume button when used with a DS-A2 RI Dock. S RANDOM button* Used with the shuffle function. * Buttons marked with an asterisk (*) are not supported - Onkyo TX SR606 | Instruction Manual - Page 96
, and that the bare wire is in contact with the metal part of each speaker terminal (page 16). • Make sure that the speaker cables are not shorting. • Check the volume (page 47). The AV receiver is designed for home theater enjoyment and has a wide volume range for precise adjustment. 96 • If - Onkyo TX SR606 | Instruction Manual - Page 97
Troubleshooting-Continued The subwoofer produces no sound • If the source material contains no audio in the LFE channel, the subwoofer produces no sound. • Check the Speaker Configuration (page 72). The Zone 2 speakers produce no sound • The Zone 2 speakers only output sources that are con- nected to - Onkyo TX SR606 | Instruction Manual - Page 98
Troubleshooting-Continued There's no picture from a source connected to an HDMI IN • Reliable operation with an HDMI-to-DVI adapter is not guaranteed. In addition, video signals from a PC are not supported (page 31). • If the message "Resolution Error" appears on the AV receiver's display, this - Onkyo TX SR606 | Instruction Manual - Page 99
very clear, you can attenuate the gain. Video ATT:0: (default). Video ATT:2: Gain is reduced by 2 dB. The AV receiver contains a microcomputer for signal processing and control functions. In very rare situations, severe interference, noise from an external source, or static electricity may cause it - Onkyo TX SR606 | Instruction Manual - Page 100
Troubleshooting-Continued Important Note Regarding Video Playback The AV receiver can upconvert component video, S-Video, and composite video sources for display on a TV connected to the HDMI OUT. However, if the picture quality of the source is poor, upconversion may make the picture worse or - Onkyo TX SR606 | Instruction Manual - Page 101
Impedance Frequency Response Tone Control Signal to Noise Ratio Speaker Impedance North American: European: American: SIRIUS Preset Channel 40 General Power Supply HDMI OUT Component OUT Composite MONITOR OUT, VCR/DVR (REC OUT) S-Video MONITOR OUT, VCR/DVR (REC OUT) ■ Audio Inputs - Onkyo TX SR606 | Instruction Manual - Page 102
The following tables show how video signals at different resolutions are output by the AV receiver. NTSC Output HDMI COMPONENT S-VIDEO COMPOSITE NTSC PAL NTSC PAL Input 1080P 1080i 720P 480P 480i 1080P 1080i 720P 480P 480i 480i 480i 480i 480i HDMI 1080P ✔ 1080i ✔ 720P ✔ 480P ✔ 480i - Onkyo TX SR606 | Instruction Manual - Page 103
2. Speaker Setup 3. Audio Adjust 4. Source Setup 5. Listening Mode Preset 6. Miscellaneous 7. Hardware Setup 8. Lock Setup ☞ page 78 6. Miscellaneous 1. Volume Setup 2. OSD Setup ☞ page 79 7. Hardware Setup 1. Remote Control 2. Zone2 3. Tuner 4. Analog Multich 5. HDMI ☞ page 82 8. Lock Setup Lock - Onkyo TX SR606 | Instruction Manual - Page 104
EUROPE ELECTRONICS GmbH Liegnitzerstrasse 6, 82194 Groebenzell, GERMANY Tel: +49-8142-4401-0 Fax: +49-8142-4401-555 http://www.eu.onkyo.com/ ONKYO EUROPE UK Office Suite 1, Gregories Court, Gregories Road, Beaconsfield, Buckinghamshire, HP9 1HQ UNITED KINGDOM Tel: +44-(0)1494-681515 Fax: +44(0)-1494
-
 1
1 -
 2
2 -
 3
3 -
 4
4 -
 5
5 -
 6
6 -
 7
7 -
8
-
9
-
10
-
11
-
12
-
13
-
14
-
15
-
16
-
17
-
18
-
19
-
20
-
21
-
22
-
23
-
24
-
25
-
26
-
27
-
28
-
29
-
30
-
31
-
32
-
33
-
34
-
35
-
36
-
37
-
38
-
39
-
40
-
41
-
42
-
43
-
44
-
45
-
46
-
47
-
48
-
49
-
50
-
51
-
52
-
53
-
54
-
55
-
56
-
57
-
58
-
59
-
60
-
61
-
62
-
63
-
64
-
65
-
66
-
67
-
68
-
69
-
70
-
71
-
72
-
73
-
74
-
75
-
76
-
77
-
78
-
79
-
80
-
81
-
82
-
83
-
84
-
85
-
86
-
87
-
88
-
89
-
90
-
91
-
92
-
93
-
94
-
95
-
96
-
97
-
98
-
99
-
100
-
101
-
102
-
103
-
104
 |
 |

E
n
AV Receiver
TX-SR606
Instruction Manual
Thank you for purchasing an Onkyo AV Receiver.
Please read this manual thoroughly before making
connections and plugging in the unit.
Following the instructions in this manual will enable
you to obtain optimum performance and listening
enjoyment from your new AV Receiver.
Please retain this manual for future reference.
Contents
Introduction
.....................................
2
Connection
.....................................
14
Turning On & First Time Setup
.....
37
Basic Operation
Playing your AV components
.......
47
Listening to the Radio
..................
51
Using the Listening Modes
...........
57
Advanced Operation
.....................
67
Troubleshooting
............................
96