Optoma DV11 User Manual
Optoma DV11 Manual
 |
UPC - 079643524167
View all Optoma DV11 manuals
Add to My Manuals
Save this manual to your list of manuals |
Optoma DV11 manual content summary:
- Optoma DV11 | User Manual - Page 1
Unit ...8 Projector Panel ...9 DVD Panel...9 Connection Ports ...10 Remote Control ...11 Installation Setting up the Projector ...12 Connecting /Off the Projector ...16 Powering On the Projector ...16 Turn On the DVD Player ...17 Turn Off the DVD Player ...17 Powering Off the Projector ...18 Warning - Optoma DV11 | User Manual - Page 2
47 Speaker Setup...48 Maintenance Troubleshooting ...49 Image Problems ...49 Projector Operation Problems...51 LED Problems...51 DVD Player Problems ...52 Sound Problems ...53 Remote Control Problems...54 Replacing the Lamp...55 Compatibility Modes...56 Ceiling Mount Installation ...57 Optoma Global - Optoma DV11 | User Manual - Page 3
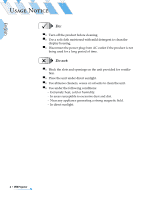
guide. ▀■ To reduce the risk of fire or electric shock, do not expose this product to rain or moisture. ▀■ To prevent the risk of electric shock, do not open or disassemble the product. ▀■ Please allow the unit to cool down before changing the lamp; carefully follow the lamp replacement instructions - Optoma DV11 | User Manual - Page 4
following conditions: - Extremely heat, cold or humidity. - In areas susceptible to excessive dust and dirt. - Near any appliance generating a strong magnetic field. - In direct sunlight. 4 * DVD Projector - Optoma DV11 | User Manual - Page 5
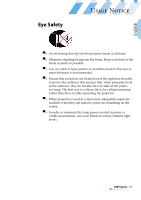
, when presenters look at the audience, they do not also have to stare at the projector lamp. The best way to achieve this is by ceiling-mounting rather than floor or table-mounting the projector. ▀■ When projector is used in a classroom, adequately supervise students when they are asked to point out - Optoma DV11 | User Manual - Page 6
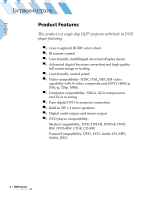
INTRODUCTION Product Features This product is a single chip DLP® projector with built-in DVD player featuring: ▀■ Uses 4 segment RGBW color wheel ▀■ IR remote control ▀■ User-friendly multilingual on-screen display menu ▀■ Advanced digital keystone correction and high quality full screen image re - Optoma DV11 | User Manual - Page 7
make sure your unit is complete. Projector with lens cap Composite Video Cable Remote Control AA Battery x 2 D-Sub to RCA Adapter (For USA and ASIA ONLY) SCART RGB/S-video Adapter (For Europe ONLY) Documentation : User's Manual Warranty Card Quick Start Card Carrying Case DVD Projector - Optoma DV11 | User Manual - Page 8
English INTRODUCTION Product Overview Main Unit 6 11 1 2 3 4 6 5 8 7 9 10 8 * DVD Projector 1. Zoom Lever 2. Focus Ring 3. Zoom Lens 4. Elevator Button 5. Elevator Foot 6. IR Receivers 11 7. DVD Panel 8. Projector Panel 9. Connection Ports 10.Power Socket 11.Speakers - Optoma DV11 | User Manual - Page 9
English INTRODUCTION Projector Panel 12 3 4 1. Lamp LED 2. Temperture LED 3. Source 4. Menu 5. Resync 6. Stand by Button/Power LED 7. Volume - 8. Volume + 9. Enter 10.Four Directional Select Keys 6 7 8 9 5 10 DVD Panel 1. Play/Pause 2. Stop 3. DVD LED 4. Enter 5. Four - Optoma DV11 | User Manual - Page 10
(PC Analog signal/SCART RGB/ HDTV/Component Video) 2. S-Video Input Connector 3. Service Connector 4. Stereo Audio Output Connector 5. Digital Audio Output Connector 6. Audio Input Connector 7. Kensington MicrosaverTM Lock Port 8. Composite Video Input Connector 9. Power Socket 10 * DVD Projector - Optoma DV11 | User Manual - Page 11
English INTRODUCTION Remote Control 1 1. Power On/Off 2 2. S-Video Source 3 3. D-Sub Source 4. DVD Source 4 20 5. Stop Button 5 21 6. Play Button .FWD Button 13 24.NEXT Button 31 25.DVD Menu 14 26.Four Directional Select Keys 27.Projector Menu 15 32 28.Volume +/- 29.Subtitle - Optoma DV11 | User Manual - Page 12
English INSTALLATION Setting up the Projector Connecting the Computer/Notebook 1. Power cord 2. VGA cable 2 1 12 * DVD Projector - Optoma DV11 | User Manual - Page 13
for YPbPr 6. SCART RGB/S- video Adapter 4 Noottee The user can install the connection port according to their 5 1 environment of audio and video equipments or demand. DVD Projector * 13 - Optoma DV11 | User Manual - Page 14
English INSTALLATION Connecting the Audio Input 1. Power cord 2. Audio cable (L/R) 1 2 Connecting the Audio Output(External Subwoofer/Stereo System) 2 1. Power cord 2. Audio cable 1 14 * DVD Projector - Optoma DV11 | User Manual - Page 15
English 1. Power cord 2. Digital audio cable INSTALLATION Connecting the Audio Output(2.1 Channel/5.1 Channel) 2 Coaxial Digital Audio Input Jack 1 2.1 Channel 5.1 Channel DVD Projector * 15 - Optoma DV11 | User Manual - Page 16
cable are securely connected. The Power LED will flash blue. 3. Turn on the lamp by pressing [Stand By] button on the con- trol panel. And the Power LED will turn green. The first time you use the projector, you can select your preferred language from quick menu after the startup screen display - Optoma DV11 | User Manual - Page 17
LED will flash green. 3. Turn on the lamp by pressing [Stand By] button on the con- trol panel. And the DVD LED will turn green. If the DVD player load the disc, you will see a message "Read disc" displayed on the projector's screen. If the DVD player does not load the disc, the start-up screen will - Optoma DV11 | User Manual - Page 18
Compressed digital audio 12cm Digital Photo Powering Off the Projector 1. Press the [Power] or [Stand By] button to turn off the projector lamp, you will see a message "Power off the lamp? Picture Mute" displayed on the projector's screen. Press the [Power] or [Stand By] button again to confirm - Optoma DV11 | User Manual - Page 19
▀■ When the "TEMP" indicator flashes orange, it indicates the photo sensor failed. Please contact your local dealer or our service center. ▀■ When the "LAMP" indicator flashes orange, it indicates the color wheel sensor failed. Please contact your local dealer or our service center. DVD Projector * 19 - Optoma DV11 | User Manual - Page 20
with three adjustable feet to modify the height of the projector. To raise or lower the image: 1. Locate the elevator elevator foot into position. 3. Use to fine-tune tilt-adjustment. 4. Lower the projector so it rests on its foot; adjust as needed. 1. Elevator Button 2. Elevator Foot 3. Tilt- - Optoma DV11 | User Manual - Page 21
to zoom in or zoom out. To focus the image, turn the focus ring until you see a clear image. The projector will focus at distances from 4.92 to 32.80 feet (1.5 to 10.0 meters). Zoom Lever Focus Ring Adjusting Projection .93 271.75 325.67 296.07 10.0 332.14 301.95 361.86 328.86 DVD Projector * 21 - Optoma DV11 | User Manual - Page 22
English INSTALLATION Adjusting the Aspect Ratio of the Image Depending on the type of video source you are viewing, the picture may or may not always look correct or fit on the screen: 4:3 format 16:9-I format 16:9-II format 22 * DVD Projector - Optoma DV11 | User Manual - Page 23
English INSTALLATION Adjusting the Sloping Image If the projector is tilted up or down, the sides of the image on the screen might slope in or out, even though the top and bottom are level. Using the [Keystone +/-] button to adjust the image. Keystone + Keystone - DVD Projector * 23 - Optoma DV11 | User Manual - Page 24
you to control the functions: with control panel and remote control. Using the Remote Control Power 4:3 16:9-I 16:9-II Native DVD D-SUB S-VIDEO VIDEO Enter Press [Power] to turns on the projector's lamp, refer to the "Powering On/Off the Projector" section on page 16~19 for more details. Scale - Optoma DV11 | User Manual - Page 25
Button Choose the camera angle to see the sequence being played back from a different angle. When a DVD contains multiple angles of a particular scene, you can use the ANGLE function. REW Button Press to current disc, title, chapter or track. Returns to the previous operation. DVD Projector * 25 - Optoma DV11 | User Manual - Page 26
Stand By Noottee The Resync function can not be used when the DVD player is operational. Power LED Lamp LED Temp LED / Volume +/Source Resync Enter Press [Stand By] to turns on the projector's lamp, refer to the "Powering On/Off the Projector" section on page 16~19 for more details. Indicate the - Optoma DV11 | User Manual - Page 27
English USER CONTROLS Using the DVD Panel DVD LED Indicate the DVD's status. Eject Button Stops playing and eject the disc. PREV But- Press to skip to pause playback. Pause Button Stop Button Press to stop playback. / Adjusts to increase/decrease the volume. Volume +/- DVD Projector * 27 - Optoma DV11 | User Manual - Page 28
] to confirm, and the screen will return to the main menu. 6. To exit, press [Projector Menu]/[Menu] again. If you don't press any key, the projector will automatically disappear after 30 seconds. The OSD menu will close and the projector will automatically save the new settings. 28 * DVD Projector - Optoma DV11 | User Manual - Page 29
English USER CONTROLS Menu Tree for Projector DVD Projector * 29 - Optoma DV11 | User Manual - Page 30
English USER CONTROLS Language Language Display a multilingual menu. Use and language. Press [Enter] to finalize the selection. to select your preferred 30 * DVD Projector - Optoma DV11 | User Manual - Page 31
USER CONTROLS English Image-I Noottee The "Color" sub menu is not supported under the analog RGB input source. Display Mode There are many factory presets optimized for various types of images. ▀■ Cinema: For home theater. ▀■ sRGB: For standard PC colour. (best colour reproduction) ▀■ Vivid: For - Optoma DV11 | User Manual - Page 32
source. Tint Adjust the color balance of red and green. ▀■ Press to increase the amount of green in an image. ▀■ Press to increase the amount of red in an image. Sharpness Adjust the sharpness of an image. ▀■ Press to decrease the sharpness. ▀■ Press to increase the sharpness. 32 * DVD Projector - Optoma DV11 | User Manual - Page 33
If you prefer a stronger image, adjust toward the maximum setting. For a smoother, more natural image, adjust toward the minimum setting. Color Temp. Adjust the color temperature. The range is from "0" to "2." At a higher temperature, the screen looks colder; at a lower temperature, the screen looks - Optoma DV11 | User Manual - Page 34
English USER CONTROLS Signal Noottee The "Signal" sub menu is supported under the Analog RGB and Analog YPbPr input sources. ▀■ Frequency: Changes the display data then "Enter" pressed, the display parameters on this menu will return to their factory default settings. 34 * DVD Projector - Optoma DV11 | User Manual - Page 35
-screen. ▀■ 16:9-I: The standard wide-screen display format of the projector. ▀■ 16:9-II: The non-standard wide-screen display format of the projector. Part of the original image will be cut if the image aspect ratio encoding error near any edge of the displayable image. DVD Projector * 35 - Optoma DV11 | User Manual - Page 36
English USER CONTROLS Keystone Adjust image distortion caused by tilting projector. (±16 degrees) Reset Choose "Yes" then "Enter" pressed, the display parameters on this menu will return to their factory default settings. 36 * DVD Projector - Optoma DV11 | User Manual - Page 37
Ceiling When you select this function, the projector turns the image upside down for ceiling-mounted projection. ▀■ Rear-Ceiling When you select this function, the projector the fans at full speed continuously to allow for proper high altitude cooling of the projector. DVD Projector * 37 - Optoma DV11 | User Manual - Page 38
English USER CONTROLS DVD Setup Press "Enter" to go to DVD menu. Mute ▀■ Choose the "On" to turn mute on. ▀■ Choose the "Off" to turn mute off. Reset Choose "Yes" then "Enter" pressed, the display parameters on this menu will return to their factory default settings. 38 * DVD Projector - Optoma DV11 | User Manual - Page 39
the cumulative lamp operating time. Lamp Reset Reset the lamp setting only when the new lamp is replaced. Lamp Reminder Choose this function to show or to hide the warning message when the changing lamp message is displayed. The message will show up 30 hours before end of life. DVD Projector * 39 - Optoma DV11 | User Manual - Page 40
How to Operate WMA/MP3/JPEG Program 1. When you place the MP3/JPEG disc, the DVD player will automatically detect the program. 2. Prioritize to enter the first table of MP3 automatically. And Folder Current Title File list MP3/WMA Format Play button JPEG Format Sliding Bar 40 * DVD Projector - Optoma DV11 | User Manual - Page 41
CONTROLS How to Operate DVD Menu 1. To open the DVD OSD menu, press [Projector Menu] on the remote control, go to "System-->DVD Setup". 2. When DVD OSD is displayed, as described above. 5. Choose the "Exit Setup" to confirm, and the screen will return to the main menu. 6. To exit, press - Optoma DV11 | User Manual - Page 42
English USER CONTROLS Menu Tree for DVD 42 * DVD Projector - Optoma DV11 | User Manual - Page 43
doesn't matter what screen ratio you select: playback ratio will always be 4:3. ▀■ Selection of screen ratio should match actual screen ratio of TV being used. DVD Projector * 43 - Optoma DV11 | User Manual - Page 44
the numerical key and importing the initial password of the one machine: 0000, then press the enter button to confirm. When you need to change the password, input the old password first, and then input the new return to their factory default settings. Exit Setup Exit this menu. 44 * DVD Projector - Optoma DV11 | User Manual - Page 45
English USER CONTROLS Language Setup OSD Language Select your preferred language for the on-screen display menu. Audio Lang Select the audio language Subtitle Lang Select the subtitle language Menu Lang Select your preferred language for DVD menu. Exit Setup Exit this menu. DVD Projector * 45 - Optoma DV11 | User Manual - Page 46
. ▀■ SPDIF/Off: Turn off the sound. ▀■ SPDIF/RAW: Select this function, when the player is con- nected to Dolby Digital Decoder. ▀■ SPDIF/PCM: Select this function, when the player is not connected to Dolby Digital Decoder. Key Adjust the key of sound. Exit Setup Exit this menu. 46 * DVD Projector - Optoma DV11 | User Manual - Page 47
Contrast controls the degree of difference between the lightest and darkest parts of the picture. Adjusting the contrast changes the amount of the contrast. ▀■ Press to increase the contrast. Saturation Adjust the color balance of red and green. ▀■ Press to increase the amount of DVD Projector * 47 - Optoma DV11 | User Manual - Page 48
English MAINTENANCE Speaker Setup Downmix Depending on the audio channels you got on volume. You may set them as "Full", 6/8, 4/8, 2/8 or "Off". To compress the high volume Dolby Digital movie, prevent the sudden high volume sound appeared. Dual Mono Sets the way of audio output for Left and right - Optoma DV11 | User Manual - Page 49
English MAINTENANCE Troubleshooting If you experience a problem with your projector, please refer to the following information. If a problem persists, please contact your local reseller or service center. Image Problems Noottee The Resync function can not be used when the DVD player is - Optoma DV11 | User Manual - Page 50
or your monitor freezes, restart all the equipment including the projector. The screen of the Notebook or PowerBook computer is not Tracking" to correct it. See page 34 for more information. Change the monitor color setting on your computer. Image has a vertical flickering bar: Use "Frequency" - Optoma DV11 | User Manual - Page 51
of life, it will burn out and may make a loud popping sound. If this happens, the projector will not turn on until the lamp module has been replaced. To replace the lamp, follow the procedures in the "Replacing the Lamp" section on page 55. LED Problems LED lighting message: DVD Projector * 51 - Optoma DV11 | User Manual - Page 52
Error (Color Wheel Senser Failed) Power LED (Blue) (Green) Flashing DVD LED Temp LED Lamp LED (Green) (Orange) (Orange) Flashing Flashing Flashing Flashing Flashing Flashing Message Reminders Replacing the lamp: Over temperature: Fan failed: 52 * DVD Projector DVD Player Problems If - Optoma DV11 | User Manual - Page 53
not be supported by the internal DVD player. If so, you can not play this type of disc. Try a different disc. For a DVD, check its region code. Most DVDs have a region code marked near the center hole. Compare its region code with the region code for a DVD that plays properly on your projector. The - Optoma DV11 | User Manual - Page 54
±15°. Make sure there are not any obstructions between the remote control and the projector. Move to within 6 m (20 ft) of the projector. Make sure batteries are inserted correctly. Make sure batteries are exhausted. If so, replace weak batteries in the remote control. 54 * DVD Projector - Optoma DV11 | User Manual - Page 55
the risk of personal injury, avoid dropping the lamp module or touching the lamp bulb. If dropped, the bulb may shatter and cause injury. Lamp Replacing Procedure: 1. Turn off the power to the lamp by pressing the [Power] or [Stand By] button. 2. Allow the projector to cool down at least 30 minutes - Optoma DV11 | User Manual - Page 56
.81 72 48.13 75 46.87 85 53.67 60 48.27 70 56.47 75 60.2 85 68.67 75 68.76 56 * DVD Projector - Optoma DV11 | User Manual - Page 57
the ceiling. 2. Avoid placing the projector near sources of heat such air-conditioning units and heaters otherwise it may overheat and shut down automatically. 3. Ceiling mounting shall be mounting on metal or concrete. Max./Min. 446.50/331.50 121.81 89.81 49.07 169.27 68.74 DVD Projector * 57 - Optoma DV11 | User Manual - Page 58
MAINTENANCE English 58 * DVD Projector Optoma Global Offices For service or support please contact your local office. USA 715 Sycamore Drive Milpitas, CA 95035, USA www.optomausa.com Tel : 408-383-3700 Fax: 408-383-3702 Service : [email protected] Canada 5630 Kennedy Road, Mississauga, ON, - Optoma DV11 | User Manual - Page 59
English MAINTENANCE Regulation & safety notices This appendix lists the general notices of your Projector. FCC notice This device has been tested and found to comply with the limits for a Class B digital device pursuant to Part 15 of the FCC rules. These limits are designed to provide reasonable - Optoma DV11 | User Manual - Page 60
with Part 15 of the FCC Rules. Operation is subject to the following two conditions: 1.this device may not cause harmful interference, and 2.this device must accept any interference received, includ- ing interference that may cause undesired operation. Notice: Canadian users This Class B digital
-
 1
1 -
 2
2 -
 3
3 -
 4
4 -
 5
5 -
 6
6 -
 7
7 -
8
-
9
-
10
-
11
-
12
-
13
-
14
-
15
-
16
-
17
-
18
-
19
-
20
-
21
-
22
-
23
-
24
-
25
-
26
-
27
-
28
-
29
-
30
-
31
-
32
-
33
-
34
-
35
-
36
-
37
-
38
-
39
-
40
-
41
-
42
-
43
-
44
-
45
-
46
-
47
-
48
-
49
-
50
-
51
-
52
-
53
-
54
-
55
-
56
-
57
-
58
-
59
-
60
 |
 |

DVD Projector
*
1
E
nglish
TABLE OF CONtENtS
TA
BLE O
F CO
NtEN
tS
Usage Notice
Precautions
.............................................................................................................................................
3
Eye Safety
E
E
Warnings
.............................................................................................................................
5
Introduction
Product Features
...................................................................................................................................
6
Package Overview
................................................................................................................................
w
w
7
Product Overview
.................................................................................................................................
8
Main Unit
.........................................................................................................................................
t
t
8
Projector Panel
...............................................................................................................................
l
l
9
DVD Panel
........................................................................................................................................
l
l
9
Connection Ports
...........................................................................................................................
10
Remote Control
..............................................................................................................................
l
l
11
Installation
Setting up the Projector
.......................................................................................................................
12
Connecting the Computer/Notebook
.......................................................................................
k
k
12
Connecting the Video
...................................................................................................................
13
Connecting the Audio Input
........................................................................................................
t
t
14
Connecting the Audio Output-(External Subwoofer/Stereo System)
...............................
14
Connecting the Audio Output-(2.1 Channel/5.1 Channel)
..................................................
15
Powering On/Off the Projector
..........................................................................................................
r
r
16
Powering On the Projector
..........................................................................................................
r
r
16
Turn On the DVD Player
...............................................................................................................
r
r
17
Turn Off the DVD Player
...............................................................................................................
r
r
17
Powering Off the Projector
..........................................................................................................
r
r
18
Warning Indicator
.........................................................................................................................
r
r
19
Adjusting the Projected Image
...........................................................................................................
20
Adjusting the Projector’s Height
.................................................................................................
t
t
20
Adjusting the Projector’s Focus
..................................................................................................
21
Adjusting the Projection Image Size
.........................................................................................
21
Adjusting the Aspect Ratio of the Image
..................................................................................
22
Adjusting the Sloping Image
......................................................................................................
23
User Controls
Control Panel & Remote Control
........................................................................................................
l
l
24
Using the Remote Control
...........................................................................................................
l
l
24