Optoma OCM818W-RU User Manual - Page 8
Mounting Screws, Bottom, Spacer
 |
View all Optoma OCM818W-RU manuals
Add to My Manuals
Save this manual to your list of manuals |
Page 8 highlights
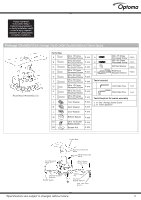
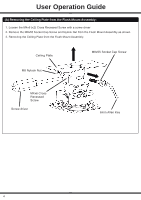
User Operation Guide C.4- Select the correct Mounting Screws from the Parts bag and firmly screw the Flush Mount Assembly onto your Projector. Once this is done, the Projector Flush Mount Assembly is ready to be mounted onto the Ceiling Plate. Mounting Screws Bottom Spacer 8
-
 1
1 -
2
-
 3
3 -
 4
4 -
 5
5 -
 6
6 -
 7
7 -
 8
8 -
 9
9 -
 10
10 -
 11
11 -
 12
12
 |
 |

8
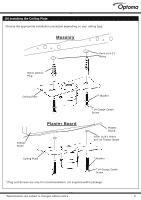
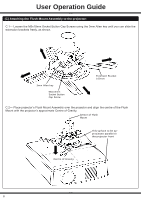
User Operation Guide
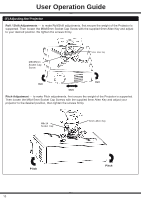
C.4— Select the correct Mounting Screws from the Parts bag and firmly screw the Flush Mount
Assembly onto your Projector.
Once this is done, the Projector Flush Mount Assembly is ready to be mounted onto the Ceiling Plate.
Mounting Screws
Bottom
Spacer