Optoma PD50 User Manual
Optoma PD50 Manual
 |
View all Optoma PD50 manuals
Add to My Manuals
Save this manual to your list of manuals |
Optoma PD50 manual content summary:
- Optoma PD50 | User Manual - Page 1
Instructions ...4 Safety Precautions ...5 Accessories ...7 Batteries ...8 Remote Control ...9 Control Panel ...10 Front Control Panel ...10 Back Control Panel ...11 Connections ...12 How to connect the Cable TV 1 Appendices ...38 Troubleshooting ...38 Specifications ...39 VESA Monitor Timing Spec 40 - Optoma PD50 | User Manual - Page 2
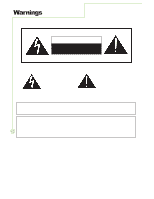
-head within a triangle is intended to tell the user that parts inside the product are a risk of electric shock to persons. The exclamation point within a triangle is intended to tell the user that important operating and servicing instructions are in the papers with the appliance. WARNING: To - Optoma PD50 | User Manual - Page 3
and, if not installed and used in accordance with the instructions, may cause harmful interference to radio communications. However, there is connected. Consult the dealer or an experienced radio/TV technician for help. This device complies with Part 15 of the FCC Rules. Operation is subject to the - Optoma PD50 | User Manual - Page 4
Install in accordance with the manufacturer's instructions. 8. Do not install near any the manufacturer. 12. Use only with the cart, stand, tripod, bracket, or table specified by the of time. 14. Refer all servicing to qualified service personnel. Servicing is required when the apparatus has - Optoma PD50 | User Manual - Page 5
Service Center. Do not cover the ventilation holes. Doing so may cause the High Definition Plasma Display to overheat, which can cause fire or damage to the High Definition Plasma Display. If using the pedestal Code provides information with respect to proper grounding of the mast and supporting - Optoma PD50 | User Manual - Page 6
code plug immediately. A short may occur, which could cause fire. Contact an Authorized Service Center for any repairs that need to be made. When using the High Definition Plasma of the High Definition Plasma Display. If water droplets get inside the unit, operating problems may result. Avoid - Optoma PD50 | User Manual - Page 7
Remote control transmitter Betteries for the remote control transmitter (AAA Battery¯2) Power cord D-sub to RCA cable Phone plug/RCA jack audio input Warranty Card 7 Optional Accessories Wall mount bracket Pedestal NOTE Please only use attachments/accessories specific by - Optoma PD50 | User Manual - Page 8
until the lock snaps. Two AAA size H I NT 8 For frequent remote control users, we suggest to replace batteries with Alkaline batteries for longer life. Precaution used batteries. 5. Battery replacement is necessary when the remote control acts sporadically or stops operating the Plasma Display. - Optoma PD50 | User Manual - Page 9
source NUMBERS 0~9 Individually select TV channels 100 Quickly enter channel number greater than 100 MTS Change TV sound mode MUTE Turn sound in PIP/POP mode POSITION Change PIP position Remote Control POWER Turn the plasma display on or off(stand by) Previous Channel Back to previous channel - Optoma PD50 | User Manual - Page 10
Panel Front Control Panel The control keys and LED indicator light are in the front display as still consume some power as long as the power cord is still inserted into the wall outlet.) Stand-by......Red Power-ON......Green fan unwork......Flash red Volume Adjustment Push the volume Up or down - Optoma PD50 | User Manual - Page 11
Back Control Panel Control Panel SPEAKER SPEAKER Terminals (R) S-Video & Composite Terminals (L) Video & Audio input Terminals Audio Input terminal Digital input for input Audio Output Terminals Connect to PC analog or HDTV YPbPr output This terminal is for after service purpose only - Optoma PD50 | User Manual - Page 12
Here we list and explain some kinds of familiar apparatus. Please ensure the correct connection between display and external equipment. How to connect the Cable TV or Antenna Use Antenna cable to connect ANTENNA socket of F connector with 75 Ohms impedance. How to connect the computer If you want to - Optoma PD50 | User Manual - Page 13
TV game set to Display is the same as VHS connection. How to connect the DVD player Most of DVD player can support various input types, and this unit can support connect to five sockets, including three image control sockets(Y, Cb, Cr ) and two audio control sockets(L/R audio channel. 13 2. Use - Optoma PD50 | User Manual - Page 14
Connections How to connect the HDTV For HDTV Tuner or D-VHS user, please connect Y, Pb, Pr cable to VGA IN/HDTV input. NOTE 14 You may need a VGA-to-Y,Pb,Pr adapter to connect VGA IN/ HDTV input with HDTV . For better picture quality, please use YCbCr connector for 480i signal. - Optoma PD50 | User Manual - Page 15
speaker. 2. You can also connect to other speakers by using Audio out sockets, you need to connect to external amplifier then connect to speaker. (RED) (BLACK) (RED) (BLACK) (RED) (BLACK) 15 Audio Amplifier - Optoma PD50 | User Manual - Page 16
halves, allowing the simultaneous viewing of two programs in side-by-side windows. 1. Select from OSD Menu Step 1 : Press the MENU/EXIT button on the remote control X to call up the on screen display to enter PIP/POP function list. Step 2 : Press theTbutton to enter the sub-selection and then use - Optoma PD50 | User Manual - Page 17
17 H I NT Selecting a Source for the pip, split screen and pop3, - In TV for main picture, you can select AV1, HDTV/VGA IN and DVI for sub picture. select TV, AV1 and AV2 for sub picture. - In DVI for main picture, you can select TV, AV1 and AV2 for sub picture. NOT E POP3 sub window only supports - Optoma PD50 | User Manual - Page 18
-present picture settings or user present settings. And the different sources input will have different menu function, referring to follwoing menu. 1. During Composite, S-Videio and TV input signal modes 2. During YCbCr 480i input signal mode. 18 3. During Analog RGB input signal mode. - Optoma PD50 | User Manual - Page 19
On - Screen Menu PICTURE 4. During Digital RGB input signal mode. 5. During HDTV input signal mode. Step 1 : Press the MENU/EXIT button on the remote control to call up on screen display and then useWXbutton to select the picture function. Step 2 : 19 Press theTbutton to enter the sub-selection - Optoma PD50 | User Manual - Page 20
black level Steps: Selecting contrast item then press WX button to enter the function. The contrast bar plasmas dispaly and the computer Steps: 20 Mode: Selecting contrast item then press WX button to enter the function. The phase bar enter the function. The sharpness bar appears on the bottom of - Optoma PD50 | User Manual - Page 21
adjusing. Mode : This function works only in Composite, S-Video, TV and HDTV modes. Frequency Description: Adjust for vaious ambient signal Selecting tint item then press WX button to enter the function. The tint bar appears on the bottom of screen, selecting WXbutton to adjust tint range from - Optoma PD50 | User Manual - Page 22
press WX button to select normal, cinerma and bright modes, re-pressing MENU/EXIT to exit sub-menu. Mode: This function works only in Video, TV and HDTV modes. Reset Description: Back to factory default value. Steps: Selecting mode item then press OK button to activate reset, re-pressing MENU - Optoma PD50 | User Manual - Page 23
user to alter the screen dimensions to suit the image being viewed. 1. During Video, TV, Digital RGB and HDTV input signal modes 2. During Analog RGB input signal mode Step 1 : Press the MENU/EXIT button on the remote control to call up on screen display and then useWXbutton to select the screen - Optoma PD50 | User Manual - Page 24
being transmitted without any modifications. Unused portions of the screen will be left in black. 3. 4:3 : This format will enlarge picture signals to 1024 x 768 in press WX button to enter the function. The H. position bar appears on the bottom of screen, selecting WXbutton to adjust horizontal - Optoma PD50 | User Manual - Page 25
sound settings to suit the program being viewed or to suit the user preference. 1. During Video, analog RGB, digital RGB, HDTV input signal modes During TV input signal mode Step 1 : 25 Press the MENU/EXIT to call up on screen display and then useWXbutton to select the audio function. Step - Optoma PD50 | User Manual - Page 26
volume item then press WX button to enter the function. The volume bar appears on the bottom of screen, selecting WXbutton to adjust volume. Re frequency sound. Steps: Selecting bass item then press WX button to adjust bass bar on menu, repressing MENU/EXIT to exit sub menu. Mode : This function - Optoma PD50 | User Manual - Page 27
stereo, SAP or mono to changeTV sound mode in NTSC system. To press MENU/EXIT to exit sub menu. Mode: This function works only in TV mode. NOTE You can also use hot key to select MTS function, please refer to the section of hot key introduction. 27 - Optoma PD50 | User Manual - Page 28
On - Screen Menu SETTINGS This menu allows the user to modify selections of OSD timeout, language, source select and source enable. Refer to the next page for descriptions. Step 1 : Press the MENU/EXIT button to call up on screen display and then useWXbutton to select the settings function. Step 2 - Optoma PD50 | User Manual - Page 29
sources input. Steps: Selecting source enable item then press OK to activate selection, pressing STbutton to select sources of analog RGB, digital RGB, HDTV, TV, AV1 or AV2 YCbCr. Press OK to disable source, pressing again OK to enable source. To press MENU/EXIT to exit source selection and sub - Optoma PD50 | User Manual - Page 30
allows the user to turn on/off the closed caption, select the text mode, and block the TV program with particular rating. Refer to the next page for descriptions. 1. During Composite input signal mode 2. During TV input signal mode Step 1 : Press the MENU/EXIT to call up on screen display and then - Optoma PD50 | User Manual - Page 31
(AV1) and TV modes. Close TV programs and movies may contains inappropriate material for viewers at all ages, therefore, are rated base on the following and be categorised in different levels : violence (V), Sexual situation (S), coarse language (L), or suggestive dialogue (D). Content blacking - Optoma PD50 | User Manual - Page 32
On - Screen Menu More Information Movie blocking Description : Independent rating system for movies. Steps : Press STbutton to highlight the desired rating then press MENU/EXIT to exit selection. Move to blocking enable/disable item to activate function. MPAA Rating Description G General - Optoma PD50 | User Manual - Page 33
: Press STbutton to highlight the desired rating then press MENU/EXIT to exit selection. Move to blocking enable/disable item to activate function. TV Rating Description Y All Children- This program is designed to be appropriate for all children Y7 Directed to Older Children- This program is - Optoma PD50 | User Manual - Page 34
menu allows the user to make channel fine tune, channel source type selection and channel search/edit. Refer to the next page for descriptions. During TV input signal mode Step 1 : Press the MENU/EXIT to call up on screen display and then useWXbutton to select the tuner function. Step 2 : Press - Optoma PD50 | User Manual - Page 35
MENU/EXIT to exit sub menu. Mode: This function works only in TV mode. Fine tune Description: Select correct tune set to channels manually. Steps: Selecting fine tune item then press OK to activate function. The bar appears on the bottom of display, selecting WXbutton to correct tune set to - Optoma PD50 | User Manual - Page 36
key functions on remote control. It helps easy and quick to use these functions. MTS Change TV sound mode in for a long time. It may cause after-image (please refer to the troubleshooting page). NOTE After the freeze, only the keys of Zoom, UP, Left support some PIP/POP/POP3 combinations, reading the - Optoma PD50 | User Manual - Page 37
mode for selecting.(About Format description, please refer to page 21) 37 FAVORITE ADD To add current TV channel to available favorite TV channel list. ERASE To remove current TV channel from TV favorite channel list. UP To switch to next upward channel on the favorite channel list. DOWN To switch - Optoma PD50 | User Manual - Page 38
Check to see if there is any object between the Plasma Display and the remote control causing obstruction. • Check to see if the batteries are installed with the correct polarities. Some parts of the screen do no light up • The plasma display panel is manufactured using an extremely high level of - Optoma PD50 | User Manual - Page 39
Specifications Dimmensions Input AC 100 ~ 120V Power Consumption Normal use 535W (maximum) Stand-by condition - Optoma PD50 | User Manual - Page 40
37.9 31.50 Y Y 75 37.5 31.50 Y Y 85 43.3 36.00 Y Y SVGA 800x600 56 35.1 36.00 Y Y 60 37.9 40.00 Y Y 72 48.1 50.00 Y Y 75 46.9 49.50 Y Y 85 compress) 75 80.0 135.00 *Y (compress) N 40 85 91.0 157.50 **Y (down sampling) N UXGA 1600x1200 60 75.0 162.00 **Y (down
-
 1
1 -
 2
2 -
 3
3 -
 4
4 -
 5
5 -
 6
6 -
 7
7 -
8
-
9
-
10
-
11
-
12
-
13
-
14
-
15
-
16
-
17
-
18
-
19
-
20
-
21
-
22
-
23
-
24
-
25
-
26
-
27
-
28
-
29
-
30
-
31
-
32
-
33
-
34
-
35
-
36
-
37
-
38
-
39
-
40
 |
 |

1
Table
of
Contents
Contents
Table Of Contents
.................................................................................................................
1
Warnings
...............................................................................................................................
2
FCC Statement
......................................................................................................................
3
Safety Instructions
...............................................................................................................
4
Safety Precautions
...............................................................................................................
5
Accessories
...........................................................................................................................
7
Batteries
................................................................................................................................
8
Remote Control
.....................................................................................................................
9
Control Panel
......................................................................................................................
10
Front Control Panel
..............................................................................................................
10
Back Control Panel
..............................................................................................................
11
Connections
.......................................................................................................................
12
How to connect the Cable TV or Antenna
.............................................................................
12
How to connect the Computer
..............................................................................................
12
How to connect the VHS
......................................................................................................
13
How to connect the DVD player
............................................................................................
13
How to connect the HDTV
....................................................................................................
14
How to connect the Speakers
..............................................................................................
15
On-Screen Menu
.................................................................................................................
16
PIP/POP
.............................................................................................................................
16
PICTURE
............................................................................................................................
18
SCREEN
.............................................................................................................................
23
AUDIO
.................................................................................................................................
25
SETTINGS
..........................................................................................................................
28
OPTIONS
............................................................................................................................
30
TUNER
................................................................................................................................
34
Hot Key Functions
.............................................................................................................
36
Appendices
.........................................................................................................................
38
Troubleshooting
...................................................................................................................
38
Specifications
.....................................................................................................................
39
VESA Monitor Timing Spec
.................................................................................................
40