Oreck DTX1100 Owners Guide - Page 4
Assembly Getting Ready for Use
 |
View all Oreck DTX1100 manuals
Add to My Manuals
Save this manual to your list of manuals |
Page 4 highlights
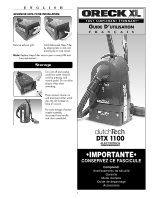
ENGLISH Assembly 17 To assist you in identifying components of your vacuum. Components vary with accessory kits: 23 18 1 Intake 2 Exhaust 13 Cord Channel 14 Standard Nozzle 18 3 Advanced Hepa Filter 15 Power Nozzle 29 (sold seperately) 16 Power Handle with Hose 4 Filter Bag 17 Standard Handle with Hose 5 Filter Bag Carrier 6 Bag Full Indicator 18 Suction Control 19 Motor Filter Grill 25 7 Power On/Off Pedal 20 Motor Filter 8 Cordwinder Pedal 21 Exhaust Filter 9 Upholstery Tool 10 Dusting Brush 20 22 Exhaust Filter Grill 11 Crevice Tool 12 Friction Wands 19 27 29 4 26 5 24 16 28 9 10 23 Power Nozzle On/Off Switch 24 Wand Clip 25 Upper Power Wand 26 Lower Power Wand 27 Hose Lock 28 Plug Holder 29 Button Locks 30 Carpet / Bare Floor Adjustment 13 1 11 3 8 7 6 29 14 30 Getting Ready for Use Connect the hose by firmly inserting end of hose into canister intake opening until it clicks. To disconnect hose, turn hose lock on canister intake to unlock hose and remove. To assemble standard wands and nozzle. Insert the smaller end of the upper wand into the larger end of the lower wand to secure. 15 WAND CLIP 24 2 12 21 22 Insert small end of bottom wand into nozzle firmly with wand clip facing back. Insert handle into upper wand by pressing firmly; button will lock on power handle. 4
-
 1
1 -
 2
2 -
 3
3 -
 4
4 -
 5
5 -
 6
6 -
 7
7 -
 8
8 -
 9
9 -
 10
10 -
11
-
12
-
13
-
14
-
15
-
16
-
17
-
18
-
19
-
20
 |
 |
