Panasonic AG-HMC40PJ Editing AVCHD with Final Cut Express 4 - Page 7
Editing With Final Cut Express 4 - ag hmc40
 |
View all Panasonic AG-HMC40PJ manuals
Add to My Manuals
Save this manual to your list of manuals |
Page 7 highlights
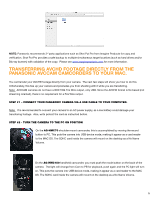
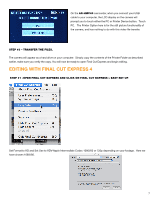
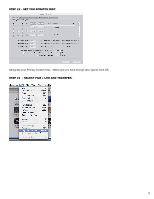
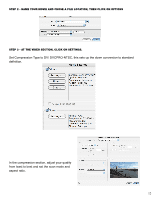
On the AG-HMC40 camcorder, when you connect your USB cable to your computer, the LCD display on the camera will prompt you to touch either the PC or Printer Device button. Touch PC. The Printer Option here is for the still picture functionality of the camera, and has nothing to do with this video file transfer. STEP #3 - TRANSFER THE FILES. The camera will appear as a hard drive on your computer. Simply copy the contents of the Private Folder as described earlier, make sure you verify the copy. You will now be ready to open Final Cut Express and begin editing. Editing with final cut express 4 Step #1 -Open Final Cut Express and click on Final Cut Express > Easy Set Up. Set Format to HD and Set Use to HDV-Apple Intermediate Codec 1080i/60 or 720p depending on your footage. Here we have chosen 1080i/60. 7
-
 1
1 -
 2
2 -
 3
3 -
 4
4 -
 5
5 -
 6
6 -
 7
7 -
 8
8 -
 9
9 -
 10
10 -
 11
11 -
 12
12 -
13
-
14
-
15
-
16
-
17
-
18
 |
 |
