Panasonic BL-C230 Installation Guide - Page 4
Mounting the Camera - bl c230a best
 |
View all Panasonic BL-C230 manuals
Add to My Manuals
Save this manual to your list of manuals |
Page 4 highlights
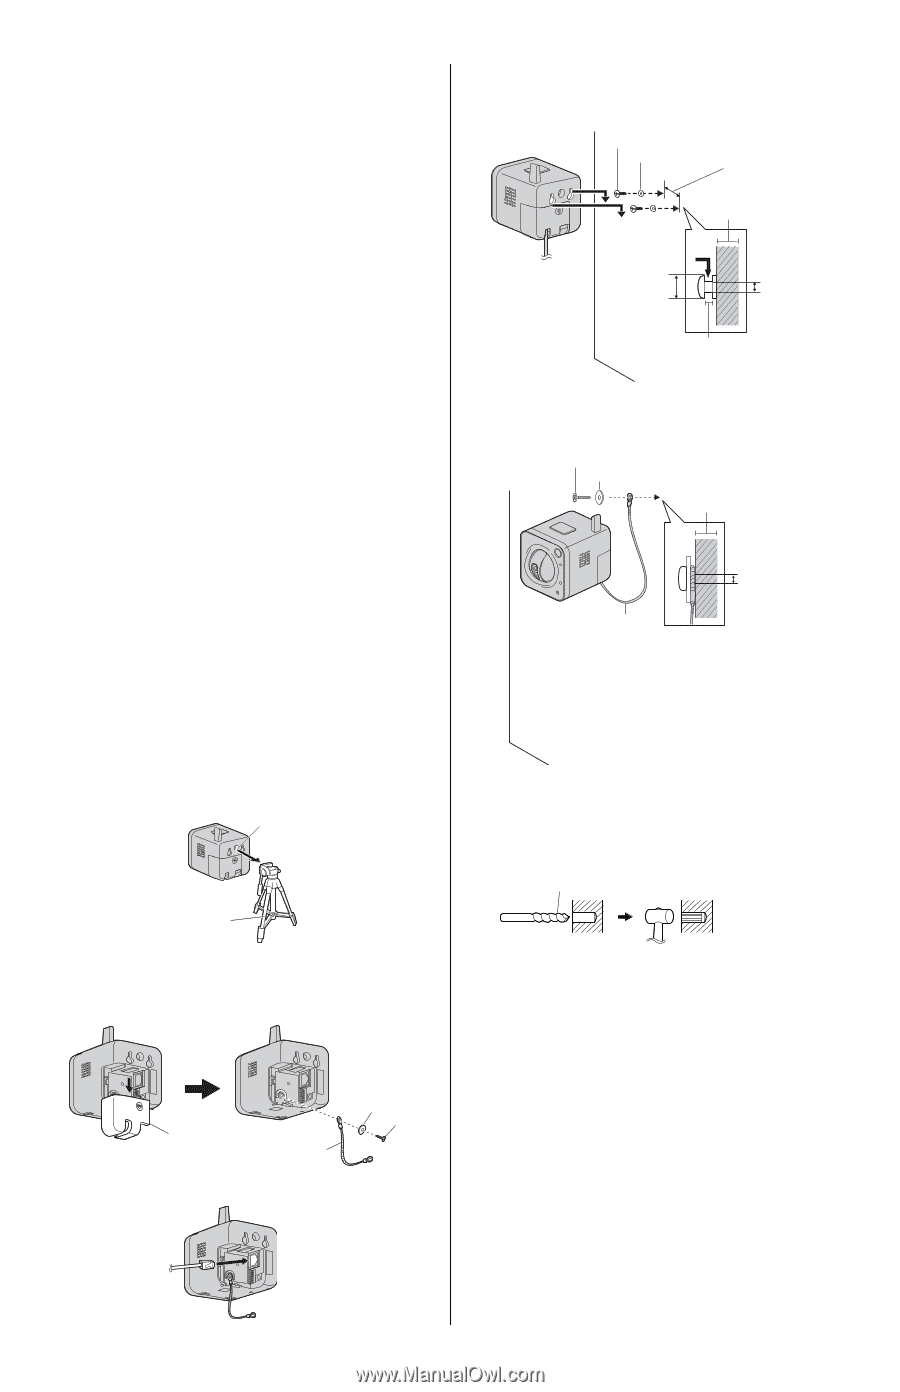
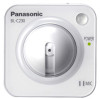
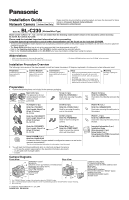
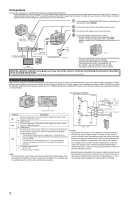
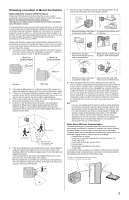
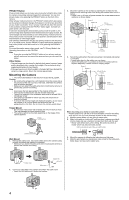
PRIVACY Button Privacy mode allows you to protect your privacy by hiding the lens inside the camera, preventing camera images from being seen. You can turn privacy mode on by pressing the PRIVACY button on the front of the camera. When privacy mode is turned on, the PRIVACY button (which also serves as the camera's indicator) changes from green to red to let you know that privacy mode is activated. To turn privacy mode off and allow the camera to be accessed, simply press the PRIVACY button again. It should turn green within a few seconds. If users are accessing the camera when privacy mode is turned on, the camera image area displayed in their web browsers turns gray or black. No camera pages can be accessed by users while privacy mode is turned on. Once privacy mode is turned off, users can press the refresh button in their web browsers to view images again. The camera's administrator can also turn privacy mode on and off using a PC or a mobile phone, and the PRIVACY button itself can be disabled so that privacy mode cannot be turned on or off by pressing the PRIVACY button. For more information about privacy mode, see 7.6 Privacy Mode in the Operating Instructions on the CD-ROM. Note • If you plan on using the PRIVACY button to turn privacy mode on and off, make sure you mount the camera where you can reach the button. Other Notes • Camera images can be viewed in relatively dark areas, however, image quality decreases when viewing dark images. We recommend using supplemental lighting for best results. • Prolonged exposure to direct sunlight or halogen light may damage the camera's image sensor. Mount the camera appropriately. Mounting the Camera • The camera illustrations in this document depict the BL-C230A. Caution • Do not drive the screws into a soft material. Drive the screws into a secure area of the wall, such as a wall stud, otherwise the camera may fall and be damaged. • Make sure you attach the safety wire when mounting the camera, to prevent the camera from falling. Note • Use screws that are appropriate for the material of the wall. • The included screws are for use with wooden walls only. • The pull-out strength of the installation area must be at least 294 N (30 kgf) per screw. • The camera is intended for indoor use only and should not be mounted outdoors. • To ensure that camera images are displayed properly, do not mount the camera on an incline. Mount the camera so that it is perpendicular to the floor. Do not mount the camera upside down. Tripod Mount • Do not use a tripod screw with a thread of 6 mm (1/4 inch) or more. This may damage the tripod mounting hole. • The camera cannot be mounted depending on the shape of the camera platform. Tripod mounting hole Tripod (customer-provided) Wall Mount 1. Remove the cable cover, secure the safety wire to the camera using screw B (included) and washer M (included). • Make sure you attach the safety wire when mounting the camera, to prevent the camera from falling. 3. Mount the camera on the screws by inserting the screws into the camera's wall mounting holes, then sliding the camera down until it is secure. • Leave 2 mm (1/16 inch) of space between the screw heads and the washers, as shown below. Screw C Washer S 29 mm (1 1/8 inches) At least 25 mm (1 inch) 9 mm (3/8 inch) 3.5 mm (1/8 inch) 2 mm (1/16 inch) 4. Secure the safety wire to the wall using screw A (included) and washer L (included). • Leave some slack in the safety wire, as shown. • Attach the safety wire in a position so that if the camera were to become detached, it would not fall on nearby people. Screw A Washer L At least 25 mm (1 inch) Safety wire 4 mm (3/16 inch) When mounting on a mortar or concrete surface • Prepare anchors for a 4 mm (3/16 inch) diameter screw for the safety wire, and 3.5 mm (1/8 inch) diameter screws for the wall mounting. 1. Mark the points where you are going to make holes. 2. Make holes with an electric drill. Insert anchors (customer-provided) into the holes and use a hammer to make them flush with the wall. • Mortar walls break easily when drilling. Be careful of pieces of mortar which may become loose and fall. Drill for concrete (in case of tile, use a drill for tile) 3. Mount the camera by following the instructions on this page. 4. Mark the point where you are going to make a hole for the safety wire, follow step 2 and secure the safety wire. Cable cover Safety wire Washer M Screw B 2. Connect a LAN cable to the camera and attach the cable cover. • Insert the LAN cable until it clicks into to place. 4
-
 1
1 -
 2
2 -
 3
3 -
 4
4
 |
 |