Panasonic CF-19PJRDX2M Reference Manual
Panasonic CF-19PJRDX2M - Toughbook 19 Tablet PC Version Manual
 |
UPC - 092281894652
View all Panasonic CF-19PJRDX2M manuals
Add to My Manuals
Save this manual to your list of manuals |
Panasonic CF-19PJRDX2M manual content summary:
- Panasonic CF-19PJRDX2M | Reference Manual - Page 1
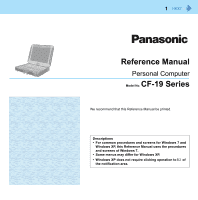
Personal Computer CF-19 Model No. Series We recommend that this Reference Manual be printed. Descriptions • For common procedures and screens for Windows 7 and Windows XP, this Reference Manual uses the procedures and screens of Windows 7. • Some menus may differ for Windows XP. • Windows XP does - Panasonic CF-19PJRDX2M | Reference Manual - Page 2
manual explains instructions, the names are referred as follows. z "Genuine Windows® 7 Professional 32-bit Service Pack 1" and "Genuine Windows® 7 Professional 64-bit Service appears. If a driver update is required, contact your technical support office. *1 Windows XP: [start] Regarding Windows 7 „ - Panasonic CF-19PJRDX2M | Reference Manual - Page 3
can select the Classic view of Control Panel or the Classic Start menu. You can also change the way a user logs on or off. This manual explains using the Windows XP default setting (not Classic view or Classic Start menu etc.). z If the message "Your computer might be at risk" is - Panasonic CF-19PJRDX2M | Reference Manual - Page 4
Key Combinations 4 NOTE z Do not repeatedly press the keys in quick succession. z Do not use the key combinations together with touch pad (external mouse), touchscreen (only for model with touch- screen), dual touch (only for model with dual touch), tablet buttons, or other key operations. z Do - Panasonic CF-19PJRDX2M | Reference Manual - Page 5
Key Combinations Key Fn + F4*1 Speaker on/off Function 5 Pop-up icon Fn + F5*1 Fn + F6*1 Volume (Fn + F5= down / Fn + F6= up) NOTE z When fine-tuning the sound volume, press and hold Fn, and press F5 or F6 intermittently. z This does not work on beeps or speakers connected to the USB port. Fn - Panasonic CF-19PJRDX2M | Reference Manual - Page 6
Key Combinations 6 *2 Windows XP: standby *3 Even if [Sound] is set to [OFF] on the [Concealed Mode Configuration] menu, or icon on the notification area and [Volume] in [SoundMAX] display do not show mute state. However, audio from the speaker is not heard. Hotkey Settings You can make 2 - Panasonic CF-19PJRDX2M | Reference Manual - Page 7
Key Combinations 7 3 Click [OK]. NOTE z You can have different settings for each user. *4 Windows XP: [start] *5 If the speaker is muted or [Sound] is turned off in [Concealed Mode Configuration], beeps do not sound. - Panasonic CF-19PJRDX2M | Reference Manual - Page 8
Tablet Buttons 8 Button Function LCD Brightness You can also adjust the LCD brightness in Dashboard for Panasonic PC. ( : down / : up page 23) Input Panel Tablet PC Input Panel on/off If you press and hold this button, Dashboard for Panasonic PC will start ( page 22). Tablet PC Input Panel - Panasonic CF-19PJRDX2M | Reference Manual - Page 9
Tablet Buttons 9 Setting the Tablet Buttons NOTE z You can have different settings for each user. z On the Windows logon screen and Welcome screen, the tablet buttons are enabled and work in default irrespective of the settings you made. „ To change the tablet button functions You can change the - Panasonic CF-19PJRDX2M | Reference Manual - Page 10
Tablet Buttons 10 „ To disable the tablet buttons You can disable the Security ( )/Input Panel ( )/Enter ( )/Rotation ( ) buttons. 1 Click [start] - [All Programs] - [Panasonic] - [Tablet Buttons Settings]. 2 Remove the check mark from [Enable Security, Input Panel, Enter, Rotation Button.] 3 - Panasonic CF-19PJRDX2M | Reference Manual - Page 11
Touchscreen 11 You can use the touchscreen function to perform the same operation as the touch pad and mouse. Touch the screen surface with the stylus (included). For further information, click flicks]. z To right-click (Start) - [Control Panel] - [Hardware and - Panasonic CF-19PJRDX2M | Reference Manual - Page 12
coating, an approved soft cloth has been included to wipe the LCD surface of the computer. Before using the computer, be sure to read the instructions provided below. • Be sure to wipe the LCD display to remove fingerprints, etc., with the soft cloth. • Do not wipe areas other than the LCD - Panasonic CF-19PJRDX2M | Reference Manual - Page 13
Touchscreen 13 „ Check the following to prevent the surface of the touchscreen from being scratched z Are you using your finger or a stylus to operate the touchscreen? z Is the surface clean? z Is the soft cloth clean? z Are you using the stylus with the tip extended? z Is the tip of the stylus - Panasonic CF-19PJRDX2M | Reference Manual - Page 14
Touchscreen 14 „ Calibration by an administrator NOTE z At first, log on to Windows as an administrator, and perform this calibration. 1 Run [Tablet PC Settings]. Click (Start) - [Control Panel] - [Hardware and Sound] - [Tablet PC Settings]. 2 Click [Calibrate]. 3 Using the stylus, touch each of - Panasonic CF-19PJRDX2M | Reference Manual - Page 15
Dual Touch 15 You can use the digitizer function to perform the same operation as the touch pad and mouse by touching the screen surface with the digitizer pen (included). And you can use the touchscreen function to perform the same operation as the touch pad and - Panasonic CF-19PJRDX2M | Reference Manual - Page 16
coating, an approved soft cloth has been included to wipe the LCD surface of the computer. Before using the computer, be sure to read the instructions provided below. • Be sure to wipe the LCD display to remove fingerprints, etc., with the soft cloth. • Do not wipe areas other than the LCD - Panasonic CF-19PJRDX2M | Reference Manual - Page 17
Dual Touch 17 Things to keep in mind when using the dual touch Do not apply excessive force to the screen Do not lift the computer while holding the LCD screen, or allow the screen to be twisted. Do not place any objects on the LCD screen. Any of the above may cause the screen glass to break, or - Panasonic CF-19PJRDX2M | Reference Manual - Page 18
Dual Touch 18 Touchscreen Calibration A standard user needs to perform the calibration as an administrator before performing the calibration for each user. Calibration by an administrator NOTE At first, log on to Windows as an administrator, and perform this calibration. Return the rotated display - Panasonic CF-19PJRDX2M | Reference Manual - Page 19
Software Keyboard 19 You can touch the screen keyboard using the stylus (included) to perform the same operation as the internal keyboard. Starting the Software Keyboard 1 Press the Input Panel button (A). z Alternatively you can click [start] - [All Programs] - [Panasonic] - [Software Keyboard]. - Panasonic CF-19PJRDX2M | Reference Manual - Page 20
Software Keyboard 20 Software Keyboard Menu 1 Click (A). 2 Add a check mark to the function you want to use. z [Auto Move] The software keyboard moves automatically to avoid overlapping the selected window. z [Auto Restore] The software keyboard minimized on the notification area will be restored - Panasonic CF-19PJRDX2M | Reference Manual - Page 21
the image quality will become lower. z You can copy the bitmap image by clicking [Edit] - [Copy], and paste it in another application software that supports bitmap format. z The touch pad mode may not work properly when using the extended desktop. z The touch pad mode may not work properly when the - Panasonic CF-19PJRDX2M | Reference Manual - Page 22
Dashboard for Panasonic PC 22 You can perform the following operations easily by using the Dashboard for Panasonic PC. 1 Click on the desktop to open the Dashboard for Panasonic PC. The screen to the right appears. The items (or "function tiles") displayed allow you configure various settings and - Panasonic CF-19PJRDX2M | Reference Manual - Page 23
[Touch Only] when you want to operate the screen with only your fingers. When you change the setting, a confirmation message appears. Follow the instructions displayed on the screen. [Pen and Touch] Change the pen (included)/finger operation mode as follows. A Click [Change settings]. The [Pen and - Panasonic CF-19PJRDX2M | Reference Manual - Page 24
Dashboard for Panasonic PC 24 [Screen Rotation Setting] Configure the orientation setting for the display. [Touch Calibration] Adjust the calibration for pen and touch inputs. Refer to "Touchscreen Calibration" ( page 13) or "Dual Touch Calibration" ( [Power Plan Extension] page 17). Configure - Panasonic CF-19PJRDX2M | Reference Manual - Page 25
Dashboard for Panasonic PC 25 Using Dashboard for Panasonic PC as an Application Launcher You can launch application programs easily by registering them to the Dashboard for Panasonic PC screen. Log on to Windows as an administrator, and proceed as follows. 1 Click on the desktop. 2 For the Basic - Panasonic CF-19PJRDX2M | Reference Manual - Page 26
Dashboard for Panasonic PC 26 Launching an application program 1 Click on the desktop. 2 Click [Launch] for the desired application program. Moving Function Tiles 1 Click and hold on the title portion of the function tile for several seconds. An orange frame will appear around the function tile. - Panasonic CF-19PJRDX2M | Reference Manual - Page 27
Dashboard for Panasonic PC 27 Deleting Function Tiles on Mypage 1 Drag and drop the function tile you want to delete onto the Trash button. 2 If a confirmation message appears, click [Yes]. Deleting Application Launcher Tiles on Basic Page 1 Click the Settings button. 2 In the [Dashboard Setting] - Panasonic CF-19PJRDX2M | Reference Manual - Page 28
Dashboard for Panasonic PC 28 Specifying Usable Functions on Dashboard for Panasonic PC You can specify functions that can be used by standard users on the Dashboard for Panasonic PC. Functions not specified will be dimmed and standard users will not be able to use these functions. z An - Panasonic CF-19PJRDX2M | Reference Manual - Page 29
x 600 pixels and rotate the display, the resolution shown in [Screen resolution] of [Display Properties] may not correspond to the correct resolution. This is not a problem. - Panasonic CF-19PJRDX2M | Reference Manual - Page 30
Display Rotation 30 z When the display is rotated, the motion video may not be displayed correctly or the sound may be distorted. Return the display angle to [Primary Landscape]. z When you set the resolution to 800 x 600 pixels, you can rotate the display to [Primary Landscape] and [Secondary - Panasonic CF-19PJRDX2M | Reference Manual - Page 31
Sleep or Hibernation Functions 31 Starting Up Your Computer Quickly The sleep*1 or hibernation functions allow you to shut off the computer without closing programs and documents. You can quickly return to the programs and documents that you were working on before sleep*1 or hibernation. - Panasonic CF-19PJRDX2M | Reference Manual - Page 32
Sleep or Hibernation Functions 32 1 Click [start] - [Control Panel] - [Performance and Maintenance] - [Power Options] - [Advanced]. 2 Select [Stand by] or [Hibernate] for [When I close the lid of my portable computer:] / [When I press the power button on my computer:], and then click [OK]. NOTE z - Panasonic CF-19PJRDX2M | Reference Manual - Page 33
to the serial port. z It may take 1 or 2 minutes to enter hibernation. Do not touch any key though the screen becomes dark. CAUTION The following problems will occur when you fail the password input (failing three times or leaving the computer unattended for one minute or more) while resuming from - Panasonic CF-19PJRDX2M | Reference Manual - Page 34
Sleep or Hibernation Functions 34 To enter standby, click [start] - [Turn Off Computer] - [Stand By]. To enter hibernation, click [start] - [Turn Off Computer], then press and hold Shift and click [Hibernate]. CAUTION While the computer is entering sleep*3 or hibernation z Do not: • Touch the - Panasonic CF-19PJRDX2M | Reference Manual - Page 35
Sleep or Hibernation Functions 35 „ To resume from sleep*3 or hibernation 1 Open the display, or slide the power switch (A). z In the default setting, the Windows password will be requested to resume. z When [Stand by] or [Hibernate] is selected as the setting for [When I close the lid of my - Panasonic CF-19PJRDX2M | Reference Manual - Page 36
Saving Power 36 You can extend battery life and save power also during AC adaptor usage. Reducing Power Consumption Use the methods below to reduce power consumption. z Change [Power Options] Click (Start) - [Control Panel] - [System and Security] - [Power Options] to select [Power saver] and - Panasonic CF-19PJRDX2M | Reference Manual - Page 37
Saving Power 37 To confirm current settings, click (Start) - [All Programs] - [Panasonic] - [Power Saving Utility] - [Advanced] to view [Wired LAN standby power saving function] or [Wireless LAN standby power saving function]. click [start] - [All Programs] - [Panasonic] - [Power Saving Utility - Panasonic CF-19PJRDX2M | Reference Manual - Page 38
Saving Power 38 „ Setup 1 Click [start] - [All Programs] - [Panasonic] - [Power Saving Utility]. 2 Click [Enable] for each function. Click [OK] in the confirmation screen that appears. z To enable "Intel video driver power saving function" Select [Enable], and slide the slide bar to the "Maximum - Panasonic CF-19PJRDX2M | Reference Manual - Page 39
page 112): For further information, refer to the Installation Manual of "Trusted Platform Module (TPM)". Setting the Supervisor Password Password, you will not be able to use your computer. Contact Panasonic Technical Support. z When running the Setup Utility, do not leave and go away from your - Panasonic CF-19PJRDX2M | Reference Manual - Page 40
without setting the Supervisor Password. Set the Supervisor Password beforehand (Î page 39). z When you have your hard disk drive repaired • Contact Panasonic Technical Support. • Before sending back the hard disk drive, be sure to set the [Hard Disk Lock] to [Disabled]. NOTE z The hard disk lock - Panasonic CF-19PJRDX2M | Reference Manual - Page 41
to prevent unauthorized access. Thus, stronger authentication is enabled. To use Intel® IPT, a dedicated solution and application software provided by a service provider is required. To check if such application software is installed, do the following. Click (Start) - [Control Panel] - [Uninstall - Panasonic CF-19PJRDX2M | Reference Manual - Page 42
Battery Power 42 Battery Indicator Battery indicator: Battery indicator Not lit Orange Green Blinking green Red Blinking red Blinking orange Blinking green and orange alternately Blinking orange slowly Battery status The battery pack is not inserted or not being charged. Charging is in progress. - Panasonic CF-19PJRDX2M | Reference Manual - Page 43
Battery Power 43 Checking the Remaining Battery Charge You can check the remaining battery charge on the screen. (After logging on to Windows) 1 Press Fn + F9. z When the battery pack is inserted (example) : Normal temperature mode : High temperature mode (below) z When the battery pack is not - Panasonic CF-19PJRDX2M | Reference Manual - Page 44
Battery Power 44 NOTE z Note that a level corresponding to a 100% charge for high temperature mode is approximately equivalent to an 80% charge level for normal temperature mode. z After switching from [Normal Temperature] to [High Temperature] or vice versa, the remaining battery capacity will - Panasonic CF-19PJRDX2M | Reference Manual - Page 45
with the battery down and you resume the operation without charging the battery, the Windows Resume Loader starts up. Follow the on-screen instructions. After that, however, Windows may not start up normally, or the [Low battery level]/[Critical battery level] function may not work normally. When - Panasonic CF-19PJRDX2M | Reference Manual - Page 46
] boot screen is displayed just after the computer starts the startup procedure. C When the remaining battery capacity is displayed, press Enter. D Follow the on-screen instructions. - Panasonic CF-19PJRDX2M | Reference Manual - Page 47
Battery Power 47 Replacing the Battery Pack The battery pack is a consumable item so the replacement will be necessary. If the battery operation time becomes noticeably short and not recovered even after recalibrating the battery, replace with a new battery. CAUTION z The battery pack is not - Panasonic CF-19PJRDX2M | Reference Manual - Page 48
Battery Power 48 z To insert A Insert the battery pack until it securely fits the connector. B Close the cover until it clicks. C Slide the latch (C) to the left to lock the cover. CAUTION z Make sure the latch is securely locked, otherwise the battery pack may fall when you carry the computer. - Panasonic CF-19PJRDX2M | Reference Manual - Page 49
Customizing the Power Setting 49 You can choose the optimum power setting for your operating condition by selecting a power plan. You can also create your own power plan. Changing the Power Plan Setting 1 Click or on the notification area and click [More power options]. 2 Click [Change plan - Panasonic CF-19PJRDX2M | Reference Manual - Page 50
Card slot (B) z For model with Smart Card slot (Î page 56) NOTE z The following types of card are not supported: PC Card Type III (10.5 mm), ZV card, SRAM card, FLASH ROM card (excluding ATA interface type), and in to the slot. z For further information, refer to the instruction manual of the card. - Panasonic CF-19PJRDX2M | Reference Manual - Page 51
area and select the card, then click [Stop]. B Follow the on-screen instructions. z These steps are not necessary when removing the card after turning off the from sleep*1 or hibernation, remove and reinsert the card. If the problem per- sists, restart the computer. z When a card is inserted, - Panasonic CF-19PJRDX2M | Reference Manual - Page 52
PC Card / ExpressCard 52 z To connect peripheral devices (SCSI, IEEE 1394, etc.) using a PC Card or an ExpressCard, follow the steps below (one example). A Connect the peripheral device to the card. B Turn on the power of device. C Insert the card until it surely fits in the slot. *1 Windows XP: - Panasonic CF-19PJRDX2M | Reference Manual - Page 53
the software from the web site below. http://panasonic.jp/support/global/cs/sd/download/ sd_formatter.html z To use the SD Memory Card on other devices, format the card on the devices. For further information, refer to the instruction manual of the devices. *1 Windows XP : SD/SDHC Memory Cards - Panasonic CF-19PJRDX2M | Reference Manual - Page 54
SD Memory Card 54 Inserting/Removing the SD Memory Card CAUTION Do not remove or insert the SD Memory Card until Windows has completed loading. Do not remove the card or turn off the computer in the following cases, otherwise the data may be corrupted. • While the computer is in sleep*2 or - Panasonic CF-19PJRDX2M | Reference Manual - Page 55
click . B Select the card. A Double-click on the notification area and click [Secure Digital Storage Device], then click [Stop]. B Follow the on-screen instructions. These steps are not necessary when removing the card after turning off the computer. 2 Remove the card. A Press the card so it comes - Panasonic CF-19PJRDX2M | Reference Manual - Page 56
Smart Card 56 You need additional software to use a Smart card. You can insert the following cards. z PC Card Type I (3.3 mm) or II (5.0 mm) to the PC Card slot (A) z Smart Card to the Smart Card slot (B) CAUTION z Do not: • Hit, bend, or drop the card. • - Panasonic CF-19PJRDX2M | Reference Manual - Page 57
Smart Card 57 „ To remove the card 1 Open the cover and draw the card straight out. - Panasonic CF-19PJRDX2M | Reference Manual - Page 58
RAM module specifications: 204 pins, SO-DIMM, 1.5 V, DDR3 SDRAM, PC3-10600 (For information of RAM module compatibility, contact Panasonic Technical Support.) CAUTION z RAM modules are extremely sensitive to static electricity and can be affected even by static electricity from the human body. When - Panasonic CF-19PJRDX2M | Reference Manual - Page 59
RAM Module 59 4 Insert/Remove the RAM module. z To insert A Tilt the module slightly and insert it in the slot. B Press down the module so that the right and left hooks (C) are locked. z To remove A Carefully open the right and left hooks (C). The module will rise. B Carefully remove the module - Panasonic CF-19PJRDX2M | Reference Manual - Page 60
replicator or the car mounter to the expansion bus connector (A) on the bottom side of the computer. For further information, refer to the instruction manual of the port replicator or the car mounter. CAUTION z The driver of the port replicator or the car mounter is preinstalled in the computer - Panasonic CF-19PJRDX2M | Reference Manual - Page 61
External Display 61 You can switch the output destination to an external analog display. Connect the external display to the external display port (VGA) (A). Switching the Display Mode 1 Press + P or Fn + F3. 2 Click the Display mode. 1 Press Fn + F3. Each time you press the key combination: - Panasonic CF-19PJRDX2M | Reference Manual - Page 62
use the simultaneous display, DVD-Video, MPEG files and other motion image files may not be played back smoothly. z Carefully read the instruction manual of the external display. When connecting an external analog display that does not conform to the Plug & Play standards, select the display driver - Panasonic CF-19PJRDX2M | Reference Manual - Page 63
External Display 63 / 1 Right-click the desktop, and click [Graphics Properties]. [Intel® Graphics and Media Control Panel] screen appears. 2 Click [Multiple Displays]. 3 Select [Extended Desktop] in [Operating Mode]. 4 Make the settings for [Primary Display] and [Second Display]. 5 Click [Apply]. - Panasonic CF-19PJRDX2M | Reference Manual - Page 64
External Display 64 z To switch left (primary device) and right (secondary device), once return the display to "notebook only". Follow the steps below. A Right-click the desktop and click [Graphics Options]. B Click [Output To] - [Built-in Display]. C Right-click the desktop and click [Graphics - Panasonic CF-19PJRDX2M | Reference Manual - Page 65
„ To connect the USB device 1 Open the cover and connect the USB device to one of the USB ports (A). For further information, refer to the instruction manual of the USB device. „ To remove the USB device 1 Disable the USB device. A Click on the notification area and click . B Select the USB device - Panasonic CF-19PJRDX2M | Reference Manual - Page 66
USB Devices 66 NOTE z You may need to install the driver for the USB device. Follow the on-screen instructions or refer to the instruction manual of the USB device. z You may need to install the driver again when connecting the device to another port. z When a USB device is connected, sleep*1 - Panasonic CF-19PJRDX2M | Reference Manual - Page 67
of the IEEE 1394 device. NOTE z You may need to install the driver for the IEEE 1394 device. Follow the on-screen instructions or refer to the instruction manual of the IEEE 1394 device. „ To remove IEEE 1394 device CAUTION z Turn off the IEEE 1394 device only after turning off the computer. 1 Turn - Panasonic CF-19PJRDX2M | Reference Manual - Page 68
Fingerprint Reader 68 . NOTE z Enrollment and authentication is unavailable to an extremely minority of people including those whose fingerprints give little data for personal identification. How to Use the Fingerprint Reader This section explains how - Panasonic CF-19PJRDX2M | Reference Manual - Page 69
Power-on Security Step 3 TPM Fingerprint Utility Initialization (If the TPM is not being used, skip this step.) „ To access the online manual This manual describes Step 2, 3 and the initial part of Step 4. For further steps, refer to the Protector Suite Help menu. z Click (Start)*1 - [All Programs - Panasonic CF-19PJRDX2M | Reference Manual - Page 70
not accept any responsibility for such an interaction. Installation 1 TPM Installation Refer to the Installation Manual of "Trusted Platform Module (TPM)". Click (Start), input "c:\util\drivers\tpm\readme.pdf ", and click [OK]. D Click [Next]. Installation starts. Follow the on-screen instructions. - Panasonic CF-19PJRDX2M | Reference Manual - Page 71
is not being used, skip this step. A Click on the "Invalid TPM status" message and then click [Initialize]. Follow the on-screen instructions. NOTE z If the "Invalid TPM status" message is not displayed Click (Start)*2 - [All Programs] - [Protector Suite] - [Control Center] - [Settings] - [Advanced - Panasonic CF-19PJRDX2M | Reference Manual - Page 72
stored on the hard disk. Hardware protection of the user data is not possible, but multiple users can enroll their fingerprints. z Follow the on-screen instructions. NOTE z Enroll at least two fingers. Even if one of them is injured, you can use another one to access your account and secret data - Panasonic CF-19PJRDX2M | Reference Manual - Page 73
Fingerprint Reader 73 More Advanced Security You can increase your computer's security level by setting the BIOS level described in this section. Performed by the Computer Administrator. 1 Register the Supervisor Password. You have to register the Supervisor Password to proceed to the next step. - Panasonic CF-19PJRDX2M | Reference Manual - Page 74
Fingerprint Reader 74 Useful Information Backup The file described below is necessary for recovering the Fingerprint authentication data. Back up this file periodically in a safe location such as removable disk to avoid data loss resulting from some accidents. We recommend you to store the file in - Panasonic CF-19PJRDX2M | Reference Manual - Page 75
internally created with two independent forms. • There can be auto submit problems with web forms which do not have Submit button. All forms that you z Password Bank*4 limitations: The following Windows applications cannot be supported. • Applications which do not use standard Windows controls and - Panasonic CF-19PJRDX2M | Reference Manual - Page 76
programs]. D Double-click [Protector Suite *.*]. Click [Protector Suite *.*], and click [Change]. E Select [Remove]. F Select [Remove all Protector Suite *.* data]. • Uninstallation starts. Follow the on-screen instructions. - Panasonic CF-19PJRDX2M | Reference Manual - Page 77
If the specific solutions for your problem in Fingerprint Reader (Î page 141) do not work, you can use these instructions as the last measure and start and try again. If it still does not work, please contact Panasonic Technical Support. E Restore or create passport. • If you have a backup of your - Panasonic CF-19PJRDX2M | Reference Manual - Page 78
Modem 78 Connecting the Internal Modem with a Telephone Jack CAUTION z You cannot connect the modem to the following lines. • Interphone • Intercoms • ISDN z Be sure to connect the telephone cable into the modem port, not into the LAN port. z Use a surge protector - Panasonic CF-19PJRDX2M | Reference Manual - Page 79
waiting for a phone call, and if you prefer, to turn the computer to sleep*2 again afterward. For further information, refer to the instruction manual of the software application. „ To enable this function 1 Click (Start) - [All Programs] - [Windows Fax and Scan]. 2 Click [Tools] - [Fax Settings - Panasonic CF-19PJRDX2M | Reference Manual - Page 80
Modem 80 A Click or on the notification area and click [More power options] - [Change when the computer sleeps]. Click [start] - [Control Panel] - [Performance and Maintenance] - [Power Options] - [Power Schemes]. B Set the expected communication time for the sleep*2 setting. NOTE z This - Panasonic CF-19PJRDX2M | Reference Manual - Page 81
LAN 81 Connecting LAN CAUTION z Do not connect the telephone cable to the LAN port. 1 Turn off the computer. z Do not use sleep*1 or hibernation. 2 Open the cover, and connect the cable. Connect the LAN port (A) and the network system (server, HUB, etc.) using a LAN cable. 3 Turn on the computer. - Panasonic CF-19PJRDX2M | Reference Manual - Page 82
LAN 82 Enabling the Power On by LAN function The computer automatically turns from off to on when the computer is accessed from the network server via the internal LAN port. 1 Select [Allow] in [Power On by LAN] in the [Advanced] menu of the Setup Utility (Î page 108). 2 In [Caution], press Enter. - Panasonic CF-19PJRDX2M | Reference Manual - Page 83
LAN 83 Enabling/Disabling the Wake Up from wired LAN function When the Wake Up from wired LAN function is enabled, the computer automatically resumes from sleep*2 or hibernation when the computer is accessed from the network server via the internal LAN port. (Default setting) The Wake Up from - Panasonic CF-19PJRDX2M | Reference Manual - Page 84
Disabling/Enabling Wireless Communication 84 There are several ways of disabling and enabling wireless communication. The wireless switch on the left side of the computer (below) Wireless Switch Utility ( page 86) Settings in the [ - Panasonic CF-19PJRDX2M | Reference Manual - Page 85
Disabling/Enabling Wireless Communication 85 „ To check the wireless communication status 1 Click on the notification area and place the cursor over the Wireless Switch Utility icon ( or ). A tool tip appears. 1 Perform either of the following procedures. z Double-click , , , or on the - Panasonic CF-19PJRDX2M | Reference Manual - Page 86
Disabling/Enabling Wireless Communication 86 Wireless Switch Utility This utility allows you to control the function of the wireless switch. This utility also allows you to enable or disable wireless devices from a pop-up menu. In the default setting, all wireless devices are enabled. „ The - Panasonic CF-19PJRDX2M | Reference Manual - Page 87
and files], and press Enter. Click [start] - [Run] and input "c:\util\wdisable\setup.exe", and click [OK]. 3 Follow the on-screen instructions to install the Wireless Connection Disable Utility. Checking the status of the wireless connection NOTE z The Wireless Switch Utility should also be - Panasonic CF-19PJRDX2M | Reference Manual - Page 88
Disabling/Enabling Wireless Communication 88 „ Status indication After installation, the Wireless Connection Disable Utility is automatically started after a user is logged in. An icon appears on the notification area. : Indicates that • the utility is enabled, and • the wireless connection is - Panasonic CF-19PJRDX2M | Reference Manual - Page 89
LAN> CAUTION z Do not use wireless LAN on airplanes, in hospitals, or in other locations where wireless LAN signals may affect devices. Follow the instructions of airline companies and hospitals. If you use the computer in these locations, turn off the wireless LAN. z To avoid unauthorized access to - Panasonic CF-19PJRDX2M | Reference Manual - Page 90
on. • If you cannot select [Turn wireless on], the wireless switch is turned off. Setting the wireless LAN access point Preparation Follow the instruction manual of the wireless LAN access point to make settings for the access point to recognize the computer. 1 Turn the wireless LAN on. 2 Click - Panasonic CF-19PJRDX2M | Reference Manual - Page 91
Wireless LAN 91 A Click , or on the notification area, click [Open Network and Sharing Center] - [Set up a connection or network] - [Manually connect to a wireless network] and click [Next]. B Input necessary information and add check marks for [Start this connection automatically] and [Connect - Panasonic CF-19PJRDX2M | Reference Manual - Page 92
Wireless LAN 92 Enabling/Disabling the Wireless LAN Standard IEEE802.11a (802.11a) 1 Click on the notification area and click or . 2 Click [802.11a Enabled] or [802.11a Disabled]. NOTE z In some countries, communication using IEEE802.11a (5 GHz wireless LAN) standard is restricted by law. z The - Panasonic CF-19PJRDX2M | Reference Manual - Page 93
on the notification area and place the cursor over the Wireless Switch Utility icon ( or ) on the notification area. A tooltip appears. „ To access the online manual A Click (Start)*1 - [All Programs] - [Bluetooth] - [Bluetooth User Guide]. *1 Windows XP: [start] - Panasonic CF-19PJRDX2M | Reference Manual - Page 94
Wireless WAN 94 This computer is equipped with the Wireless WAN enabling you to communicate using radio frequencies. Inserting/Removing a SIM Card Before using the Wireless WAN, set a SIM card to the SIM card slot. CAUTION z Be sure to shut down the computer - Panasonic CF-19PJRDX2M | Reference Manual - Page 95
Wireless WAN 95 „ To insert a SIM card 1 Turn off the computer. 2 Open the cover. 3 Insert the SIM card into the SIM card slot with the contact side facing downward and with the cut corner oriented as shown in the illustration. SIM Card Contact CAUTION z Do not insert the SIM card upside down. - Panasonic CF-19PJRDX2M | Reference Manual - Page 96
. [Wireless WAN Manager] screen appears. 2 Click [Help]. NOTE z If is not displayed, another wireless WAN manager may be installed. In this case, refer to the instruction manual of the wireless WAN manager. - Panasonic CF-19PJRDX2M | Reference Manual - Page 97
Disk Drive 97 Inserting/Removing the Hard Disk Drive To change your hard disk drive, contact Panasonic Technical Support. CAUTION z Back up all the important data before removing the hard disk drive. z If you need to read the hard disk data on another computer - Panasonic CF-19PJRDX2M | Reference Manual - Page 98
Hard Disk Drive 98 C Pull the tab (B) of the hard disk drive and slide it out of the slot. To insert A Insert the hard disk drive until it surely fits in the slot. B Close the cover until it clicks, and slide the latch (C) to the left to lock the cover. 4 Insert the battery pack ( page 47). *1 - Panasonic CF-19PJRDX2M | Reference Manual - Page 99
memory drive instead of a hard disk drive. (A hard disk drive is not mounted.) In the other chapter of this manual, replace "hard disk" and "hard disk drive" mentioned in this manual with "flash memory" and "flash memory drive". The procedure for inserting/removing the flash memory drive is same as - Panasonic CF-19PJRDX2M | Reference Manual - Page 100
Flash Memory Drive 100 Disabling auto-defragment Windows automatically processes "defragment" to speed up in accessing files, etc. However, this process is not always necessary because you can access files at high speed even if they are decentrally-saved in the flash memory. Also, we recommend - Panasonic CF-19PJRDX2M | Reference Manual - Page 101
Quick Boot Manager 101 By using quick boot manager, you can shorten boot time of Windows. You can also set [Boot Mode] to [Fast] in the [Boot] menu of the Setup Utility (Î page 110). Starting Quick Boot Manager 1 Log on to Windows as an administrator. 2 Click (Start) - [All Programs] - [Panasonic] - Panasonic CF-19PJRDX2M | Reference Manual - Page 102
Quick Boot Manager 102 „ Boot training By using this function, Windows learns reading files on boot to shorten the boot time. To start this function, perform the following procedure. If [Enter Password] is displayed during the following procedure, input the Supervisor Password or the User Password - Panasonic CF-19PJRDX2M | Reference Manual - Page 103
Setup Utility 103 You can make the settings of the computer's operating environment (password settings, startup drive selection, etc.) Starting the Setup Utility 1 Turn on or restart the computer. 2 Press F2 or Del while [Panasonic] boot screen is displayed soon after the computer starts the - Panasonic CF-19PJRDX2M | Reference Manual - Page 104
Setup Utility 104 Information Menu Language Underlined items are the factory presets. English French Japanese Product Information Model No. Serial No. Computer information (cannot be changed.) System Information Processor Type Processor Speed Memory Size Available Memory*1 Hard Disk Computer - Panasonic CF-19PJRDX2M | Reference Manual - Page 105
Setup Utility 105 Main Menu System Date • Day of the Week/Month/Day/Year. • You can use Tab to move the cursor. System Time • 24-hr. style. • You can use Tab to move the cursor. Underlined items are the factory presets. [xxx xx/xx/xxxx] [xx:xx:xx] Main Configuration Touch Pad Disabled Enabled - Panasonic CF-19PJRDX2M | Reference Manual - Page 106
Setup Utility Environment Current Status • Only when [Environment] is set to [Auto]. XConcealed Mode Configuration *2 The submenu that appears when [Concealed Mode Configuration] is selected: Concealed Mode LCD Backlight • Can be changed only when [Concealed Mode] is set to [Enabled]. LED • Can be - Panasonic CF-19PJRDX2M | Reference Manual - Page 107
that appears when [CPU Configuration] is selected: Execute-Disable Bit Capability Disabled • [Enabled] indicates that this computer supports hardware-based Enabled Data Execution Prevention (DEP). Intel (R) Hyper Threading Technology Disabled Enabled Core Multi-Processing Disabled Enabled - Panasonic CF-19PJRDX2M | Reference Manual - Page 108
Setup Utility Serial Port B I/O IRQ • Can be changed only when [Serial Port B] is set to [Enabled]. GPS • Only for model with GPS I/O IRQ • Only for model with GPS • Can be changed only when [GPS] is set to [Enabled]. Disabled Enabled Auto 3F8/IRQ4 2F8/IRQ3 3E8/IRQ7 2E8/IRQ5 Disabled Enabled Auto - Panasonic CF-19PJRDX2M | Reference Manual - Page 109
• If [Port Replicator USB Port] is set to [Disabled], the LAN port of port replicator or the car mounter is Enabled also disabled. Legacy USB Support Disabled Enabled - Panasonic CF-19PJRDX2M | Reference Manual - Page 110
Setup Utility 110 Boot Menu Boot Mode • Setting [Fast] will skip the [Panasonic] boot screen normally displayed immediately after the computer is turned on. The time required to display the Windows boot screen will become shorter. Since the [Panasonic] boot screen is not displayed, press and hold - Panasonic CF-19PJRDX2M | Reference Manual - Page 111
Setup Utility 111 Security Menu Boot Prompt Configuration Underlined items are the factory presets. Setup Utility Prompt Disabled • When [Setup Utility Prompt] is set to [Disabled], the message "Press F2 for Setup / F12 for LAN" Enabled is not displayed on [Panasonic] boot screen. However, - Panasonic CF-19PJRDX2M | Reference Manual - Page 112
Setup Utility 112 XEmbedded Security(TPM) • Only for model that supports TPM • For information on TPM, refer to the Installation Manual of "Trusted Platform Module (TPM)". Enter the sub-menu. Click (Start), input "c:\util\drivers\tpm\readme.pdf" in [Search programs and files], and press Enter. - Panasonic CF-19PJRDX2M | Reference Manual - Page 113
default values. To select a boot device which operates only in the next booting. View a list of system recovery tools you can use to repair startup problems, run diagnostics, or restore your system. Execute Diagnostic Utility. - Panasonic CF-19PJRDX2M | Reference Manual - Page 114
Icon Enlarger 114 Enlarging the screen items You can enlarge the screen items such as characters, icons, title bars and cursor. CAUTION z "Icon Enlarger" will not start up if the display resolution is set lower than 1024 × 768 dots. NOTE z A part of the enlarged menu or some screen items may be - Panasonic CF-19PJRDX2M | Reference Manual - Page 115
Loupe Utility 115 You can magnify the specific part of the screen. Activating the Loupe Utility 1 Click (Start) - [All Programs] - [Panasonic] - [Loupe Utility]. 2 Click [OK]. z appears on the notification area. If does not appear on the area, click . Using the Loupe Utility 1 Point the - Panasonic CF-19PJRDX2M | Reference Manual - Page 116
Loupe Utility Setting the Loupe Utility 1 Click on the notification area and right-click . 2 Click [Settings]. [Show/hide shortcuts assignment] z When using the external mouse/touch pad A Click [Mouse/Touch pad] B Click a combination of Alt, Ctrl, and Shift, and add the check mark. (Multiple keys - Panasonic CF-19PJRDX2M | Reference Manual - Page 117
not operating properly, you can use the PC-Diagnostic Utility to determine whether or not there is a problem. If the utility discovers a problem in the hardware, contact Panasonic Technical Support. Software cannot be checked using this utility. Hardware that can be checked using the PC-Diagnostic - Panasonic CF-19PJRDX2M | Reference Manual - Page 118
Hardware Diagnostics 118 Regarding the PC-Diagnostic Utility NOTE z For the hard disk and memory only, you can select standard diagnostic check or extended diagnostic check. When the PC-Diagnostic Utility starts up, it will run the standard diagnostic check. z We recommend that you use the touch - Panasonic CF-19PJRDX2M | Reference Manual - Page 119
memory diagnostic check, the display may freeze for a long period of time. Wait until the process is complete. • Green: No problems discovered • Red: Problems discovered NOTE z Using the following procedure, you can run a diagnostic check on a specified hardware component, or run an extended - Panasonic CF-19PJRDX2M | Reference Manual - Page 120
and the message "Check Result TEST FAILED" is displayed, you can assume that there is a problem with the computer's hardware. Confirm which hardware component is displayed as red, and contact Panasonic Technical Support. If the display is green and the message "Check Result TEST PASSED" is displayed - Panasonic CF-19PJRDX2M | Reference Manual - Page 121
Start) - [Control Panel] - [Back up your computer]. B Click [Create a system image]. C Select a location for backup and click [next]. Follow the on-screen instructions. NOTE z Connect the AC adaptor and do not remove it until backup is complete. Restoring the Hard Disk Data To restore the image data - Panasonic CF-19PJRDX2M | Reference Manual - Page 122
keyboard layout and click [Next]. E Select [User name] and input [Password], then click [OK]. F Click [System Restore] and follow the on-screen instructions. z To perform from a recovery disc Before performing, you have to create a recovery disc (Î page 124). A Turn off the computer and connect the - Panasonic CF-19PJRDX2M | Reference Manual - Page 123
your CD/DVD drive in [Boot Override]. H Press Enter. • The computer will restart. I Click [Run "System Recovery Options"] and click [Next]. J Follow the on-screen instructions. 123 - Panasonic CF-19PJRDX2M | Reference Manual - Page 124
Recovery Disc Creation Utility 124 You can make a recovery disc for Windows 7 Professional (32 bit or 64 bit). The recovery disc returns the hard disk to the factory default. To create a backup of the recent state of the hard disk, refer to Hard Disk Backup/Restore Function (Î page 121). - Panasonic CF-19PJRDX2M | Reference Manual - Page 125
is same as the disc #1 and click [OK]. Then create all of recovery discs by following on-screen instructions. NOTE z The disc created with this utility is only for this computer. You cannot use for others. the computer and try to create a recovery disc again. • Contact Panasonic Technical Support. - Panasonic CF-19PJRDX2M | Reference Manual - Page 126
Hard Disk Data Erase Utility 126 When disposing the computer or transferring the ownership, erase all hard disk data in order to avoid data leakage. Even if you erase the data or initialize the hard disk using normal Windows commands, the data can be read with some special software. Use the hard - Panasonic CF-19PJRDX2M | Reference Manual - Page 127
service is only available in certain regions. http://www.absolute.com NOTE z Consult Absolute Software Corp. before disposal. About Windows-related files The Windows files included in the Windows DVD-ROM or CD-ROM are contained in the following folders: c:\windows\support\migwiz, c:\windows\support - Panasonic CF-19PJRDX2M | Reference Manual - Page 128
Technical Information Serial Devices The COM ports of the computer are assigned as below. z COM1 : Serial Port A z COM2 : Serial Port B (Port replicator*2/Car mounter*2) z COM3 : GPS*2 *2 Optional If you change the assignment, the serial devices may not work properly. 128 - Panasonic CF-19PJRDX2M | Reference Manual - Page 129
Error Message 129 Follow the instructions below when an error message appears. If the problem persists or if the error message is not shown here, contact Panasonic Technical Support. Error Message Solution Bad System CMOS System CMOS Checksum Error An error has occurred in the memory of system - Panasonic CF-19PJRDX2M | Reference Manual - Page 130
Troubleshooting (Advanced) 130 Refer to the following instructions when a problem occurs. If the remedies indicated in the chart do not solve the problem, contact Panasonic Technical Support. For a software problem, refer to the instruction manual of the software. • To check the computer's usage - Panasonic CF-19PJRDX2M | Reference Manual - Page 131
Troubleshooting (Advanced) 131 „ Sleep*1 or Hibernation Cannot enter sleep*1 or hibernation automatically. The computer does not resume. z Disconnect peripheral devices. z If you connect to a network using - Panasonic CF-19PJRDX2M | Reference Manual - Page 132
Troubleshooting (Advanced) 132 „ Sound Can not record with microphone z Use a condenser microphone. z Some settings may have to be made depending on the microphone. When using a monaural - Panasonic CF-19PJRDX2M | Reference Manual - Page 133
Troubleshooting (Advanced) 133 „ Keyboard Only numbers can be input. Only capital letters can be input. Cannot enter special characters etc.) and symbols. Cannot use the keyboard - Panasonic CF-19PJRDX2M | Reference Manual - Page 134
Troubleshooting (Advanced) 134 „ Network Cannot connect to a network. Cannot check the computer's MAC address. z Set [LAN], or [LAN] and [Modem] to [Enabled] in the [Advanced] menu - Panasonic CF-19PJRDX2M | Reference Manual - Page 135
Troubleshooting (Advanced) 135 Wireless Communication (only for model with wireless LAN/wireless WAN) Access point is not detected. Shorten the distance between the computer and the - Panasonic CF-19PJRDX2M | Reference Manual - Page 136
Troubleshooting (Advanced) 136 „ Connecting Peripherals An error occurs while installing the driver. A z When or is displayed in the Device Manager, remove and insert the device. If the problem persists, restart the computer. z The computer may not recognize the connection/removal of some devices, - Panasonic CF-19PJRDX2M | Reference Manual - Page 137
Troubleshooting of the other USB ports. z Set [USB Port] and [Legacy USB Support] to [Enabled] in the [Advanced] menu of the Setup Utility (Î page the connection. z The device driver may not work. Refer to the instruction manual of the device. z Do not connect 2 mouse devices simultaneously. z Set - Panasonic CF-19PJRDX2M | Reference Manual - Page 138
Troubleshooting ], and select [High performance], then close the window. These problems may occur due to performance loss that results from the CPU and input [c:\util\cpupower\setup.exe], and click [OK]. Follow the on-screen instructions. B Click [start] - [All Programs] - [Panasonic] - [CPU Idle - Panasonic CF-19PJRDX2M | Reference Manual - Page 139
Troubleshooting (Advanced) 139 „ Touch Pad / Touchscreen (only for model with touchscreen) / page 105). z The touch pad may be disabled by some mouse drivers. Check your mouse's operating instructions. z Perform the touchscreen calibration (Î page 13). z - Panasonic CF-19PJRDX2M | Reference Manual - Page 140
Troubleshooting (Advanced) 140 „ PC Card / ExpressCard (only for model with ExpressCard slot ] menu of the Setup Utility (Î page 109). z The port settings are not correct. z Read the instruction manual of the card or contact the manufacturer of the card. z Remove the card and insert it again (Î - Panasonic CF-19PJRDX2M | Reference Manual - Page 141
Troubleshooting ( after the steps described above have been performed. Contact Panasonic Technical Support. Sensor does not work. z Exported passport can help you Other functions Replace/Repair the sensor, then follow the instructions in section "Replacing sensor." (Î page 143). Some limited - Panasonic CF-19PJRDX2M | Reference Manual - Page 142
Troubleshooting (Advanced) 142 „ Fingerprint Reader (only for model with Fingerprint Reader) User cannot use enrolled finger. (e.g. injury) z It is strongly recommended to enroll at least two fingers to avoid this problem. If you enrolled multiple fingers, simply use other finger. If you only - Panasonic CF-19PJRDX2M | Reference Manual - Page 143
Troubleshooting (Advanced) 143 „ Fingerprint Reader (only for model with Fingerprint Reader) disk is used, "Protector Suite" has not stored any data on the device and therefore has no problem to continue after you replaced the sensor. However, in case you use the Power-on security (Preboot - Panasonic CF-19PJRDX2M | Reference Manual - Page 144
Troubleshooting (Advanced) 144 „ Fingerprint Reader (only for model with Fingerprint Reader) properly. z When switching to a different user with the Fast User Switching function, the following problems may occur. • Some applications may not work properly. • Key combination with Fn may not work - Panasonic CF-19PJRDX2M | Reference Manual - Page 145
Troubleshooting (Advanced) 145 „ Others No response. z Press Ctrl + Shift + Esc to open Task Manager and close the software application. z An input screen (e.g., password input screen at - Panasonic CF-19PJRDX2M | Reference Manual - Page 146
Troubleshooting (Advanced) 146 Checking the Computer's Usage Status You can check the computer's usage status in the PC Information Viewer. You may need this information when calling Panasonic Technical Support for advice. NOTE z This computer periodically records the management information of the - Panasonic CF-19PJRDX2M | Reference Manual - Page 147
Troubleshooting (Advanced) 147 „ To save a copy of the screen as an image file 1 Display the screen you want to save. 2 Press Ctrl + Alt + F7. 3 When the - Panasonic CF-19PJRDX2M | Reference Manual - Page 148
Corporation assumes no liability for damage incurred directly or indirectly from errors, omissions or discrepancies between the computer and the manuals. Trademarks • Microsoft, Windows, Windows 7 and the Windows logo are registered trademarks or trademarks of Microsoft Corporation of the United
-
 1
1 -
 2
2 -
 3
3 -
 4
4 -
 5
5 -
 6
6 -
 7
7 -
8
-
9
-
10
-
11
-
12
-
13
-
14
-
15
-
16
-
17
-
18
-
19
-
20
-
21
-
22
-
23
-
24
-
25
-
26
-
27
-
28
-
29
-
30
-
31
-
32
-
33
-
34
-
35
-
36
-
37
-
38
-
39
-
40
-
41
-
42
-
43
-
44
-
45
-
46
-
47
-
48
-
49
-
50
-
51
-
52
-
53
-
54
-
55
-
56
-
57
-
58
-
59
-
60
-
61
-
62
-
63
-
64
-
65
-
66
-
67
-
68
-
69
-
70
-
71
-
72
-
73
-
74
-
75
-
76
-
77
-
78
-
79
-
80
-
81
-
82
-
83
-
84
-
85
-
86
-
87
-
88
-
89
-
90
-
91
-
92
-
93
-
94
-
95
-
96
-
97
-
98
-
99
-
100
-
101
-
102
-
103
-
104
-
105
-
106
-
107
-
108
-
109
-
110
-
111
-
112
-
113
-
114
-
115
-
116
-
117
-
118
-
119
-
120
-
121
-
122
-
123
-
124
-
125
-
126
-
127
-
128
-
129
-
130
-
131
-
132
-
133
-
134
-
135
-
136
-
137
-
138
-
139
-
140
-
141
-
142
-
143
-
144
-
145
-
146
-
147
-
148
 |
 |

1
Reference Manual
Personal Computer
Model No.
CF-19 Series
We recommend that this Reference Manual be printed.
Descriptions
•
For common procedures and screens for Windows 7 and
Windows XP, this Reference Manual uses the procedures
and screens of Windows 7.
•
Some menus may differ for Windows XP.
•
Windows XP does not require clicking operation to
of
the notification area.