Panasonic FV30VQ3 FV10NLF1 User Guide
Panasonic FV30VQ3 Manual
 |
View all Panasonic FV30VQ3 manuals
Add to My Manuals
Save this manual to your list of manuals |
Panasonic FV30VQ3 manual content summary:
- Panasonic FV30VQ3 | FV10NLF1 User Guide - Page 1
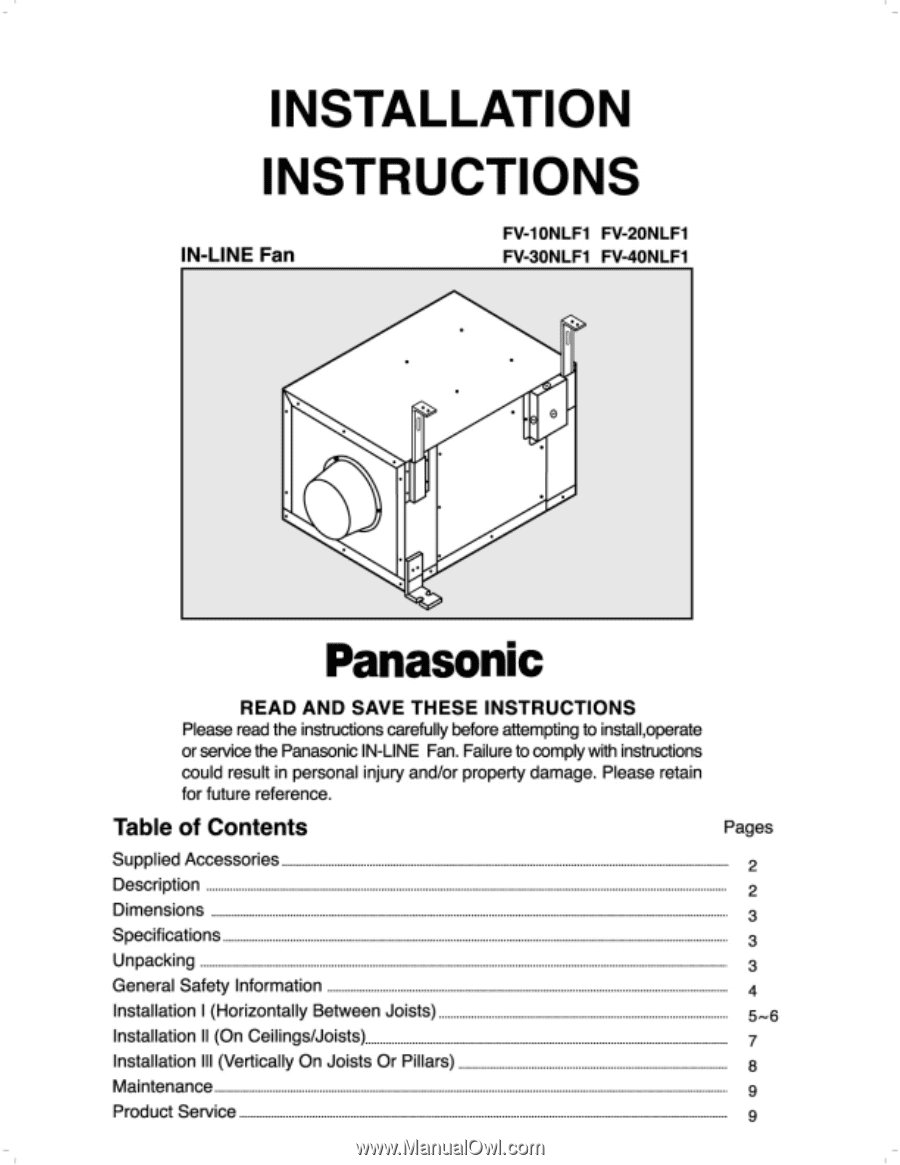
Panasonic READ AND SAVE THESE INSTRUCTIONS Please readtheinstructionscarefulybeforeattemptingto install,operate or servicethePanasonicIN-UNE Fan. ) 5-6 InstallationII (On Ceilings/Joists).. 7 InstallationIII (VerticallyOn Joists OrPillars) 8 Maintenance 9 Product Service g - Panasonic FV30VQ3 | FV10NLF1 User Guide - Page 2
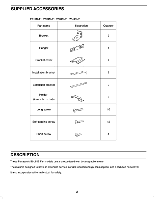
screw 01,11 a sic l CISZt i. (i: 7' 4,:1 P C' Quantity 2 1 2 2 2 2 10 12 4 DESCRIPTION These Panasonic IN.LINE Fan models use a sirocco fan driven by a capaPtor motor. The motor is designed to have an extended service life with reduced energy consumption, and a reduced noise level. It also - Panasonic FV30VQ3 | FV10NLF1 User Guide - Page 3
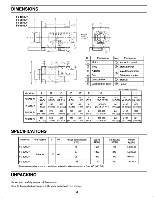
Oa.t a1 10 0 NO. Part name No. Pan name a 0 Motor 0 Inspectionpanel • e Body (a) Adaper ® BakkeGOYS! ..., Installationbracket 0 Fan CV Extension bracket e Jordanbox 0 Bracket e ® Junctionbox cover Holder ModelNo. A B C D E F G 0111111AMOVIS f11111(11th) H I J 340 240 - Panasonic FV30VQ3 | FV10NLF1 User Guide - Page 4
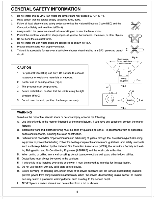
GENERAL SAFETY INFORMATION I. Do not install this IN-LINE Fan where the temperature may exceed & •C(140 °F). 2. Make certain that the service supply voltage is I 20V, 60Hz. 3. Follow all local electrical and safety codes as well as the National Electrical Code (NEC) and the Occupation Safety and - Panasonic FV30VQ3 | FV10NLF1 User Guide - Page 5
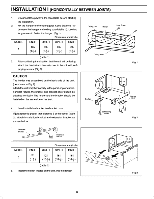
INSTALLATION I (HORIZONTALLY BETWEEN JOISTS) 1. Disconnect the power to the receptacle belore starting the installation. 2. Fix the hanger to the ceiling joist. Keep distance • A" between the hanger and ceiling board (table 1). Use two long screws to fasten the hanger. (Flg.1) Dimension: mm(inch) - Panasonic FV30VQ3 | FV10NLF1 User Guide - Page 6
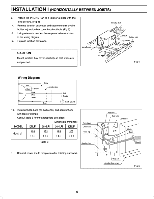
INSTALLATION I (HORIZONTALLYBETWEENJOISTS) 6. Attach the IN-LINE Fan to a joist or a pillar with the lOng screws. (FIg.4) 7. Remove junctionbox cover andsecureconduit or wire holder lo junction box cover knockout hole. (Fig.5) 8. Usingwire nuts, - Panasonic FV30VQ3 | FV10NLF1 User Guide - Page 7
INSTALLATIONII (ON CEILINGS/JOISTS) I. Machinstallationbracket andbracket to the unit body. (Fig.6) CAUTION Insert the installationbracket into the bracket cover attached to the panel. 2. Extend installation bracket and put the unit on the ceiling or joist. Securewith long sass (RV) 4 \ \ ,k2ta' - Panasonic FV30VQ3 | FV10NLF1 User Guide - Page 8
III (VERTICALLY ON JOISTS OR PILLARS) Installingthe IN-LINEFan requires an accessiblearea (attic or air extraction apparatus) 1. Install the IN-LINE Fan using the first step described in INSTALLATIONII. 2. Extendinstallationbracket andhang the unit on the joist or paler. Fix with the long screws - Panasonic FV30VQ3 | FV10NLF1 User Guide - Page 9
donot immerseInwater).wipe dry with Cloth. 3. Remove dust and dirt inside the fan's body using a vacuum Sooner. (Fig.10) 4. Using a cloth Service Center nearest you.) PANASONIC CONSUMERELECTRONICSCOMPANY One Panasonic Way, Secaucus. NJ 07094, USA httpj/www.panasonic.com PANASONIC
-
 1
1 -
 2
2 -
 3
3 -
 4
4 -
 5
5 -
 6
6 -
 7
7 -
8
-
9
 |
 |
INSTALLATION
INSTRUCTIONS
IN
-LINE
Fan
FV-10NLF1 FV-20NL
F1
FV-20NLF1 FV-40NL
F1
Panasonic
READ
AND
SAVE
THESE INSTRUCTIONS
Please read
the
instructions
carefuly
before
attempting
to
install,operate
or
service
the
Panasonic
IN-UNE Fan.
Failure
to
comply
with
instructions
could
result
in
personal
injury
and/or
property
damage.
Please retain
for
future
reference.
Table
of
Contents
Pages
Supplied
Accessories
2
Description
2
Dimensions
3
Specifications
_
3
Unpacking
3
General
Safety Information
4
Installation
I
(Horizontally
Between Joists)
5-6
Installation
II
(On
Ceilings/Joists)..
7
Installation
III
(Vertically
On
Joists
Or
Pillars)
8
Maintenance
9
Product Service
g