Panasonic NNS334 NNS334 User Guide - Page 15
Auto Defrost Feature, Defrosting Tips & Techniques
 |
View all Panasonic NNS334 manuals
Add to My Manuals
Save this manual to your list of manuals |
Page 15 highlights
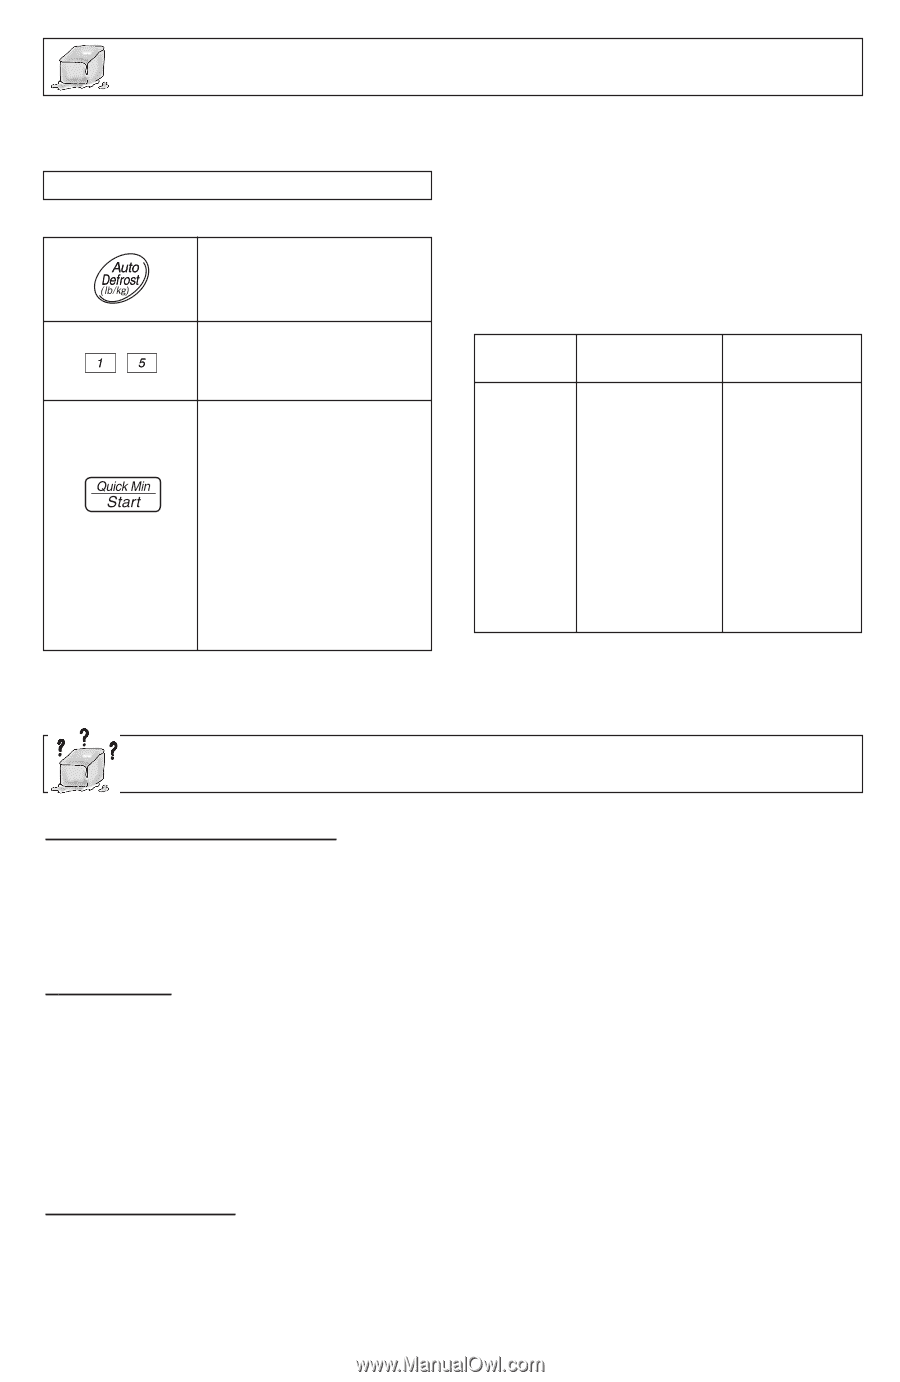
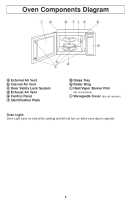
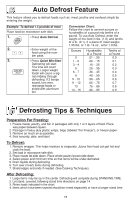
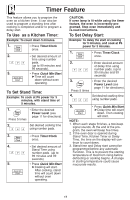
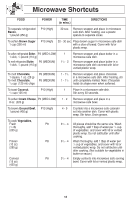
Auto Defrost Feature This feature allows you to defrost foods such as: meat, poultry and seafood simply by entering the weight. Example: To defrost 1.5 pounds of meat Place food on microwave safe dish. 1. • Press Auto Defrost. 2. • Enter weight of the food using the num- ber pads. 3. • Press Quick Min/Start. Defrosting will start. The time will count down. Larger weight foods will cause a sig- nal midway through defrosting. If 2 beeps sound, turn over, rearrange foods or shield with aluminum foil. Conversion Chart: Follow the chart to convert ounces or hundredths of a pound into tenths of a pound. To use Auto Defrost, enter the weight of the food in lbs. (1.0) and tenths of a lb. (0.1). If a piece of meat weighs 1.95 lbs. or 1 lb. 14 oz., enter 1.9 lbs. Ounces 0 1 - 2 3 - 4 5 6 - 7 8 9 - 10 11 - 12 13 14 - 15 Hundredths of a Pound .01 - .05 .06 - .15 .16 - .25 .26 - .35 .36 - .45 .46 - .55 .56 - .65 .66 - .75 .76 - .85 .86 - .95 Tenths of a Pound 0.0 0.1 0.2 0.3 0.4 0.5 0.6 0.7 0.8 0.9 Defrosting Tips & Techniques Preparation For Freezing: 1. Freeze meats, poultry, and fish in packages with only 1 or 2 layers of food. Place wax paper between layers. 2. Package in heavy-duty plastic wraps, bags (labeled "For Freezer"), or freezer paper. 3. Remove as much air as possible. 4. Seal securely, date, and label. To Defrost: 1. Remove wrapper. This helps moisture to evaporate. Juices from food can get hot and cook the food. 2. Set food in microwave safe dish. 3. Place roasts fat-side down. Place whole poultry breast-side down. 4. Select power and minimum time so that items will be under-defrosted. 5. Drain liquids during defrosting. 6. Turn over (invert) items during defrosting. 7. Shield edges and ends if needed. (See Cooking Techniques). After Defrosting: 1. Large items may be icy in the center. Defrosting will complete during STANDING TIME. 2. Let stand, covered, following stand time directions on page 14. 3. Rinse foods indicated in the chart. 4. Items which have been layered should be rinsed separately or have a longer stand time. 13
-
 1
1 -
2
-
3
-
4
-
5
-
6
-
7
-
8
-
9
-
 10
10 -
 11
11 -
 12
12 -
 13
13 -
 14
14 -
 15
15 -
 16
16 -
 17
17 -
 18
18 -
 19
19 -
 20
20 -
21
-
22
-
23
-
24
-
25
-
26
-
27
-
28
-
29
-
30
-
31
-
32
-
33
-
34
-
35
-
36
-
37
-
38
-
39
-
40
-
41
-
42
-
43
-
44
-
45
-
46
-
47
-
48
-
49
-
50
-
51
-
52
-
53
-
54
-
55
-
56
 |
 |