Panasonic NNSD277WR NNSD277BR User Guide
Panasonic NNSD277WR Manual
 |
UPC - 037988910496
View all Panasonic NNSD277WR manuals
Add to My Manuals
Save this manual to your list of manuals |
Panasonic NNSD277WR manual content summary:
- Panasonic NNSD277WR | NNSD277BR User Guide - Page 1
Over The Range Microwave Oven Models: NN-SD277SR/SD277BR/SD277WR Safety Information Precautions Inside cover Important Safety Instructions 1-2 Installation and Grounding Instructions 3-4 Safety Precautions 5 Operation Control Panel 8 Function Features 9 Child Safety Lock 9 Setting - Panasonic NNSD277WR | NNSD277BR User Guide - Page 2
don't immediately follow instructions. WARNING You can be killed or seriously injured if you don't follow instructions. CAUTION You can (d) The oven should not be adjusted or repaired by anyone except properly qualified service personnel. © Panasonic Home Appliances Microwave Oven (Shanghai) - Panasonic NNSD277WR | NNSD277BR User Guide - Page 3
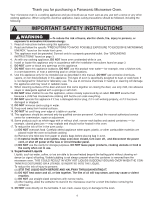
a Panasonic Microwave Oven. Your microwave oven is a cooking appliance and you should use as much care as you use with a stove or any other cooking appliance. When using this electrical appliance, basic safety precautions should be followed, including the following: IMPORTANT SAFETY INSTRUCTIONS - Panasonic NNSD277WR | NNSD277BR User Guide - Page 4
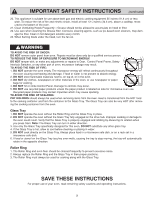
hood, turn the fan on. WARNING TO AVOID THE RISK OF SHOCK: DO NOT remove outer panel from oven. Repairs must be done only by a qualified service person. TO REDUCE THE RISK OF EXPOSURE TO MICROWAVE ENERGY: DO NOT tamper with, or make any adjustments or repairs to Door, Control Panel Frame, Safety - Panasonic NNSD277WR | NNSD277BR User Guide - Page 5
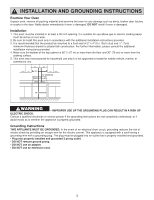
36 inches or less wide. 2. Be sure to install this oven only in accordance with the additional installation instructions provided. 3. It is recommended that the product be SHOCK. Consult a qualified electrician or service person if the grounding instructions are not completely understood, or if - Panasonic NNSD277WR | NNSD277BR User Guide - Page 6
INSTALLATION AND GROUNDING INSTRUCTIONS (continued) Wiring Requirements The oven must be operated on a SEPARATE CIRCUIT. No other appliance should share the circuit with the microwave oven. If it does, the branch circuit fuse may blow or the circuit breaker may trip. The oven must be plugged into at - Panasonic NNSD277WR | NNSD277BR User Guide - Page 7
available. Follow popcorn manufacturer's directions and use a brand suitable for the cooking power of your microwave oven. CAUTION: When using pre-packaged microwave popcorn, you can follow recommended package instructions or use the popcorn pad (refer to page 12). Otherwise, the popcorn may not pop - Panasonic NNSD277WR | NNSD277BR User Guide - Page 8
prevent overcooking. Arcing can occur if foil is too close to oven wall or only door and damage to your oven will result. Browning Dish Browning dishes are designed for microwave cooking only. Check Yes browning dish information for instructions and heating chart. Do not preheat for more than - Panasonic NNSD277WR | NNSD277BR User Guide - Page 9
Ring 1 See-through Oven Window 2 Waveguide Cover (do not remove) 3 Oven Light (Oven Light is replaceable, see page 26) 4 Glass Tray (Turntable) 5 Oven Air Vent (Vent regularly cleaned, see page 26) - Shelf Supports = Door Safety Lock System ~ Identification Plate ! Warning Label @ Function Label - Panasonic NNSD277WR | NNSD277BR User Guide - Page 10
and cooking functions selected. (2) Popcorn Pad: Touch this pad to pop a bag of packaged microwave popcorn. (☛ page 12) (3) Power Level Pad: Touch this pad to select a cooking ) (9) Stop/Reset Pad: Touch this pad to stop oven or clear all entries. (10) Start Pad: Touch this pad to start functioning. If - Panasonic NNSD277WR | NNSD277BR User Guide - Page 11
ON/OFF MENU ACTION SCREEN helps you to program your oven by prompting the next step to be taken. When you become familiar with your oven, the prompt can be turned off. 3 taps OFF Prompting Guide will not appear 3 more taps *ON Prompting Guide will appear. DEMO MODE ON/OFF Demo mode is designed - Panasonic NNSD277WR | NNSD277BR User Guide - Page 12
the display window shows "VENTILATING", and the fan can not be manually turned off. If subsequently another key is pressed and "HOT" appears in the display window, the microwave oven will not operate, and you must wait until the microwave is cool and "HOT" disappears from the display to re-program - Panasonic NNSD277WR | NNSD277BR User Guide - Page 13
dry out and may cause a fire. A microwave oven's cooking power tells you the amount of microwave power available for cooking. Quick Min Feature This cooking time. 2. Quick Min Pad can be used to add more time during manual cooking. Keep Warm Feature This feature will keep food warm for up to 30 - Panasonic NNSD277WR | NNSD277BR User Guide - Page 14
Popcorn Feature This sensor feature allows you to pop popcorn without setting weight and time. The oven simplifies programming. Example: To pop a bag of microwave popcorn 1. • Press Popcorn. 2. • (see More/Less Feature.) Optional 3. • Press Start . ➤Cooking starts. Cooking is complete when - Panasonic NNSD277WR | NNSD277BR User Guide - Page 15
, date, and label. To Defrost: 1. Remove wrapper. This helps moisture to evaporate. Juices from food can get hot and cook the food. 2. Set food in a microwave safe dish. 3. Place roasts fat-side down. Place whole poultry breast-side down. 4. Select power and minimum time so that items will be under - Panasonic NNSD277WR | NNSD277BR User Guide - Page 16
Defrosting Tips & Techniques (continued) FOOD DEFROST TIME at P3 mins (per lb) DURING DEFROSTING Fish and Seafood [up to 3 lbs. (1.4 kg)] Crabmeat 6 Break apart/Rearrange Fish Steaks 4 to 6 Turn over Fish Fillets 4 to 6 Turn over/Rearrange/Shield ends Sea Scallops 4 to 6 Break apart/ - Panasonic NNSD277WR | NNSD277BR User Guide - Page 17
please refer to page 11 for manual cooking. Sensor Reheat Feature Sensor Cook Feature This sensor feature allows you the outside of the cooking containers and the inside of the microwave oven are dry before placing food in the oven. Residual beads of moisture turning into steam can mislead the - Panasonic NNSD277WR | NNSD277BR User Guide - Page 18
. If additional time is needed, continue to cook manually. Follow manufacturer's directions for preparation. Follow manufacturer's directions Let stand 5 minutes before serving. Place pasta with hot tap water in a microwave safe casserole dish. Cover with lid or vented plastic wrap. Break apart in - Panasonic NNSD277WR | NNSD277BR User Guide - Page 19
Recipes OMELET Basic Omelet 1 tablespoon butter or margarine 2 eggs 2 tablespoons milk salt and ground black pepper, if desired Heat butter in a microwave safe 9-inch pie plate, 30 seconds at P10, or until melted. Turn the plate to coat the bottom with butter. Meanwhile, combine the - Panasonic NNSD277WR | NNSD277BR User Guide - Page 20
. ➤Cooking will start. After cooking, stand time will count down without oven operating. CAUTION: If oven lamp is lit while using the timer feature, the oven is incorrectly programmed. Stop oven immediately and re-read instructions. To Set Delay Start: Example: To delay the start of cooking - Panasonic NNSD277WR | NNSD277BR User Guide - Page 21
Off) Rotate dish halfway through cooking Placement of the Roller Ring Before using the microwave oven, be sure the Roller Ring is properly installed. Incorrect installation can result in improper cooking, damage to the oven or spillage of food. The Roller Ring must be located on the surface between - Panasonic NNSD277WR | NNSD277BR User Guide - Page 22
safe dish with a slice of bread. Cover with lid or plastic wrap. 1 11/2 - 2 Remove wrapper and place butter in a microwave safe dish. Remove wrapper and place butter in a microwave safe dish covered with lid or vented plastic wrap. 1 - 11/2 1 - 11/2 Remove wrapper and place chocolate in - Panasonic NNSD277WR | NNSD277BR User Guide - Page 23
3 4 Heated liquids can erupt if not stirred. Do not heat liquids in microwave oven without stirring before heating. 2 - 3 4 - 5 4 - 5 3 - 5 Spread nuts into a 9-inch (23 cm) microwave safe pie plate. Stir occasionally. Place in a small microwave safe bowl. Stir twice. 30 sec. 5 Place tomato in - Panasonic NNSD277WR | NNSD277BR User Guide - Page 24
such as a ham bone, may be undercooked. Large amounts of fat absorb microwave energy and the meat next to these areas may overcook. Density Porous, airy in whole eggs may cause them to explode, and possibly damage the oven or cause injury. Reheating SLICED hard-boiled eggs and cooking SCRAMBLED eggs - Panasonic NNSD277WR | NNSD277BR User Guide - Page 25
the center and pieces from the center to the edge of the dish. Stand Time Most foods will continue to cook by conduction after the microwave oven has turned off. In meat cookery, the internal temperature will rise 5°F to 15°F (3°C to 8°C), if allowed to stand, tented with foil, for 10 to 15 - Panasonic NNSD277WR | NNSD277BR User Guide - Page 26
Operating Manual (this book) Glass Tray Shelf (Metal Rack) Roller Ring Assembly Oven Light, Cooktop Light PART NUMBER F00038Q10AP A06015H00AP F06025H00AP F290D5Q00AP F60305H00AP Accessory Purchases (U.S.A and Puerto Rico) Purchase Parts, Accessories and Instruction Books online for all Panasonic - Panasonic NNSD277WR | NNSD277BR User Guide - Page 27
of Your Microwave Oven (continued) Cleaning Vent Grille (Oven Air Vent) 1. Moisten a soft cloth in hot water containing mild detergent and wipe gently as shown in Fig. A. Do not use ammonia or a strong detergent. 3. Install replacement Charcoal Filter (NN-CF203) Install the Charcoal Filter - Panasonic NNSD277WR | NNSD277BR User Guide - Page 28
dirt. Shake and remove moisture before replacing. Installing Grease Filters 1. Slide in the edge of the Grease Filters along the opening's guide edges. Oven Light Replacement Be careful as the Oven Light Cover and the bulb may be hot. 1. Unplug microwave oven or disconnect power. 2. Remove the Vent - Panasonic NNSD277WR | NNSD277BR User Guide - Page 29
The Roller Ring and oven bottom are dirty. The CHILD LOCK was activated. This display indicates a problem with the microwave generation system. REMEDY and enter new program. Program again according to the Operating Instructions. Program oven again. Take out Glass Tray and Roller Ring. Wipe with - Panasonic NNSD277WR | NNSD277BR User Guide - Page 30
Limited Warranty & Customer Services Directory (For U.S.A and Puerto Rico only) PANASONIC CONSUMER ELECTRONICS COMPANY, DIVISION OF PANASONIC CORPORATION OF NORTH AMERICA One Panasonic Way Secaucus, New Jersey 07094 PANASONIC Over-The-Range Microwave Oven Limited Warranty Limited Warranty - Panasonic NNSD277WR | NNSD277BR User Guide - Page 31
Quick Guide to Operation Feature How to Operate To Set Clock (☛ page 10) Press once. Pop-Out Dial Set time of day. Press once. To Set Light - Panasonic NNSD277WR | NNSD277BR User Guide - Page 32
record of your purchase for future reference. Model No Serial No Date of Purchase Panasonic Consumer Electronics Company, Division of Panasonic Corporation of North America One Panasonic Way Secaucus, New Jersey 07094 Panasonic Home Appliances Microwave Oven (Shanghai) Co., Ltd. Web Site: http - Panasonic NNSD277WR | NNSD277BR User Guide - Page 33
Microondas Modelos: NN-SD277SR/SD277BR/SD277WR Información de ESTE INSTRUCTIVO EN SU TOTALIDAD. For English Instructions, turn over the book. Para asistencia, por 7262) contáctenos nuestro sitio web en: http://www.panasonic.com/contactinfo (U.S.A y Puerto Rico) Para obtener referencias sobre - Panasonic NNSD277WR | NNSD277BR User Guide - Page 34
de otros es muy importante. Hemos proporcionado mensajes de seguridad importantes en este manual y en su aparato. Lea y obedezca siempre todos los mensajes de seguridad. excepto el personal de servicio debidamente calificado. © Panasonic Artículos para el Hogar Hornos de Microondas de Shanghai 2008. - Panasonic NNSD277WR | NNSD277BR User Guide - Page 35
Microondas Panasonic. cocinar, NO DEJE el horno desatendido cuando esta en uso. 5. Instale o ubique este aparato solamente de acuerdo con las instrucciones de instalaci fines para los que fue hecho, tal como se describen en este manual. No use químicos o vapores corrosivos en este aparato. Este tipo - Panasonic NNSD277WR | NNSD277BR User Guide - Page 36
aparato puede ser utilizado sobre equipos de cocina a gas y eléctricos a 36 pulgadas (91,4 cm). Para reducir riesgos de incendio y descargas eléctricas, instale al menos a 135/8 pulgadas (34,6 cm), por sobre las hornillas de la estufa, medido desde el fondo del horno. 21. Limpie las ventilaciones de - Panasonic NNSD277WR | NNSD277BR User Guide - Page 37
INSTRUCCIONES DE INSTALACIÓN Examine Su Horno Desempaque el horno, quite todo el material de empaque y examine que su horno no tenga ningún daño, tal como abolladuras, seguros de la puerta rotos o resquebrajaduras en la puerta. Notifique inmediatamente a su distribuidor si el horno está dañado. - Panasonic NNSD277WR | NNSD277BR User Guide - Page 38
trabarse o la comida cocinarse más lento que en los tiempos recomendados en este manual. El horno debe ser conectado en un enchufe a tierra de al menos 20 A Usar un bajo voltaje dará como resultado un cocinado más lento. Panasonic NO es responsable por cualquier daño que haya resultado del uso del - Panasonic NNSD277WR | NNSD277BR User Guide - Page 39
Sugerencias Útiles Siga Estas Precauciones de Seguridad Cuando Cocine en Su Horno IMPORTANTE La cocción adecuada depende del tiempo designado y del peso de los alimentos. Si usa una porción menor de la recomendada y cocina por el tiempo para la porción recomendada, puede resultar en un incendio. Si - Panasonic NNSD277WR | NNSD277BR User Guide - Page 40
Guía de Utensilios UTENSILIO MICROONDAS COMENTARIOS Papel aluminio Si, para protección únicamente Pequeñas tiras de papel aluminio pueden ser utilizadas para proteger las partes más delicadas de carnes y aves. Pueden ocurrir chispas si el aluminio se encuentra muy cerca del las paredes o la - Panasonic NNSD277WR | NNSD277BR User Guide - Page 41
Diagrama de Componentes del Horno 3 1 4! 5 -2 6 7 8 = @ 9# ~ 0 0 Repisa La Repisa puede ser usada para cocción de 2 niveles, ver página 19 Bandeja de Cristal Aro de Rodillo 1 Ventana del Horno Transparente 2 Cubierta del guía de ondas (no remover) 3 Luz interior del Horno de Microondas ( - Panasonic NNSD277WR | NNSD277BR User Guide - Page 42
Panel de Control (1) (13) (2) (14) (3) (15) (16) (4) (5) (6) (7) (17) (8) (9) (10) (11) (18) (12) (19) (1) Pantalla indicadora: La pantalla incluye indicador para informarle la hora, el tiempo de cocción y la función de cocción seleccionada. (2) Tecla de Palomitas de Maíz: Toque - Panasonic NNSD277WR | NNSD277BR User Guide - Page 43
Características de función SELECCIÓN DE IDIOMA El horno le permite elegir el idioma de la pantalla: inglés, francés o alemán. Puede cambiar el idioma al presionar y sujetar el teclado numérico durante 2 segundos y después dar golpecitos en el teclado numérico hasta que aparezca el idioma deseado. - Panasonic NNSD277WR | NNSD277BR User Guide - Page 44
Reloj Ejemplo: Para ajustar 11:25 1. 2. Saque y rote • Presione la tecla de Reloj. ➤punto comienza a parpadear. • Configure la hora del día usando el Dial Saliente. ➤11:25 aparece en la pantalla indicadora. 3. • Presione la tecla de Reloj. ➤punto deja de parpadear. La hora está ingresada y - Panasonic NNSD277WR | NNSD277BR User Guide - Page 45
Potencia y a continuación minuto automático. 2. El tecla de Minuto automático puede ser utilizado para agre- gar más tiempo durante la cocción manual. Mantener Caliente Esta característica permite mantener caliente los alimentos después de 30 minutos de cocinar. Ejemplo: Para mantener 2 tazas de - Panasonic NNSD277WR | NNSD277BR User Guide - Page 46
Palomitas de Maíz Esta característica del Sensor le permite preparar sus Palomitas de Maíz si necesidad de fijar el peso y timepo. El horno simplicafica la programación. Ejemplo: Para cocinar palomitas de maíz para microondas 1. • Presione la tecla de Palomitas de Maíz. 2. • (vea la función de - Panasonic NNSD277WR | NNSD277BR User Guide - Page 47
Descongelación Turbo Inverter Esta función le permite descongelar carne, productos avícolas y pescado con sólo introducir el peso. Ejemplo: Para descongelar 1,5 kg de carne. Coloque la comida en un plato adecuado para el uso de microondas. 1. • Presione la tecla de Descongelación Turbo - Panasonic NNSD277WR | NNSD277BR User Guide - Page 48
Consejos y Técnicas de Descongelación (continuación) Tiempo de Alimento descongelación Durante la descongelación (min/kg) (P3) Pescado y Marisco [hasta 1,4 kg (3 libras)] Carne de Cangrejo 6 Romper y separar/Reordenar Bistecs de Pescado 4 a 6 Dar la vuelta Filetes de Pescado 4 a 6 - Panasonic NNSD277WR | NNSD277BR User Guide - Page 49
individual o el tamaño del servicio es otro que el listado en la página 16, por favor refiérase a la página 11 para cocción manual. Recalentamiento por Sensor Cocción por Sensor Esta función del sensor le permite calentar cualquier cantidad de comida pulsando un botón. El horno lo hace todo - Panasonic NNSD277WR | NNSD277BR User Guide - Page 50
Tabla de Cocción con Sensor Receta Porción/Peso Consejos 1. Cereal 40 g - 80 g Coloque un platón especial para microondas dentro del horno. Siga las (0,5 taza -1 taza) instrucciones del fabricante para preparar una rápida avena. 2. Salchicha 2 enlaces - 8 enlaces Seguir las instrucciones del - Panasonic NNSD277WR | NNSD277BR User Guide - Page 51
Recetas de Microondas OMELET (TORTILLA) Omelet básica (Tortilla) 1 cucharada de mantequilla o margarina 2 huevos 2 cucharadas de leche sal y pimienta negra, si así se desea Calentar mantequilla de 9 pulgadas del plato del pie, 30 segundos en Potencia P10, o hasta derretirla. Gire el plato - Panasonic NNSD277WR | NNSD277BR User Guide - Page 52
Temporizador Esta característica le permite programar el tiempo después de que la cocción ha sido completada y programar el horno con un tiempo de espera y/o un comienzo tardío. Para usar como temporizador en la cocina: Ejemplo: Para contar 5 minutos 1. • Presione Tiempo. 2. • Configure el - Panasonic NNSD277WR | NNSD277BR User Guide - Page 53
Operación Cómo usar la Repisa Cuando se usan Microondas 1. La Repisa debe de ser puesta en los Soportes de la Repisa de forma segura para prevenir daños al horno por formación de arcos. 2. NO use el plato de dorado con microondas en el estante. El estante y el plato pueden sobrecalentarse. 3. NO - Panasonic NNSD277WR | NNSD277BR User Guide - Page 54
Consejos Rápidos ALIMENTOS POTENCIA Tocino, Separado, 1 libra (450 g) P10 (ALTO) Azúcar Morena, Suavizada 1 taza (250 ml) P10 (ALTO) Para ablandar la Mantequilla, 1 varilla, 1/4 de libra (110 g) Para derretir la Mantequilla, 1 varilla, 1/4 de libra (110 g) P3 (MEDIO-BAJO) P6 (MEDIO) - Panasonic NNSD277WR | NNSD277BR User Guide - Page 55
Consejos Rápidos (continuación) ALIMENTOS Para cocinar Papa Horneada, (170 g - 225 g) (6 oz - 8 oz cada una) 1 2 POTENCIA P8 P8 Para vapor en las toallas de mano - 4 P10 (ALTO) Helado, Suavizado, 1/2 galón (2 litro) Taza de agua 1 taza (250 ml) 2 taza (500 ml) P3 (MEDIO-BAJO) P10 (ALTO) P10 ( - Panasonic NNSD277WR | NNSD277BR User Guide - Page 56
Características de los Alimentos Huesos y Grasas Tanto los huesos como la grasa afectan la cocción. Los huesos pueden causar cocción irregular. La carne cercana a las puntas de los huesos puede sobre cocinarse en tanto que la carne ubicada bajo un hueso largo, tal como un hueso de jamón, puede - Panasonic NNSD277WR | NNSD277BR User Guide - Page 57
Técnicas para Cocinar (continuación) Cubierta Como en la cocina convencional, el vapor se evapora durante la cocción por microondas. Las tapas de las cacerolas o cubiertas de plástico son usadas para sellar ajustadamente. Cuando utilice envoltura plástica, ventile la cubierta plástica doblando - Panasonic NNSD277WR | NNSD277BR User Guide - Page 58
Y DEBAJO DE LA BANDEJA DE CRISTAL. DESCRIPCIÓN DE LAS PARTES Instrucciones/Manual de uso (este libro) Bandeja de Cristal Repisa (Rejilla de Metal (Lunes-Viernes 9 a.m. a 8 p.m.) Compañía de Servicios y Tecnología Panasonic. 20421 84th Avenue South, Kent, WA 98032 (Aceptamos Visa, Mastercard, - Panasonic NNSD277WR | NNSD277BR User Guide - Page 59
No utilice amoníaco o un detergente fuerte. 3. Instale el Filtro de Carbón de reemplazo (NN-CF203) Instale el Filtro de Carbón alineando los dos agujeros, luego és de su agente local de Panasonic. El número de parte para el reemplazo del filtro de carbón es NN-CF203 y rogamos consulte las siguientes - Panasonic NNSD277WR | NNSD277BR User Guide - Page 60
y tire hasta que encaje. (Use una ampolleta de 115-125 voltios, 30 vatios) Si la ampolleta no está disponible localmente, contacte a su comerciante Panasonic local. El número de parte es F60305H00AP. 4. Reinstale la Tapa de la Luz Superior de Cocción usando un tornillo. Reemplazo de la Luz del - Panasonic NNSD277WR | NNSD277BR User Guide - Page 61
Antes de Acudir a Servicio Estas cosas son normales: Mi horno de microondas causa interferencia con mi televisor. Se acumula vapor en la puerta del horno y aire caliente sale de las rejillas de ventilación. En algunos radios y televisores puede ocurrir interferencia cuando usted cocine con su - Panasonic NNSD277WR | NNSD277BR User Guide - Page 62
. Servicio a domicilio durante el período de garantía en Los Estados Unidos y Puerto Rico se puede obtener llamando sin cargo de llamada a Panasonic Service and Technology Company (PSTC), al número de teléfono 1-800-211-PANA (7262), donde podrá localizar un Centro de Servicio autorizado de PSTC - Panasonic NNSD277WR | NNSD277BR User Guide - Page 63
GUÍA RAPIDA DE OPERACIÓN Caracteristica Como Operarla Para Poner el Reloj en la Hora (☛ página 10) Presione 1 vez. Dial Saliente Registre la hora. Presione 1 vez. Para Seleccionar Luz Encedida/Noche/Apagada (☛ página 10) Para Seleccionar Plato Giratorio Encedido/Apagado (☛ página 10) Luz - Panasonic NNSD277WR | NNSD277BR User Guide - Page 64
7/16" x 152/5") 591 mm x 242 mm x 367 mm (23 1/4" x 9 1/2" x 14 7/16") NN-CF203 2 450 MHz Turbo Alto 300 PCM 160 PCM 55 dB 49 dB Aprox. 25,0 kg (55 lb) *Determinado Panasonic, División de Panasonic Corporacion de Norte Américana One Panasonic Way Secaucus, New Jersey 07094, USA Panasonic
-
 1
1 -
 2
2 -
 3
3 -
 4
4 -
 5
5 -
 6
6 -
 7
7 -
8
-
9
-
10
-
11
-
12
-
13
-
14
-
15
-
16
-
17
-
18
-
19
-
20
-
21
-
22
-
23
-
24
-
25
-
26
-
27
-
28
-
29
-
30
-
31
-
32
-
33
-
34
-
35
-
36
-
37
-
38
-
39
-
40
-
41
-
42
-
43
-
44
-
45
-
46
-
47
-
48
-
49
-
50
-
51
-
52
-
53
-
54
-
55
-
56
-
57
-
58
-
59
-
60
-
61
-
62
-
63
-
64
 |
 |

Operating Instructions
Over The Range Microwave Oven
Models: NN-SD277SR/SD277BR/SD277WR
For assistance, please call:
1-800-211-PANA(7262)
contact us via the web at:
(U.S.A and Puerto Rico)
For microwave oven safety reference, please visit FDA's webpage at:
www.fda.gov/cdrh/consumer/microwave.html
Safety Information
Precautions
................................................
Inside cover
Important Safety Instructions
.................................
1-2
Installation and Grounding Instructions
...............
3-4
Safety Precautions
......................................................
5
Operation
Timer Feature (Kitchen Timer/Stand Time/Delay Start)
....................................................................................
18
How to Use Shelf
........................................................
19
Microwave Shortcuts
..............................................
20-21
Food Characteristics
...................................................
22
Cooking Techniques
...............................................
22-23
Quick Guide to Operation
...........................................
29
Operation
Control Panel
................................................................
8
Function Features
.........................................................
9
Child Safety Lock
..........................................................
9
Setting the Clock
.........................................................
10
Selecting Light On/Night/Off
........................................
10
Selecting Turntable On/Off
..........................................
10
Selecting Fan High/Low/Off
........................................
10
Selecting Super/Turbo/Off
...........................................
10
Selecting Auto Off 1/3/5/10
.........................................
10
Selecting Power & Cook Time
.....................................
11
Quick Min Feature
.......................................................
11
Keep Warm Feature
....................................................
11
Popcorn Feature
.........................................................
12
More/Less Feature
......................................................
12
Inverter Turbo Defrost Feature
....................................
13
Defrosting Tips & Techniques
................................
13-14
Sensor Reheat Feature
...............................................
15
Sensor Cook Feature
..................................................
15
Sensor Cook Chart
.....................................................
16
Microwave Recipes
.....................................................
17
Maintenance
Care and Cleaning of Your Microwave Oven
........
24-26
Accessory Purchases
..................................................
24
Cleaning Vent Grille (Oven Air Vent)
...........................
25
Installing Vent Grille
....................................................
25
Charcoal Filter Attachment/Replacement
...................
25
Cleaning Grease Filters
..............................................
26
Installing Grease Filters
..............................................
26
Cooktop/Night Light Replacement
..............................
26
Oven Light Replacement
............................................
26
Before Requesting Service
.........................................
27
Limited Warranty & Customer Service Directory
........
28
General Information
Cookware Guide
...........................................................
6
Oven Components Diagram
.........................................
7
Specifications
..............................................................
30
User’s Record
.............................................................
30
READ ALL INSTRUCTIONS CAREFULLY BEFORE USING THE OVEN.
Para instrucciones en español, voltee el libro.
F00038Q13AP
iPress0509-4
Printed in China