Panasonic PT-D3500 Dlp Projector - English/ French - Page 22
Projection, Powering Up The Projector, Making Adjustment And Selection, Making Adjustment
 |
View all Panasonic PT-D3500 manuals
Add to My Manuals
Save this manual to your list of manuals |
Page 22 highlights
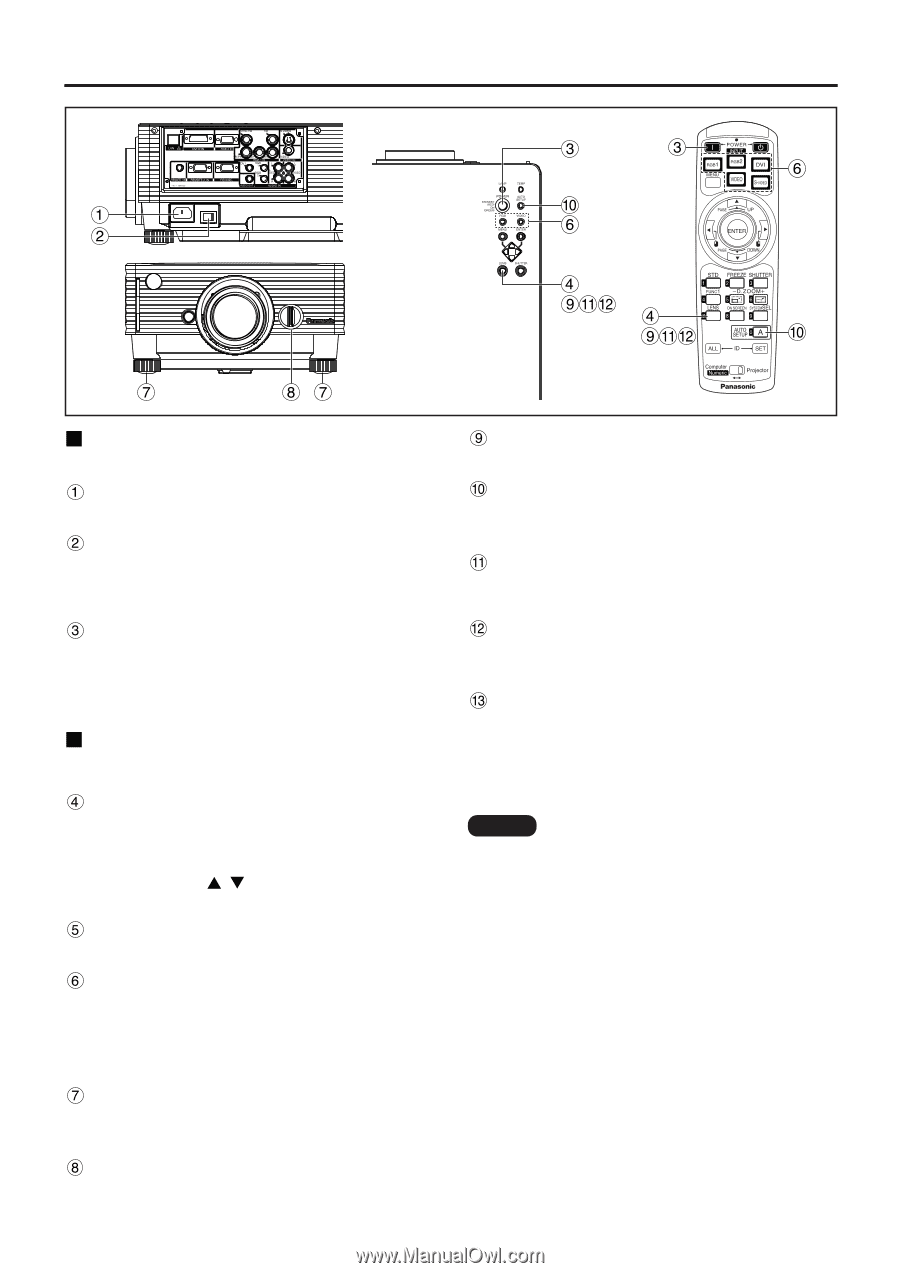
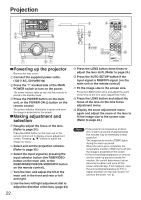
Projection Powering up the projector Remove the lens cover. Connect the supplied power cable. (120 V AC, 50 Hz/60 Hz) Press the "I" marked side of the MAIN POWER switch to turn on the power. The power indicator lights up red, and the projector is placed in the standby mode. Press the POWER button on the main unit, or the POWER ON (|) button on the remote control. The power indicator illuminates in green and soon the image is projected on the screen. Making adjustment and selection Roughly adjust the focus of the lens. (Refer to page 24.) Press the LENS button on the main unit or the remote control unit to display a focus adjustment screen. Pressing buttons to adjust the image into focus. Select and set the projection scheme. (Refer to page 35.) Select the input signal by pressing the input selector button (the RGB/VIDEO button on the main unit, or the RGB1/RGB2/VIDEO/S-VIDEO/DVI button on the remote control). Turn the feet, and adjust the tilt of the main unit in the front and rear or left and right. Use the lens left/right adjustment dial to adjust the direction of the lens. (page 24) 22 Press the LENS button three times to adjust the lens shift. (Refer to page 24.) Press the AUTO SETUP button if the input signal is RGB/DVI signal. [on the main unit or the remote control] Fit the image size to the screen size. Press the LENS button twice and adjust the zoom of the lens on the lens zoom adjustment menu. Press the LENS button and adjust the focus of the lens on the lens focus adjustment menu. Display the zoom adjustment menu again and adjust the zoom of the lens to fit the image size to the screen size. (Refer to page 24.) Note • If the projector is powered up at about 0˚C, a warm-up period of approximately five minutes may be necessary to start projection. The temperature monitor (TEMP) lights during the warm-up period. When the warm-up is completed, the temperature monitor (TEMP) turns off and the image is projected on the screen. • If the surrounding temperature is very low and the warm-up period exceeds five minutes, the control determines it as an abnormal condition and turns off the power automatically. If this happens, raise the surrounding temperature to 0°C or higher and then turn the main power "on" and turn the power "on" (|).
-
 1
1 -
2
-
3
-
4
-
5
-
6
-
7
-
8
-
9
-
10
-
11
-
12
-
13
-
14
-
15
-
16
-
 17
17 -
 18
18 -
 19
19 -
 20
20 -
 21
21 -
 22
22 -
 23
23 -
 24
24 -
 25
25 -
 26
26 -
 27
27 -
28
-
29
-
30
-
31
-
32
-
33
-
34
-
35
-
36
-
37
-
38
-
39
-
40
-
41
-
42
-
43
-
44
-
45
-
46
-
47
-
48
-
49
-
50
-
51
-
52
-
53
-
54
-
55
-
56
-
57
-
58
-
59
-
60
-
61
-
62
-
63
-
64
-
65
-
66
-
67
-
68
-
69
-
70
-
71
-
72
 |
 |