Panasonic PT-DZ12000U Operating Instructions
Panasonic PT-DZ12000U - WUXGA DLP Projector Manual
 |
UPC - 791871111550
View all Panasonic PT-DZ12000U manuals
Add to My Manuals
Save this manual to your list of manuals |
Panasonic PT-DZ12000U manual content summary:
- Panasonic PT-DZ12000U | Operating Instructions - Page 1
Operating Instructions 3-chip DLP®-based Projector Commercial Use PT-D12000U Models No. PT-DZ12000U Read these instructions completely before operating this unit. TQBJ 0263-1 - Panasonic PT-DZ12000U | Operating Instructions - Page 2
that you will be pleased with your Panasonic DLP® based projector. The serial number of your product may be found on an attached label. You should note it in the space provided below and retain this booklet in case service is required. Model number: PT-D12000U/PT-DZ12000U Serial number: 2 - ENGLISH - Panasonic PT-DZ12000U | Operating Instructions - Page 3
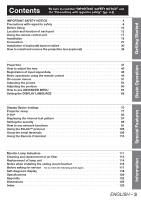
111 Cleaning and replacement of air filter 112 Replacement of lamp unit 114 Notes when installing the ceiling mount bracket 116 Before asking for service ʜ try to check the following points again 117 Self-diagnosis display 118 Specifications 120 Appendix 122 Dimensions 125 Index 126 - Panasonic PT-DZ12000U | Operating Instructions - Page 4
to alert the user to the presence of important operating and maintenance (servicing) instructions in the literature accompanying the product. CAUTION: This equipment is equipped with a three-pin grounding-type power plug. Do not remove the grounding pin on the power - Panasonic PT-DZ12000U | Operating Instructions - Page 5
accordance with the instructions, may cause harmful equipment off and on, the user is encouraged to try to correct PT-D12000U/PT-DZ12000U Panasonic Panasonic Corporation of North America One Panasonic Way, Secaucus, New Jersey 07094 (888) 411-1996 [email protected] (HID) lamp that contains - Panasonic PT-DZ12000U | Operating Instructions - Page 6
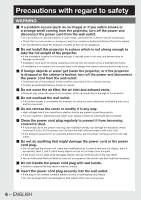
in any way. • High voltages which can cause fire or electric shocks are present inside the projector. • For any inspection, adjustment and repair work, please contact an Authorized Service Center. „ Clean the power cord plug regularly to prevent it from becoming covered in dust. • If dust builds up - Panasonic PT-DZ12000U | Operating Instructions - Page 7
the lamp unit. • If the lamp section breaks, it may cause injury. „ Do not place liquid containers on top of the projector. • If water spills onto the projector or gets inside it, fire or electric shocks could result. • If any water gets inside the projector, contact an Authorized Service Center - Panasonic PT-DZ12000U | Operating Instructions - Page 8
of mercury as fluorescent lamps, and the broken pieces may cause injury. • If you believe that you have absorbed the gas or that the gas has got into your eyes or mouth, seek medical advice immediately. • Ask your dealer to replace the lamp unit and check the inside of the projector. 8 - ENGLISH - Panasonic PT-DZ12000U | Operating Instructions - Page 9
problems with operation. • It is a good idea to clean the inside of the projector before the season for humid weather arrives. Ask your nearest Authorized Service Center to clean the projector Company. „ Do not use projectors with the adjustable feet or projection lens cover removed. • If this - Panasonic PT-DZ12000U | Operating Instructions - Page 10
lens. If this is not done, dust will collect inside the projector and problems with the projector will result. „ Avoid installing the product in a place exposed to vibrations or impacts. If the projector is installed in a place where vibrations are transmitted from a source of driving power - Panasonic PT-DZ12000U | Operating Instructions - Page 11
. Cover the lens with the supplied lens cap when the projector is not used. „ DLP chips The DLP chips are made using extremely high-precision technology. Note that in rare cases, pixels may be missing or always lit, but this is not a malfunction. „ Lamp A mercury lamp with high internal pressure is - Panasonic PT-DZ12000U | Operating Instructions - Page 12
18, 84) These buttons are used in systems with multiple projectors to enter projector ID numbers. They may also be used to enter user-adjustment values and by service personnel. j STATUS button p. 48) Press this button to display projector information. It can also be used to send information about - Panasonic PT-DZ12000U | Operating Instructions - Page 13
) buttonŋŋŋ (p. 40) These buttons are used together with the arrow keys to adjust the projection lens. p Function 1 (FUNC1) button p. 49) This button function can be assigned on the "FUNC1" line of the "PROJECTOR SETUP" page, found on the Main Menu page. q DEFAULT button p. 53) Press this button - Panasonic PT-DZ12000U | Operating Instructions - Page 14
111) These LEDs illuminate and flash to indicate lamp warmup intervals, abnormal internal temperatures, or cooling fan errors. 6 Power indicator lamp p. 37) The lamp lights in red when the MAIN POWER switch is turned to " l ". It turns to green when the POWER ON button of the remote control or the - Panasonic PT-DZ12000U | Operating Instructions - Page 15
power applied to the projector. 3 Slot cover p. 31) Install the optional input modules here. 4 POWER ON ( I ) button pp. 37, 38) When the projector is in standby mode with the MAIN POWER switch of the projector "SECURITY" password. 8 LENS button p. 40) Toggles through the lens Zoom, Focus, and - Panasonic PT-DZ12000U | Operating Instructions - Page 16
remote control cable (M3 jack). 2 REMOTE2 IN terminal p. 110) The user can remotely control the main unit by using an external control circuit to this ). 6 LAN terminal (10BASE-T/100BASE-TX pp. 28-29, 93) The projector can be connected to a network and controlled through it's onboard web page. - Panasonic PT-DZ12000U | Operating Instructions - Page 17
the ⾚ side first). 3. Close the battery compartment lid. • Replace the battery compartment lid over the compartment and slide until it clicks. also be aimed at the screen, which will reflect commands back to the projector's front receiver window as illustrated in figure 2. • When the Remote Control - Panasonic PT-DZ12000U | Operating Instructions - Page 18
in intense ambient light such as fluorescent lamps. Carefully site the projector so its Remote Control receiver windows will not if the batteries of the remote control are left exhausted. When the batteries are replaced, set the same ID number again. • The ID number can be set to " - Panasonic PT-DZ12000U | Operating Instructions - Page 19
Getting Started Installation Examples of system expansion The projector is provided with a number of terminals and optional accessories to enable (optional). System 3 Built-in keystone and geometric correction can compensate for offset projector mounting and curved screens. Panasonic ENGLISH - 19 - Panasonic PT-DZ12000U | Operating Instructions - Page 20
installed, the value will be fixed at H=SH/2 for both the PT-D12000U and PT-DZ12000U. If the ET-D75LE6 has been installed, the values will be H = 0.1 × SH to 0.9 × SH for the PT-D12000U, and H = 0 to SH for the PT-DZ12000U. L Screen Lens ET-D75LE1 ET-D75LE2 ET-D75LE3 ET-D75LE4 ET-D75LE5 ET-D75LE6 - Panasonic PT-DZ12000U | Operating Instructions - Page 21
of the circle Screen R3 L3 : Projection distance R3 : Radius of the circle Screen R3 L3 : Projection distance R3 : Radius of the circle Lens ET-D75LE1 ET-D75LE2 ET-D75LE3 ET-D75LE4 ET-D75LE5 ET-D75LE6 ET-D75LE8 Keystone correction only Vertical Keystone Correction Angle Ћ( ˃) Horizontal - Panasonic PT-DZ12000U | Operating Instructions - Page 22
. „ Projection distances by the type of projection lenses (for PT-DZ12000U) z For the screen aspect ratio of 16:10 (Units: m (feet/inches)) Lens type Model number of projection lens ET-D75LE1 Throw ratio*1 1.4-1.8 : 1 Screen dimensions Screen Effective Effective size height width Min. (inch - Panasonic PT-DZ12000U | Operating Instructions - Page 23
02 (3´4˝) 1.18 (3´10˝) 1.34 (4´4˝) 1.50 (4´11˝) 1.81 (5´11˝) 2.29 (7´6˝) 3.08 (10´1˝) 3.87 (12´8˝) 4.66 (15´3˝) Lens type Model number of projection lens ET-D75LE1 Throw ratio*1 1.6-2.2 : 1 Screen dimensions Screen Effective Effective size height width Min. Max. (inch) (SH) (SW) 70 80 90 100 - Panasonic PT-DZ12000U | Operating Instructions - Page 24
Installation (continued) „ Projection distances by the type of projection lenses (for PT-D12000U) z For the screen aspect ratio of 4:3 (Units: m (feet/inches)) Lens type Zoom lens Fixed-focus lens Model number of projection lens ET-D75LE1 ET-D75LE2 ET-D75LE3 ET-D75LE4 ET-D75LE8 ET-D75LE6 - Panasonic PT-DZ12000U | Operating Instructions - Page 25
Started If the projector is used with a screen size not listed in this manual, check the diagonal dimension (inch) of your screen and calculate the projection distance using the following formulas. „ Calculation formulas for projection distance by lens types (for PT-DZ12000U) Model number of - Panasonic PT-DZ12000U | Operating Instructions - Page 26
lens types (for PT-D12000U) Model number of projection lens ET-D75LE1 Throw ratio Aspect ratio 4:3 1.5-2.0 : 1 16:9 4:3 ET-D75LE2 2.0-3.0 : 1 16:9 Zoom lens Set up the projector with a space of 40 cm or more at the front so that the air filter can be replaced. • When the projector is to be - Panasonic PT-DZ12000U | Operating Instructions - Page 27
connection, read carefully the instruction manual for the device to be connected. • Turning off the power switch of the devices before In this case, a time base corrector (TBC) must be connected. • The projector accepts the following signals: video, S-Video, analog RGB, DVI-D and signals which - Panasonic PT-DZ12000U | Operating Instructions - Page 28
be distorted. If this is the case, connect a TBC between the projector and the video deck. Note • The DVI-D signal input terminal supports only a single link. • The HDMI-DVI-D conversion cable is some devices the images may not appear or other problems may be encountered in operation. 28 - ENGLISH - Panasonic PT-DZ12000U | Operating Instructions - Page 29
, also turn off the power of the PC. • When the length of the cable from a PC to the projector is long or when there are many relay devices such as switches, the video may be interrupted or fuzzy. In such a case, use a cable compensator. Note • For the specifications of the RGB signals that - Panasonic PT-DZ12000U | Operating Instructions - Page 30
present on the optional input module cannot be used with the PT-D12000U/PT-DZ12000U. Use the LAN terminal that is provided as standard with the projector. *2: HDCP (High-bandwidth Digital Content Protection) HDCP is a specification for encoding digital image signals which was developed to protect - Panasonic PT-DZ12000U | Operating Instructions - Page 31
S-VIDEO RGB1 RGB2 AUTO SETUP DVI-D AUX LENS ENTER SHUTTER LIGHT ON OFF AC IN OFF ON MAIN POWER 1. Remove the slot cover. Slot Cover 2. Insert the input module. Remove 2 screws. 3. Install the two screws. 4. Register the input signal. • This projector needs to register the type of input - Panasonic PT-DZ12000U | Operating Instructions - Page 32
DVI-D signal DVI-D input module ET-MD77DV Projector IN OUT REMOTE 1 REMOTE 2 IN RS- POWER ON STANDBY VIDEO S-VIDEO RGB1 RGB2 AUTO SETUP DVI-D AUX LENS ENTER SHUTTER LIGHT ON OFF AC IN OFF ON MAIN POWER PC Note • Insert the input module suitable for the input signal specifications - Panasonic PT-DZ12000U | Operating Instructions - Page 33
menu. (pp. 58-59) *1: The LAN terminal present on the optional input module cannot be used with the PT-D12000U/PT-DZ12000U. Use the LAN terminal that is provided as standard with the projector. Connecting the signal to the HD/SD-SDI input module HD/SD-SDI input module (optional) ET-MD77SD3 (for - Panasonic PT-DZ12000U | Operating Instructions - Page 34
from the SYSTEM SELECTOR menu. (pp. 58-59) • Settings specific to the connected device are required. (pp. 74-75) • To send the pictures properly , use a connecting cable with the specifications of Canare 5CFB or higher (5CFB, 7CFB, etc.) or of Belden1694A or - Panasonic PT-DZ12000U | Operating Instructions - Page 35
- Note • The DVI-D signal input module supports only a single link. • The HDMI-DVI problems may be encountered in operation. *1: The LAN terminal present on the optional input card cannot be used with the PT-D12000U/PT-DZ12000U. Use the LAN terminal that is provided as standard with the projector - Panasonic PT-DZ12000U | Operating Instructions - Page 36
so that it is at the home position (p. 41) before installing or removing the projection lens. Attention • Remove the dust-proof sponge from the lens fitting of the projector before installing the projection lens. (Keep the dust-proof sponge in a safe place for later use if needed.) • After removing - Panasonic PT-DZ12000U | Operating Instructions - Page 37
supply status. Make sure that you fully understand the operation of the power indicator lamp before operating the projector. Indicator status Off Projector status Main power is off Standby mode Red Lit POWER ON ( | ) button can be pressed so that images can be projected. Green Lit Images - Panasonic PT-DZ12000U | Operating Instructions - Page 38
completed, the temperature monitor (TEMP) lamp turns off and the image is projected on the screen. • If the temperature of the operating environment is low and warm-up takes more than 5 minutes, the projector will judge that a problem has occurred and the power will be turned off automatically. If - Panasonic PT-DZ12000U | Operating Instructions - Page 39
marked side of the MAIN POWER switch to remove all power from the projector. Note • In the cooling state after the power is turned off, the lamp will not light up even if the power is turned on. To light up the lamp, turn on the power supply again when the lamp has been cooled sufficiently. • The - Panasonic PT-DZ12000U | Operating Instructions - Page 40
Shift, Zoom, and Focus controls to properly frame the image on the screen. LENS FOCUS ADJUST LENS ZOOM ADJUST „ At the projector 1. Press LENS on the control panel. • Pressing the button changes the setup screen in the order of "FOCUS", "ZOOM" and "SHIFT". 2. Press to select an item and - Panasonic PT-DZ12000U | Operating Instructions - Page 41
the parts of the projector. Using the standard projection position as the reference, the optical axis shift function makes it possible to adjust the projection position in the ranges shown in the figures below. Model number of projection lens PT-D12000U PT-DZ12000U 0.15V 0.50V Projected 0.15V - Panasonic PT-DZ12000U | Operating Instructions - Page 42
the focus adjustment screws a, b and c after installing the lens.) Figure 3 : Cross section view of the lens mount Lens tilt direction (when adjustment screws turned counterclockwise) Screen direction Lens bracket Adjustment Locking screw Lens flange screw Hole for Allen hex socket driver Spring - Panasonic PT-DZ12000U | Operating Instructions - Page 43
) An Allen wrench is supplied with the ET-D75LE6 and ET-D75LE8 optional lens. Figure 4 : Relation between the adjustment place and adjustment screw c V up b b c H left c a H right b a ac V bottom a ab Projector Screen Adjustment place: The place where the just-in-focus point is at - Panasonic PT-DZ12000U | Operating Instructions - Page 44
lens (continued) z Precautions for projector installation work When installing the projector without using the adjustable feet, insert metal spacers (10 mm to 20 mm) between the projector may take a while until the images stabilize after the power is turned on. Ceiling mounting screws (M6) Base - Panasonic PT-DZ12000U | Operating Instructions - Page 45
pages (A to L with 8 data items each, giving a total of 96 memories). Registration of new data When a new format input signal is applied to the projector, press MENU on the remote control or operating section of the main unit. When its data has been registered, the "MAIN MENU" screen is displayed - Panasonic PT-DZ12000U | Operating Instructions - Page 46
? SVGA72-A2 A2 RGB1 48.08kHz 72.17Hz H(POS) V(POS) 3. Press ENTER. • The data of the signal selected is cleared. 46 - ENGLISH Sub memory The projector has a sub-memory function that can be used to store several sets of adjustments for a given registered signal. Sub-memories should be used when the - Panasonic PT-DZ12000U | Operating Instructions - Page 47
Basic Operation 3. Press ENTER. • A "Change registered signals" screen will appear. RENAME NAME SXGA60-A1 MEMORY NO A1 INPUT RGB1 fH 64.00kHz fV 60.00Hz SYNAC.SBTACTE D E F G H I J K HL(PMOS)N O P Q R S T U V W X Y Z V;(P:OS), . abcdefghijklmno pqrstuvwxyz/+-* 0123456789 _@[] < > - Panasonic PT-DZ12000U | Operating Instructions - Page 48
, for example, a shutter mode is available that allows the user to hide images temporarily. 1. Press SHUTTER on the remote control STATUS INPUT NAME SIGNAL FREQUENCY PROJECTOR RUNTIME LAMP1 LAMP2 LAMP3 LAMP4 INTAKE AIR TEMP. OPTICS MODULE TEMP. AROUND LAMP TEMP. REMOTE2 STATUS 1/3 RGB2 - Panasonic PT-DZ12000U | Operating Instructions - Page 49
. In this case, manually adjust the items of "INPUT RESOLUTION", "CLOCK PHASE" and "SHIFT". • For specific signals and landscape signals Setting FUNC1" for details. (p. 83) Displaying the internal test pattern The projector has eight types of internal test patterns to check the condition of the set - Panasonic PT-DZ12000U | Operating Instructions - Page 50
Basic operations using the remote control (continued) Changing the picture aspect ratio You can toggle through an appropriate set of aspect ratios for a given input signal. 1. Press ASPECT on the remote control. • The setting will change as follows each time ASPECT is pressed. VID AUTO (PRI.) - Panasonic PT-DZ12000U | Operating Instructions - Page 51
items may not be valid for certain signal formats applied to the projector. The menu items that cannot be adjusted or used are shown in CONTRAST BRIGHTNESS COLOR TINT COLOR TEMPERATURE GAMMA SYSTEM DAYLIGHT VIEW SHARPNESS NOISE REDUCTION DYNAMIC IRIS SYSTEM SELECTOR MENU SELECT CHANGE STANDARD 0 0 - Panasonic PT-DZ12000U | Operating Instructions - Page 52
MATCHING LARGE SCREEN CORRECTION LAMP SELECT LAMP RELAY RS-232C REMOTE2 MODE STATUS AIR FILTER CLEANING AUTO POWER OFF FUNC1 MENU SELECT CHANGE 1/2 ALL FRONT-FLOOR ON HORIZONTAL QUAD OFF DEFAULT DISABLE PROJECTOR SETUP 2/2 DATE AND TIME SAVE ALL USER DATA LOAD ALL USER DATA INITIALIZE SERVICE - Panasonic PT-DZ12000U | Operating Instructions - Page 53
the screen. MAIN MENU PICTURE POSITION ADVANCED MENU DISPLAY LANGUAGE DISPLAY OPTION PROJECTOR SETUP P IN P TEST PATTERN SIGNAL LIST SECURITY NETWORK MENU SELECT ENTER COLOR TINT COLOR TEMPERATURE GAMMA SYSTEM DAYLIGHT VIEW SHARPNESS NOISE REDUCTION DYNAMIC IRIS SYSTEM SELECTOR MENU SELECT CHANGE - Panasonic PT-DZ12000U | Operating Instructions - Page 54
display the "PICTURE" menu. MENU SELECT ENTER SUB MENU • Some menu items may not be valid for certain signal formats applied to the projector. 54 - ENGLISH Switching the picture mode The user can switch to the desired picture mode suitable for the image source and the environment in which this - Panasonic PT-DZ12000U | Operating Instructions - Page 55
toward greenish color. Adjustment range Maximum value 31 Minimum value -31 Adjusting the color temperature Used to set the projector's white point. Three presets and two user-definable modes are available. A colorimeter should be used if available. • Carry out this adjustment while the signals to - Panasonic PT-DZ12000U | Operating Instructions - Page 56
The setting will change as follows each time ◄► is pressed. DEFAULT USER1* USER2* 2.6 2.5 2.2 * "USER1" and "USER2" can hold user-defined gamma curves uploaded to the projector through the RS-232 terminal. Additional Gamma settings can be made available for selection from a sub-menu. Consult - Panasonic PT-DZ12000U | Operating Instructions - Page 57
The possible setting range will vary depending on the input signal. Noise reduction setting This can be used to adjust pictures if they amount 4. Select "USER" in step 3. 5. Press ENTER. • The "DYNAMIC IRIS" screen will be displayed. DYNAMIC IRIS AUTO IRIS OFF MANUAL IRIS OFF DYNAMIC - Panasonic PT-DZ12000U | Operating Instructions - Page 58
projector to automatically recognize input signals. Furthermore, if unstable signals are input, the system format can be selected manually. 1. Press ▲▼ to select "SYSTEM SELECTOR". NOISE Note • Refer to the types of signals compatible with the projector. (pp. 122-123) „ Input module ET-MD77SD1: - Panasonic PT-DZ12000U | Operating Instructions - Page 59
Basic Operation ET-MD100SD4: When single link SDI signals Select from AUTO YCbCr, 1 080/60i, 1 035/60i, 720/60p, 1 080/24p, 1 080/50i, 1 080/30p, 1 080/25p, 1 080/24sF, 720/50p, 480i, and 576i. When dual link SDI signals Select from AUTO RGB, AUTO X'Y'Z', 1 920/24p/RGB, 2 048/24p/RGB, 2 048/24p/XYZ - Panasonic PT-DZ12000U | Operating Instructions - Page 60
display the "POSITION" menu. Shift adjustment This function allows the user to adjust the raster position vertically or horizontally if the position of the image projected on the screen is displaced even when the projector is properly aligned with the screen, and the internal test patterns are - Panasonic PT-DZ12000U | Operating Instructions - Page 61
When wide signals are input*2, the PT-D12000U displays pictures with the aspect ratio converted to 4:3. The PT-DZ12000U displays pictures reduced to fit a is effective for the NTSC signal input. • S1 AUTO: The projector identifies the S1 signal and displays the picture by automatically switching the - Panasonic PT-DZ12000U | Operating Instructions - Page 62
Adjusting the position (continued) Adjusting the zoom ratio This adjusts the size of the projected pictures. 1. Press ▲▼ to select "ZOOM". ASPECT ZOOM CLOCK PHASE DEFAULT 0 2. Press ENTER. • The "ZOOM" screen will be displayed. ZOOM MODE INTERLOCKED V H HV INTERNAL OFF 100% 100% 100% 3. - Panasonic PT-DZ12000U | Operating Instructions - Page 63
press ◄► to adjust the correction amount. • You can adjust the projection images as shown below. KEYSTONE menu: • VERTICAL KEYSTONE • LINEARITY CURVED menu: • LENS THROW RATIO Set to the throw ratio being used (the projection distance divided by the screen width). (pp. 22-24) • VERTICAL KEYSTONE - Panasonic PT-DZ12000U | Operating Instructions - Page 64
screen. MAIN MENU PICTURE POSITION ADVANCED MENU DISPLAY LANGUAGE DISPLAY OPTION PROJECTOR SETUP P IN P TEST PATTERN SIGNAL LIST SECURITY NETWORK MENU SELECT fine-tunes the images projected by the video deck or other devices when the noise appears on the edges of the screen or if a part of the - Panasonic PT-DZ12000U | Operating Instructions - Page 65
item for adjustment. 4. Press ◄► to adjust blanking. • The adjustment value for the PT-D12000U can be changed within a range of 0 to 525 vertically and 0 to 700 horizontally. • The adjustment value for the PT-DZ12000U can be changed within a range of 0 to 600 vertically and 0 to 960 horizontally - Panasonic PT-DZ12000U | Operating Instructions - Page 66
are not going to be used. • ON: When the default linear blending ramps are sufficient. • USER: When a user-defined blending ramp is required. These ramps can be defined and uploaded to the projector through the RS-232 port. Consult your dealer for details. 3. Press ENTER. • The "EDGE BLENDING - Panasonic PT-DZ12000U | Operating Instructions - Page 67
Edge blending width (right) range BRIGHT adjustment (right) Marker BRIGHT OUTSIDE BRIGHT INSIDE Note • The Bright Inside adjustments are used to match the projector's main-screen-area black levels to the level within the blended area. The Bright Outside adjustments may be used to fine adjust the - Panasonic PT-DZ12000U | Operating Instructions - Page 68
"SHORT", deterioration in the picture quality will occur. Furthermore, the noise reduction function cannot be used. Raster position When the scaler is set „ PT-D12000U When 5:4 pictures are displayed (when SXGA signals are input) Pressing ▼ button will move the image downward. „ PT-DZ12000U When - Panasonic PT-DZ12000U | Operating Instructions - Page 69
screen. MAIN MENU PICTURE POSITION ADVANCED MENU DISPLAY LANGUAGE DISPLAY OPTION PROJECTOR SETUP P IN P TEST PATTERN SIGNAL LIST SECURITY NETWORK MENU , and control button names will be displayed in the language the user chooses. • The available languages are: English, German (DEUTSCH), French - Panasonic PT-DZ12000U | Operating Instructions - Page 70
color matching When multiple sets are used simultaneously, this projector allows the user to correct the difference of colors among the sets. 1. Press ▲▼ to select "COLOR MATCHING". DISPLAY OPTION COLOR MATCHING OFF LARGE SCREEN - Panasonic PT-DZ12000U | Operating Instructions - Page 71
should be carried out by a person who is familiar with the projector or by a service person because a high level of skill is required to make successful Press ▲▼ to select "COLOR MATCHING". DISPLAY OPTION COLOR MATCHING OFF LARGE SCREEN CORRECTION OFF 2. Press ◄► to select "MEASURED" or " - Panasonic PT-DZ12000U | Operating Instructions - Page 72
projector, the colors will not be projected correctly. Large Screen Correction When viewing images close up on a large screen PT-DZ12000U) and "4:3" (PT-D12000U). RGB IN (Only RGB input) When unregistered signals are to be input frequently because the unit is used at conferences or other venues - Panasonic PT-DZ12000U | Operating Instructions - Page 73
• USER: To receive signals of specific horizontal resolution (number of horizontally displayed dots) 8. If "User" is does not display normally when the projector and an external device are connected via EDID2 (Input signal formats supported) : Mainly use this when to the instruction manual of the - Panasonic PT-DZ12000U | Operating Instructions - Page 74
each time ◄► is pressed. EDID1 EDID2(PC) • EDID1 (Input signal formats supported) : Mainly select this when an external device (DVD player, etc.) for the output setting of the connected external device. Refer to the instruction manual of the external device. • If the setting is changed, the - Panasonic PT-DZ12000U | Operating Instructions - Page 75
• 4-1019: Set this when gray appears black. On-Screen display setting The user can specify the on-screen display. 1. Press ▲▼ to select "ON-SCREEN DISPLAY be retained when you return to the page. OFF ON z INPUT GUIDE This sets whether to display the currently selected input terminal name at the - Panasonic PT-DZ12000U | Operating Instructions - Page 76
The setting will change as follows each time ◄► is pressed. LOGO3 NONE LOGO2 LOGO1 • LOGO3: The Panasonic logo and DIGITAL PROJECTOR logo are projected. • NONE: No startup logo is projected. • LOGO1: The picture registered by the user will be projected. • LOGO2: The picture registered by the - Panasonic PT-DZ12000U | Operating Instructions - Page 77
MENU SELECT ENTER SUB MENU Press to select "PROJECTOR SETUP". Press to display the "PROJECTOR SETUP" menu. Setting a projector ID The projector has an ID number setting function that helps the user to control two or more projectors either simultaneously or separately with a single remote control - Panasonic PT-DZ12000U | Operating Instructions - Page 78
with the projector orientation (pointed forward, or toward the ceiling or floor) 1. Press ▲▼ to select "DIRECTION". ALTITUDE MODE DIRECTION LAMP SELECT ON the standard setup. • VERTICAL: Select this if the projector is tilted at a large vertical angle (an angle which exceeds 30˃from the horizontal). - Panasonic PT-DZ12000U | Operating Instructions - Page 79
, if the cumulative operating times for all lamps exceed 2 000 hours, the projector will switch to standby mode. • Lamp units which are not turned on should still be installed to the projector. • When it is time to replace the lamp, the number of the lamps that illuminate will be greater than the - Panasonic PT-DZ12000U | Operating Instructions - Page 80
RS-232C setting This sets communication parameters for the projector. (p. 106) 1. Press ▲▼ to select "RS-232C". LAMP RELAY RS-232C REMOTE2 MODE OFF DEFAULT 80 . DEFAULT USER • DEFAULT: The pin assignment of the REMOTE2 terminal is used as the projector default setting. (p. 110) • USER: This - Panasonic PT-DZ12000U | Operating Instructions - Page 81
INPUT NAME SIGNAL FREQUENCY PROJECTOR RUNTIME LAMP1 LAMP2 LAMP3 LAMP4 INTAKE AIR TEMP. OPTICS MODULE TEMP. AROUND LAMP TEMP. REMOTE2 STATUS 1/3 projector unit. • NETWORK VERSION: Displays the network version of the projector unit. • ON COUNT: POWER ON TIMES: Displays the number of times the power - Panasonic PT-DZ12000U | Operating Instructions - Page 82
while cleaning of the air filter is in progress. If there is a problem with the air filter, the air filter cleaning monitor (FILTER CLEANING) 24 hours have elapsed since cleaning was last carried out. Auto power off The projector can be set to automatically enter the standby state if no signal - Panasonic PT-DZ12000U | Operating Instructions - Page 83
and time This lets you set the time zone and the current date and time for the projector's internal clock. 1. Press ▲▼ to select "DATE AND TIME". PROJECTOR SETUP 2/2 DATE AND TIME SAVE ALL USER DATA 2. Press ENTER. • The "DATE AND TIME" screen will be displayed. DATE AND TIME TIME ZONE ADJUST - Panasonic PT-DZ12000U | Operating Instructions - Page 84
USER DATA? PROGRESS After data has been loaded, power will turn off automatically. Please wait for the fan to finish cooling before you turn on the projector ◄► to select "OK", and press ENTER. Service password This function is used by a service person. Input the password with the numeric buttons - Panasonic PT-DZ12000U | Operating Instructions - Page 85
IN P". MAIN MENU PICTURE POSITION ADVANCED MENU DISPLAY LANGUAGE DISPLAY OPTION PROJECTOR SETUP P IN P TEST PATTERN SIGNAL LIST SECURITY NETWORK MENU SELECT and then select from "USER1", "USER2", and "USER3". • The settings for the user data selected for "P IN P MODE" are displayed. P IN P P IN P - Panasonic PT-DZ12000U | Operating Instructions - Page 86
the input signals specified for the main window. "SUB WINDOW": Frame lock is set for the input signals specified for the subwindow. • TYPE: The user can select the window that is displayed by priority when two windows overlap. Press ◄► to switch windows. "MAIN WINDOW": The main window is displayed - Panasonic PT-DZ12000U | Operating Instructions - Page 87
of displayed internal test patterns The setting will change as follows each time ◄► is pressed. MENU screen + Focus MENU screen + Entry screen The projector has 8 types of internal test patterns to check the condition of the set. MENU Press to display the MAIN MENU screen. MAIN MENU PICTURE - Panasonic PT-DZ12000U | Operating Instructions - Page 88
screen or to set and display the user company's URL under the projected pictures. PICTURE POSITION ADVANCED MENU DISPLAY LANGUAGE DISPLAY OPTION PROJECTOR SETUP P IN P TEST PATTERN SIGNAL LIST other than using the POWER STANDBY ( ) button and SHUTTER button and adjusting the lens will not be possible - Panasonic PT-DZ12000U | Operating Instructions - Page 89
display is disabled. • TEXT: The text display is enabled. • LOGO1: The picture registered by the user will be projected. • LOGO2: The picture registered by the user will be projected. • LOGO3: The Panasonic logo is projected. Note • Separate software is required in order to create the pictures to - Panasonic PT-DZ12000U | Operating Instructions - Page 90
, the on-screen menu disappears. To continue operation, press the MENU button to display the main menu. • If an attempt is made to control the projector from the remote control or main unit controls when "ENABLE" is set, the security password screen appears. To change a setting, enter the security - Panasonic PT-DZ12000U | Operating Instructions - Page 91
How to use network functions MENU ENTER Network standby When the projector is in a standby state, you can control the power of the projector from a computer connected via a wired LAN. 1. Press ▲▼ to select "NETWORK STANDBY". NETWORK NETWORK STANDBY OFF NETWORK SETUP 2. Press ◄► to switch - Panasonic PT-DZ12000U | Operating Instructions - Page 92
The hash value is created by MD5 combining "admin1:", password, ":" and random numbers. The random numbers are 8-byte values sent from the projector when connecting. • COMMAND PORT: Set the port number used for the command control. • STORE: Save the current network control settings. Network status - Panasonic PT-DZ12000U | Operating Instructions - Page 93
Projector settings and adjustments • Projector status display • Transmission of E-mail messages if there is a problem with the projector • Use a straight insulated LAN cable which supports category 5 or above. • The length of being received or sent. LAN10/100 lamp (yellow) This lights when a 100BASE - Panasonic PT-DZ12000U | Operating Instructions - Page 94
the IP address set by the projector into the URL input field of the Web browser. 3. Enter your "User Name" and "Password". • The factory default settings are user1 (user privileges) or admin1 (administrator privileges) for the user name and panasonic (lowercase letters) for the password. 4. Press - Panasonic PT-DZ12000U | Operating Instructions - Page 95
to off. Monitor information button Click this item, and the status of the projector is displayed. Detailed set up button Click this item to display the advanced settings page. Change password button Power On/Off control SHUTTER control OSD (On-screen Display) display/nondisplay System type switching - Panasonic PT-DZ12000U | Operating Instructions - Page 96
then [Detail control] to display the Detail control page. Pressing these buttons controls the projector and updates the on-screen description on the right of the control page when control is finished. Lens adjustment Test pattern display This button updates the on-screen description on the right of - Panasonic PT-DZ12000U | Operating Instructions - Page 97
the prescribed cumulative time, and it is now time to replace the lamp. LAMP STATUS The lamp has failed to light. Wait a short while for the lamp to cool off, and then turn on the power. APERTURE (CONTRAST-SHUTTER) Trouble has occurred in the contrast shutter circuitry. Consult your dealer - Panasonic PT-DZ12000U | Operating Instructions - Page 98
page With this projector, if a problem occurs or if the lamp usage time reaches reached again. The user can modify the lamp service time has reached the value set in the field. LAMP3 RUNTIME: remaining lamp service time has reached the value set in the field. LAMP4 RUNTIME: remaining lamp service - Panasonic PT-DZ12000U | Operating Instructions - Page 99
Special Features Periodic warning interval setting (E-mail is sent on the checked days of the week/times) ENGLISH - 99 - Panasonic PT-DZ12000U | Operating Instructions - Page 100
has reached the value set in the field. LAMP2 RUNTIME: remaining lamp service time has reached the value set in the field. LAMP3 RUNTIME: remaining lamp service time has reached the value set in the field. LAMP4 RUNTIME: remaining lamp service time has reached the value set in the field. INPUT AIR - Panasonic PT-DZ12000U | Operating Instructions - Page 101
setup page. Select the authentication method specified by your Internet service provider. Set this if SMTP authentication has been selected. POP : Alphanumeric characters (A-Z, a-z, 0-9), hyphen (-), period (.) POP server user name field POP server password field Enter the port number for the - Panasonic PT-DZ12000U | Operating Instructions - Page 102
below is sent when an error has occurred. === Panasonic projector report(ERROR) === Projector Type : DZ12000 ----- check system ----- MAIN CPU BUS [ OK ] BATTERY [ OK ] CLOGGED FILTER SENSOR [ OK ] LENS SHIFT [ OK ] COVER OPEN [ OK ] AC POWER [ OK ] (Error code 00 00 00 00 00 00 00 00 - Panasonic PT-DZ12000U | Operating Instructions - Page 103
input characters: Numeric characters (0-9), period (.) (Example: 192.168.0.254) Enter the port number here. Number 80 is normally used. Enter the name of the projector here. Enter the host name here if it is required when the DHCP server is going to be used, for instance. Button to update settings - Panasonic PT-DZ12000U | Operating Instructions - Page 104
the current version, and if everything is in order, press the [OK] button. Version data rewriting is now commenced. Do not turn off the power while the version data is being rewritten. Messages such as the ones shown below appear during data rewriting. The following message appears upon completion - Panasonic PT-DZ12000U | Operating Instructions - Page 105
from a PC. Supported commands The following table lists the PJLink™ protocol commands that can be used to control the projector. Command Control details Notes POWR POWR ? INPT INPT ? AVMT AVMT ? Power supply control Parameters 0 = Standby 1 = Power ON Parameters Power supply status query - Panasonic PT-DZ12000U | Operating Instructions - Page 106
RS-422 IN SERIAL RS-422 OUT RS-232C IN RS-422 IN SERIAL RS-422 OUT Connection terminals on projector 1 Connection terminals on projector 2 D-Sub 9-pin (male) D-Sub 9-pin (female) D-Sub 9-pin (male) Communication cable (straight) Communication cable (straight) „ Pin assignments and signal - Panasonic PT-DZ12000U | Operating Instructions - Page 107
IN RS-422 IN SERIAL RS-422 OUT RS-232C IN RS-422 IN SERIAL RS-422 OUT Connection terminals on projector 1 Connection terminals on projector 2 D-Sub 9-pin (male) D-Sub 9-pin (female) D-Sub 9-pin (male) Communication cable (straight) Communication cable (straight) „ Pin assignments and signal - Panasonic PT-DZ12000U | Operating Instructions - Page 108
projector to the personal computer. • Projector ID supported specification is Group and responding (ID Group) is on Control commands When controlling the projector from a computer, the following commands are available: Command Function of command Remarks PON POF Power "ON" Power Active lamp mode - Panasonic PT-DZ12000U | Operating Instructions - Page 109
„ Connecting to a PC z For RS-232C Projector 1 NC 2 3 4 NC 5 6 NC 7 8 9 NC Computer (DTE specifications) NC 1 2 3 NC 4 5 NC 6 7 8 NC 9 „ When multiple projectors are connected 1st (RS-422 OUT) 1 2 3 4 5 6 7 8 9 2nd (RS-422 IN) 1 2 3 4 5 6 7 8 9 Attention • To connect the - Panasonic PT-DZ12000U | Operating Instructions - Page 110
External control Remote terminal/External control STANDBY ON LAMP RGB1 VIDEO RGB2 S-VIDEO Projector set up in a meeting room DVI-D "USER". • When pin 1 and pin 9 are short-circuited, the following buttons on the projector's control panel and on the remote control cannot be used. POWER - Panasonic PT-DZ12000U | Operating Instructions - Page 111
and consult the distributor. Lighting in red Indicates the time for replacing the lamp unit. • Did you notice a "REPLACE THE LAMP" message on the screen when turning on the projector power supply? • This lamp monitor lights up when the lamp unit used hours have reached 1 800 hours. Request the - Panasonic PT-DZ12000U | Operating Instructions - Page 112
If the air filter is blocked with too much dust, the inside of the projector will become hot and the temperature monitor (TEMP) indicator will flash and the power will turn off. The static electric mesh filter should be replaced and the metal mesh filter and brush inside the filter unit should be - Panasonic PT-DZ12000U | Operating Instructions - Page 113
and dust will get inside the projector and cause problems with operation. Pin guide Filter cleaning unit Static electric mesh filter Filter cleaning unit fixing screw Note • If cleaning cannot remove the dust completely, then it is a sign to replace the static electric mesh filter. Consult - Panasonic PT-DZ12000U | Operating Instructions - Page 114
operating time for all of the lamps reaches 2 000 hours or more, the power will turn off automatically approximately 10 minutes after it is turned on, and the projector will switch to standby mode. Attention • Clean and replace the air filter when replacing the lamp units. (pp. 112-113) „ Indication - Panasonic PT-DZ12000U | Operating Instructions - Page 115
Procedure of lamp unit replacement 1. Turn the main power OFF, following the procedures described in "Powering up the projector" (p. 38) and "Powering off the projector" (p. 39), disconnect the power plug from the AC power source, and wait for one hour or more. Then check that the lamp unit has - Panasonic PT-DZ12000U | Operating Instructions - Page 116
as a result of using a ceiling mount bracket not manufactured by Panasonic, or if damage to the projector occurs as a result of an inappropriate location used for installing the ceiling mount bracket, even if the projector's warranty period has not yet expired. • Use a torque screwdriver or similar - Panasonic PT-DZ12000U | Operating Instructions - Page 117
-59 58-59 ʔ 122-123 ʔ ʔ • Use Fn and F3 keys for setting. (For details, refer to the instruction manual of the computer.) • Is DVI-D IN or AUX DVI IN set to "EDID2 (PC)"? • The problem may be solved by updating the driver for the graphics board to the latest driver. ʔ 73-74 ʔ Information - Panasonic PT-DZ12000U | Operating Instructions - Page 118
there is sufficient electrical wiring capacity for the projector's power consumption requirements. U91 Lamp unit cover is not closed • Close the lamp unit cover. H01 Internal clock battery replacement • The battery needs to be replaced. Consult your dealer. H11 Air intake temperature sensor - Panasonic PT-DZ12000U | Operating Instructions - Page 119
Lens shift error F97 Geometry correction board communication error FE1 Power supply fan error FE2 Lamp 1 fan error FE3 Lamp 2 fan error FE4 Lamp 3 fan error FE5 Lamp G prism fan error Remedy • Problem with lamp. Consult your dealer. • If turning the main power off and back on again does - Panasonic PT-DZ12000U | Operating Instructions - Page 120
Specifications Model No. PT-D12000U PT-DZ12000U Power supply 120 - 240 V, 50 Hz/60 Hz Power consumption 1 600̬ʵ1 500̬ (about 10 W (120V AC) / 15 W (240V AC) in standby) Amps 16 Aʵ9.0 A Panel size 0.95 inch (aspect ratio 4:3) 0.96 inch (aspect ratio 16:10) DLP® Chip Display system Three - Panasonic PT-DZ12000U | Operating Instructions - Page 121
dimensions Width: 51 mm (2˝), Thickness: 23 mm (0.9˝), Depth: 176 mm (6.9˝) Optional Hanging attachment (For high ceiling): Hanging attachment (For low ceiling): Projection lens: DVI-D input module: SD-SDI input module: HD/SD-SDI input module: Dual link HD/SD-SDI input module: Replacement Lamp - Panasonic PT-DZ12000U | Operating Instructions - Page 122
Appendix Compatible Signals The following table specifies the types of RGB/YPBPR/DVI-D signals compatible with the projector. RGB signals can also be input within the range of fH=15 kHz-100 kHz, fV=24 Hz-120 Hz, dot clock=20 MHz-162 - Panasonic PT-DZ12000U | Operating Instructions - Page 123
75 60 65.3 60 1 920 × 1 080*1 1 920 × 1 080 66.6 59.9 WUXGA*1 1 920 × 1 200 74 60 *1: Only when using VESA CVT RB (Reduced Blanking) Dot Note • The number of display dots of the PT-D12000U is 1 400 x 1 050, and the number of display dots of the PT-DZ12000U is 1 920 x 1 200. A signal - Panasonic PT-DZ12000U | Operating Instructions - Page 124
(1 920 × 1 200) non-interlace signal, Dot clock frezuency : 25 MHz - 162 MHz • The WUXGA signals support only VESA CVT-RB (Reduced Blanking) signals. Note • Noise reduction cannot be used. • For the PT-DZ12000U, the picture quality of the sub-window may deteriorate when the resolution of the input - Panasonic PT-DZ12000U | Operating Instructions - Page 125
643 (25.3˝) Dimensions Outside dimensions unit : mm (inch) 320 (12.6˝) AC IN OFF ON MAIN POWER FILTER CLEANING OPEN CLOSE 578 (22.8˝) Information ENGLISH - 125 - Panasonic PT-DZ12000U | Operating Instructions - Page 126
the projection lens ŋŋŋŋ 36 I Indication of monitor lamp 111 Initialize 84 Installation dimensions diagram 26 Installation Setting 78 Installing the input module 30 L Lamp relay 80 Lamp select 79 Lamp unit replacement 115 Large Screen Correction 72 List of P IN P 124 Load all user data 84 - Panasonic PT-DZ12000U | Operating Instructions - Page 127
Serial terminals 106 Service password 84 Setting a projector ID 77 Setting FUNC1 83 Setting projector ID number to remote control ŋŋŋŋ 18 Setting the date and time 83 Setting the security password 88 Setting the text 89 Sharpness setting 57 Shift adjustment 60 Specifications 120 sRGB 59 - Panasonic PT-DZ12000U | Operating Instructions - Page 128
the software. The guarantee will not be valid for any malfunctions caused by such actions. Trademark Acknowledgement • Digital Light Processing, DLP, and DLP® CHIP are registered trademarks of the Texas Instruments. • VGA and XGA are trademarks of International Business Machines Corporation. • S-VGA - Panasonic PT-DZ12000U | Operating Instructions - Page 129
constituer un risque de choc éIectrique aux personnes. Le point d'exclamation dans un triangle avertit l'usager de la présence d'instructions importantes concernant l'utilisation et l'entretien (réparation) dans la littérature accompagnant le produit. ATTENTION: Cet appareil est équipé d'une fiche - Panasonic PT-DZ12000U | Operating Instructions - Page 130
pas installer ce projecteur dans un endroit qui n'est pas assez résistant pour supporter le poids du projecteur. • Si l'emplacement d'installation n'est pas assez résistant du cordon d'alimentation. • Contacter un centre de service autorisé pour toute réparation du cordon d'alimentation qui s'avèrerait - Panasonic PT-DZ12000U | Operating Instructions - Page 131
incendie ou des chocs électriques. „ Ne jamais démonter la lampe. • Toute rupture de la lampe risquerait en effet de causer de graves blessures. „ Ne pas le fil accessoire (à installer à un endroit différent que le support de montage au plafond) ainsi que les oeillets correspondants, en tant - Panasonic PT-DZ12000U | Operating Instructions - Page 132
Précautions de sécurité (suite) „ N'utilisez pas le projecteur lorsque le couvercle de l'objectif est encore attaché à l'objectif (vendu séparément). • Dans le cas contraire, un incendie risque de se produire. „ Ne pas regarder directement dans l'objectif pendant que le projecteur fonctionne. • Une - Panasonic PT-DZ12000U | Operating Instructions - Page 133
é le gaz, ou que le gaz a pénétré dans les yeux ou la bouche, consulter immédiatement un médecin. • Demander à son revendeur de remplacer l'unité de lampe et de vérifier l'intérieur du projecteur. „ Demander à un centre technique agréé de nettoyer l'intérieur du projecteur au moins une fois par an - Panasonic PT-DZ12000U | Operating Instructions - Page 134
projecteur. Télécommande [N2QAYB000076 × 1] Piles de la télécommande (AA) Cordon d'alimentation Pour 240 V Pour 120 V [K2CG3YY00035 × 1] [K2CH3YY00001 × 1] Support anti-chutes Oeillet Fil [TPAHE86 × 4] [TTRA0143 × 4] Mise en garde concernant les déplacements du projecteur L'objectif de - Panasonic PT-DZ12000U | Operating Instructions - Page 135
DLP sont fabriquées à l'aide d'une technologie de très haute précision. Veuillez noter qu'en de „ rares cas, des pixels peuvent manquer ou être toujours allumés, mais il ne s'agit pas d'un dysfonctionnement. Lampe La source de lumière utilisée dans cet appareil est une lampe . • Panasonic et ses - Panasonic PT-DZ12000U | Operating Instructions - Page 136
soumise à de très fortes pressions internes. Une mauvaise manipulation risquerait d'entraîner une défaillance. • Une lampe usée risque même d'exploser en cas de manipulation violente. Contacter un prestataire de services spécialisé dans le traitement de déchets industriels pour la mise au rebut des - Panasonic PT-DZ12000U | Operating Instructions - Page 137
revisser à l'aide d'un tournevis cruciforme, les vis de fixation du couvercle. Vis du couvercle de la lampe Mise en garde • Installer fermement la lampe ainsi que le couvercle de la lampe. En effet, dans le cas contraire, le circuit de protection ne fonctionnera pas correctement et l'appareil ne - Panasonic PT-DZ12000U | Operating Instructions - Page 138
Projectors Panasonic Projector Systems Company Unit of Panasonic Corporation of North America One Panasonic Way, Secaucus, New Jersey 07094 (201) 392-6591 Technical Support: PHONE: (888) 411-1996 FAX : (201) 348-7523 E-Mail : [email protected] Panasonic Canada Inc. 5770
-
 1
1 -
 2
2 -
 3
3 -
 4
4 -
 5
5 -
 6
6 -
 7
7 -
8
-
9
-
10
-
11
-
12
-
13
-
14
-
15
-
16
-
17
-
18
-
19
-
20
-
21
-
22
-
23
-
24
-
25
-
26
-
27
-
28
-
29
-
30
-
31
-
32
-
33
-
34
-
35
-
36
-
37
-
38
-
39
-
40
-
41
-
42
-
43
-
44
-
45
-
46
-
47
-
48
-
49
-
50
-
51
-
52
-
53
-
54
-
55
-
56
-
57
-
58
-
59
-
60
-
61
-
62
-
63
-
64
-
65
-
66
-
67
-
68
-
69
-
70
-
71
-
72
-
73
-
74
-
75
-
76
-
77
-
78
-
79
-
80
-
81
-
82
-
83
-
84
-
85
-
86
-
87
-
88
-
89
-
90
-
91
-
92
-
93
-
94
-
95
-
96
-
97
-
98
-
99
-
100
-
101
-
102
-
103
-
104
-
105
-
106
-
107
-
108
-
109
-
110
-
111
-
112
-
113
-
114
-
115
-
116
-
117
-
118
-
119
-
120
-
121
-
122
-
123
-
124
-
125
-
126
-
127
-
128
-
129
-
130
-
131
-
132
-
133
-
134
-
135
-
136
-
137
-
138
 |
 |

TQBJ 0263-1
Operating Instructions
3-chip DLP
®
-based Projector
Commercial Use
PT-D12000U
PT-DZ12000U
Read these instructions completely before operating this unit.
Models No.