Panasonic PT-DZ12000U Operating Instructions - Page 57
Basic Operation, Sharpness setting, Noise reduction setting, Dynamic iris setting - user manual
 |
UPC - 791871111550
View all Panasonic PT-DZ12000U manuals
Add to My Manuals
Save this manual to your list of manuals |
Page 57 highlights
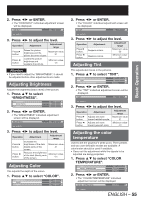
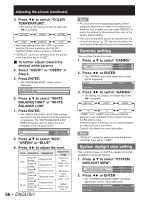
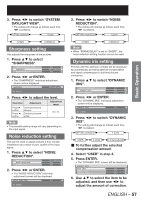
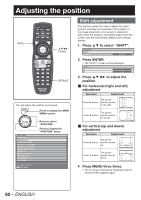
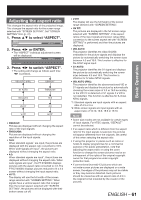
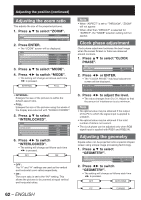
3. Press ◄► to switch "SYSTEM DAYLIGHT VIEW". • The setting will change as follows each time ◄► is pressed. OFF (No correction) 1 (Low) 3 (High) 2 (Medium) Sharpness setting This adjusts the sharpness of the pictures. 1. Press ▲▼ to select "SHARPNESS". SYSTEM DAYLIGHT VIEW SHARPNESS NOISE REDUCTION OFF 0 OFF 2. Press ◄► or ENTER. • The "SHARPNESS" individual adjustment screen will be displayed. SHARPNESS 0 ADJUST 3. Press ◄► to adjust the level. Operation Adjustment Press ► button. Press ◄ button. Contours become sharper. Contours become softer. Adjustment range 0 to 15 Note • The possible setting range will vary depending on the input signal. Noise reduction setting This can be used to adjust pictures if they contain interference as a result of poor quality of the input signal. 1. Press ▲▼ to select "NOISE REDUCTION". SHARPNESS NOISE REDUCTION DYNAMIC IRIS 0 OFF OFF 2. Press ◄► or ENTER. • The "NOISE REDUCTION" individual adjustment screen will be displayed. NOISE REDUCTION OFF CHANGE 3. Press ◄► to switch "NOISE REDUCTION". • The setting will change as follows each time ◄► is pressed. OFF (No correction) 1 (Low) 3 (High) 2 (Medium) Note • When "FRAME DELAY" is set to "SHORT", the noise reduction setting function cannot be used. Dynamic iris setting Pictures with the optimum contrast will be displayed by automatically providing aperture compensation and signal compensation to suit the pictures concerned. 1. Press ▲▼ to select "DYNAMIC IRIS". NOISE REDUCTION DYNAMIC IRIS SYSTEM SELECTOR OFF OFF AUTO1 2. Press ◄► or ENTER. • The "DYNAMIC IRIS" individual adjustment screen will be displayed. DYNAMIC IRIS OFF CHANGE 3. Press ◄► to switch "DYNAMIC IRIS". • The setting will change as follows each time ◄► is pressed. OFF (No correction) 1 (Low) USER 3 (High) 2 (Intermediate) „ To further adjust the selected compensation amount 4. Select "USER" in step 3. 5. Press ENTER. • The "DYNAMIC IRIS" screen will be displayed. DYNAMIC IRIS AUTO IRIS OFF MANUAL IRIS OFF DYNAMIC GAMMA OFF 6. Use ▲▼ to select the item to be adjusted, and then use ◄► to adjust the amount of correction. ENGLISH - 57 Basic Operation
-
 1
1 -
2
-
3
-
4
-
5
-
6
-
7
-
8
-
9
-
10
-
11
-
12
-
13
-
14
-
15
-
16
-
17
-
18
-
19
-
20
-
21
-
22
-
23
-
24
-
25
-
26
-
27
-
28
-
29
-
30
-
31
-
32
-
33
-
34
-
35
-
36
-
37
-
38
-
39
-
40
-
41
-
42
-
43
-
44
-
45
-
46
-
47
-
48
-
49
-
50
-
51
-
 52
52 -
 53
53 -
 54
54 -
 55
55 -
 56
56 -
 57
57 -
 58
58 -
 59
59 -
 60
60 -
 61
61 -
 62
62 -
63
-
64
-
65
-
66
-
67
-
68
-
69
-
70
-
71
-
72
-
73
-
74
-
75
-
76
-
77
-
78
-
79
-
80
-
81
-
82
-
83
-
84
-
85
-
86
-
87
-
88
-
89
-
90
-
91
-
92
-
93
-
94
-
95
-
96
-
97
-
98
-
99
-
100
-
101
-
102
-
103
-
104
-
105
-
106
-
107
-
108
-
109
-
110
-
111
-
112
-
113
-
114
-
115
-
116
-
117
-
118
-
119
-
120
-
121
-
122
-
123
-
124
-
125
-
126
-
127
-
128
-
129
-
130
-
131
-
132
-
133
-
134
-
135
-
136
-
137
-
138
 |
 |