Panasonic SA-XR25S SAXR25 User Guide - Page 11
Adjusting speaker output, level, FILTER, D-INPUT, Select D-INPUT.
 |
View all Panasonic SA-XR25S manuals
Add to My Manuals
Save this manual to your list of manuals |
Page 11 highlights
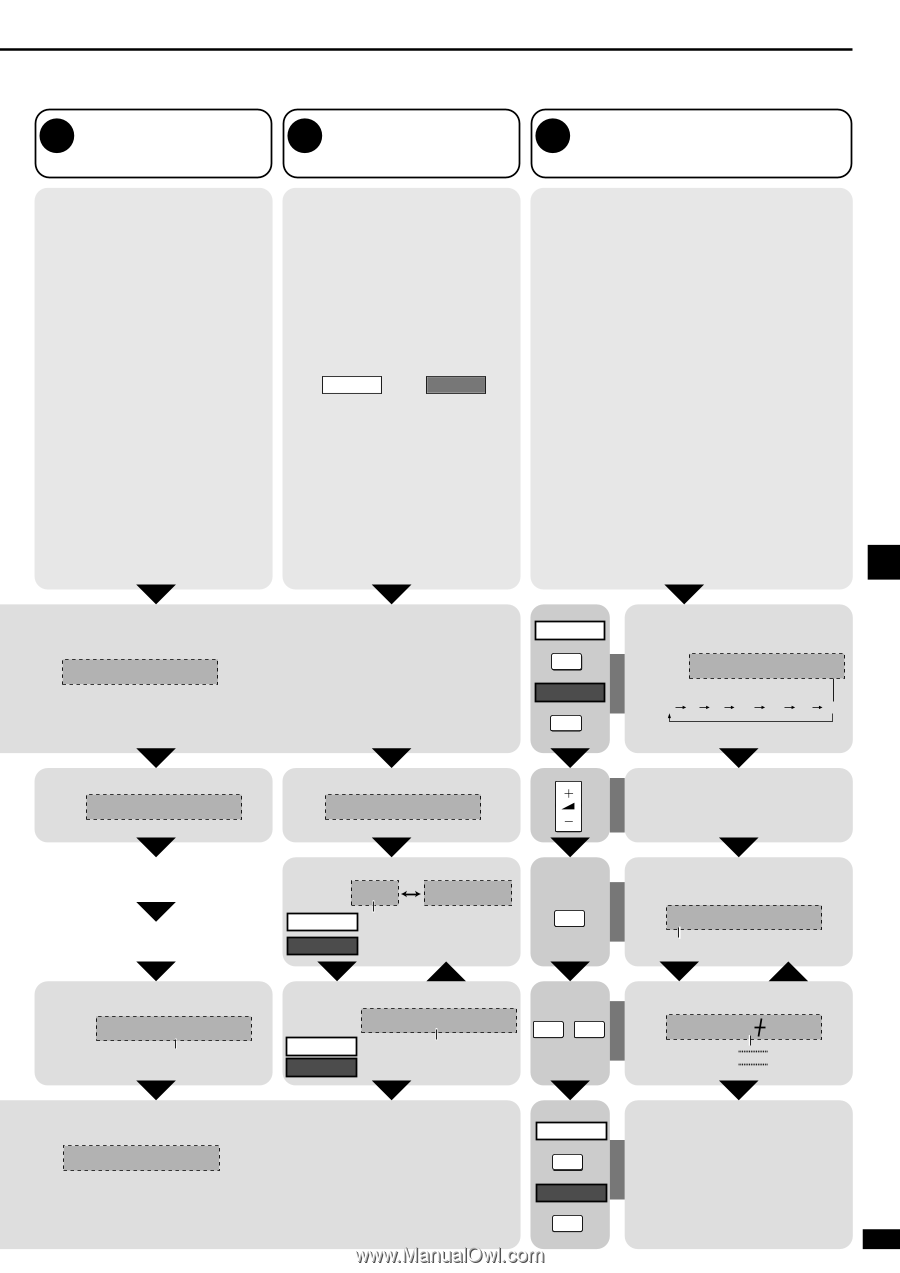
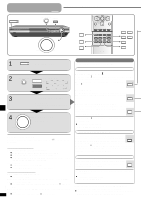
Change the settings to suit your equipment to the environment in which you are using it. Before making any changes, read the descriptions of the settings, note the factory settings and ranges, and refer to the equipment's instructions. 3 FILTER 4 D-INPUT Digital input 5 Adjusting speaker output level Change the cut-off for bass output from the front speakers If you set the front speakers to "SMALL", the filter is set to 100 Hz. Raise the cut-off if the bass from the front speakers is unsatisfactory so that this bass is output through the subwoofer. You can raise the cut-off from 100 Hz to either 150 Hz or 200 Hz. Change these settings to suit the connections you have made to the optical (OPT) and coaxial (COAX) digital input terminals, so that the correct source is selected when you press [INPUT SELECTOR]. The factory settings are: SA-XR45 TV: DVD: DVR: CD: OPT 1 OPT 2 OPT 3 COAX SA-XR25 TV: DVD: CD: OPT 1 OPT 2 COAX Adjust the level of the other speakers based on the output of the front speakers. (Speakers set as "NONE" or "NO" are skipped. Adjust the volume of the front speakers with [VOLUME].) C (center), RS (right surround), SB (surround back) and LS (left surround) can be adjusted between -10 dB and +10 dB, with 0 being the level of the front speakers. Adjust center, surround and surround back output to the same apparent level of the front speakers. For SW (subwoofer), you can select "- - -" so there is no output, "MIN" for minimum output, a level between 1 and 19, or "MAX" for maximum output. Adjust subwoofer output so it is balanced with the front speakers. Subwoofer output is easily influenced by the source. You can also change its level while playing something for better effect (\ page 18). Step 3 SETUP Select "FILTER". F I LT E R Change the setting. 100 100, 150, 200 COMPLETE SA-XR45 -TEST/-SETUP SA-XR25 TEST Output the signal. TEST L Two seconds each. L C R RS SB LS SW Select "D-INPUT". D-INPUT VOLUME Adjust the main volume. Select the input position. TV OPT 1 SA-XR45 TV, DVD, DVR, CD SA-XR25 TV, DVD, CD Repeat. Change the setting. OPT 1 SA-XR45 OPT 1, OPT 2, OPT 3, COAX SA-XR25 OPT 1, OPT 2, COAX LEVEL -/L +/R Select the speaker channel. C 0dB C, RS, SB, LS, SW Repeat. Adjust the level. C -10 dB ---, MIN, 1 4dB +10 dB 19, MAX SA-XR45 -TEST/-SETUP Stop the test signal. RQT6840 SA-XR25 TEST 11
-
 1
1 -
2
-
3
-
4
-
5
-
 6
6 -
 7
7 -
 8
8 -
 9
9 -
 10
10 -
 11
11 -
 12
12 -
 13
13 -
 14
14 -
 15
15 -
 16
16 -
17
-
18
-
19
-
20
-
21
-
22
-
23
-
24
 |
 |