Panasonic SABT228 SABT228 User Guide - Page 32
Optional speaker settings
 |
View all Panasonic SABT228 manuals
Add to My Manuals
Save this manual to your list of manuals |
Page 32 highlights
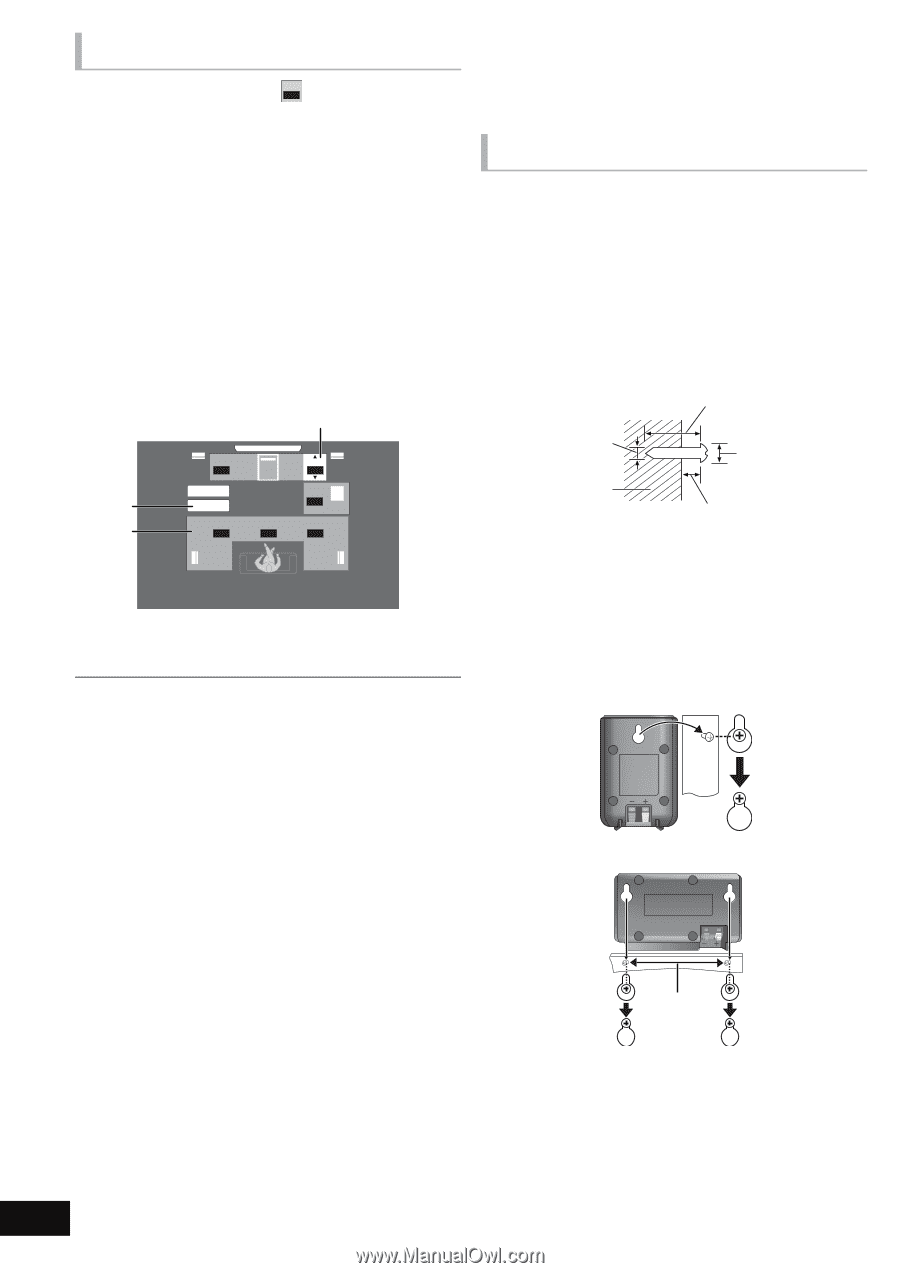
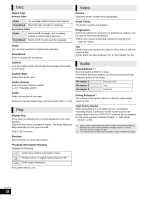
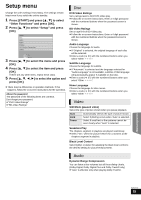
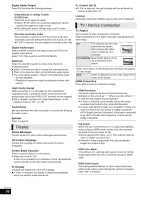
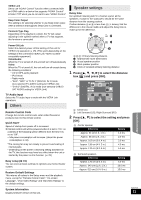
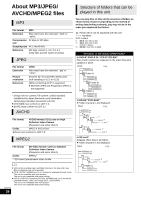
Adjusting speaker level Volume (Channel balance) ( dB 0 ) (Effective when playing multi-channel audio) 1 Select "Test" and press [OK]. A test signal is output. 2 While listening to the test signal Press [3, 4] to adjust the volume of each speaker. The volume can be adjusted between r6 dB to s6 dB. ≥ Set each speaker level according to the volume of the Front (L) and Front (R) speaker volume respectively. ≥ No signal is output for the subwoofer. To adjust its volume, see page 18, "Adjusting speaker level during play". 3 Press [OK]. The test signal stops. ms dB L 0.0 C 0R Complete Test dB 0 SW dB ms dB 0 0.0 0 LS RS A Center (C) B Test C Left Surround (LS), Right Surround (RS) To finish the speaker setting Press [3, 4, 2, 1] to select "Complete" and press [OK]. Speaker installation Optionalspeakersettings option Attaching to a wall You can attach all of the speakers (except subwoofer) to a wall. ≥ The wall or pillar on which the speakers are to be attached should be capable of supporting 10 kg (22 lbs) per screw. Consult a qualified building contractor when attaching the speakers to a wall. Improper attachment may result in damage to the wall and speakers. ≥ Do not attempt to attach these speakers to walls using methods other than those described in this manual. 1 Drive a screw (not included) into the wall. A At least 30 mm (1 3/16q) B ‰ 4.0 mm (5/32q) C ‰ 7.0 mm to 9.4 mm (9/32q to 3/8q) D Wall or pillar E 5.5 mm to 7.5 mm (7/32q to 5/16q) 2 Fit the speaker securely onto the screw(s) with the hole(s). Front speaker and surround speaker Center speaker VQT2T10 32 F 100 mm (3 15/16q)
-
 1
1 -
2
-
3
-
4
-
5
-
6
-
7
-
8
-
9
-
10
-
11
-
12
-
13
-
14
-
15
-
16
-
17
-
18
-
19
-
20
-
21
-
22
-
23
-
24
-
25
-
26
-
 27
27 -
 28
28 -
 29
29 -
 30
30 -
 31
31 -
 32
32 -
 33
33 -
 34
34 -
 35
35 -
 36
36 -
 37
37 -
38
-
39
-
40
-
41
-
42
-
43
-
44
 |
 |