Panasonic TC-P55GT50 TCP55GT50 User Guide - Page 15
Panasonic TC-P55GT50 Manual
 |
View all Panasonic TC-P55GT50 manuals
Add to My Manuals
Save this manual to your list of manuals |
Page 15 highlights
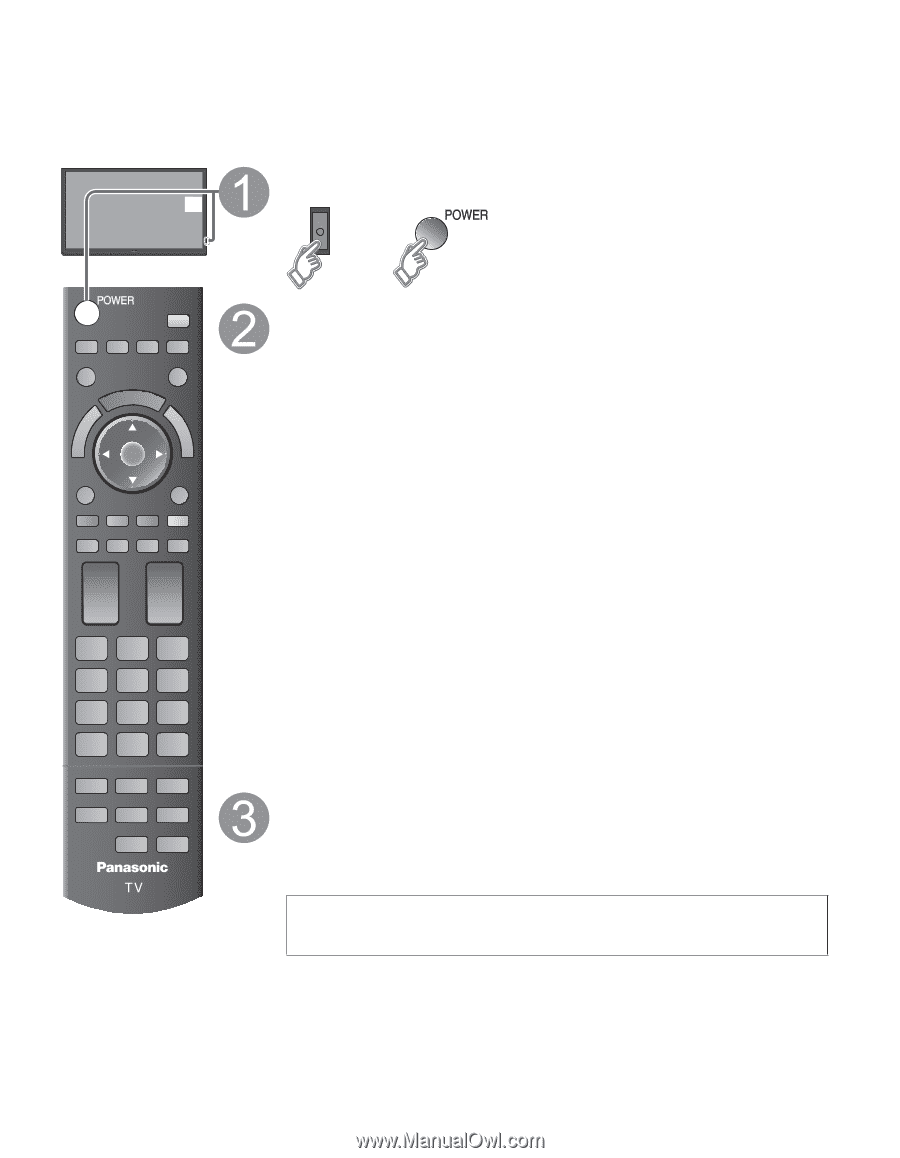
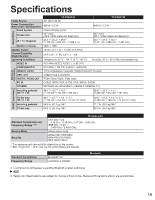
First Time Setup The first time setup screen is displayed only when the TV is turned on for the first time, after the power cord is inserted into a wall outlet and the "Auto power on" is set to "No". (Press MENU --> Setup --> Advanced setup -->Auto power on) Turn the TV on with the POWER button or (TV) (Remote) or Setup the following items ● Select your language ● Select your country ● Select your viewing mode (Be sure to select "Home Use") If you select "Store Demonstration" by mistake, confirmation screen will be displayed. To display the "Set viewing mode" screen again and select "Home Use", do one of the following: • Press and hold down the rear POWER button for at least five seconds. • Unplug power cord for 30 seconds and plug in again. ● ANT/Cable setup Select and set the settings according to your ANT/Cable environment. Select "Yes" on the confirmation screen, to start the scanning process. After scanning is finished completely, press OK to continue. ● Label the inputs for easy identification To name each input, follow the instructions on screen. When done, select NEXT and press OK to go to the next step. ● Configure Network settings Select the Network type and select the setting mode. If you select "Wireless (WiFi)", start "Wireless network settings" Select "Automatic" or set "Manual" setting, start connection test. When you complete "Network settings" successfully, the completion screen will be displayed. ● Adjust the Clock Select the clock mode and set other settings. When "Auto" is selected, clock will be set automatically according to Time zone and DST. Complete First time setup Completion screen is displayed. You can repeat the First time setup • Press MENU --> Setup --> First time setup To watch TV via a Cable box, Satellite receiver, or any other source (DVD, DVR, gaming device, etc.), press the INPUT button and select the appropriate input. 15
-
 1
1 -
2
-
3
-
4
-
5
-
6
-
7
-
8
-
9
-
 10
10 -
 11
11 -
 12
12 -
 13
13 -
 14
14 -
 15
15 -
 16
16 -
 17
17 -
 18
18 -
 19
19 -
 20
20 -
21
-
22
-
23
-
24
-
25
-
26
 |
 |