Panasonic VW-BN1 Dvd Burner - Page 9
Power supply, Inserting/removing a disc, DC/C.C.IN 5.0 V].
 |
UPC - 037988255863
View all Panasonic VW-BN1 manuals
Add to My Manuals
Save this manual to your list of manuals |
Page 9 highlights
¬ Power supply 3 B1 A 2 1 Connect the AC cable to the AC adaptor A. 2 Connect the AC cable to the AC outlet. 3 Connect the AC adaptor to this unit's DC input terminal [DC/C.C.IN 5.0 V]. ≥ The power lamp B lights up. ≥ The AC cable is for use with this unit only. Do not use it with any other devices. ≥ The unit and the disc heat up during use. This is not a malfunction. ¬ Inserting/removing a disc ≥ When inserting or removing the disc, connect the AC adaptor to the unit. You cannot insert or remove a disc unless the unit is powered. 1 Connect this unit to the AC adaptor. 2 Inserting disc Insert the disc in the disc insertion slot. The disc is automatically loaded. A A Recording/playback side Removing disc Press the [
-
 1
1 -
2
-
3
-
 4
4 -
 5
5 -
 6
6 -
 7
7 -
 8
8 -
 9
9 -
 10
10 -
 11
11 -
 12
12 -
 13
13 -
 14
14 -
15
-
16
-
17
-
18
-
19
-
20
-
21
-
22
-
23
-
24
 |
 |

9
LSQT1268
(ENG)
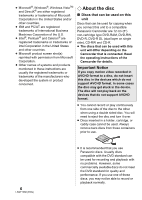
¬
Power supply
1
Connect the AC cable to the AC
adaptor
A
.
2
Connect the AC cable to the AC
outlet.
3
Connect the AC adaptor to this
unit’s DC input terminal
[DC/C.C.IN 5.0 V].
≥
The power lamp
B
lights up.
≥
The
AC cable
is for use with this unit only.
Do not use it with any other devices.
≥
The unit and the disc heat up during use.
This is not a malfunction.
¬
Inserting/removing a
disc
≥
When inserting or removing the disc,
connect the AC adaptor to the unit.
You cannot insert or remove a disc
unless the unit is powered.
1
Connect this unit to the AC adaptor.
2
Inserting disc
Insert the disc in the disc insertion
slot.
The disc is automatically loaded.
A
Recording/playback side
Removing disc
Press the [
<
] button.
≥
Be careful not to touch the recording/
playback side of the disc when inserting/
removing it.
B
A
1
3
2
A