Panasonic ew3122s EW3122 User Guide - Page 7
Setting, GOTII
 |
View all Panasonic ew3122s manuals
Add to My Manuals
Save this manual to your list of manuals |
Page 7 highlights
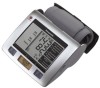
BEFORE STARTING MEASUREMENTS Setting the date and time * Please be sure to set the date and time before taking the first measurement after purchasing the blood pressure monitor or after changing the batteries. • If measurements are taken without setting the date and time, the date and time will not be stored. • Please read the "Caution when using only the AC adapter" on p. 10. c9 1fir 2 1 hold With the power switched off, the Set button "1" below the display pressed for at least 3 seconds. The month value will blink. If the time is already set, and the button is pressed for a short time, the alarm setting display will be shown. 7;0 I DOD 1 8/ 3 GOTII 8/ 3 15:001 8/ 3 1M 2 Set the month. Press the Change button "2" repeatedly to set the correct month. 04 Set the day. 0 Press the Set button "1". The day value will blink. ® Press the Change button "2" repeatedly to set the correct day. A Set the hour. -r ® Press the Set button "1". The hour value will blink. ® Press the Change button "2" to set the correct hour. 5 Set the minute. C) Press the Set button "1". The minute value will blink. ® Press the Change button "2" repeatedly to set the correct minute. 6 Press the Set button "1" at the exact time the minute changes to finalize the date/time setting. 7 Press the On/Off Start button to switch off the power. When the date or time are blinking, the clock is stopped. During leap years, 3/1 will be displayed on February 29. For this reason, reset the date to 2/29. 11 POSITIONING THE PRESSURE CUFF Open the cover and I remove the pressure cuff from the main body. (See p. 8.) 2 Insert the plug into the socket. • Insert the pressure cuff plug all the way in. • Position the tube outlet so that it is on the palm side of the arm in line with the little finger of the hand. Tape fastener 3 Wrap around upper arm. • Wrap around bare arm. The blood pressure monitor can be used by wrapping the cuff on either upper arm. However, since it has been said that the difference in blood pressure between the left and right arms may be around 10mmHg, be sure to always use the same arm for measurements. 4 Fasten so that there is no gap between the cuff and the arm, but be careful that the cuff is not too tight. Approximately 2 to 3cm (25/32" to 1-3/16") from inside of elbow • Be careful not to catch your clothes when wrapping the cuff. (Doing so may lead to lower accuracy.) • Press the tape fastener down well. 12
-
 1
1 -
 2
2 -
 3
3 -
 4
4 -
 5
5 -
 6
6 -
 7
7 -
 8
8 -
 9
9 -
 10
10 -
 11
11 -
 12
12 -
13
-
14
-
15
 |
 |
