Pfaff coverlock 4.0 Owner's Manual
Pfaff coverlock 4.0 Manual
 |
View all Pfaff coverlock 4.0 manuals
Add to My Manuals
Save this manual to your list of manuals |
Pfaff coverlock 4.0 manual content summary:
- Pfaff coverlock 4.0 | Owner's Manual - Page 1
coverlockTM 4.0 Owner's Manual - Pfaff coverlock 4.0 | Owner's Manual - Page 2
the needle area, such as threading needle, changing needle, or changing presser foot, etc. • Always unplug sewing machine from the electrical outlet when removing covers, lubricating, or when making any other user servicing adjustments mentioned in the instruction manual. • Never drop or insert any - Pfaff coverlock 4.0 | Owner's Manual - Page 3
OPERATING INSTRUCTIONS INTRODUCTION Parts of the machine 4 Accessories 5 Optional accessories from INSPIRA 6 PREPARATIONS Connecting the foot control and the power supply ........ 7 Setting up the spool stand 7 Setting up the telescopic thread stand 8 Front cover 8 Open ...8 Close ...8 - Pfaff coverlock 4.0 | Owner's Manual - Page 4
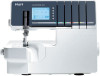
Parts of the machine 4 5 6 7 8 10 9 3 coverlock 4.0 2 1 18 17 16 11 12 1. Telescopic thread stand 2. Handle 3. Touch screen 4. Load stitch button 5. Save stitch button 6. Clear button 7. Settings menu button 8. Info button 9. Stitch plate 10.Flat bed extension 11.Cutter - Pfaff coverlock 4.0 | Owner's Manual - Page 5
thread converter 33.Upper looper clutch 33.Chain/coverstitch thread guide 29 31 27 28 30 32 26 34 33 Accessories Accessories are contained in the accessory box. 1. Accessory table. The push pin is used in the small holes in the table to hold your fabric in place when sewing circles (see page 36). - Pfaff coverlock 4.0 | Owner's Manual - Page 6
Optional accessories from INSPIRA™ Optional presser feet specially prepared for this machine are available at your PFAFF® dealer. The snap-on type presser foot used on this machine allows easy removal and replacement. Elastic Foot 620 08 65-96 The Elastic Foot guides and stretches narrow elastic - Pfaff coverlock 4.0 | Owner's Manual - Page 7
Note: When the front cover is open the safety switch is activated and prevents the machine from sewing, even if the foot control is pressed. Note: To retract the foot control cord, unplug the foot control from the machine (A). Pull the cord gently and release - the cord will retract itself into the - Pfaff coverlock 4.0 | Owner's Manual - Page 8
sure the trim falls into the bag while sewing. coverlock 4.0 1 2 coverlock 4.0 german design Presser foot lift Raise the presser foot by lowering presser foot lift at the back of the machine. Pressing down on the presser foot lift puts the presser foot in the extra lift position. 8 Preparations - Pfaff coverlock 4.0 | Owner's Manual - Page 9
button on the back of the presser foot ankle and the foot will snap into place. Needle information This overlock uses a Áat shank industrial needle that eliminates the possibility of inserting the needle backwards. Do not attempt to use a standard household sewing machine needle of any size or type - Pfaff coverlock 4.0 | Owner's Manual - Page 10
converter A Engaging Turn off the main power switch and unplug the machine. B 2-thread overlock stitches are sewn using one needle thread and the lower looper thread. Before sewing, the 2-thread converter must be attached to the upper looper. • Open the front cover. • Raise the white handle - Pfaff coverlock 4.0 | Owner's Manual - Page 11
to coverstitch table B For coverstitch and chainstitch sewing the coverstitch table B should be used. 1 • Lift the hook (1) to release The stitch Ànger lever should be set to N for all standard overlock sewing. To sew rolled edge you need to retract the stitch Ànger by setting the stitch - Pfaff coverlock 4.0 | Owner's Manual - Page 12
for recommendations on what needles and thread to use for different fabric weights. Tip: Your new machine is threaded to sew a standard overlock. Tie your own threads to these threads and carefully pull them through the machine, to easily thread your new overlock machine the Àrst time. Note: If the - Pfaff coverlock 4.0 | Owner's Manual - Page 13
to make certain it is properly placed between the tension discs (3) 2 coverlock 4.0 3 1 2 • Thread the looper area of the machine following the red color coded thread guides (4-9). 9 4 8 5 76 • Use the tweezers to thread the hole in the upper looper from front to back (9). • Pull about - Pfaff coverlock 4.0 | Owner's Manual - Page 14
2 coverlock 4.0 3 1 2 • Turn the handwheel toward you until the lower looper extends out 10 mm (3/8") from the needle plate edge. • Thread the looper area of the machine following the yellow color coded thread guides (4-10). • Place the thread through threading guide (4). 5 • Place the thread - Pfaff coverlock 4.0 | Owner's Manual - Page 15
of the machine following the purple color coded thread guides (4-11). • Place the thread through threading guide (4). • Place the thread through the front slot of threading 5 guide (5). 10 11 coverlock 4.0 3 1 2 4 5 9 • Thread the chainstitch thread guide (8) by holding the thread in front - Pfaff coverlock 4.0 | Owner's Manual - Page 16
the thread guide located on the bottom of the needle clamp. • Thread the eye of the needle (9). Use the needle threader (see page 22) to make needle eye threading easier. • Pull about 10 cm (4") of thread through needle eye to hang free. • Place the thread to the back, under the presser foot. 16 - Pfaff coverlock 4.0 | Owner's Manual - Page 17
behind the thread guide located on the bottom of the needle clamp. • Thread the eye of the needle (9). Use the needle threader (see page 22) to make needle eye threading easier. • Pull about 10 cm (4") of thread through needle eye to hang free. • Place the thread to the back, under the presser foot - Pfaff coverlock 4.0 | Owner's Manual - Page 18
of the thread guide located on the bottom of the needle clamp. • Thread the eye of the needle (9). Use the needle threader (see page 22) to make the threading easier. 9 • Pull about 10 cm (4") of thread through needle eye to hang free. • Place the thread to the back, under the presser foot. 18 - Pfaff coverlock 4.0 | Owner's Manual - Page 19
thread guide located on the bottom of the needle clamp for coverstitch. • Thread the eye of the needle (9). Use the needle threader (see page 22) to make the threading easier. • Pull about 10 cm (4") of thread through needle eye to hang free. • Place the thread to the back, under the presser foot - Pfaff coverlock 4.0 | Owner's Manual - Page 20
the tension discs and pull it down to make certain it is properly placed between the tension discs (3). • Continue to thread points (4-8). 2 coverlock 4.0 3 1 2 4 • Slip the thread into the middle slot on the thread guide (5) and into the slot on the take-up lever cover (6). Then slip the - Pfaff coverlock 4.0 | Owner's Manual - Page 21
is in front of the thread guide located on the bottom of the needle clamp. • Thread the eye of the needle (9). Use the needle threader (see page 22) to make the threading easier. • Pull about 10 cm (4") of thread through needle eye to hang free. • Place the thread to the back, under the presser foot - Pfaff coverlock 4.0 | Owner's Manual - Page 22
tangles on thread guides or looping under thread stand. • Cut the thread behind the knot and thread the needle. Note: When using standard thread spools, place the thread unreeling disc as shown to prevent the thread from getting caught on the edge of the spool. PFAFF coverlock 4.0 german design - Pfaff coverlock 4.0 | Owner's Manual - Page 23
machine, the last sewn stitch is selected. 1. Stitch selection drop down menu 2. Stitch Àeld 1 3. Needle position recommendation 4. Cutting width recommendation 2 5. Presser foot pressure recommendation 6. Thread open a list of the coverlock™ 4.0 stitches. • Use the scroll bar arrows to - Pfaff coverlock 4.0 | Owner's Manual - Page 24
when turning your machine off. Thread tension Touch the arrow pointing right next to the thread tension icon to open a thread tension adjustment window changed. See page 37 for more instructions on adjusting the stitch length. Sewing speed To adjust the maximum sewing speed, touch the speed icon. It - Pfaff coverlock 4.0 | Owner's Manual - Page 25
without a stitch is a free position and can be used to save your new stitch. Touch a free position and then OK (A) to save your stitch. The stitch information appears in the selected position. Touch Cancel (B) to close the saving window and return to the Sewing mode view. Any box with a stitch is an - Pfaff coverlock 4.0 | Owner's Manual - Page 26
stitch, touch the Info button. The Àrst tab shows what the stitch is used for. The second tab shows valuable hints, and the third tab shows the fabric recommended for that particular stitch. The fourth tab shows the machine setup recommendations for the selected stitch. See page 23 for explanation - Pfaff coverlock 4.0 | Owner's Manual - Page 27
up. The pop-up will close when the presser foot is lowered. Warning, overloaded, please wait If you are sewing on very heavy fabric or if the machine is blocked when sewing, the main motor can get overloaded and the machine will stop sewing. The pop-up will close when the main motor and power supply - Pfaff coverlock 4.0 | Owner's Manual - Page 28
edges, side seams, sleeves, etc. Specialty techniques can be done with a 4-thread overlock seam such as A and B 6.0 N No A 3 gathering, applying piping with the optional piping foot and elastic with the optional elastic foot. 4-thread safety stitch, wide For joining with reinforced - Pfaff coverlock 4.0 | Owner's Manual - Page 29
. Use heavier threads in the loopers to create decorative braids. (Hold your hand A 6.0 N No A• •• 6 behind the presser foot and gently and slowly pull the thread chain as you sew, trying to keep the same tension as it has been sewn onto fabric.) 3-thread overlock, narrow For sewing two - Pfaff coverlock 4.0 | Owner's Manual - Page 30
on Àne B 6.0 N No A fabrics. ••• 12 3-thread stretch overlock For sewing extra stretchy fabrics. Add additional stretch by using a stretchy type thread in the loopers. Change the thread tension accordingly. A and B 6.0 N Yes A •• • 13 3-thread rolled edge* For edging lightweight - Pfaff coverlock 4.0 | Owner's Manual - Page 31
overlock, narrow For overcasting a single layer of light to medium weight fabrics. Converter required. B 6.0 N Yes A •• 16 2-thread narrow edge* Use for edging lightweight fabrics. Converter required. Read more on page 34. B 6.0 R Yes A •• 17 2-thread Áatlock, wide For sewing - Pfaff coverlock 4.0 | Owner's Manual - Page 32
as it is an easily D -R No B unraveled stitch, and never run out • • 25 of bobbin thread. Use decorative thread in looper for embellishment. Read more on page 36. * Not recommended for heavyweight woven fabrics or medium to heavyweight stretch fabrics. 32 Stitches & sewing techniques - Pfaff coverlock 4.0 | Owner's Manual - Page 33
from the back, then toward you. Tip: When you have re-threaded the machine, always chain off and test sew a sample to test thread tension. Tip: The presser foot on this machine has marks to indicate the needle position. Use this as a guide when sewing. (25--38")cm Stitches & sewing techniques 33 - Pfaff coverlock 4.0 | Owner's Manual - Page 34
and test sew on a sample of your fabric before sewing on your garment. Hold the thread chain before sewing to keep it from curling into the seam. Note: The minimum overlock stitch width that can be obtained for rolled edging is approximately 1.5 mm. Coverstitch sewing The coverstitch can be used for - Pfaff coverlock 4.0 | Owner's Manual - Page 35
thread in the upper looper and regular threads in the lower looper and needle. Ladder stitch To create a ladder stitch, sew with right sides of the fabric together. The needle thread will be the prominent thread that creates the ladder. 3-thread ladder stitch Stitches & sewing techniques - Pfaff coverlock 4.0 | Owner's Manual - Page 36
machine and chain off. Sewing hints Pintuck sewing Sew decorative pintucks on the fabric before cutting out the garment. Use overlock right needle and select 3-thread overlock, narrow. Note: The rolled edge stitch can also be used for this technique • Lower the presser foot and sew. The fabric B - Pfaff coverlock 4.0 | Owner's Manual - Page 37
the right needle is used: 3 - 5 mm • When using the chainstitch needle: 8 - 10 mm 5.5 Turn the dial to adjust the desired seam width. For 6.0 standard setting the dial should be set to 6.0. 6.5 Presser foot pressure adjustment The presser foot pressure for sewing based on normal conditions - Pfaff coverlock 4.0 | Owner's Manual - Page 38
1.0 and 2.0. The setting depends on the material being sewn as well as the desired amount of gathering. Test sew with different settings before sewing on your garment. Stretch overlock (lightweight fabrics) When overedging light woven or loosely knit fabrics, such as silk and silky knitwear, adjust - Pfaff coverlock 4.0 | Owner's Manual - Page 39
), or decrease the lower looper thread tension (yellow). 2-thread overlock, wrap When the lower looper thread tension is too tight or needle thread tension is too loose When the lower looper thread tension is too loose 3-thread Áatlock stitch When the lower looper thread tension is too loose When - Pfaff coverlock 4.0 | Owner's Manual - Page 40
tension is too loose Increase the coverstitch looper thread tension (purple). Increase the coverstitch left needle thread tension (blue), or decrease the coverstitch looper thread tension (purple). When the coverstitch middle needle thread tension is too Increase the coverstitch middle needle - Pfaff coverlock 4.0 | Owner's Manual - Page 41
main power switch and unplug the machine. To keep the machine running smoothly and quietly the moving parts, pointed out on the picture, must be lubricated often. Use supplied sewing machine oil. Do not use any other oil, it could damage the machine. Wipe the machine surface to remove all excess oil - Pfaff coverlock 4.0 | Owner's Manual - Page 42
from the dust. Store the machine, so it is not exposed to direct sunlight or humidity. Servicing If you have any questions regarding service and/or operation, contact your local PFAFF® dealer. Trouble shooting Problem Fabric does not feed well Needle breaks Thread breaks Skipped stitches Solution - Pfaff coverlock 4.0 | Owner's Manual - Page 43
the right to change the machine equipment and the assortment of accessories without prior notice, or make modiÀcations to the performance or design. Such modiÀcations, however, will always be to the beniÀt of the user and the product. Intellectual Property PFAFF, COVERLOCK and INSPIRA are trademarks - Pfaff coverlock 4.0 | Owner's Manual - Page 44
www.pfaff.com 413 19 69 - 26F • English • Inhouse • © 2011 KSIN Luxembourg II, S.ar.l. • All rights reserved • Printed in Sweden on environment friendly paper
-
 1
1 -
 2
2 -
 3
3 -
 4
4 -
 5
5 -
 6
6 -
 7
7 -
8
-
9
-
10
-
11
-
12
-
13
-
14
-
15
-
16
-
17
-
18
-
19
-
20
-
21
-
22
-
23
-
24
-
25
-
26
-
27
-
28
-
29
-
30
-
31
-
32
-
33
-
34
-
35
-
36
-
37
-
38
-
39
-
40
-
41
-
42
-
43
-
44
 |
 |

coverlock
TM
4.0
Owner’s Manual