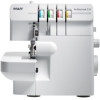
Pfaff hobbylock 2.0 Owner's Manual - Page 18
Flatlock sewing - parts
 |
View all Pfaff hobbylock 2.0 manuals
Add to My Manuals
Save this manual to your list of manuals |
Page 18 highlights
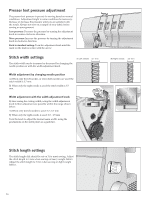
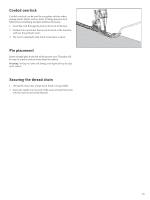
Flatlock sewing A Flatlock Stitch is made by adjusting the tension of the 2- or 3-thread overlock stitch, sewing the seam and pulling the fabric apart to Áatten the seam. The tensions must be adjusted correctly for the fabric to pull Áat. The Flatlock Stitch can be used both as a decorative construction stitch, sewing two pieces together (Standard Flatlock Stitch), or for ornamentation only on one piece of fabric (Ornamental Flatlock Stitch). There are two ways to sew a Flatlock Stitch. Either with the wrong sides of the fabric together to create a decorative look, or with the right sides together, to create a Ladder Stitch. 2-thread Áatlock stitch Standard Flatlock Stitch 1. Use the left needle. 2. For 2-thread Flatlock: Attach the two-thread converter (see page 8). Thread the lower looper and the left needle. For 3-thread Flatlock: Thread the lower and upper looper and the left needle. 3. Set the thread tension according to the stitch table on pages 23-26. 4. Place the wrong sides of the two pieces of fabric together to sew a decorative stitch on the right side of the garment. 5. Sew the seam, trimming the excess fabric. The needle thread will form a V on the underside of the fabric. The lower looper thread will pull into a straight line at the fabric edge. 6. Unfold the fabric and pull on opposite sides of the seam to pull the stitches Áat. Ornamental Áatlock stitch 1. Place the movable upper cutter in the nonworking position. The fabric should not be trimmed on this stitch. 2. Follow steps 1-3 above. 3. Fold the fabric piece, wrong sides together, to sew a decorative stitch on the right side of the garment. 4. Position the fabric so the seam is sewn with part of the stitch extending off the fabric. 5. Unfold the fabric and pull on opposite sides of the stitch to Áatten. Tip: The upper looper thread is the prominent thread in the Áatlock stitch. Place a decorative thread in the upper looper and regular threads in the lower looper and needle. Ladder stitch To create a ladder stitch, sew with right sides of the fabric together. The needle thread will be the prominent thread that creates the ladder. Standard Áatlock stitch 3-thread Áatlock stitch Ornamental Áatlock stitch 2-thread ladder stitch 3-thread ladder stitch 18
-
 1
1 -
2
-
3
-
4
-
5
-
6
-
7
-
8
-
9
-
10
-
11
-
12
-
 13
13 -
 14
14 -
 15
15 -
 16
16 -
 17
17 -
 18
18 -
 19
19 -
 20
20 -
 21
21 -
 22
22 -
 23
23 -
24
-
25
-
26
-
27
-
28
 |
 |
