Pfaff hobbylock 794 Owner's Manual - Page 9
Opening, closing, looper cover, support, looper, cover, lever, right, Threading, procedure - threading guide
 |
View all Pfaff hobbylock 794 manuals
Add to My Manuals
Save this manual to your list of manuals |
Page 9 highlights
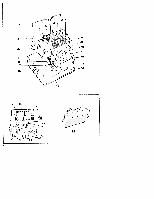
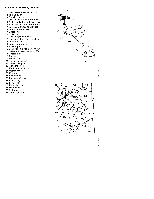
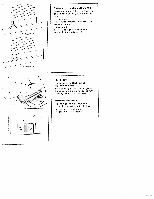
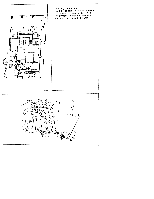
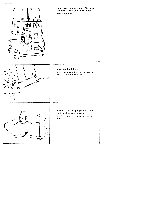
Opening and closing looper cover and work support Push looper cover lever to the right, swing cover in the direction of the arrow and lower it. To close the looper cover, push the cover until it locks. To open the work support, push it to the left. To close the work support, push it to the right until it locks. A threading diagram is affixed to the machine (A). Threading procedure Threading must be done correctly to obtain a well-formed seam. Thread the machine in the following sequence: 1. Right looper (red) 2. Left looper (orange) 3. Right needle (green) 4. Left needle (blue) Diagram B shows threading of the thread guides behind the carrying handle. Diagram C shows threading of the thread tension. Now pull the respective thread into the corresponding guides and tension discs. 7
-
 1
1 -
2
-
3
-
 4
4 -
 5
5 -
 6
6 -
 7
7 -
 8
8 -
 9
9 -
 10
10 -
 11
11 -
 12
12 -
 13
13 -
 14
14 -
15
-
16
-
17
-
18
-
19
-
20
-
21
-
22
-
23
-
24
-
25
-
26
-
27
-
28
-
29
-
30
-
31
-
32
-
33
-
34
-
35
-
36
 |
 |
