Pfaff smart 100s Owner's Manual - Page 20
Reverse, sewing, Changing, directions, Removing, Cutting, thread
 |
View all Pfaff smart 100s manuals
Add to My Manuals
Save this manual to your list of manuals |
Page 20 highlights
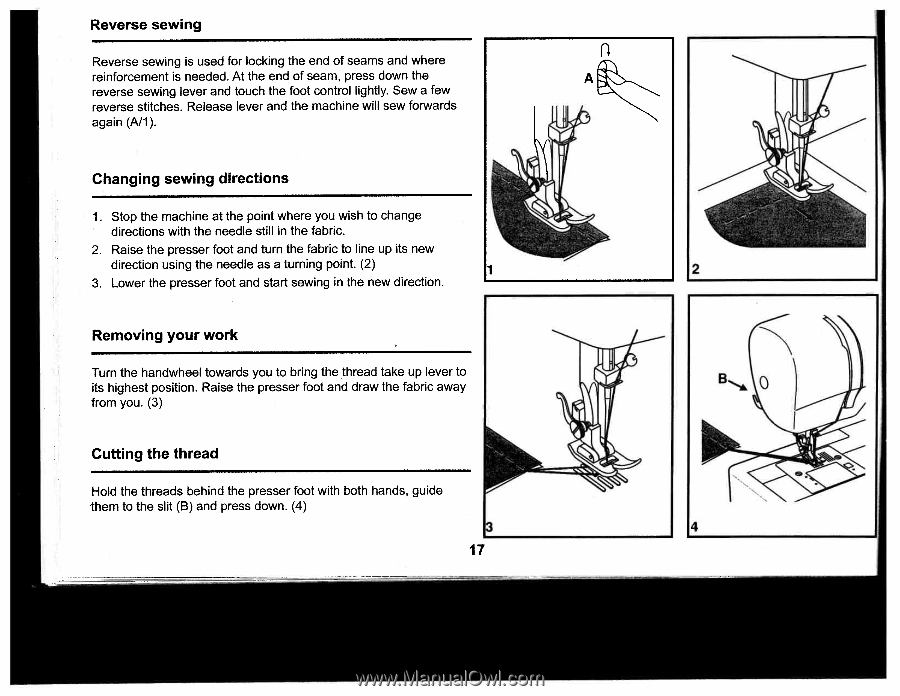
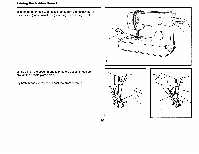
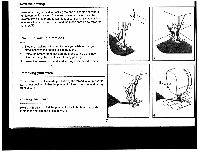
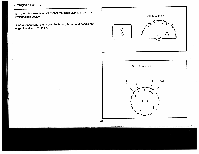
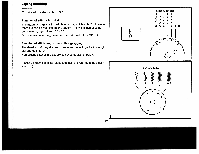
Reverse sewing Reverse sewing is used for locking the end of seams and where reinforcement is needed. At the end of seam, press down the reverse sewing lever and touch the foot control lightly. Sew a few reverse stitches. Release lever and the machine will sew forwards again (All). Changing sewing directions 1. Stop the machine at the point where you wish to change directions with the needle still in the fabric. 2. Raise the presser foot and turn the fabric to line up its new direction using the needle as a turning point. (2) 1 2 3. Lower the presser foot and start sewing in the new direction. Removing your work Turn the handwheel towards you to bring the thread take up lever to its highest position. Raise the presser foot and draw the fabric away from you. (3) Cutting the thread Hold the threads behind the presser foot with both hands, guide 'them to the slit (B) and press down. (4) 4 17
-
 1
1 -
2
-
3
-
4
-
5
-
6
-
7
-
8
-
9
-
10
-
11
-
12
-
13
-
14
-
 15
15 -
 16
16 -
 17
17 -
 18
18 -
 19
19 -
 20
20 -
 21
21 -
 22
22 -
 23
23 -
 24
24 -
 25
25 -
26
-
27
-
28
-
29
-
30
-
31
-
32
-
33
-
34
-
35
-
36
 |
 |